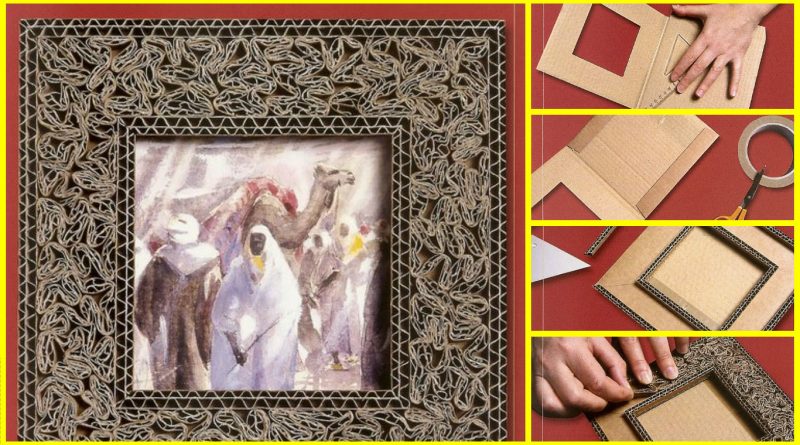
Posted onJanuary 28, 2017November 19, 2022inBest out of Waste, DIY, Home Decor, Step by step, Tutorial How to Make Photo Frame with Corrugated Cardboard
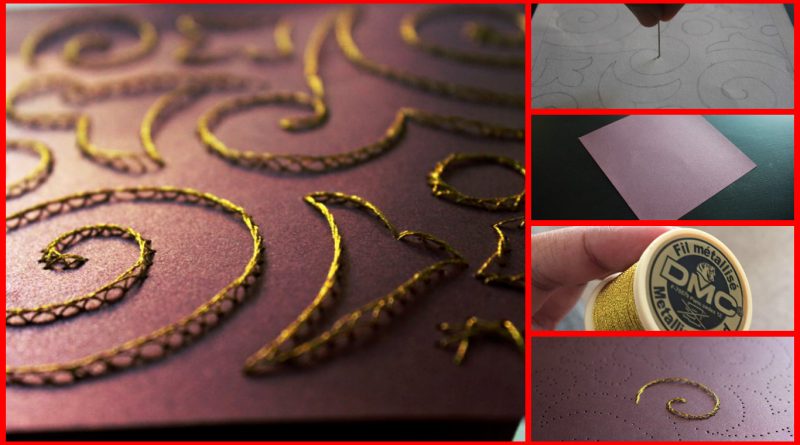
Posted onJanuary 28, 2017inDIY, Embroidery And Sewing, Step by step, Tutorial Paper Embroidery Step By Step
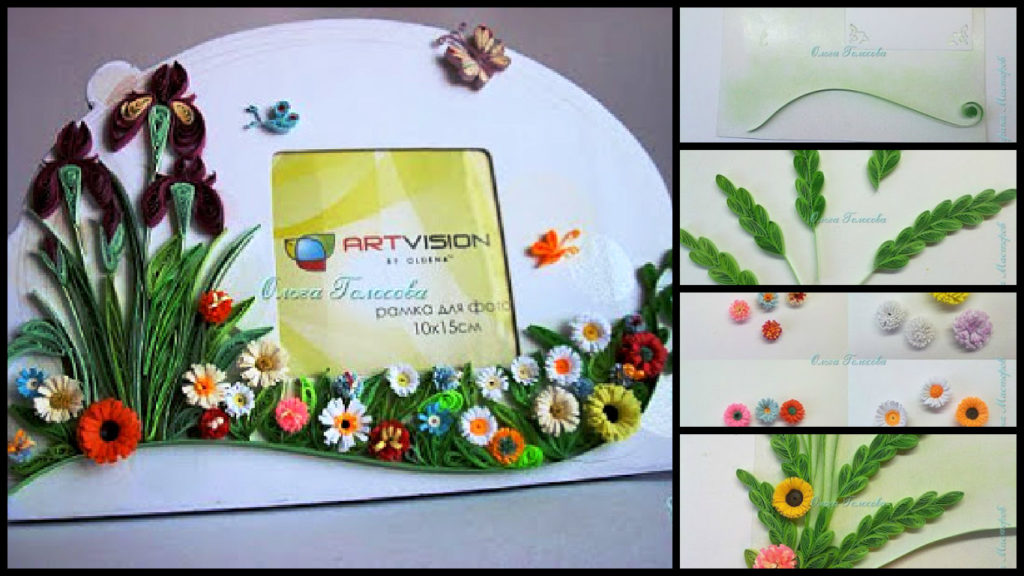
Posted onJanuary 28, 2017inQuilling, Step by step, Tutorial How to make quilling photo frame step by step
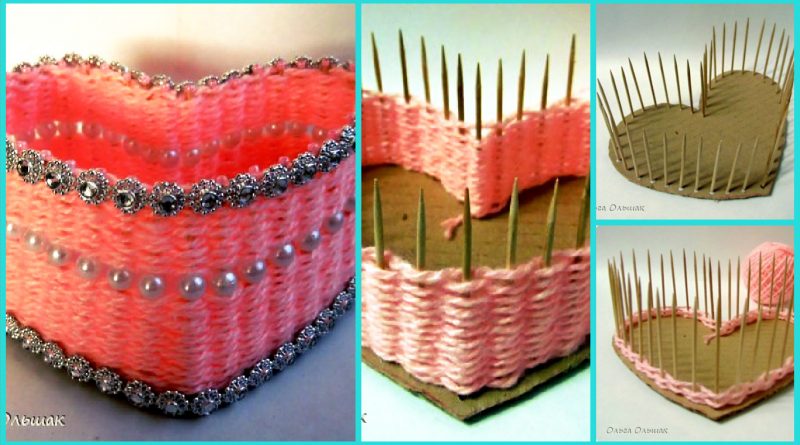
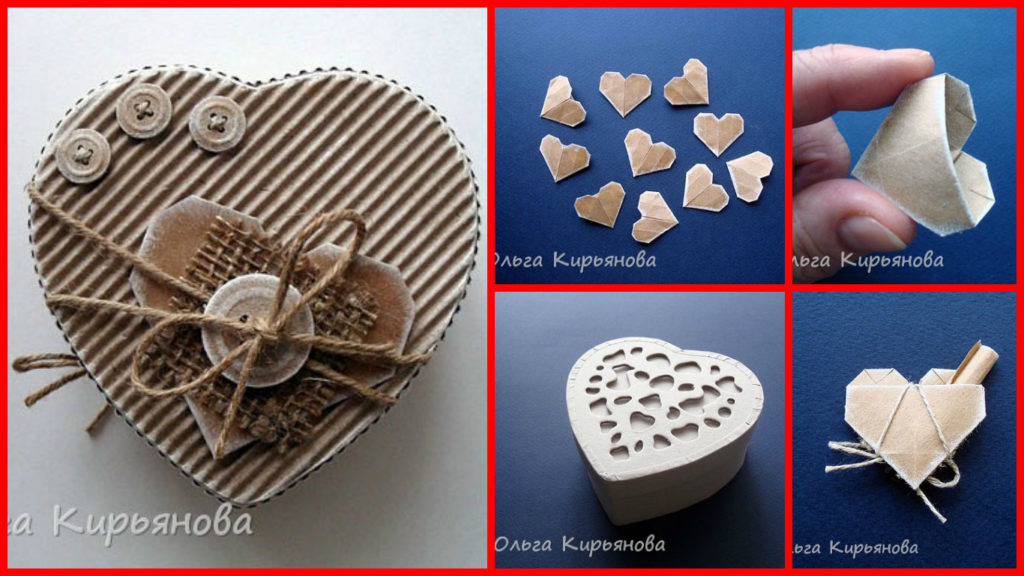
Posted onJanuary 28, 2017inBest out of Waste, DIY, Step by step, Tutorial How to make beautiful heart shaped basket
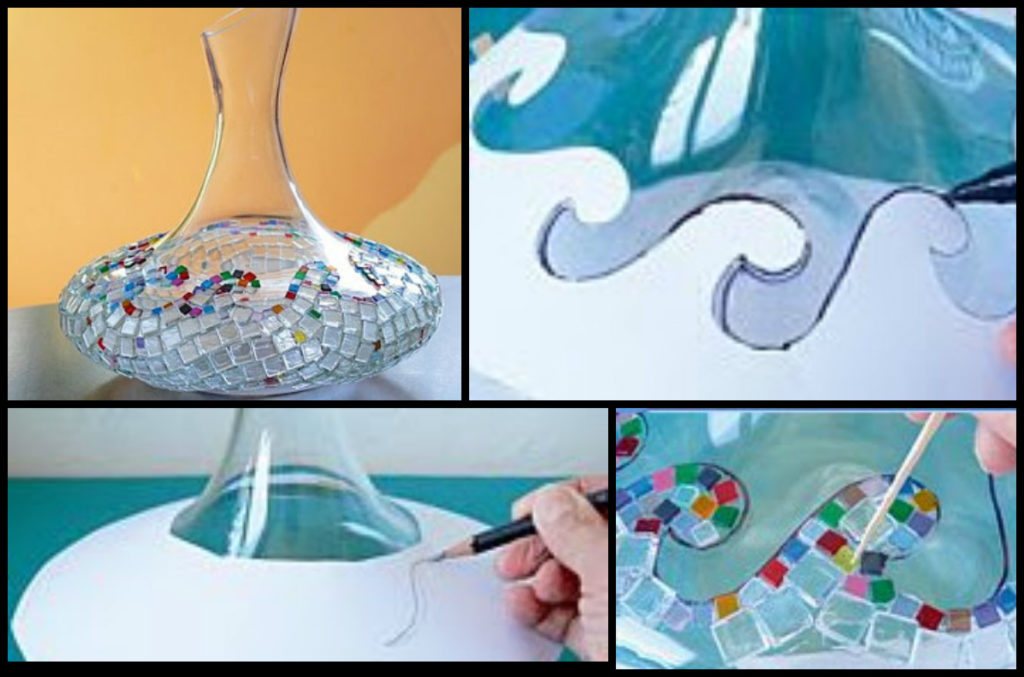
Posted onJanuary 28, 2017inDIY, Home Decor, Step by step, Tutorial How to decorate a vase mosaic step by step
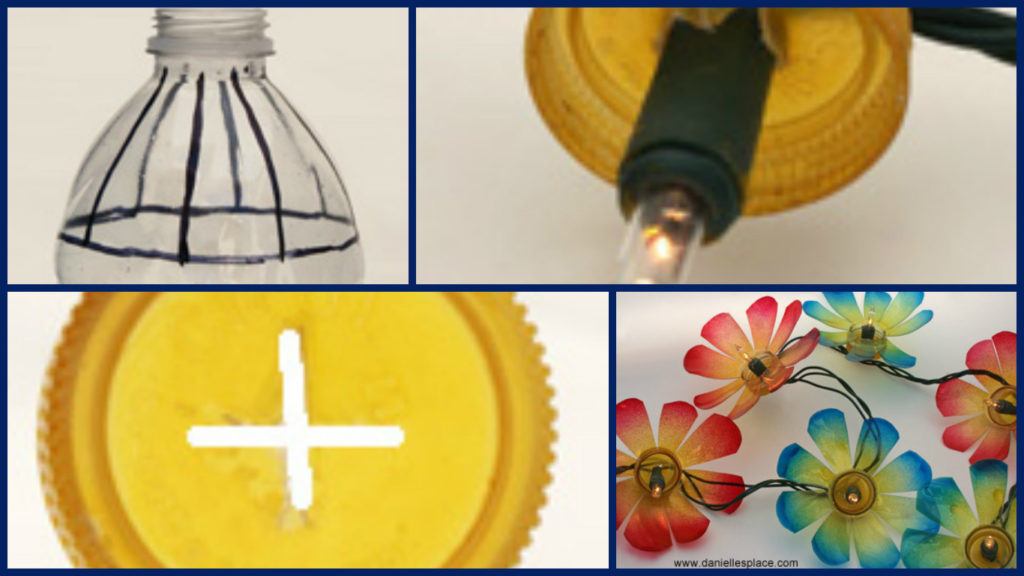
Posted onJanuary 28, 2017inBest out of Waste, Diwali, DIY, Home Decor, Step by step, Tutorial How to make garland of plastic bottles
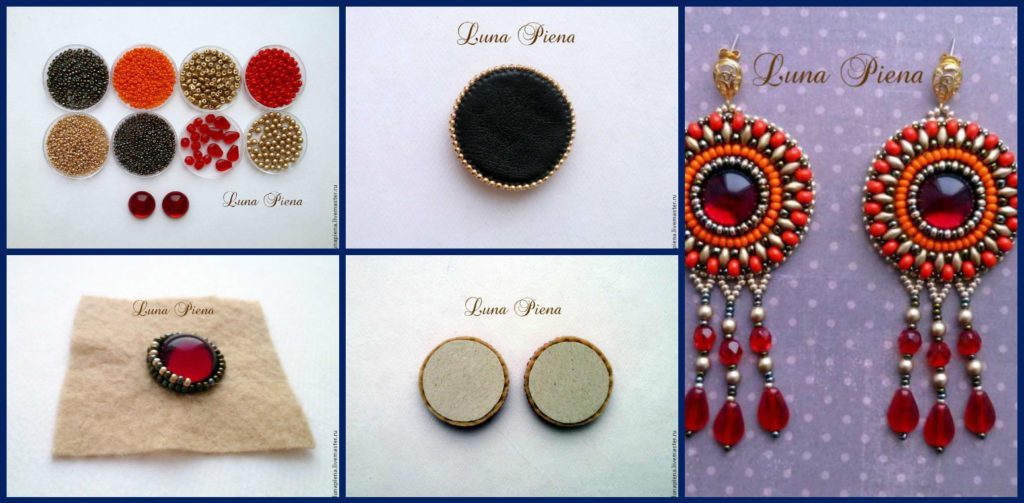
Posted onJanuary 28, 2017inDIY, Fashion, Jewellery, Step by step, Tutorial How to create earrings in oriental style
Posted onJanuary 28, 2017inBest out of Waste, DIY, Home Decor, Newspaper Crafts, Step by step, Tutorial How to make bicycle planters