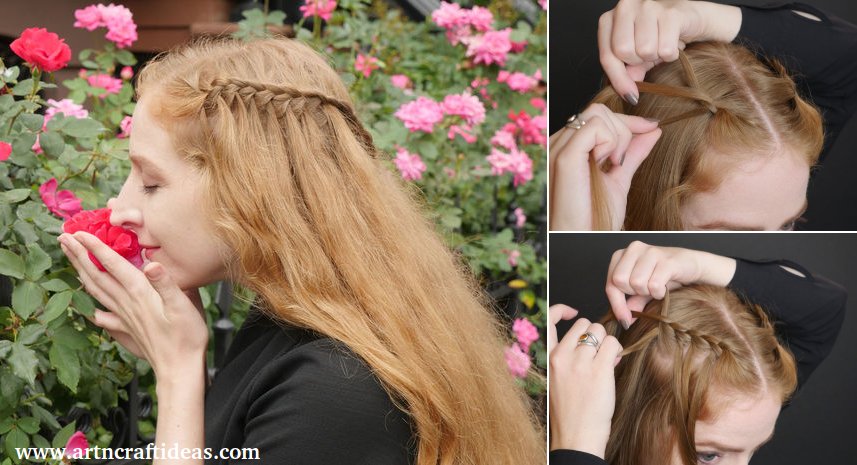
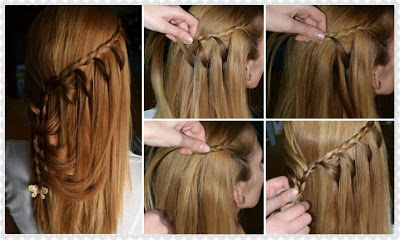
Posted onJuly 10, 2017September 14, 2017inFashion, Hairstyle, Tutorial Easy Waterfall Braid Tutorial – Step by step
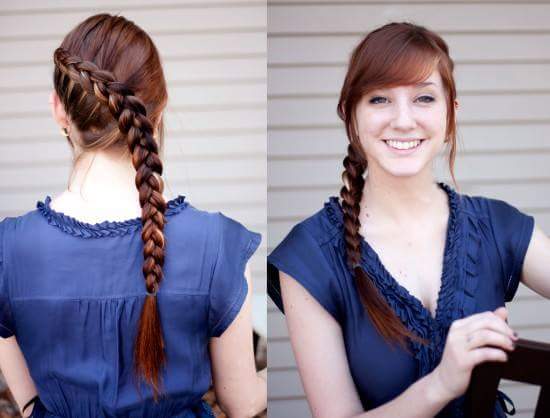
Posted onJuly 4, 2017inFashion, Hairstyle, Step by step Latest Long Hair step by step hairstyles for Girls
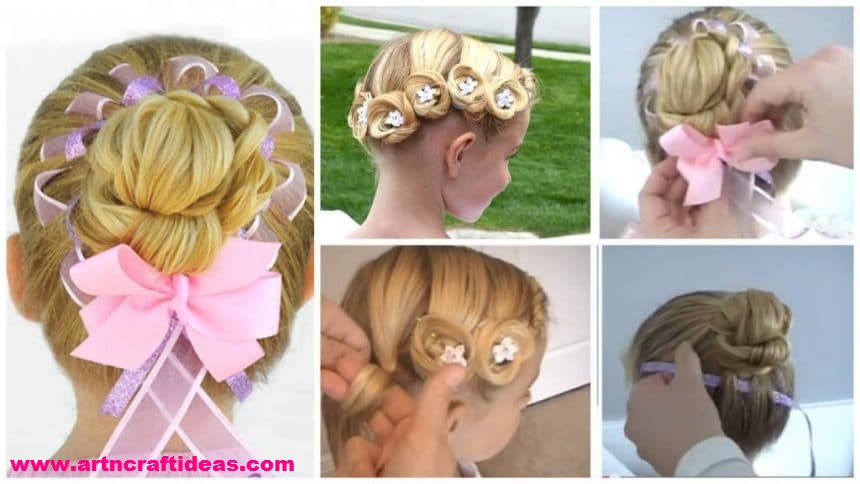
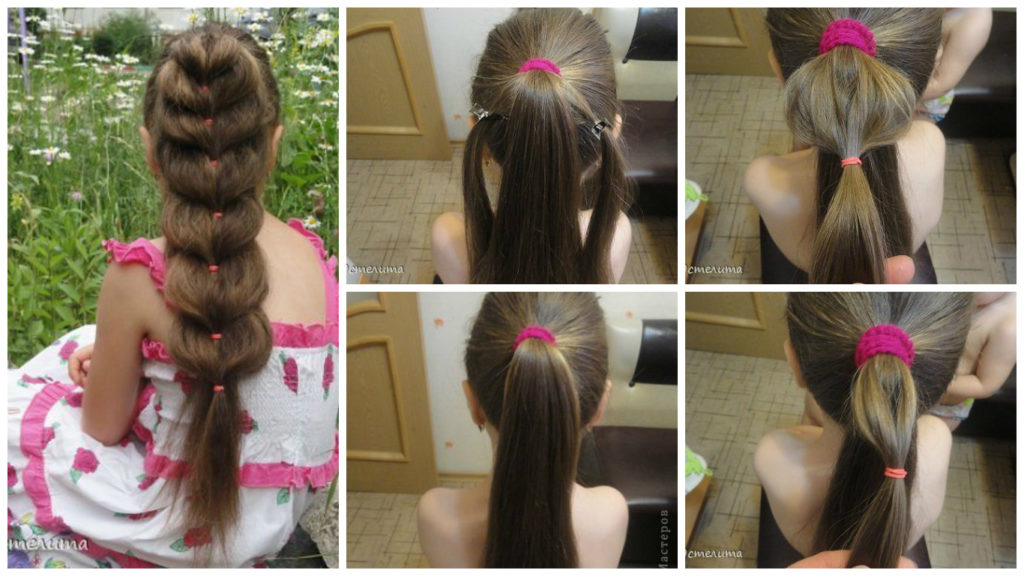
Posted onJuly 2, 2017inHairstyle, Tutorial 2 Cool Hairstyles for Little Girls on Any Occasion Step By Step
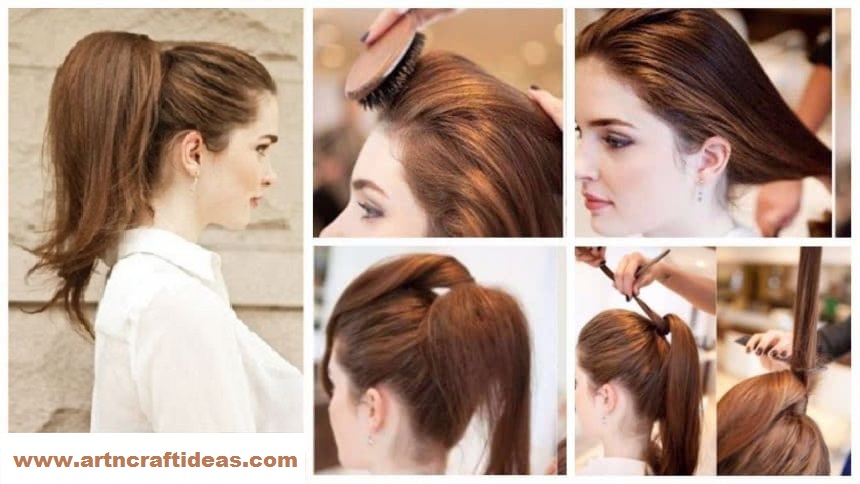
Posted onJuly 2, 2017July 2, 2017inHairstyle, Tutorial How To Elegant High Full Ponytail Hairstyle Step By Step
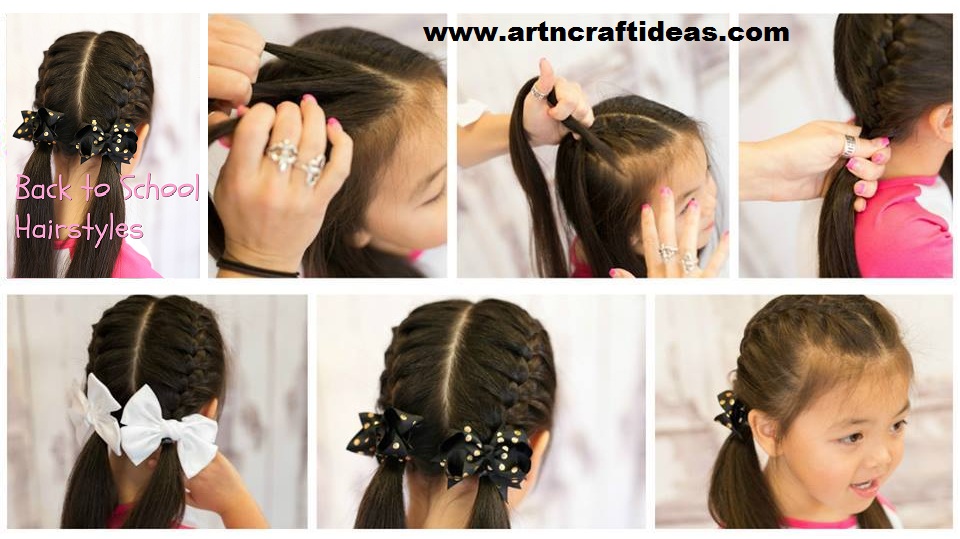
Posted onJuly 1, 2017July 1, 2017inHairstyle, Kids Corner, Tutorial Super Easy Hairstyle To Try For Back To School
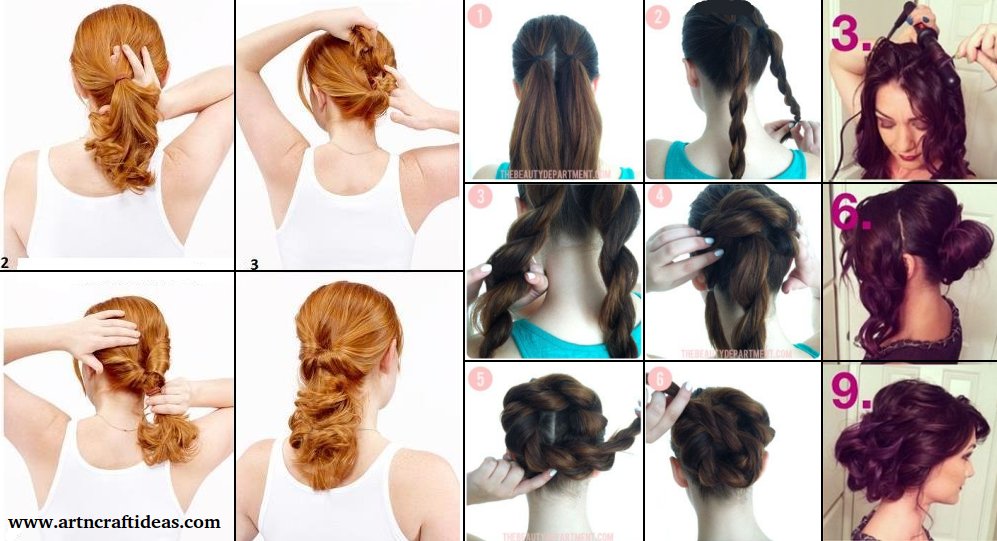
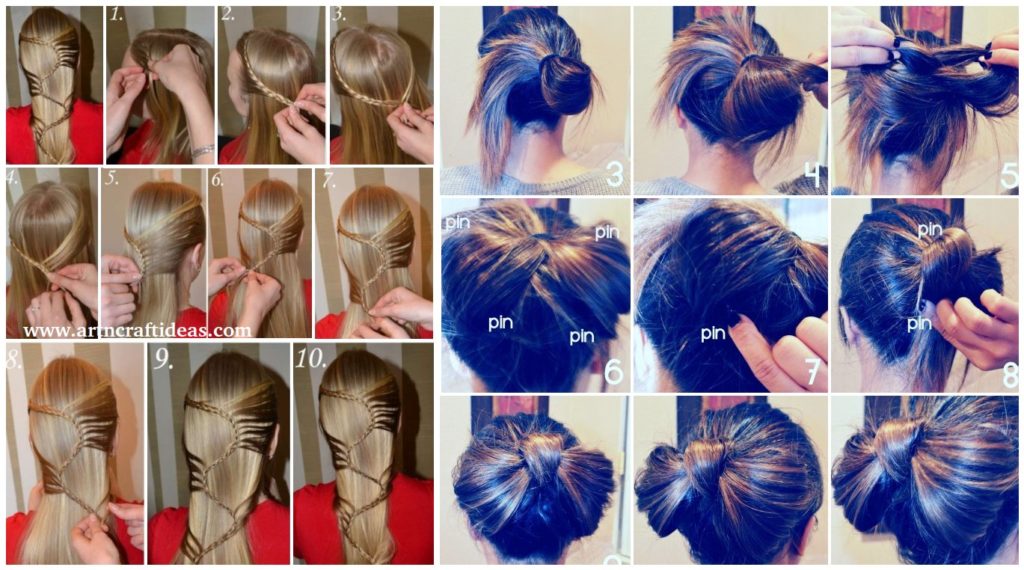
Posted onJuly 1, 2017July 1, 2017inHairstyle, Ideas, Step by step 20+ Step by Step Hairstyles for Long Hair