This work is very simple but with a little effort, you get a wonderful gift made with their own hands Materials:
For this work you need: flat 0.3cm blue and yellow for the petals of the iris (the color, you can choose any of your choices), strips of green leaves and shades of different colors for. Strips “Fuzzies” width 1cm, 0.7cm, 0.5 cm of any color of your choice. A strip of green 0.5 cm for clearing the border. (By the way, I have the strip of office paper). Paper watercolor background, thick cardboard for the stand, PVA glue, scissors, quilling tool or a toothpick. “Fuzzies”: from whole strips 1cm – 5pcs, 0.7cm -2 pcs, 0.5 cm -2 piece,
“Daisies”: from whole strips 1cm – 3 pieces, 0.7cm – 4 units
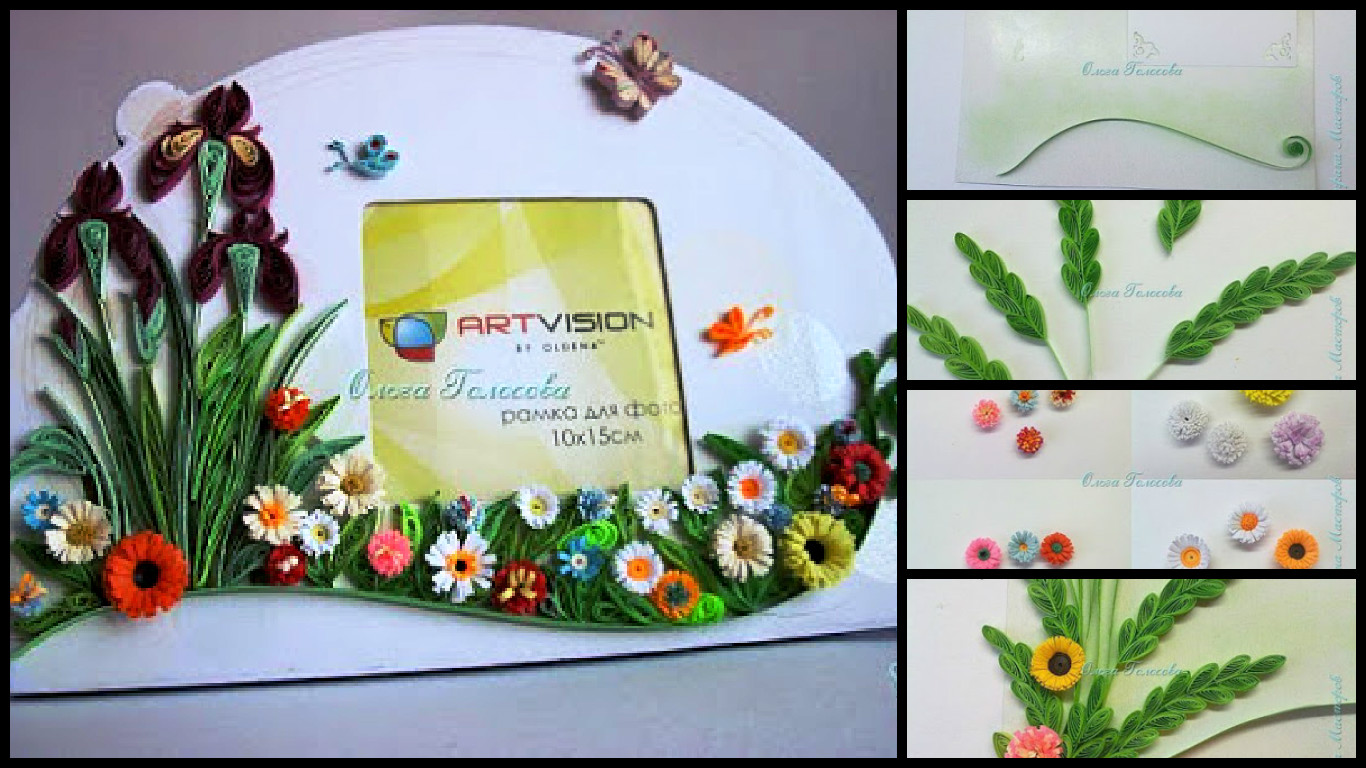
you can make a variety of sizes, colors, and shapes of your choice and mood. Depending on the size of the strip (width may be 0.5 -0.7- 1- 1.5 cm 3, and an entire length or ½, 1/4) and “Fluffy” of different sizes are obtained. Fringe is made as follows: the desired length of the strips cut from one edge along the entire length, leaving about 2 mm uncut. We try to make cuts as close as possible to each other, it will give the “Fuzzy” more natural look. To speed can be simultaneously cut into 2-3 strips. Then cut into strips curl up into a tight roll, we fix the bottom of a glue and glue after drying fluffs.
You can combine (superimpose on each other), two tassels of different colors and twist them together, you get “pussy.”
If a strip of fringe 0.3cm stick and start to roll with the 0.3cm strip, then turn “daisy” and, depending on the lengths of the bars and midway flowers themselves are of different sizes. Middle, get striped if you connect (apply) strips of different colors. Instead of a simple strip, 0.3cm can take the fringe of smaller strips. For example the main fringe of 1cm strips, middle, and – 0.5 cm. Glued together strips, begin to wind a smaller fringe into a tight roll. In the finished roll straighten the edges and do not touch the middle of a.
These are different Fluffy – is where carousing fancy.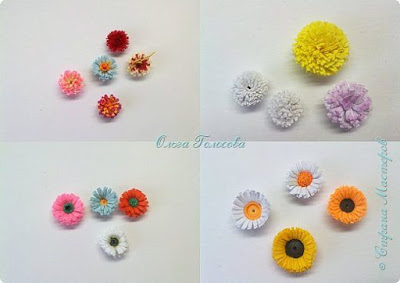 Leaves.
For branches, twist the 40 petals form “drop” from ½ strips. Springs collect, how in the photo. In order to collect the leaf, must be green stripes 0.3 cm folded in half and glue. Then it is necessary to make an incision of 3-4 mm (get a “slingshot”). And it inserts “drop” – this is the height of the sheet.
Then glue the strips along the left and right of the subsequent parts “drop”.
We need more and some leaves – a 16 “drops” of the entire strip, 14 – ½ of the strips and 6 – from ¼ strips.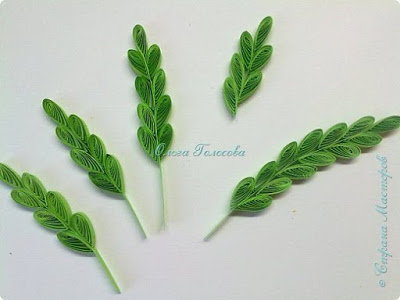 Irises.
To glue the petals entire blue stripes and half yellow. We turn to roll it to dissolve the d.15-16 mm, making the shape of a drop, and we bend it slightly (6 pieces). For the upper petals (6 pieces): twist the whole blue stripes, roll up d.13-14 to dissolve, then squeeze it in the middle, let go and then we press the edges, giving the shape of a semicircle.
For the buds of blue strips ½ twist the shape of a drop (x2), and 2 parts green arrow in the form of halves 0.3cm strips. Blue bud pastes it into a green arrow. Arrow: ready “drop” it is necessary to pinch between the thumb and forefinger of his right hand and fingernail thumb or forefinger of the left hand to press down. Then, without releasing the drop, hold it over the entire length, thereby fixing the resulting new shape.
Peduncle (3 nesses) of whole green stripes make the shape of a drop, then we hold it between your fingers and press down the top – get the triangle.
Collect flower: flower stalks to glue lower petals, and then the top. To stem green bar 0.3cm must be folded in half and glue and glue the ends of the two sides to the peduncle.
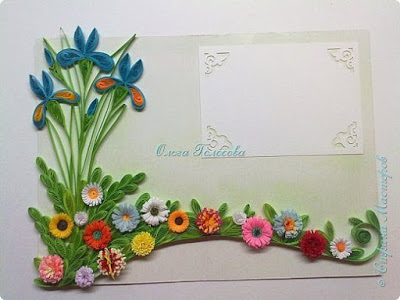
All items are ready, proceed to assembly.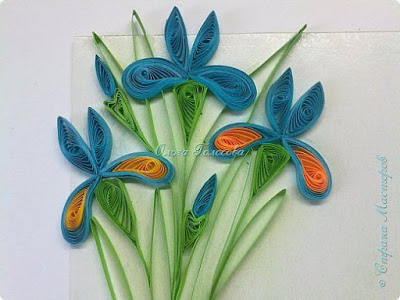 Take a sheet of watercolor paper (I have the size of 21h15), toning background of dry pastels (crayons, pencils) as in the photo, it is necessary to use a knife to make shavings pastels and rub it on the background cloth (cotton). Bottom reserve white.
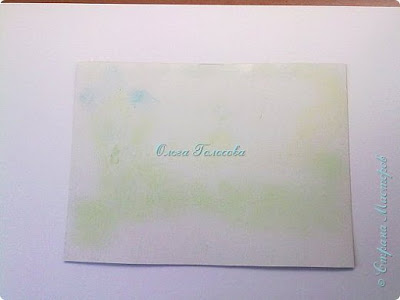 After the background was painted, glue with glue PVA border clearing – 0.5 cm strip giving it the desired shape (curved with an awl or skewer note the location for the photo or corners sticking to him.
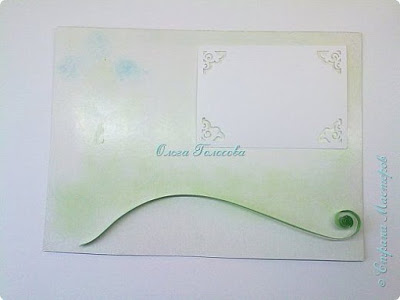 Glue the irises. The leaves of irises do as loops of conventional strips. Please try on, which will host the leaf, cut the desired size, glue, and so on.
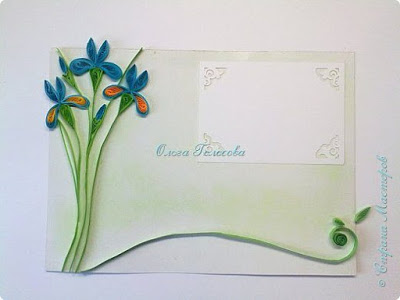 Now we go to the meadow. Please suggest decomposed leaves and flowers, so to speak by example. And then collect on glue. To work was neat, glue the like can be more careful, do not rush. To work, you may need tweezers.
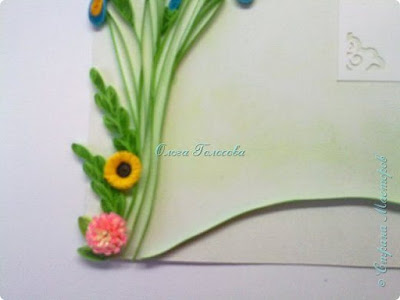 Putting it gradually, in parts. And at first glue the leaves and then flowers.
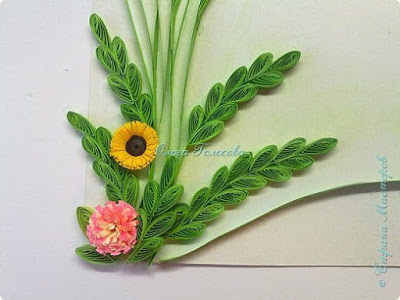 And at first glue the leaves and then flowers.
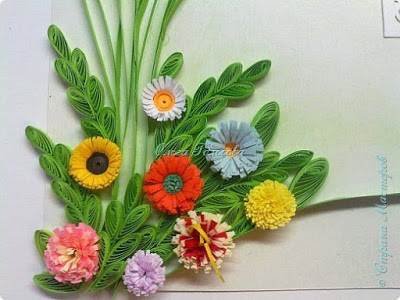 They collected one part, go to the next.
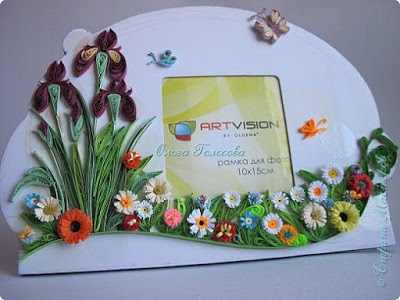
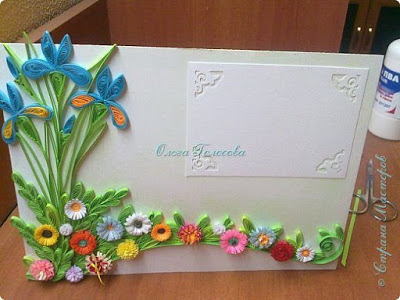
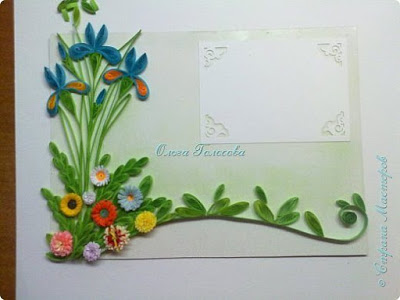 At the end we inspect the work, adding, where you “drops”. It remains to glue the frame to our stand of thick cardboard. Here is photo frame and ready to – make a great gift made with their own hands
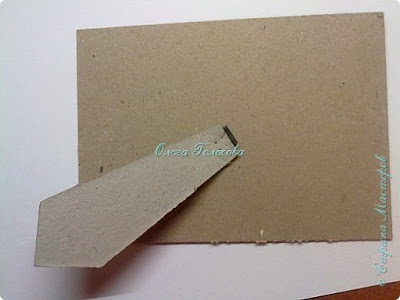 Here is photo frame and ready to – make a great gift made with their own hands