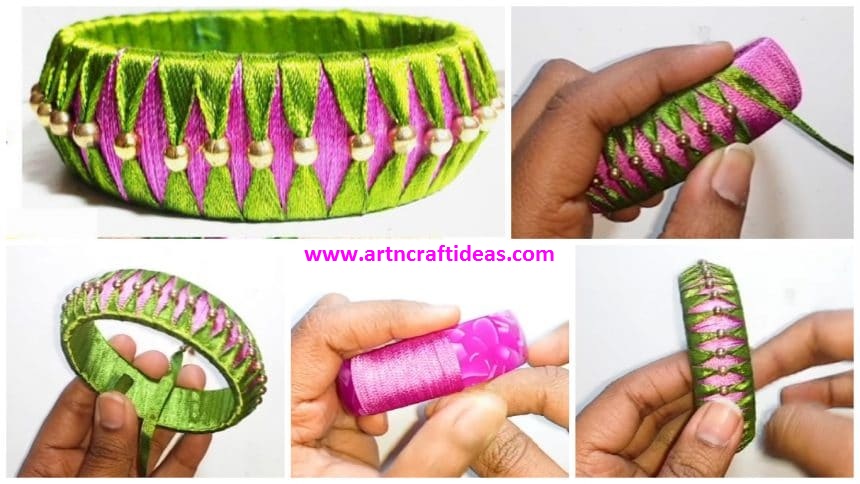
Posted onJuly 9, 2017inCraft, DIY, Jewellery, Tutorial, Video How to Make Silk Thread Ribbon Bangle at Home
Posted onJuly 7, 2017inDIY, Fashion, Jewellery, Tutorial DIY Silicone Transparent Floral Bracelet Tutorial
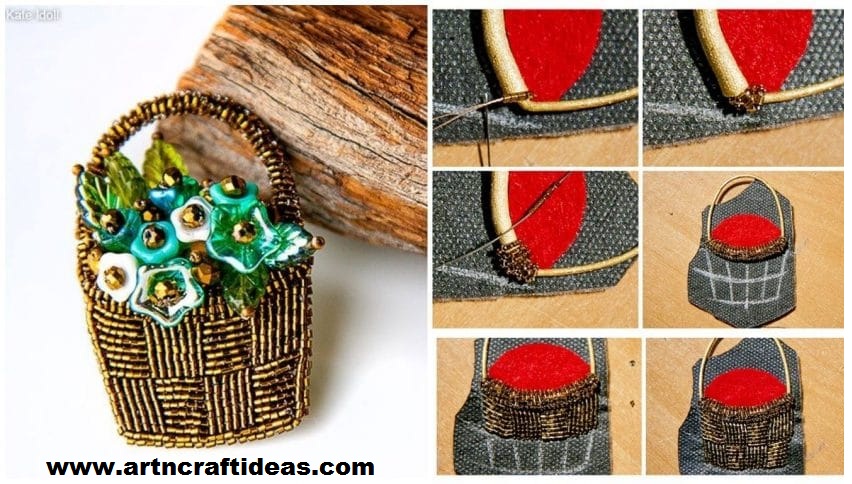
Posted onJune 30, 2017June 30, 2017inDIY, Jewellery, Tutorial DIY beautiful brooches “Basket with flowers”
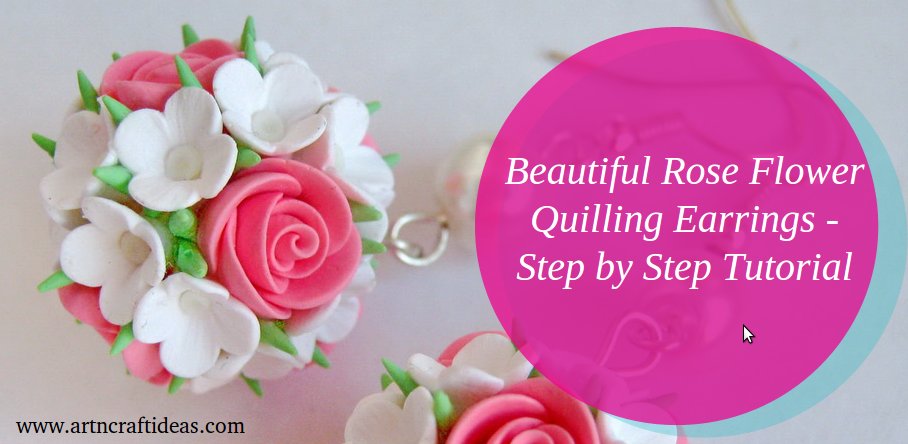
Posted onJune 25, 2017inJewellery, Quilling, Tutorial Beautiful Rose Flower Quilling Earrings Tutorial
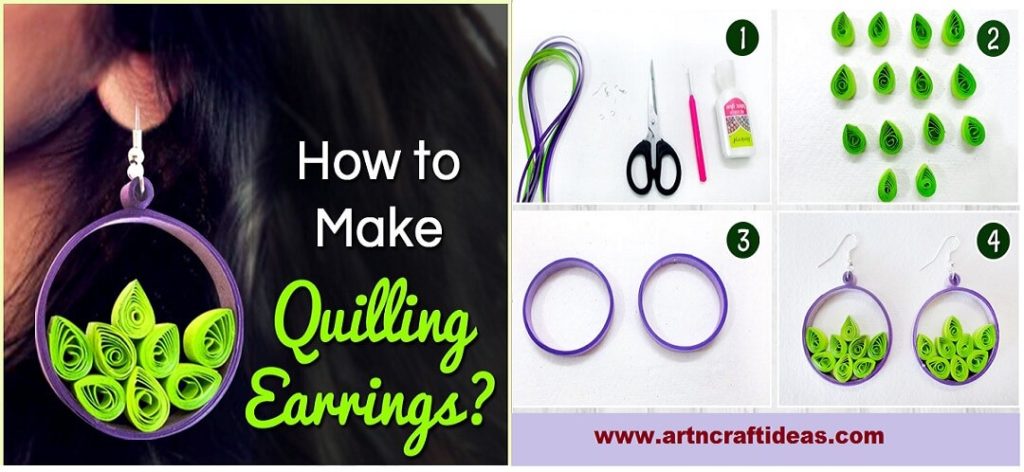
Posted onJune 3, 2017June 3, 2017inJewellery, Quilling, Tutorial, Video how to make Quilling Earrings
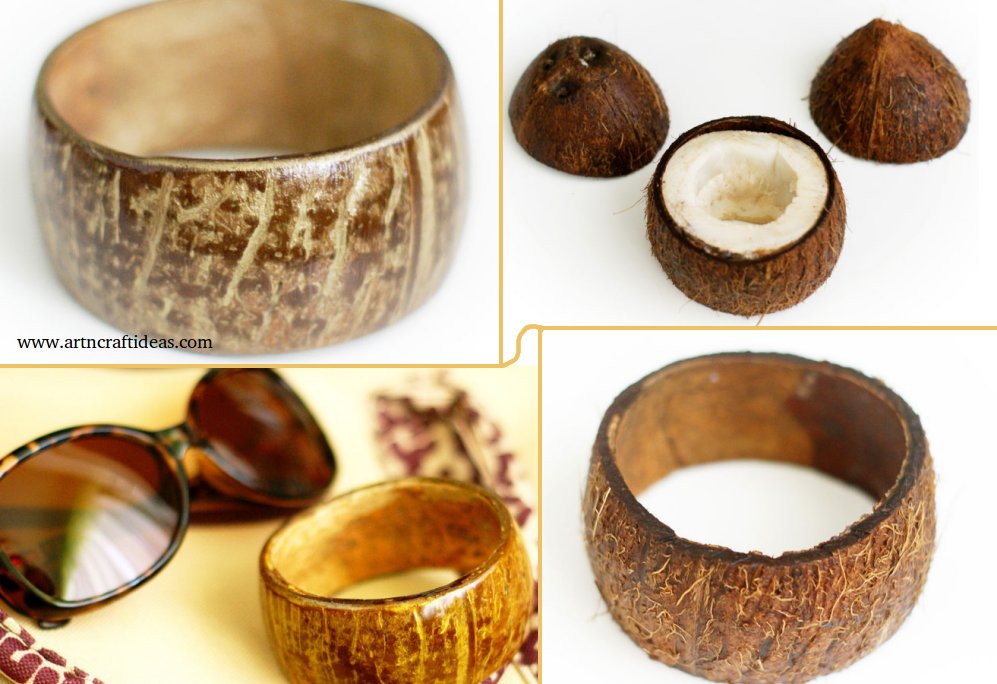
Posted onJune 1, 2017inBest out of Waste, Jewellery, Step by step, Tutorial How to make coconut shell bracelet – Step by step