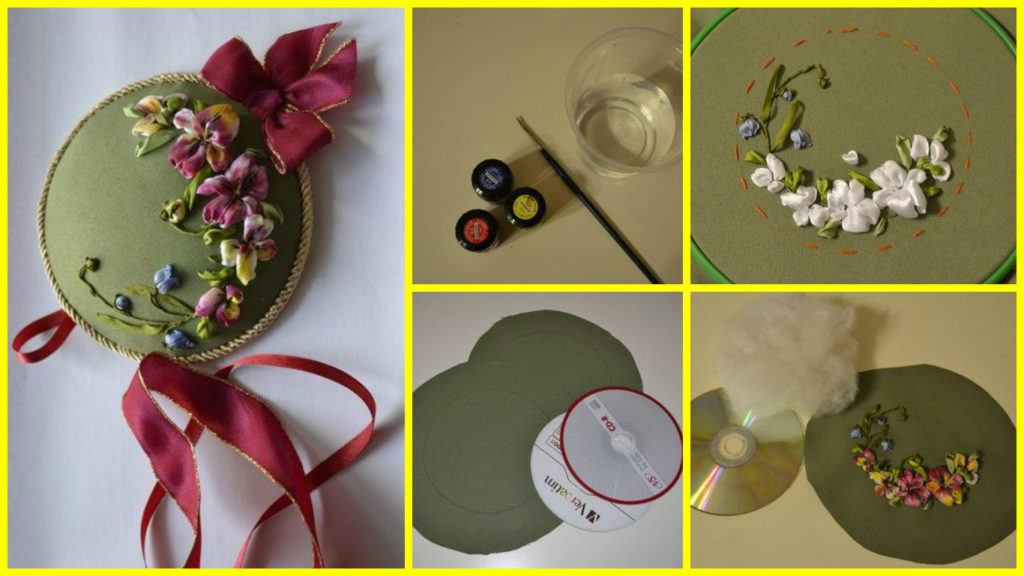
Posted onJanuary 29, 2017inBest out of Waste, DIY, Step by step, Tutorial Beautiful needle bed of two discs
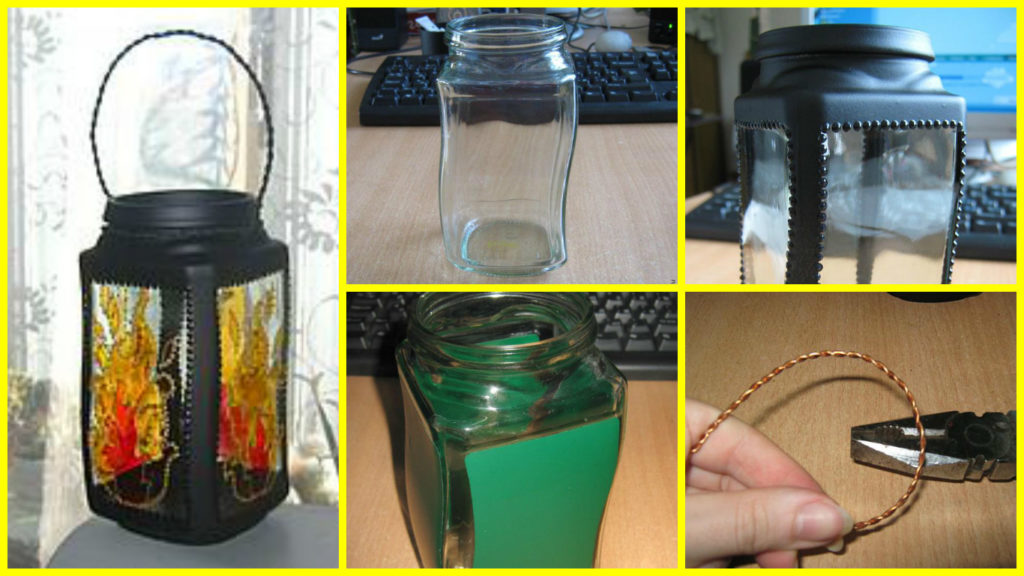
Posted onJanuary 29, 2017inBest out of Waste, DIY, Home Decor, Step by step, Tutorial How to make jar vase lamp
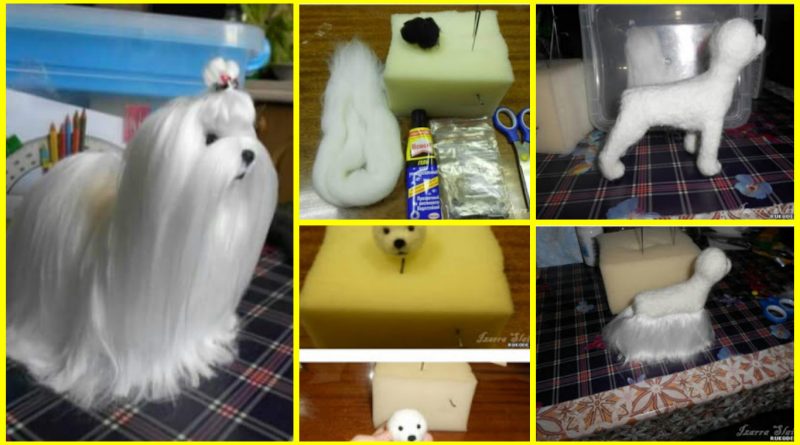
Posted onJanuary 29, 2017inDIY, Other, Step by step, Tutorial How to make needle felted puppy step by step
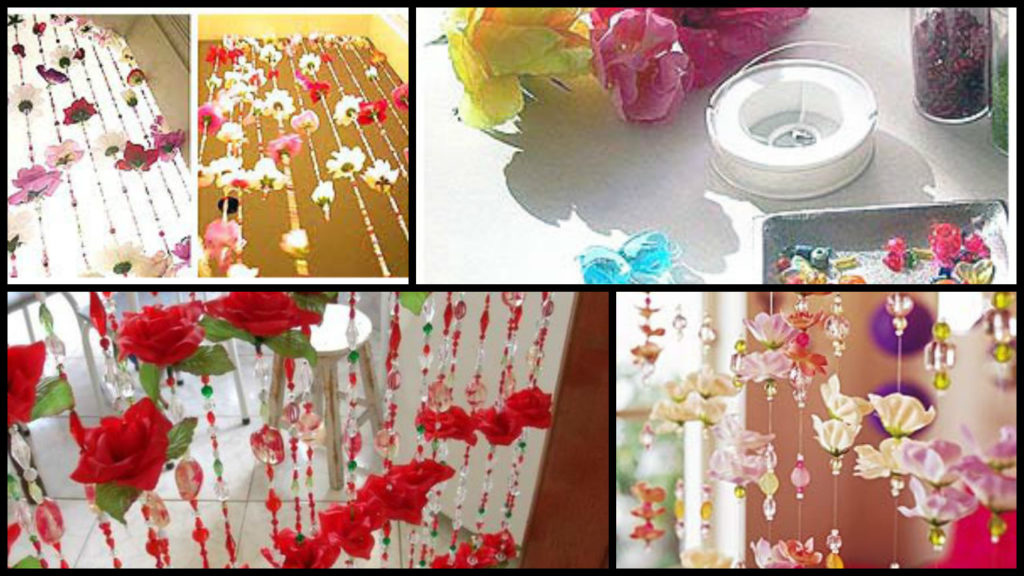
Posted onJanuary 29, 2017inBest out of Waste, DIY, Home Decor, Step by step, Tutorial Beautiful curtains made of beads and artificial flowers
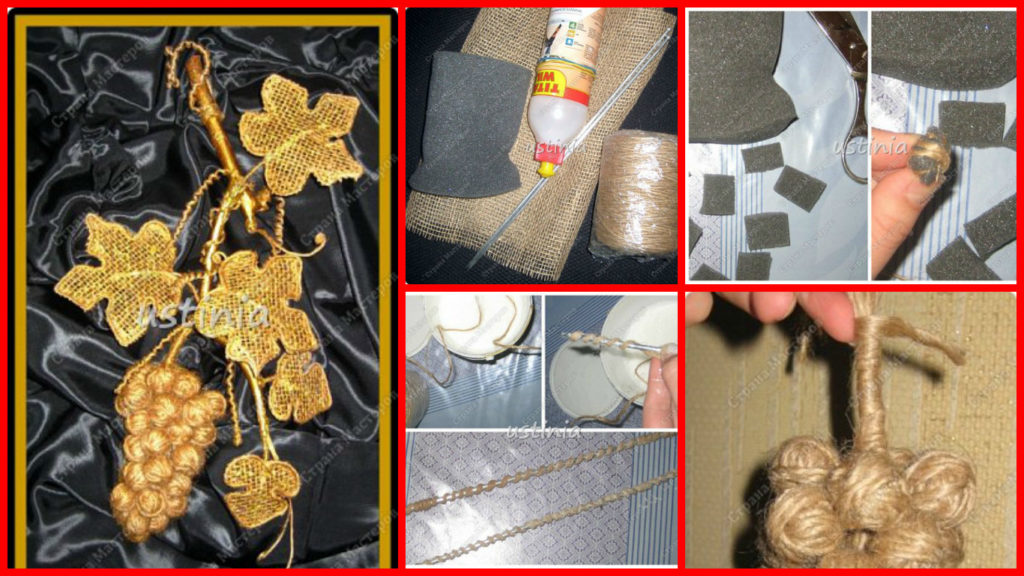
Posted onJanuary 29, 2017inDIY, Home Decor, Step by step, Tutorial How to make golden grapes of jute and burlap
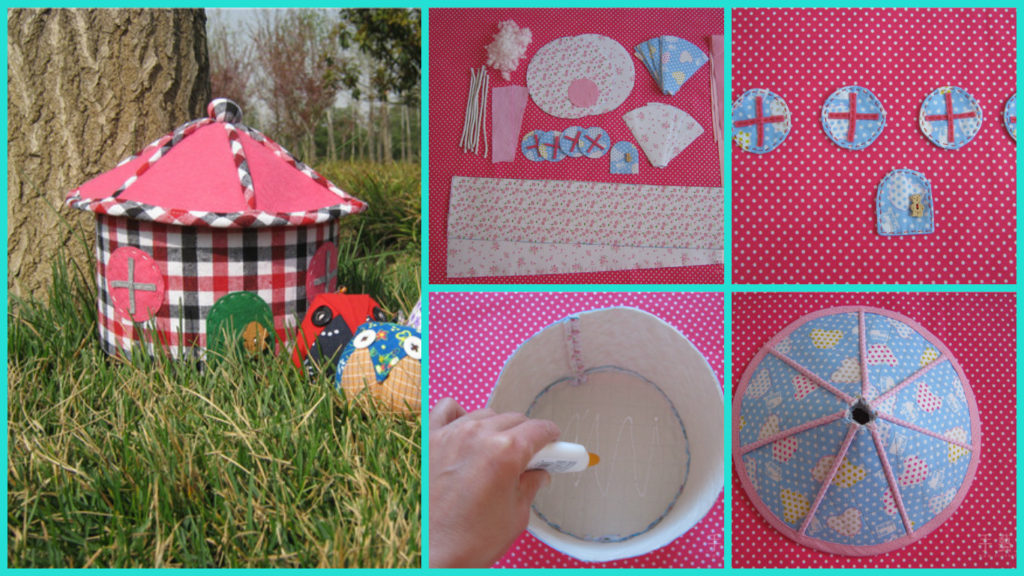
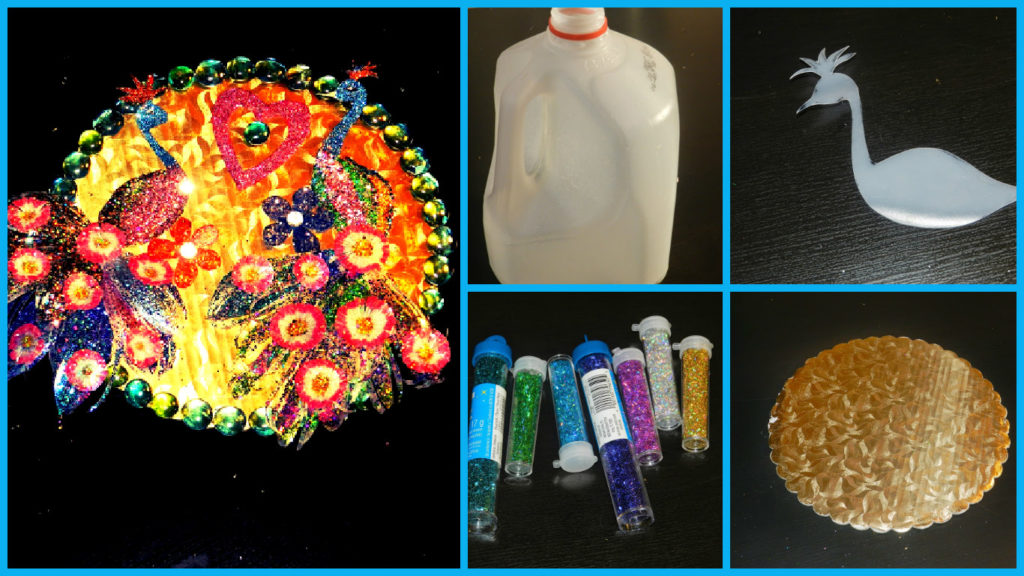
Posted onJanuary 29, 2017inBest out of Waste, DIY, Home Decor, Step by step, Tutorial How to decor home from waste materials