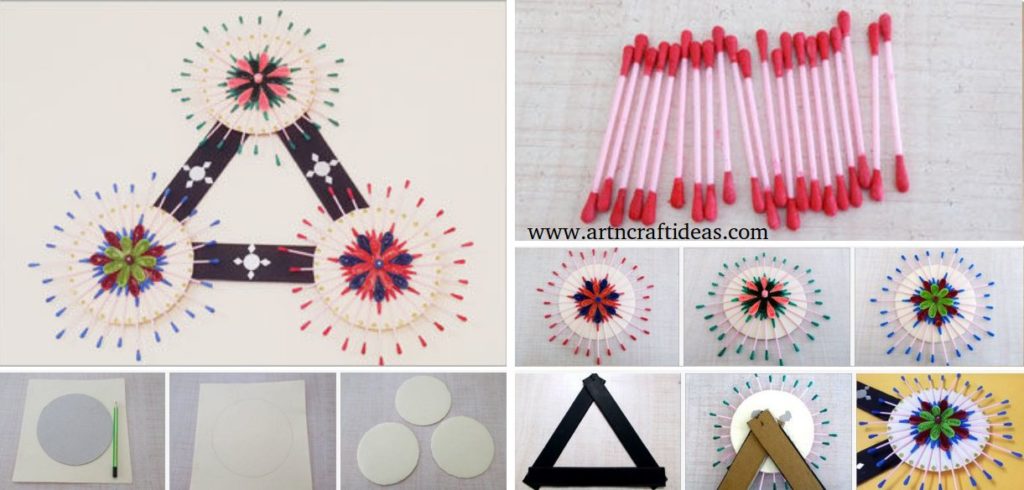
Posted onJuly 13, 2017July 13, 2017inDIY, Home Decor, Paper Crafts, Quilling, Tutorial How to Make Quilling & Earbud Wall Hanging
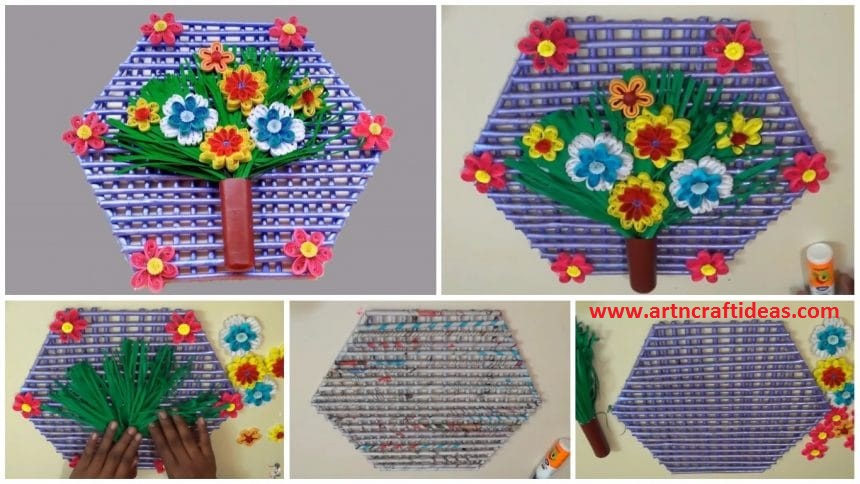
Posted onJuly 6, 2017inBest out of Waste, Craft, Newspaper Crafts, Quilling, Tutorial Paper quilling wall hanging design for room decoration
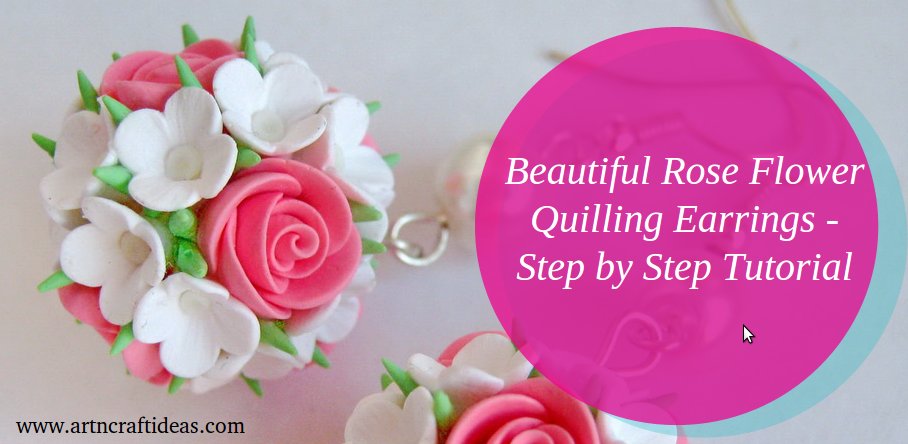
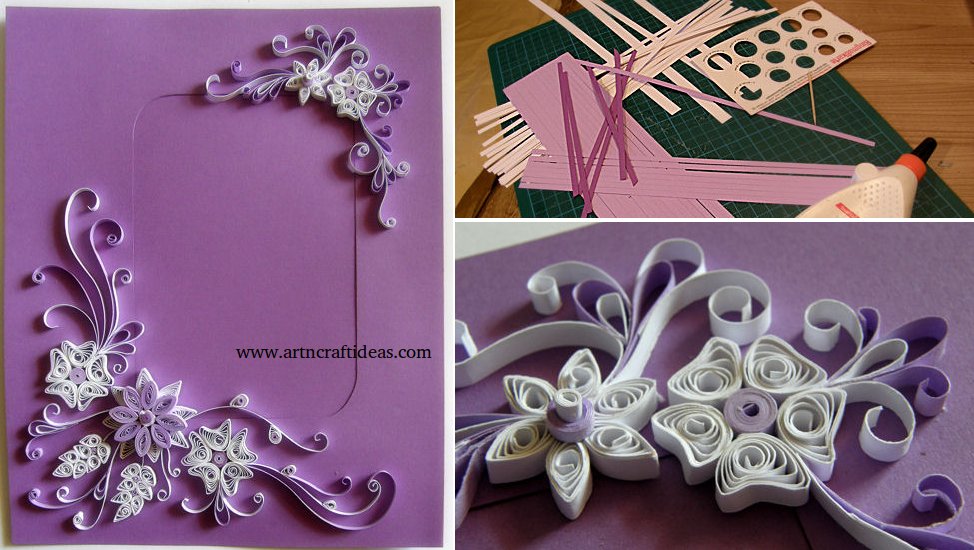
Posted onJune 25, 2017inJewellery, Quilling, Tutorial Beautiful Rose Flower Quilling Earrings Tutorial
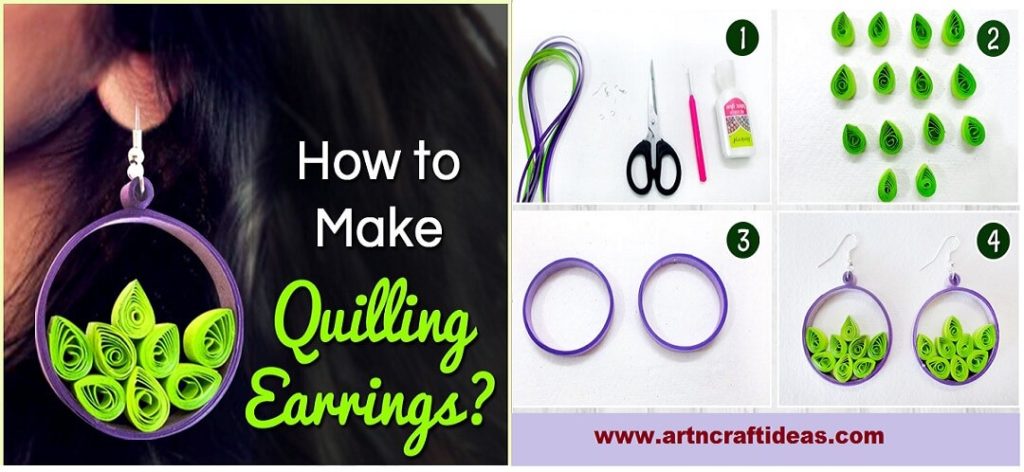
Posted onJune 3, 2017June 3, 2017inJewellery, Quilling, Tutorial, Video how to make Quilling Earrings
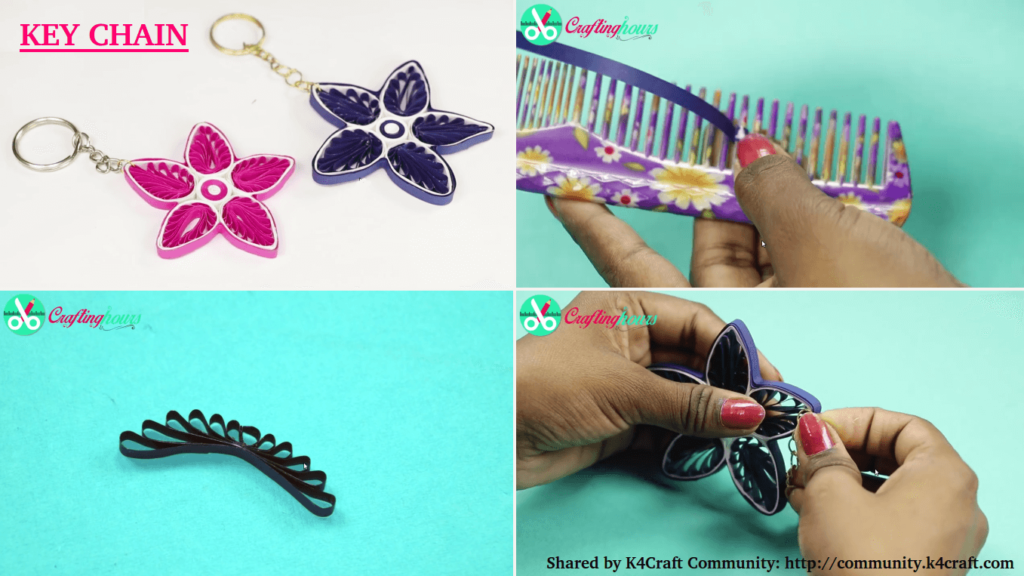
Posted onApril 25, 2017inQuilling, Step by step, Video Paper Quilling – How to Make Key chain from Quilling Art
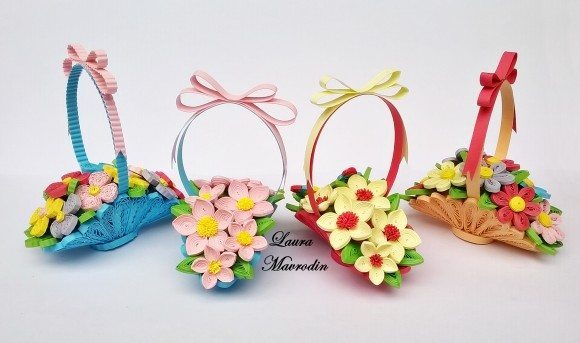
Posted onFebruary 24, 2017February 25, 2017inDIY, Quilling, Step by step, Tutorial How to make quilling basket of flowers bouquets
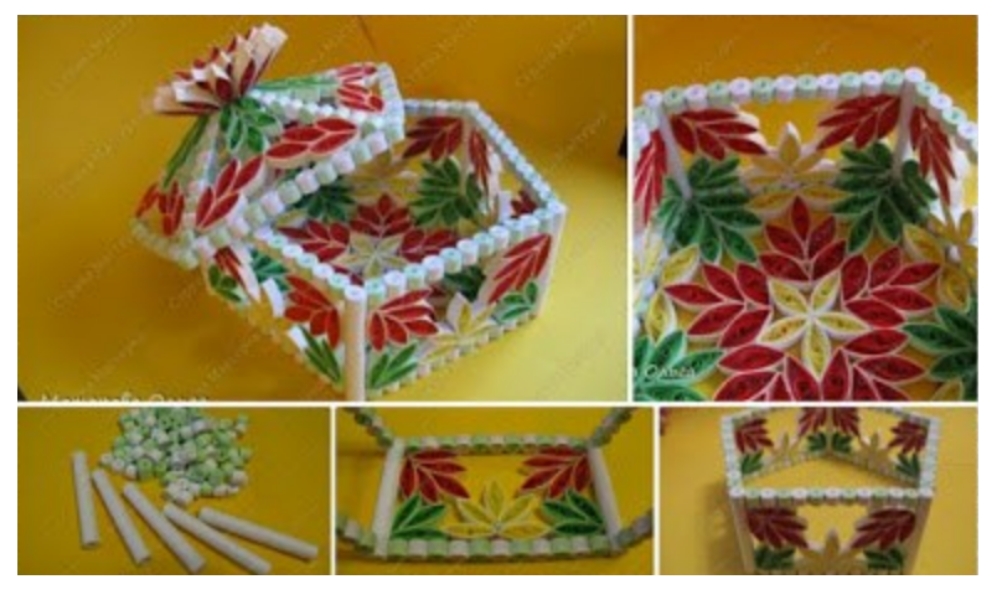
Posted onFebruary 16, 2017July 17, 2017inDIY, Quilling, Step by step, Tutorial How to make Quilling Casket
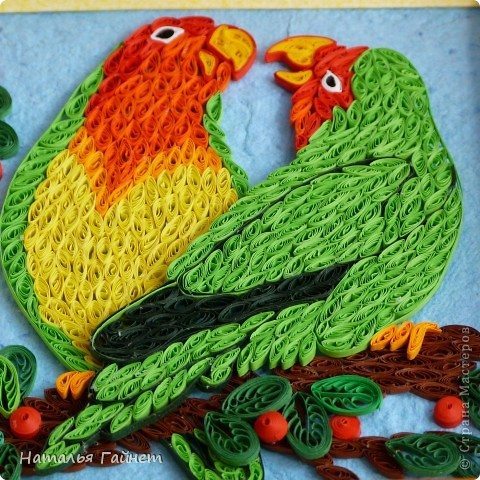
Posted onFebruary 11, 2017inDIY, Quilling, Step by step, Tutorial, Valentine’s Day, Wedding Paper Quilling Beautiful Lovebirds – Happy couple