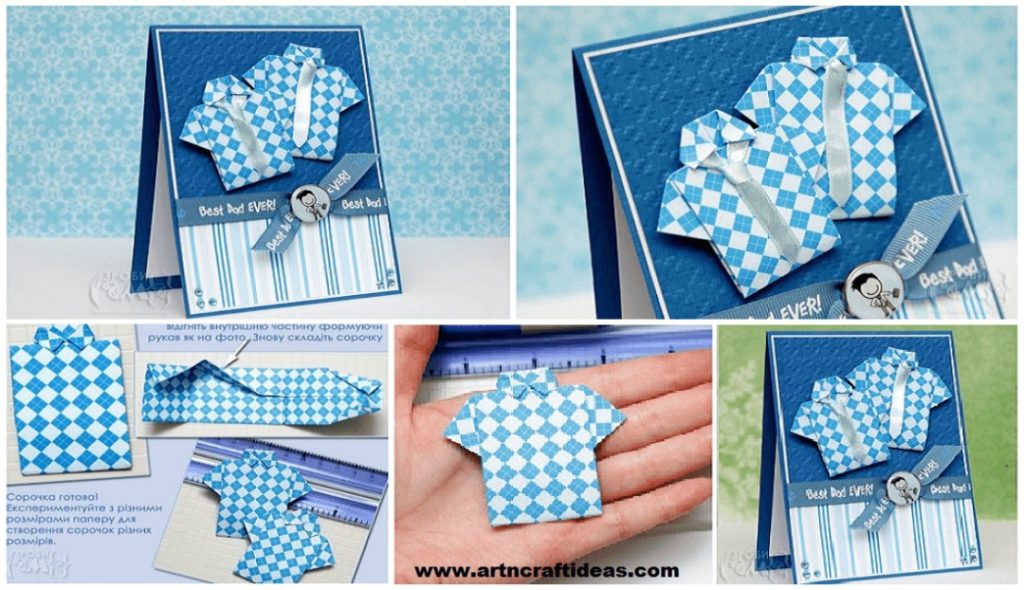
Posted onJune 3, 2017June 3, 2017inCraft, Father's Day, Origami, Tutorial Father’s Day Cards – card with origami-shirt
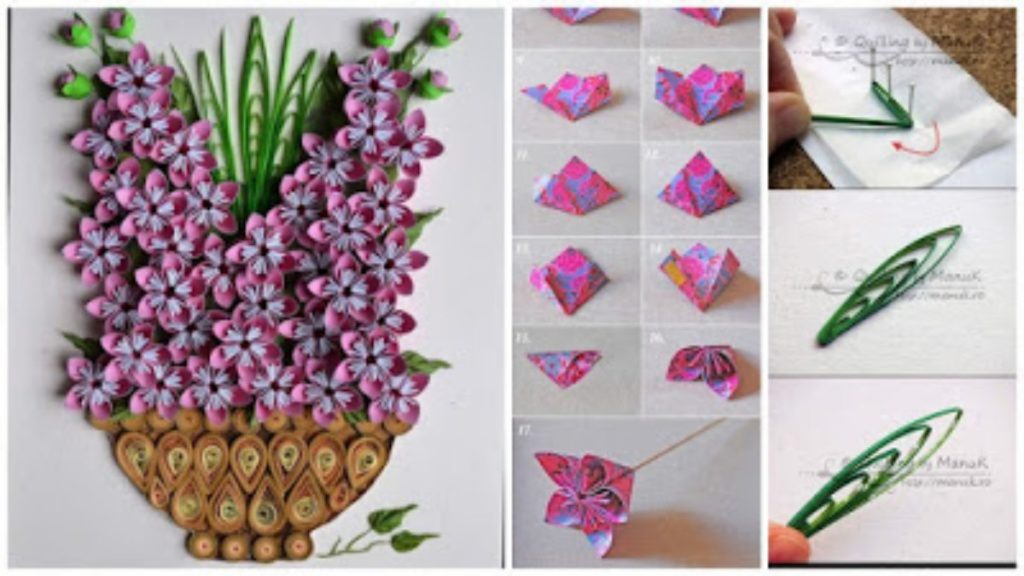
Posted onMarch 30, 2017May 11, 2017inFlower Crafts, Origami, Tutorial How to Make a Origami Kusudama Flower
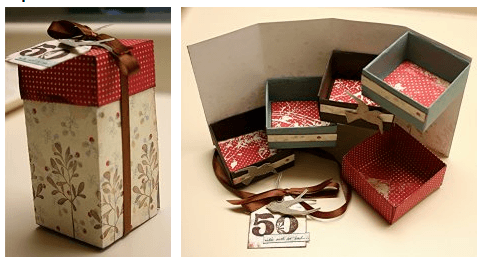
Posted onFebruary 11, 2017February 11, 2017inDIY, Origami, Step by step, Tutorial DIY Simple Way to Create a Secret Box
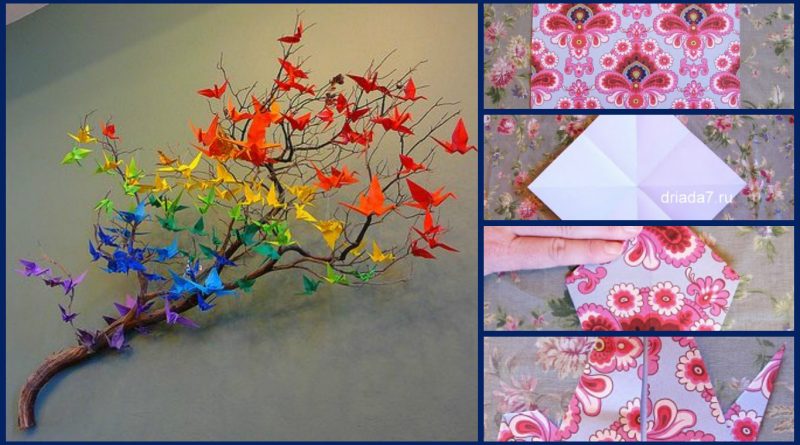
Posted onFebruary 10, 2017inDIY, Home Decor, Origami, Step by step, Tutorial How to make a paper crane
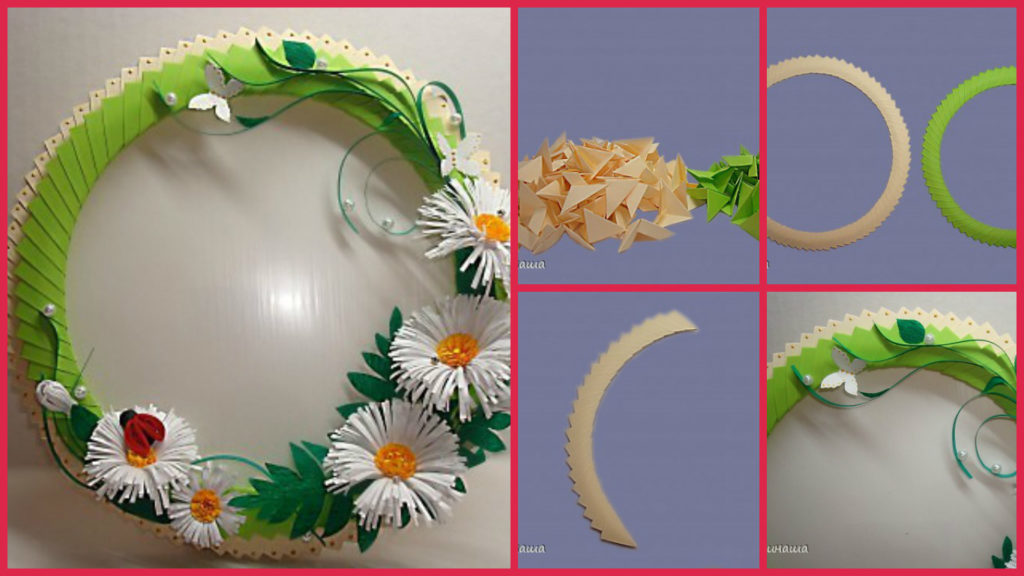
Posted onFebruary 7, 2017inDIY, Origami, Step by step, Tutorial DIY: Handmade frame from origami paper
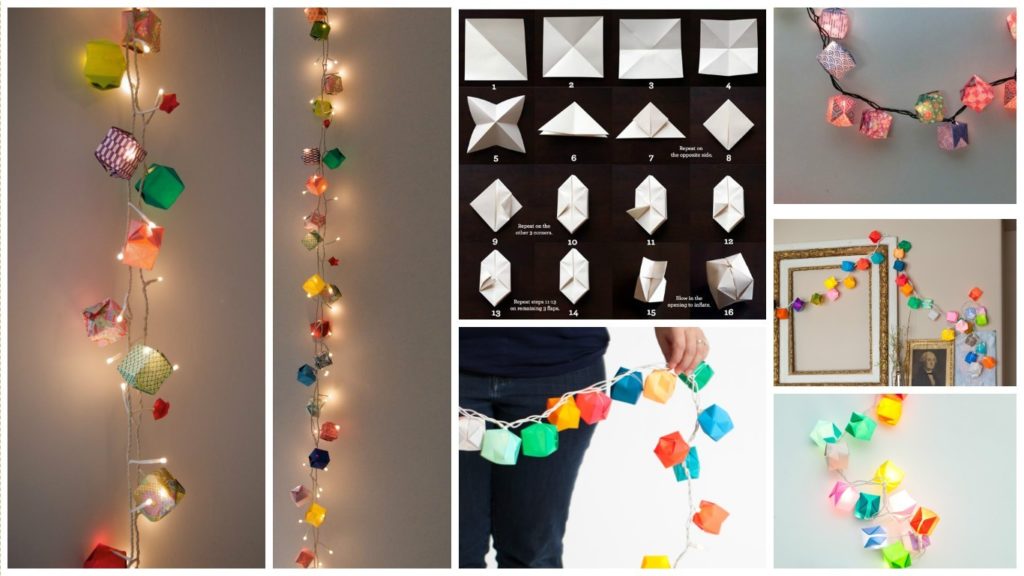
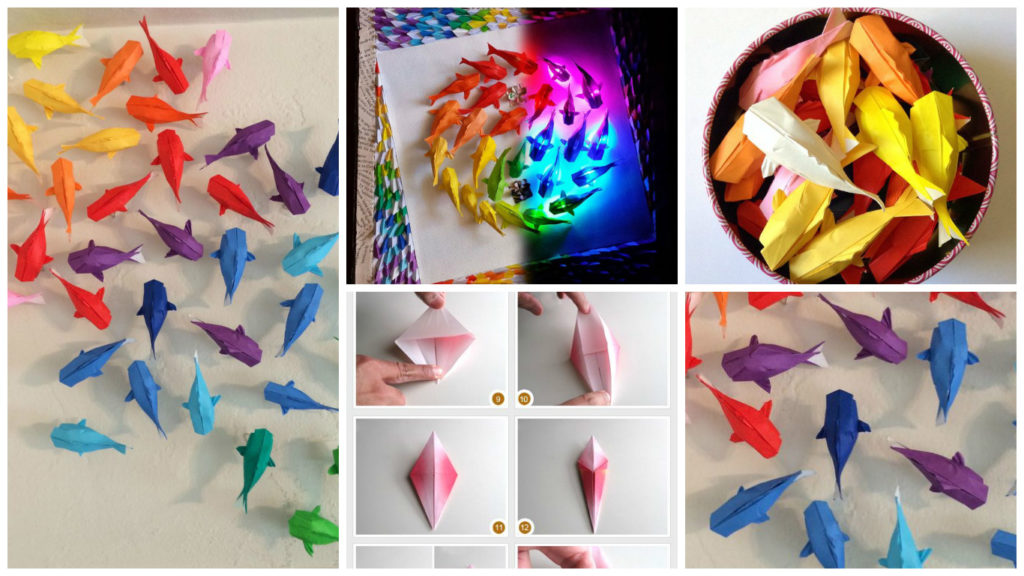
Posted onJanuary 11, 2017inDIY, Home Decor, Origami, Step by step, Tutorial Beautiful Origami Light Garland
Posted onJanuary 11, 2017January 11, 2017inChristmas, DIY, Origami, Paper Crafts, Step by step, Tutorial How to Make Origami Snowman
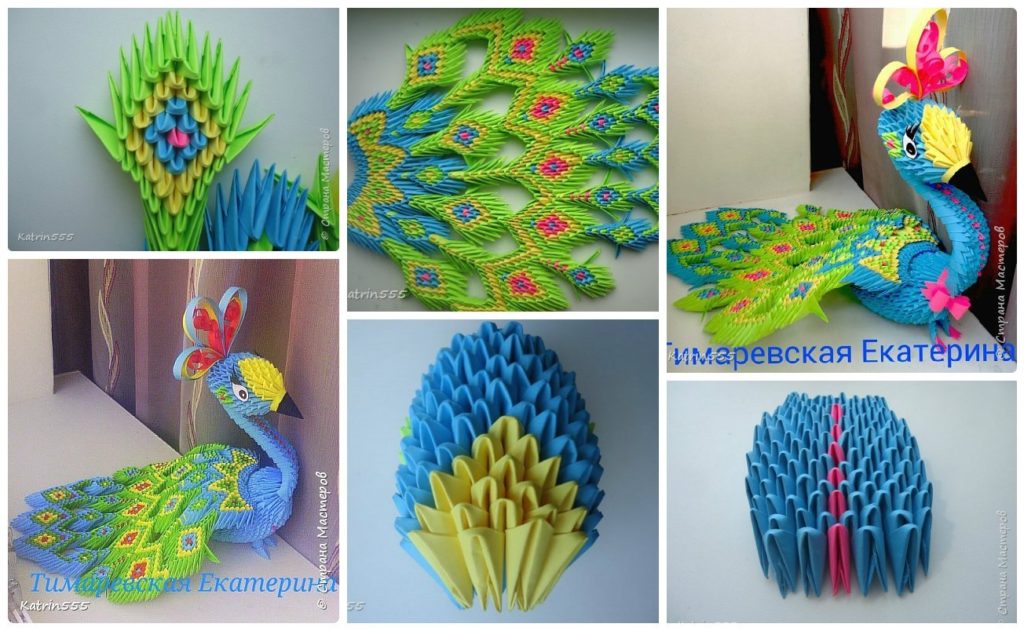
Posted onJanuary 11, 2017January 11, 2017inDIY, Origami, Paper Crafts, Step by step, Tutorial DIY How to make origami peacock