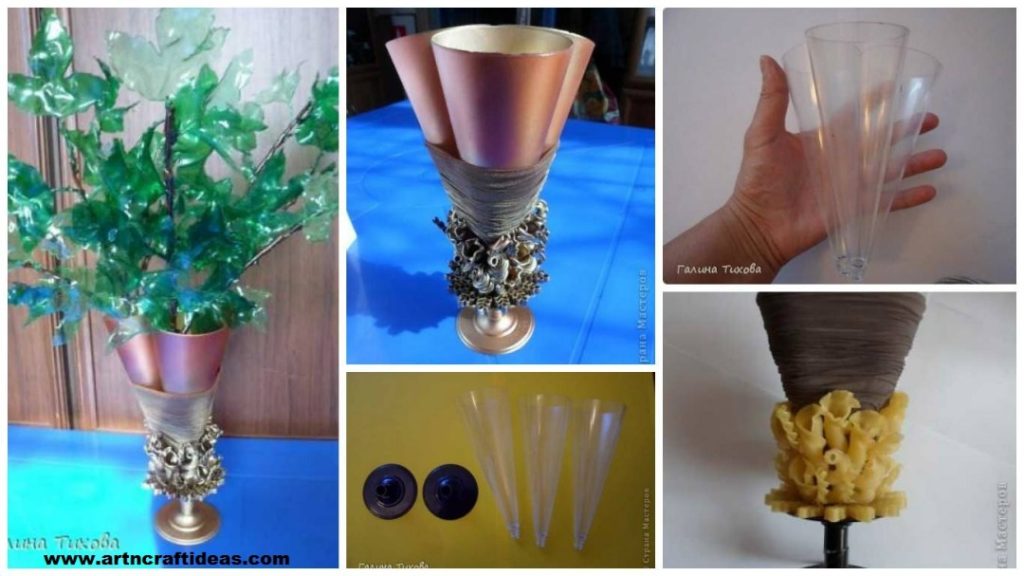
Posted onJune 9, 2017inBest out of Waste, Craft, Tutorial DIY Vase of branches made from plastic bottles
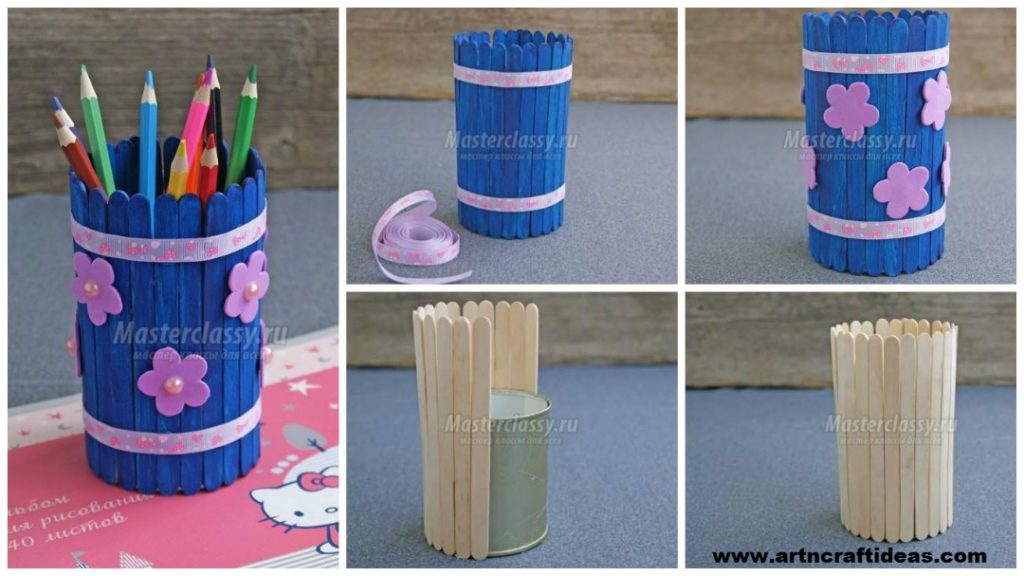
Posted onJune 9, 2017inBest out of Waste, Craft, Tutorial How to Make a Pencil Holder with Popsicle Sticks
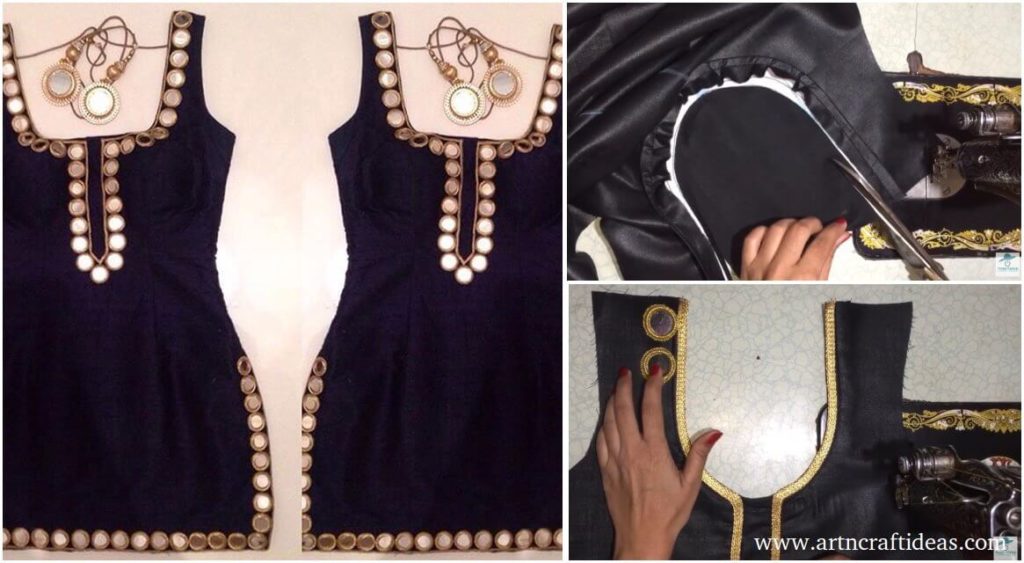
Posted onJune 5, 2017June 5, 2017inClothing, Tutorial, Video DIY Fashion: Round Neck Design for Kurti with Mirror work
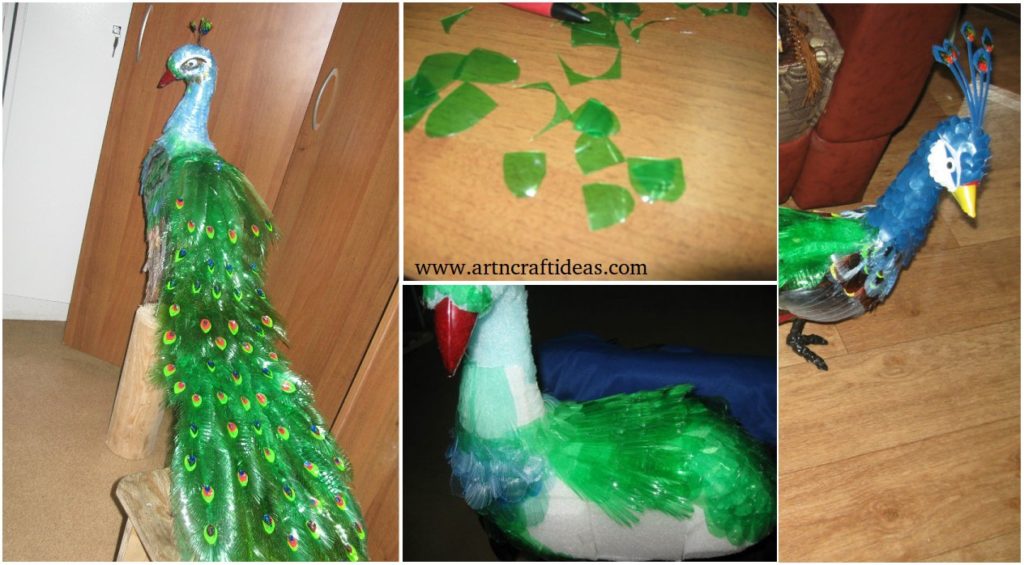
Posted onJune 4, 2017inBest out of Waste, DIY, Tutorial DIY Beautiful Peacock Design from plastic bottles
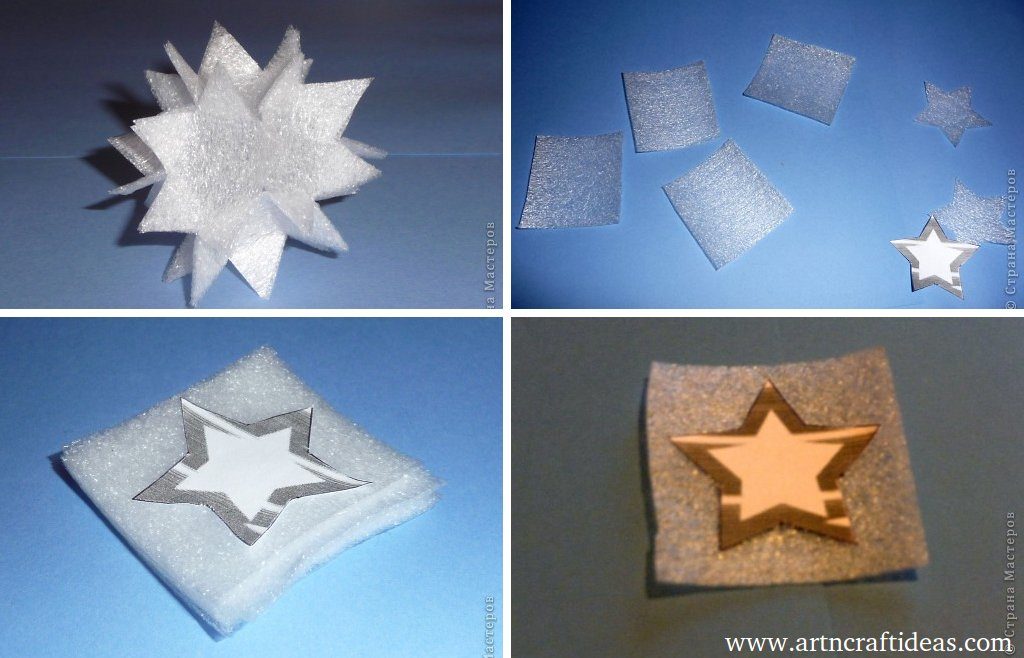
Posted onJune 4, 2017inBest out of Waste, Christmas, Decorations, Tutorial Recycled Craft: Snowflake foam hands (Tutorial)
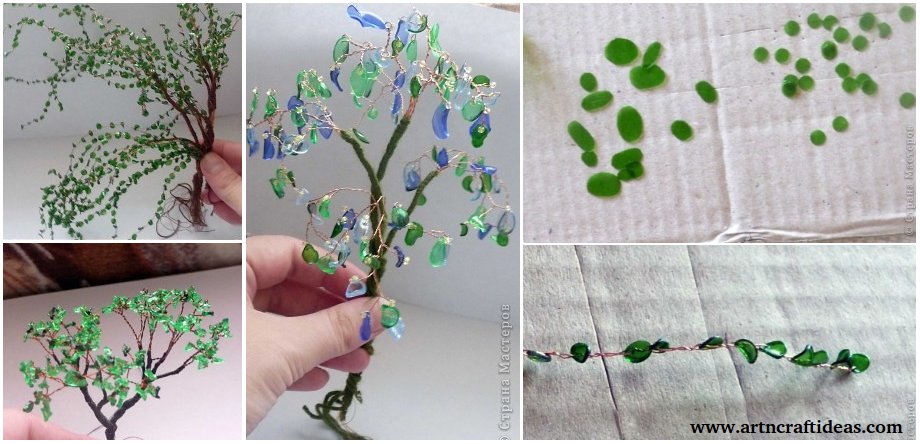
Posted onJune 4, 2017June 4, 2017inBest out of Waste, Home Decor, Tutorial DIY RECYCLED CRAFT: Bonsai Made Of Plastic Bottle (Tutorial)
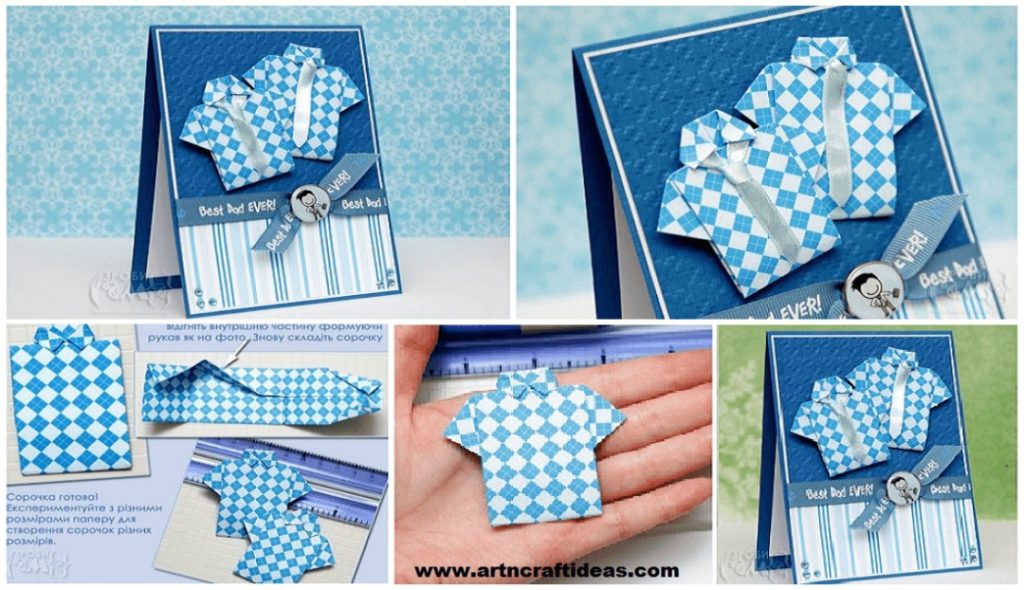
Posted onJune 3, 2017June 3, 2017inCraft, Father's Day, Origami, Tutorial Father’s Day Cards – card with origami-shirt