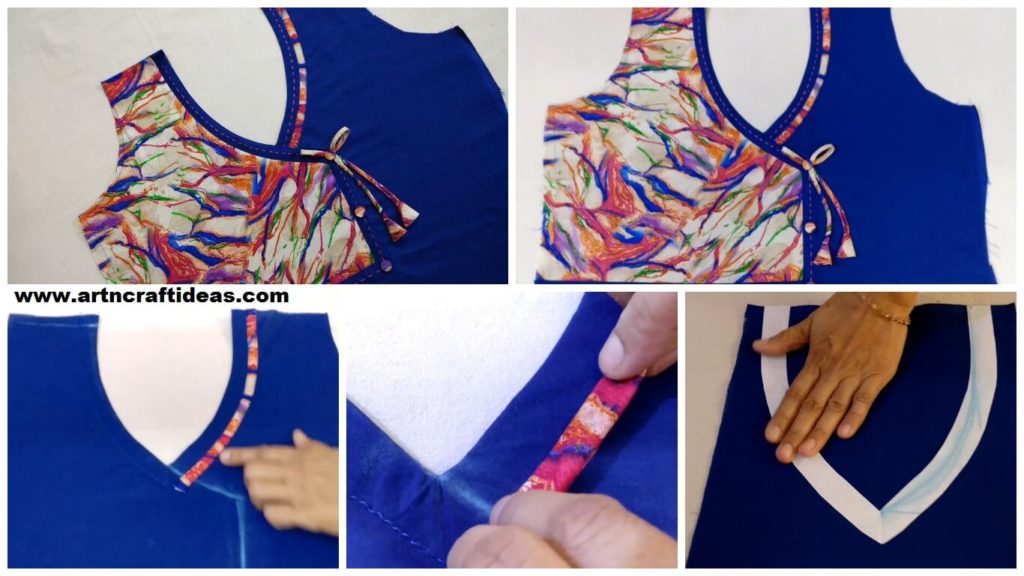
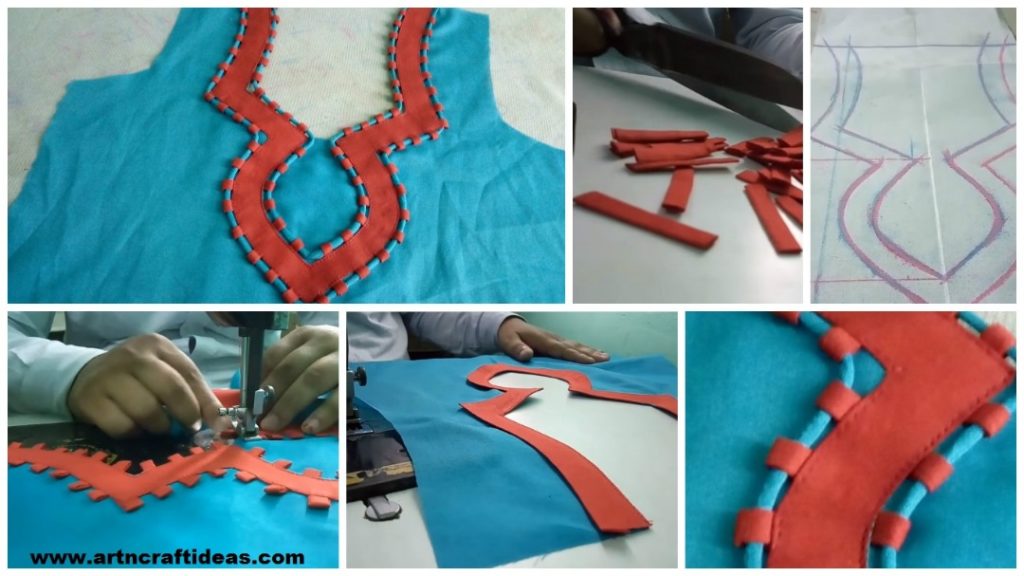
Posted onJune 16, 2017inClothing, Embroidery And Sewing, Patchwork Crafts, Tutorial, Video Designer Kurti Neck Design Cutting and Stitching
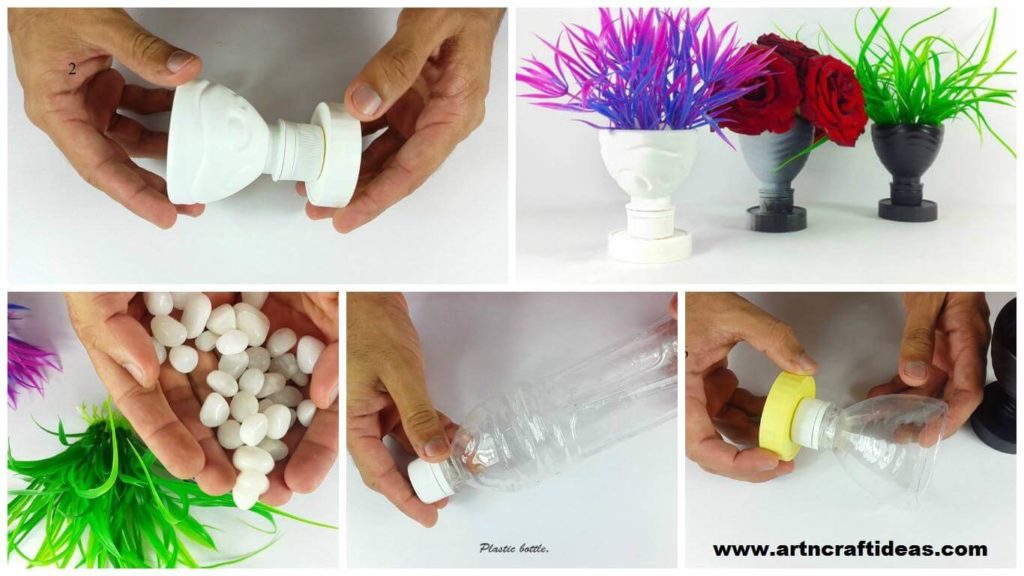
Posted onJune 11, 2017inBest out of Waste, Craft, DIY, Tutorial, Video DIY Flower Vase Out of Plastic Bottle
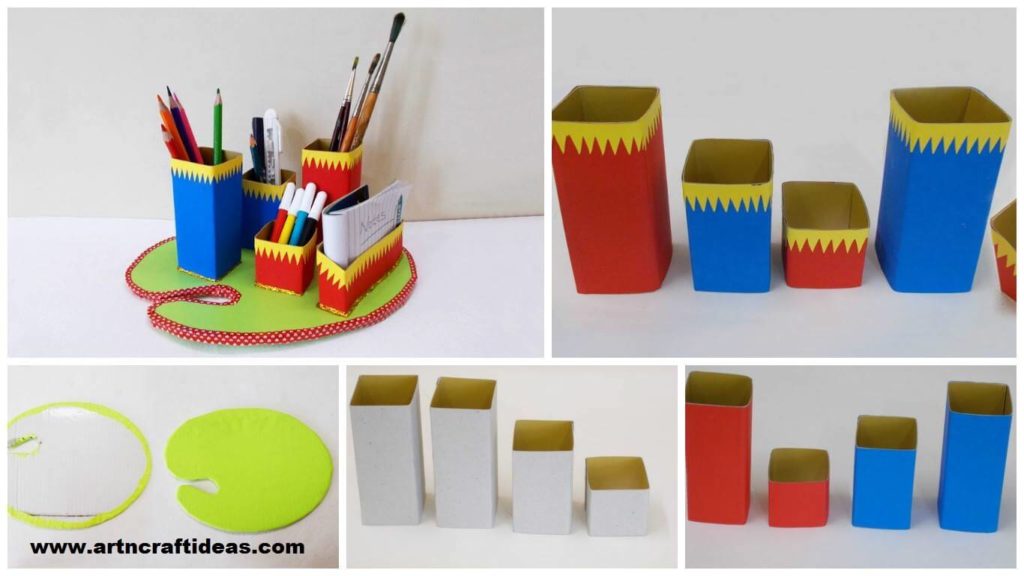
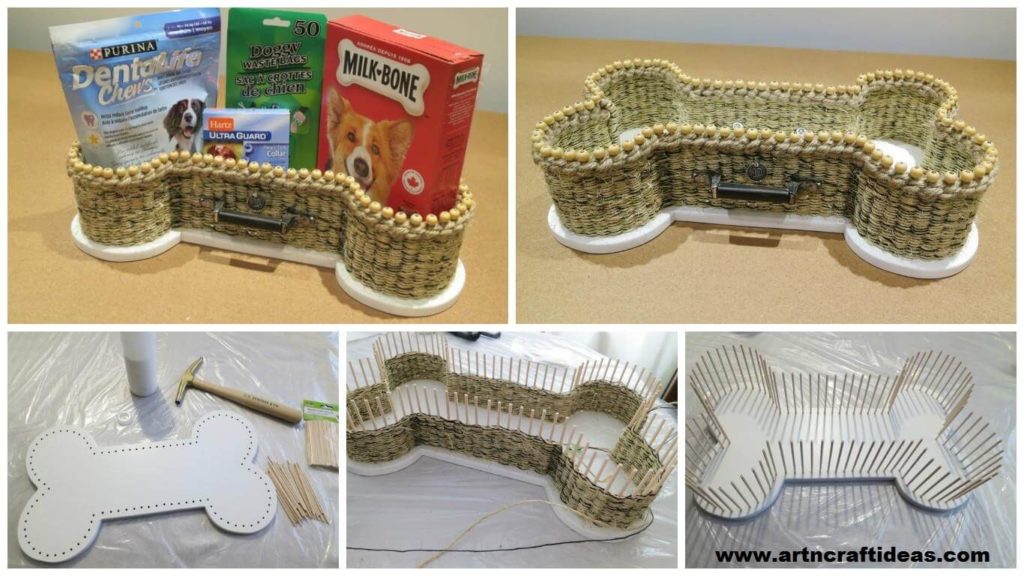
Posted onJune 11, 2017inBest out of Waste, Cardboard Crafts, Craft, DIY, Tutorial How to Make DIY Desk Organizer
Posted onJune 9, 2017inClothing, Embroidery And Sewing, Tutorial, Video How to sew a Jacket style pattern kurti
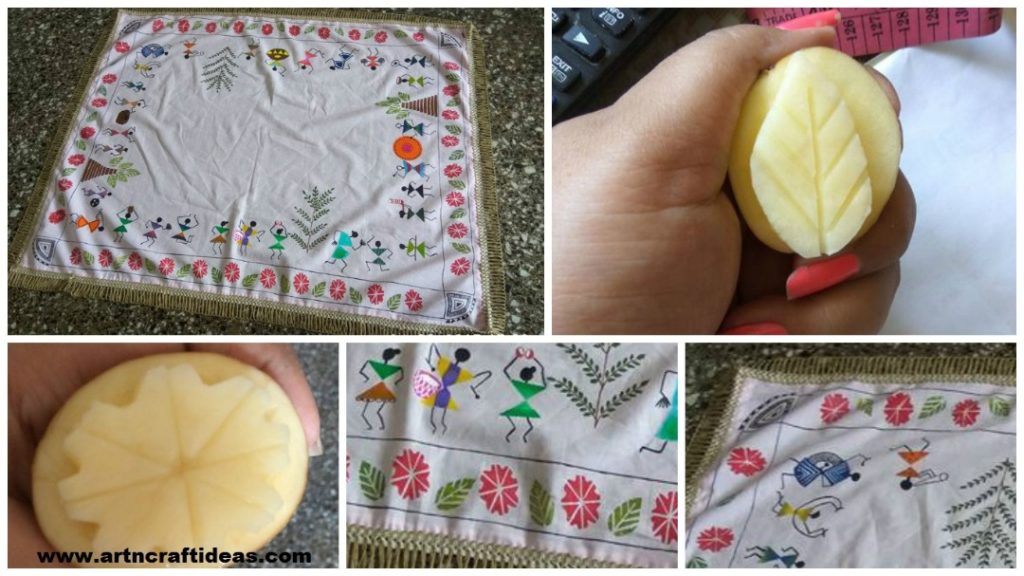
Posted onJune 9, 2017November 20, 2018inBest out of Waste, Craft, Tutorial DIY warli art table cover using potato stamps
Posted onJune 9, 2017inClothing, Embroidery And Sewing, Patchwork Crafts, Tutorial How to sew piping neck design