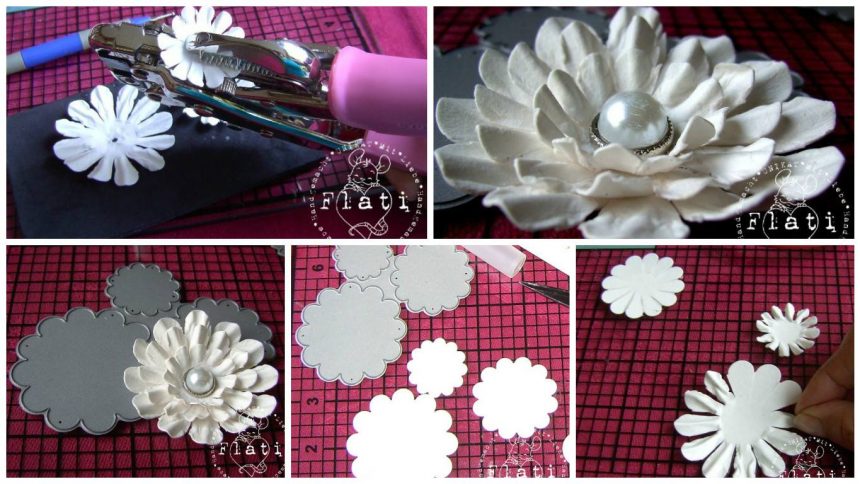
Posted onJanuary 19, 2017inFlower Crafts, Paper Crafts, Step by step, Tutorial How to make beautiful elegant flower scrap of watercolor paper
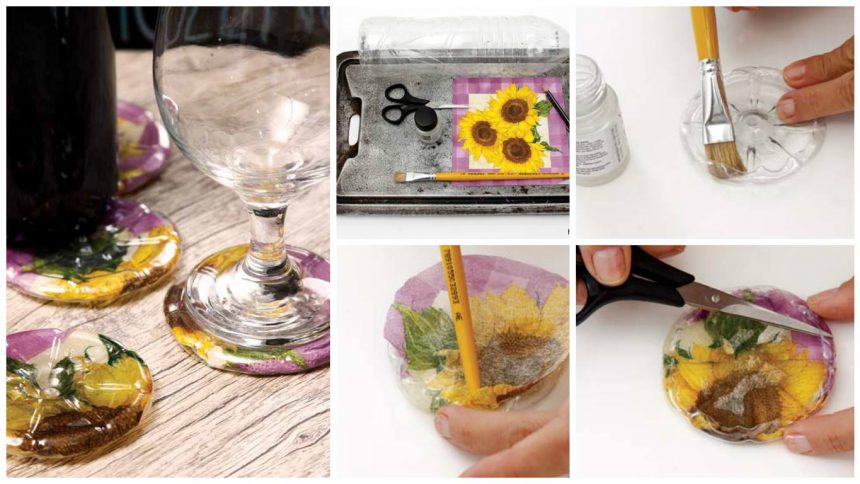
Posted onJanuary 19, 2017January 19, 2017inHome Decor, Step by step, Tutorial Beautiful coasters out of plastic bottles
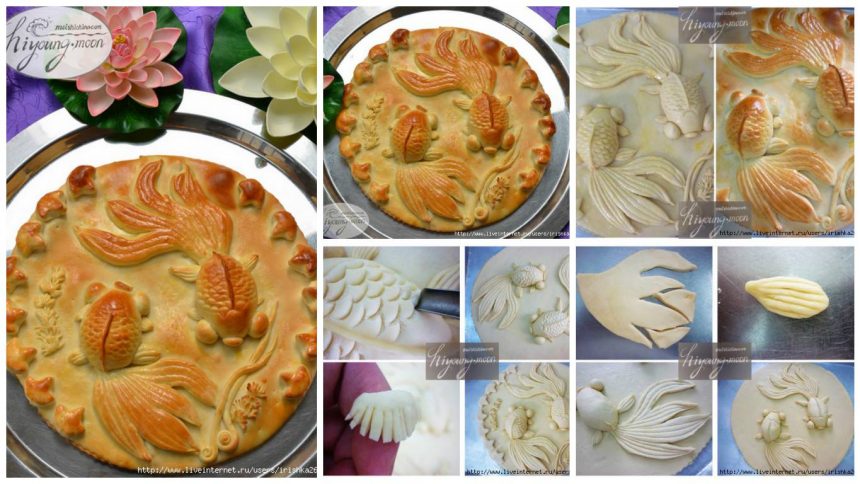
Posted onJanuary 19, 2017inFood Decoration, Step by step, Tutorial How to make “Goldfish” cakes – Step By Step
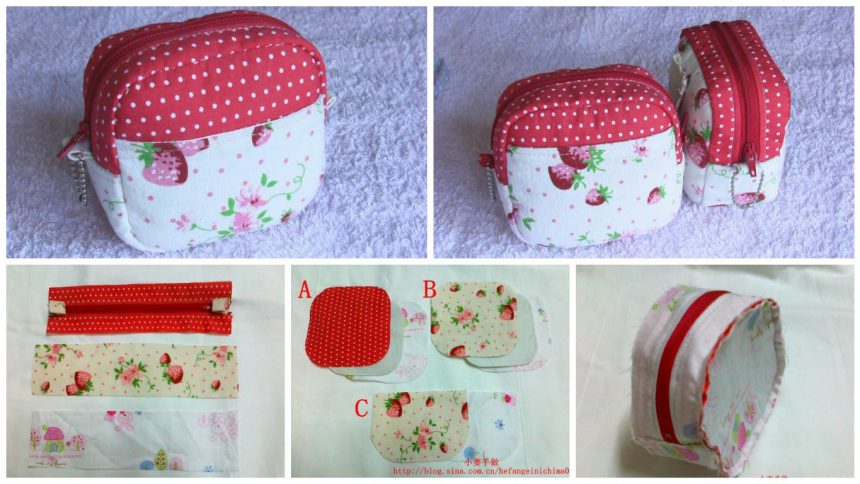
Posted onJanuary 19, 2017inPatchwork Crafts, Step by step, Tutorial How to make beautiful bag on a belt
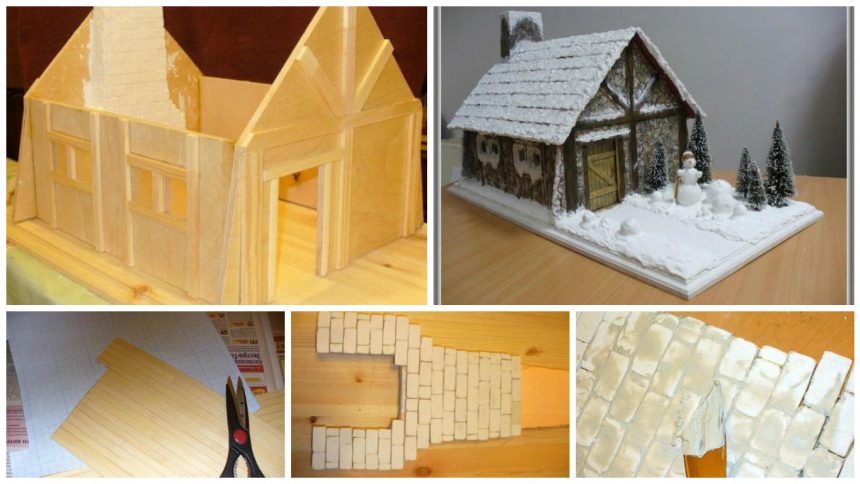
Posted onJanuary 19, 2017inHome Decor, Step by step, Tutorial How to make a miniature alpine hut – Step By Step
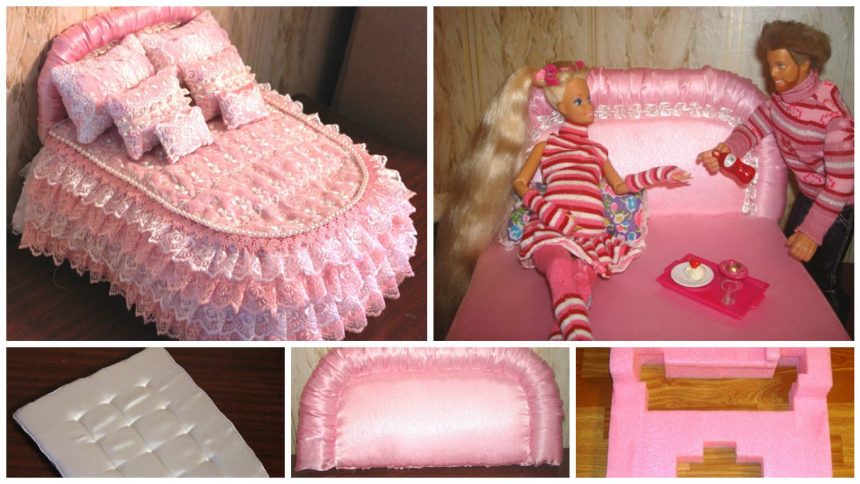
Posted onJanuary 19, 2017inKids Crafts, Step by step, Tutorial How to make a bed for Barbie dolls – Step By step
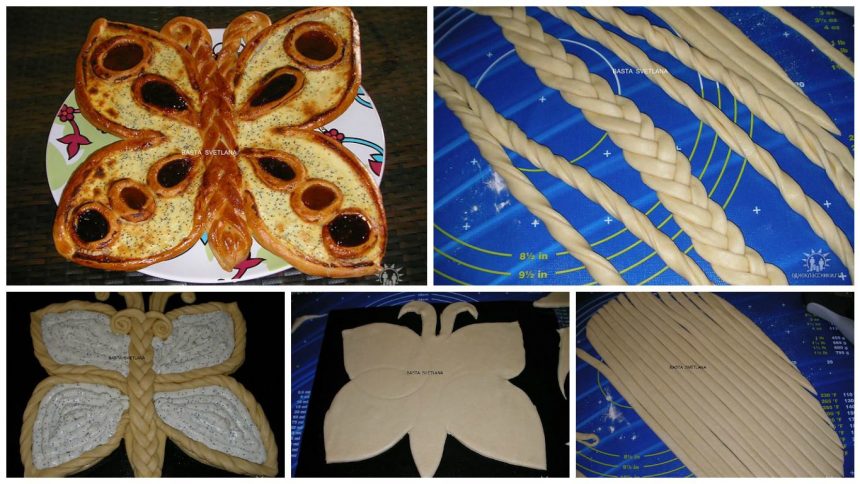
Posted onJanuary 19, 2017inFood Decoration, Step by step, Tutorial How to make “Butterfly” with curd cream and jam – Step By Step
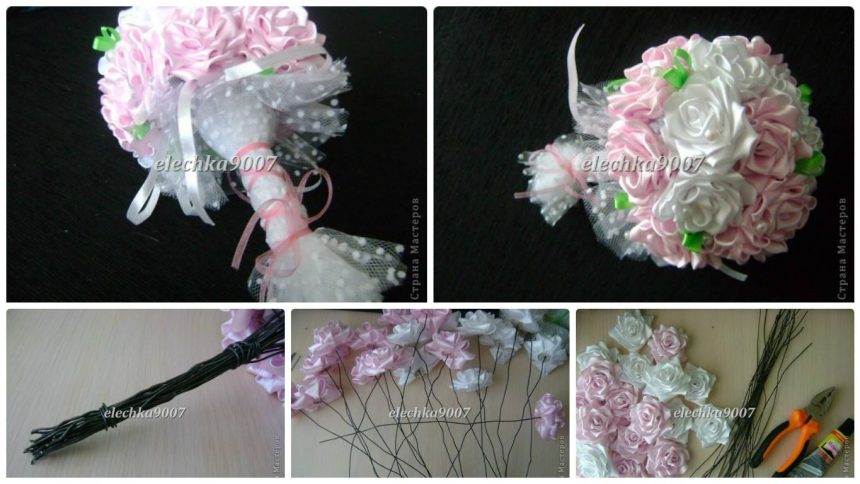
Posted onJanuary 19, 2017inStep by step, Tutorial, Wedding How to make beautiful wedding bouquet of ribbon flowers