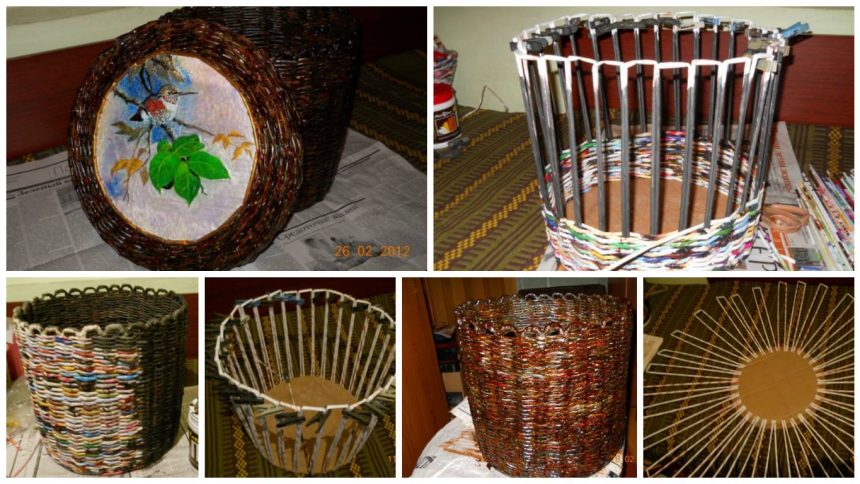
Posted onJanuary 19, 2017inNewspaper Crafts, Step by step, Tutorial How to weaving box for needlework
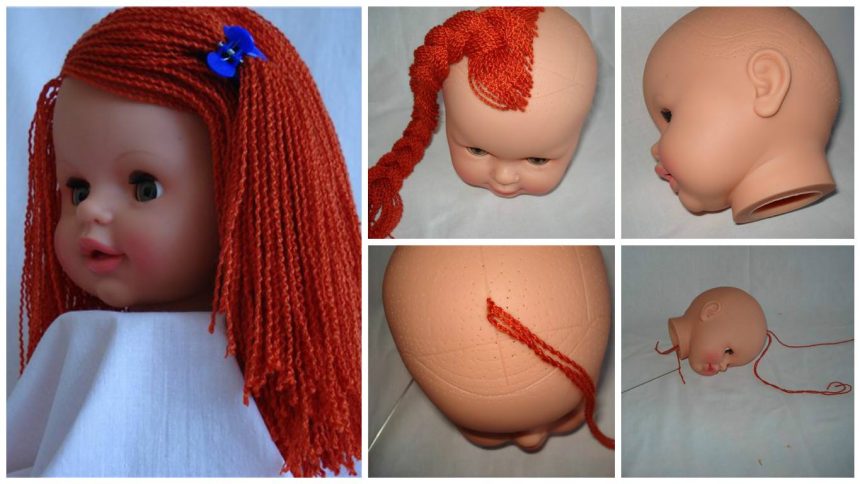
Posted onJanuary 19, 2017inKids Crafts, Step by step, Tutorial How to change the matted hair on the doll’s head to the new – Step By Step
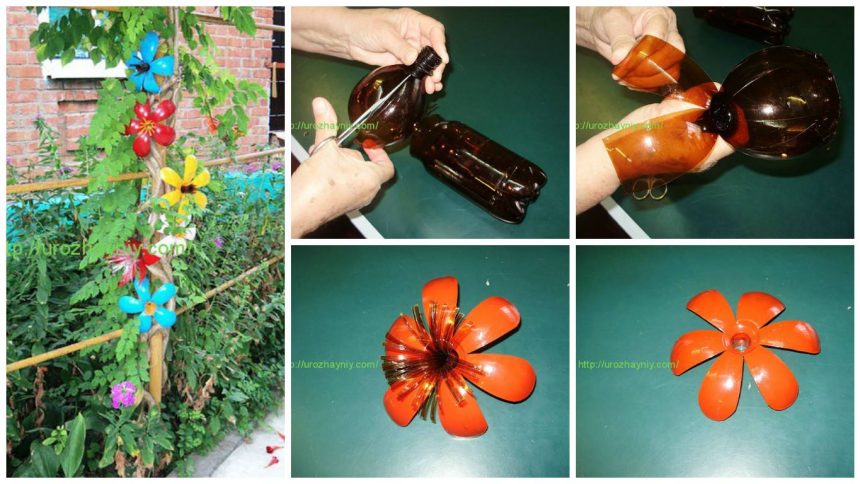
Posted onJanuary 19, 2017inFlower Crafts, Step by step, Tutorial How to make beautiful garden flowers from plastic bottles
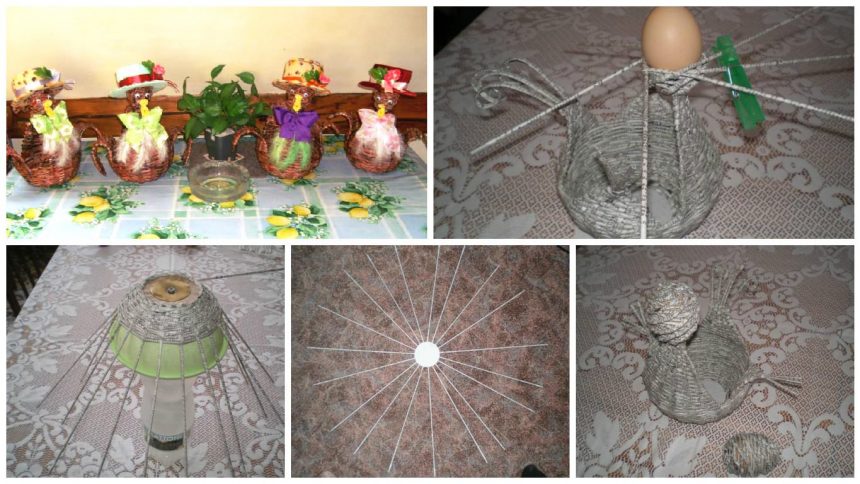
Posted onJanuary 19, 2017April 26, 2017inNewspaper Crafts, Step by step, Tutorial How to weaving poultry from newspapers tubes
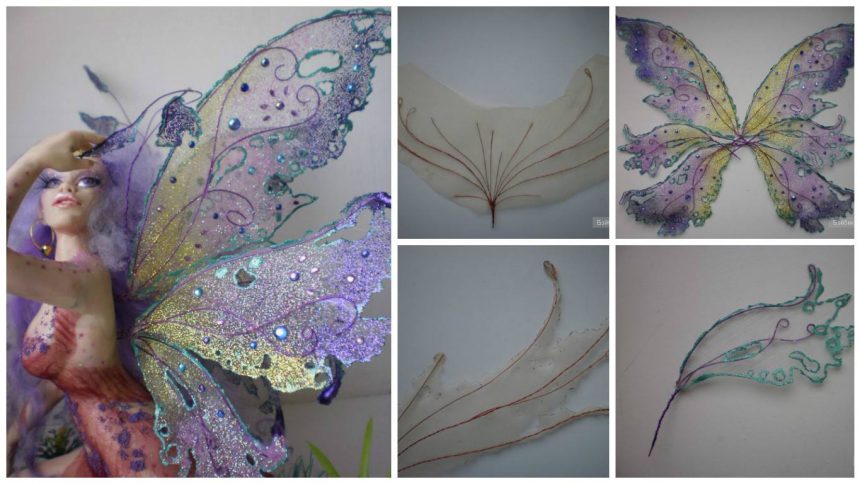
Posted onJanuary 19, 2017inOther, Step by step, Tutorial How to make beautiful wings for pupa and tail for mermaid
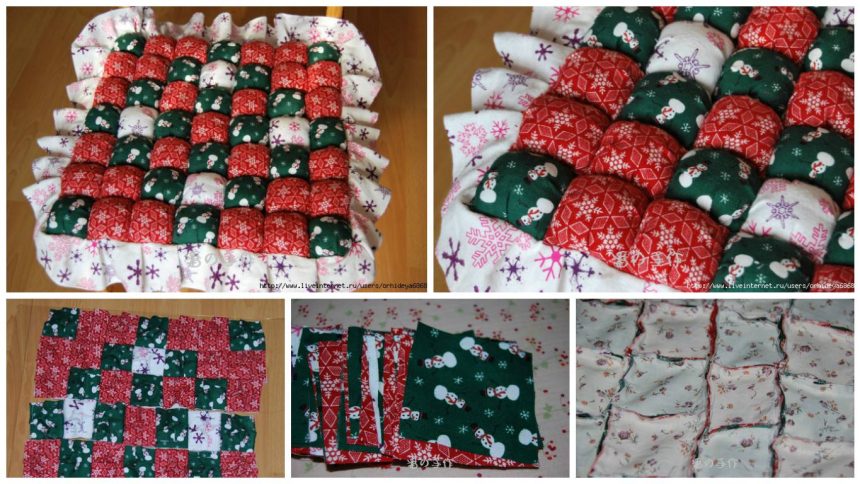
Posted onJanuary 19, 2017inPatchwork Crafts, Step by step, Tutorial How to make patchwork pillow – Step By Step
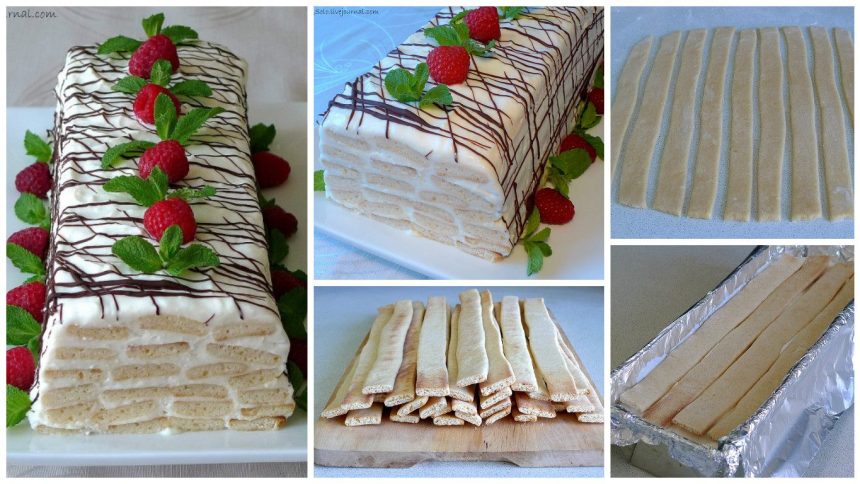
Posted onJanuary 19, 2017inFood Decoration, Step by step, Tutorial How to make incredible cake “Honey log” – Step By Step
Posted onJanuary 19, 2017inNewspaper Crafts, Step by step, Tutorial How to make fun giraffe from newspaper tubes – Step By Step