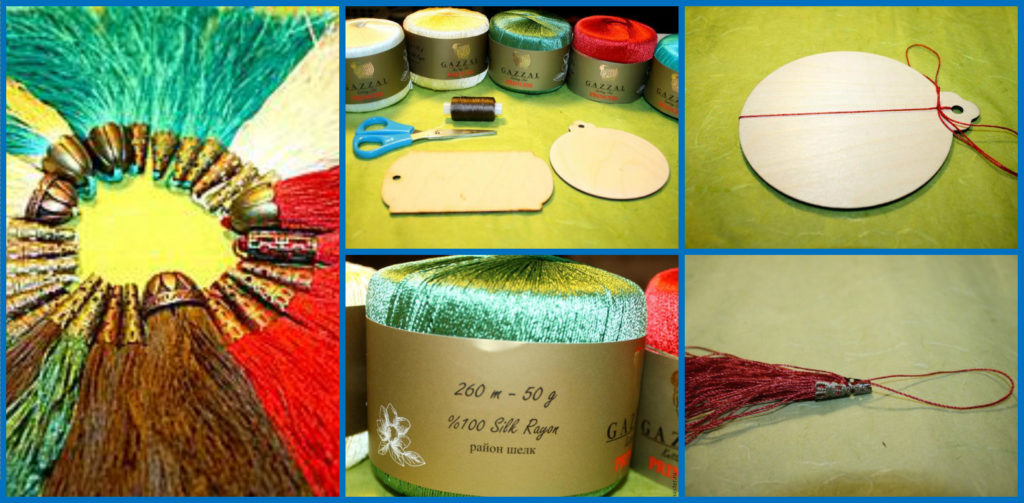
Posted onFebruary 4, 2017inDIY, Fashion, Step by step, Tutorial How to make beautiful tassels of thread
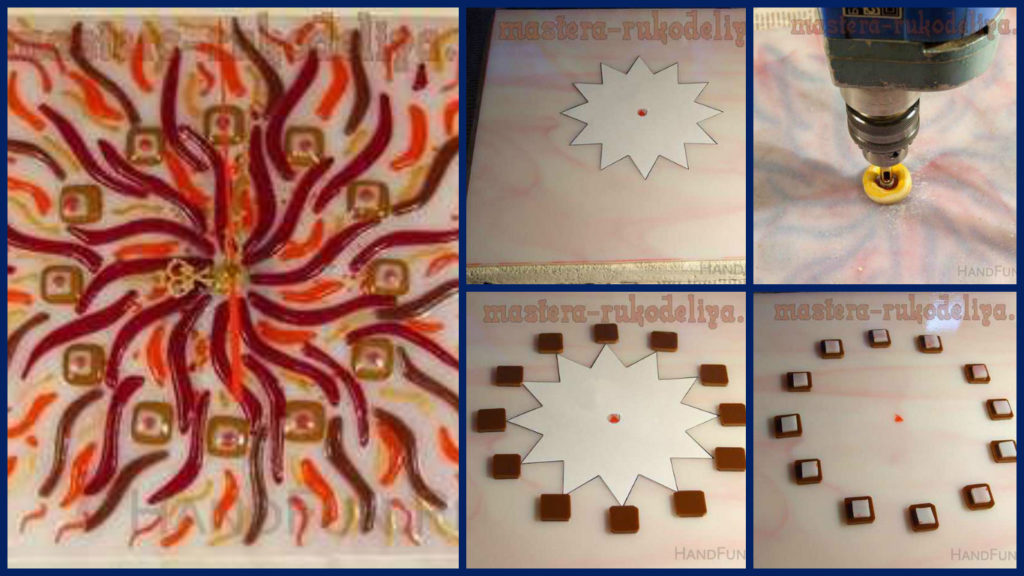
Posted onFebruary 4, 2017inDIY, Home Decor, Other, Step by step, Tutorial DIY: Beautiful Clocks “Fire Flower”
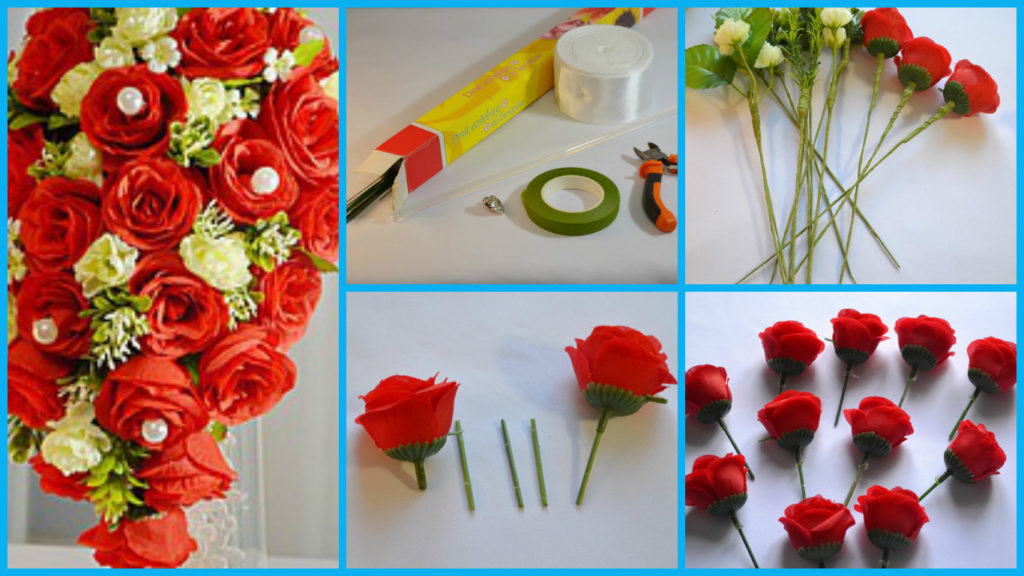
Posted onFebruary 4, 2017inFlower Crafts, Other, Step by step, Tutorial, Valentine’s Day How to create a cascading bouquet of artificial flowers
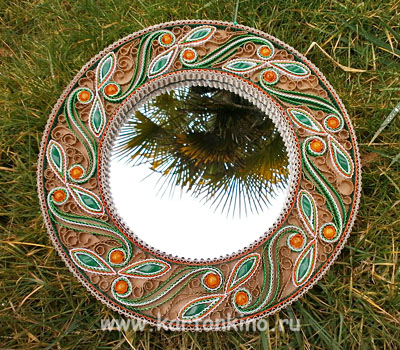
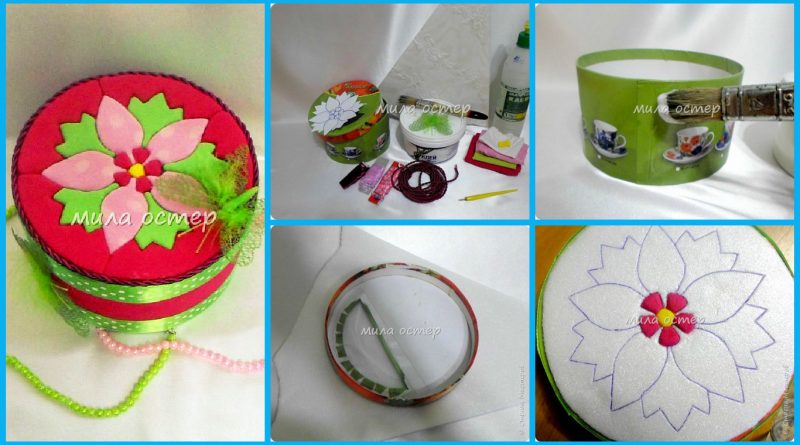
Posted onFebruary 4, 2017inBest out of Waste, DIY, Home Decor, Step by step, Tutorial Round frame mirror made of cardboard
Posted onFebruary 4, 2017inDIY, Quilling, Step by step, Tutorial How to make cock from quilling paper
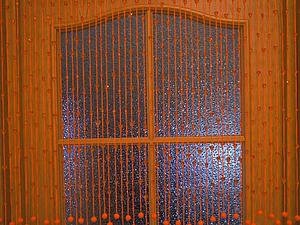
Posted onFebruary 4, 2017inCrochet, DIY, Home Decor, Step by step, Tutorial The original curtains on the door knit “Orange Heart”
Posted onFebruary 3, 2017inBirthday, DIY, Other, Step by step, Tutorial DIY: Beautiful bag making tutorial
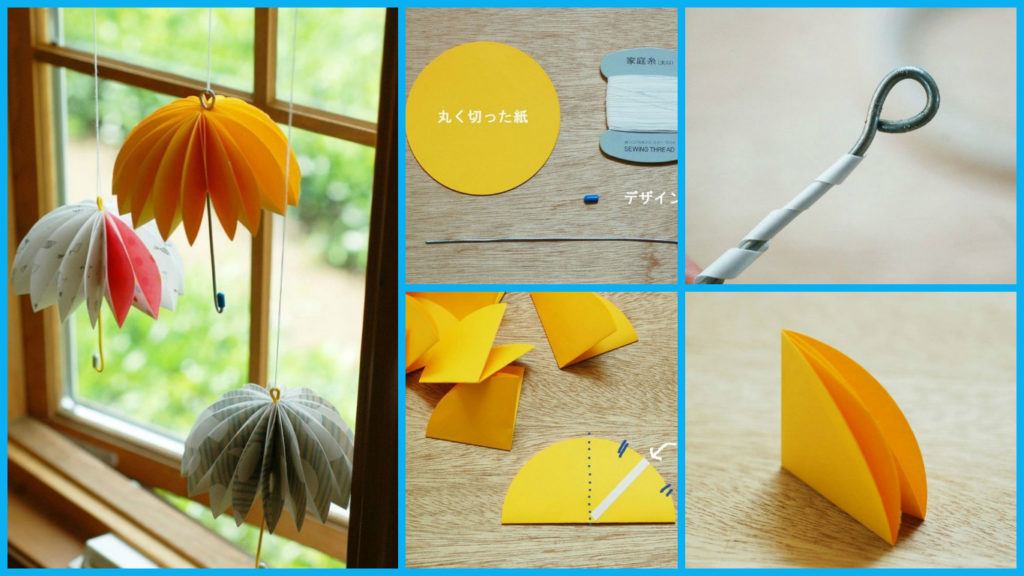
Posted onFebruary 3, 2017inDIY, Home Decor, Kids Crafts, Paper Crafts, Step by step, Tutorial How to make a paper umbrella
Posted onFebruary 1, 2017inDIY, Embroidery And Sewing, Step by step, Tutorial DIY: Hand embroidery mirror work designs
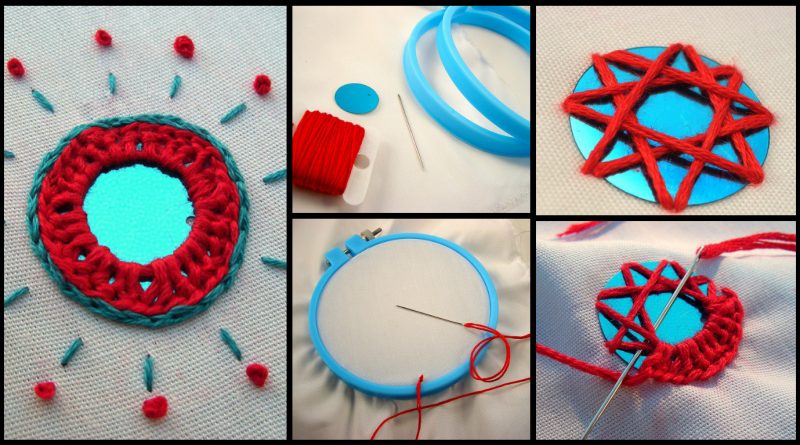
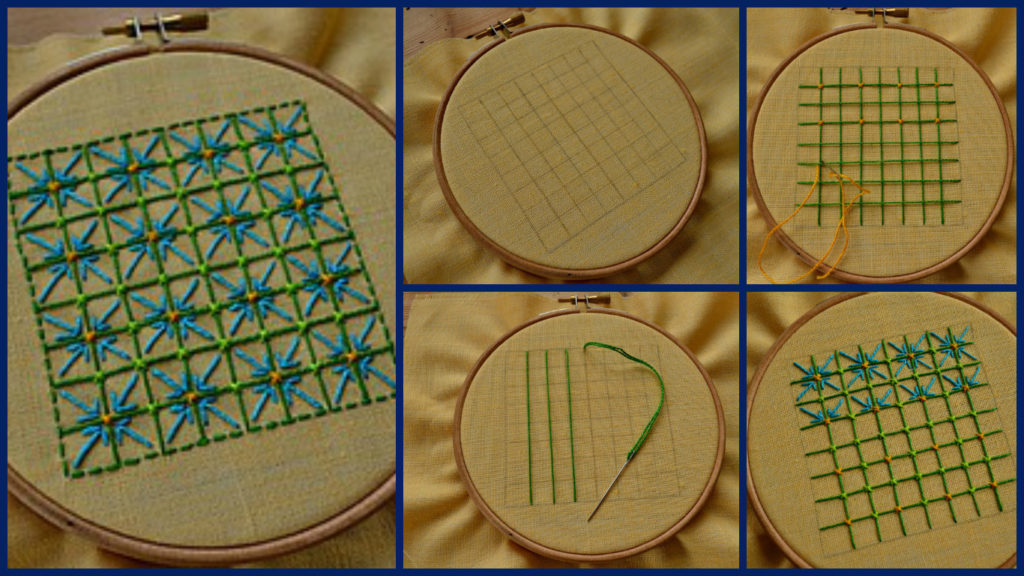
Posted onFebruary 1, 2017February 1, 2017inDIY, Embroidery And Sewing, Step by step, Tutorial DIY: Decorative mesh or Cross for the lazy