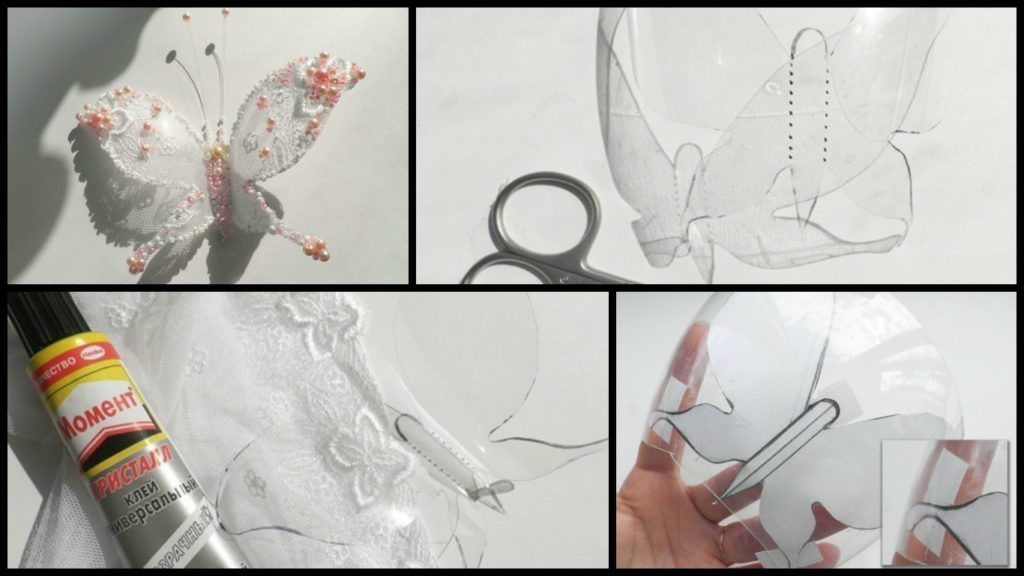
Posted onFebruary 1, 2017inBest out of Waste, DIY, Home Decor, Step by step, Tutorial How to make butterfly from a plastic bottle
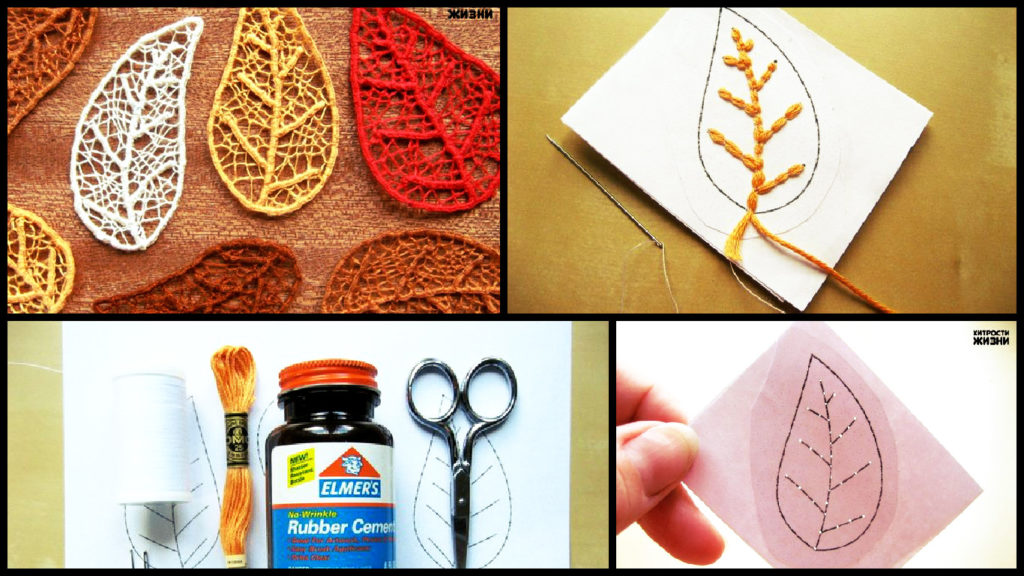
Posted onFebruary 1, 2017inDIY, Embroidery And Sewing, Step by step, Tutorial How to make needlepoint skeletonized leaves
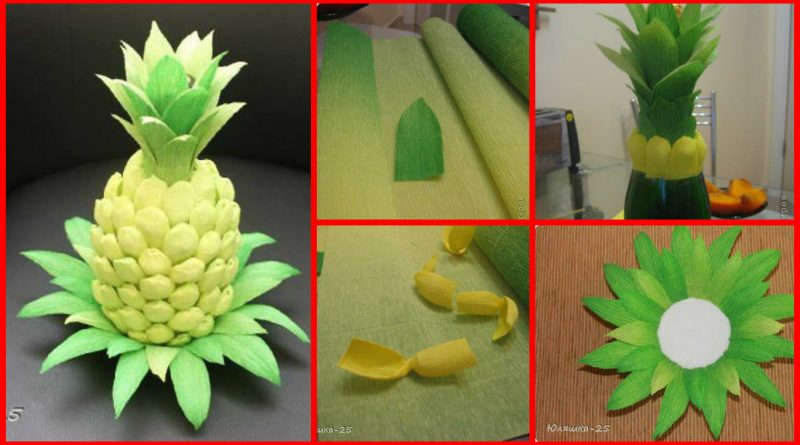
Posted onFebruary 1, 2017inDIY, Kids Crafts, Paper Crafts, Step by step, Tutorial DIY: Pineapple from the bottle
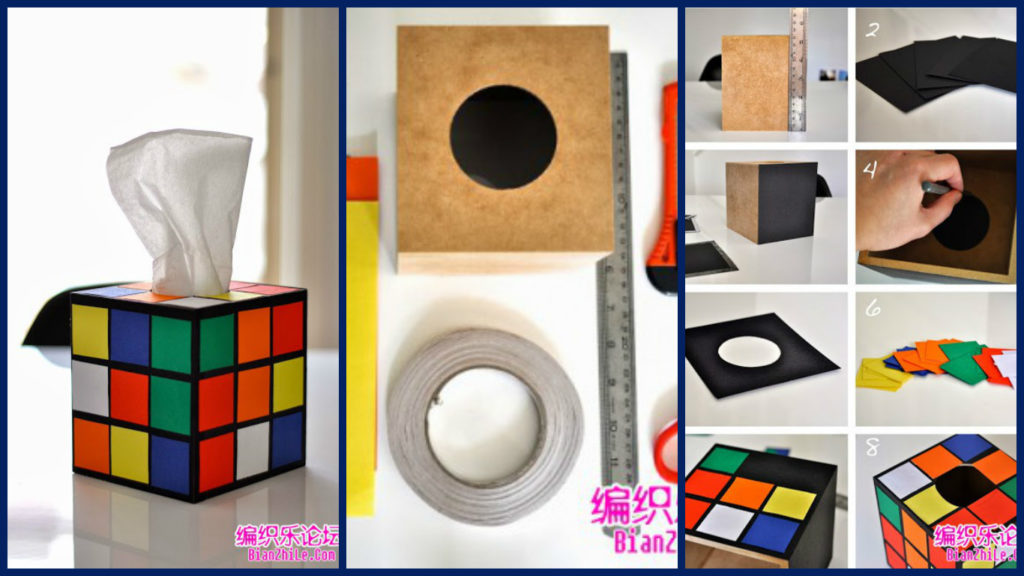
Posted onFebruary 1, 2017inBest out of Waste, DIY, Kids Crafts, Step by step, Tutorial How To Make Rubik’s Cube Tissue Box Cover
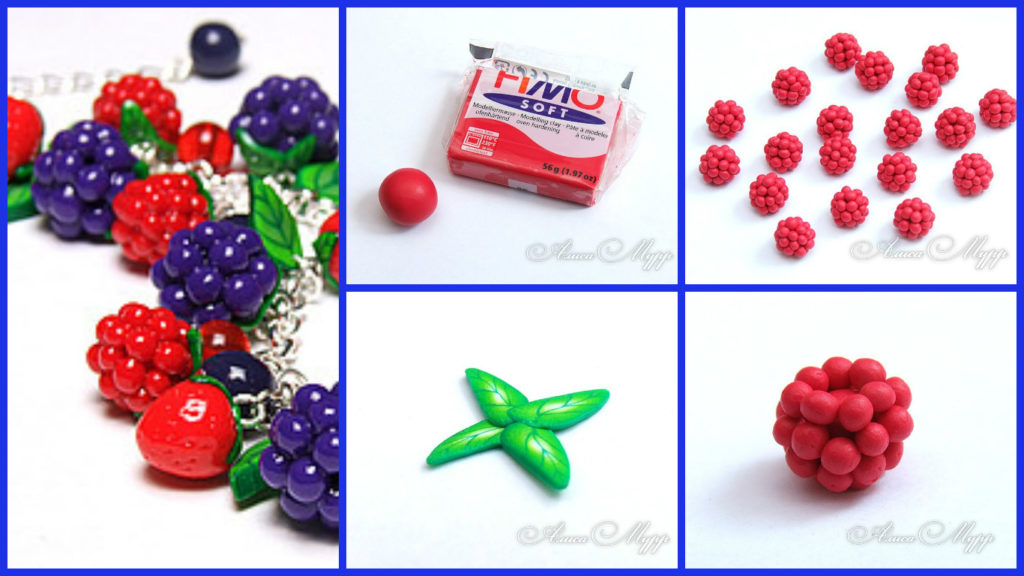
Posted onFebruary 1, 2017inClay, Jewellery, Step by step, Tutorial How to make raspberries from polymer clay
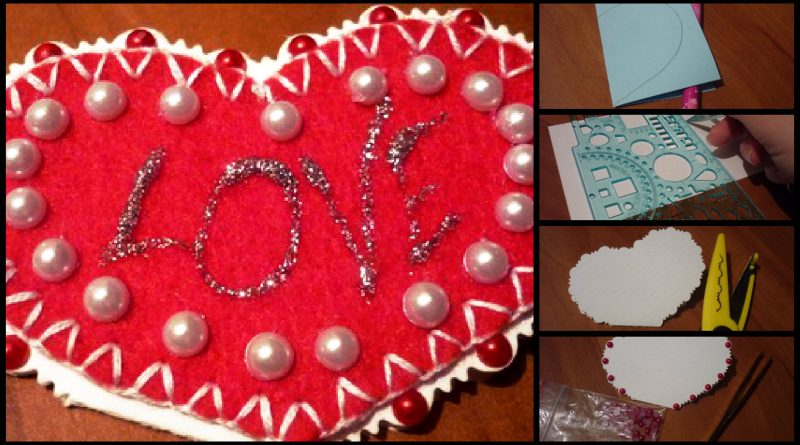
Posted onFebruary 1, 2017February 1, 2017inKids Crafts, Paper Crafts, Step by step, Tutorial, Valentine’s Day Simple and beautiful idea about felt hearts
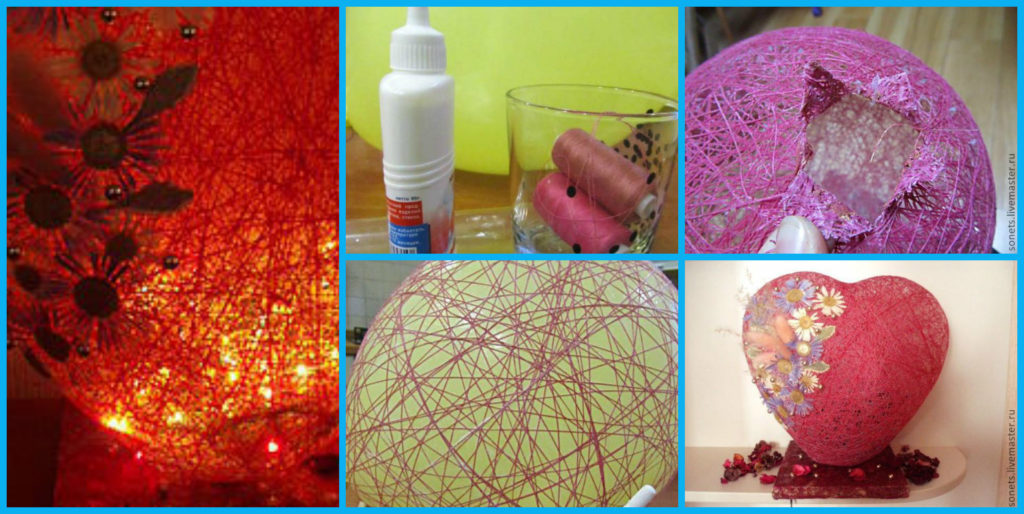
Posted onFebruary 1, 2017February 1, 2017inBest out of Waste, DIY, Home Decor, Step by step, Tutorial, Valentine’s Day DIY: Beautiful (Night Lamp) Heart ball of thread
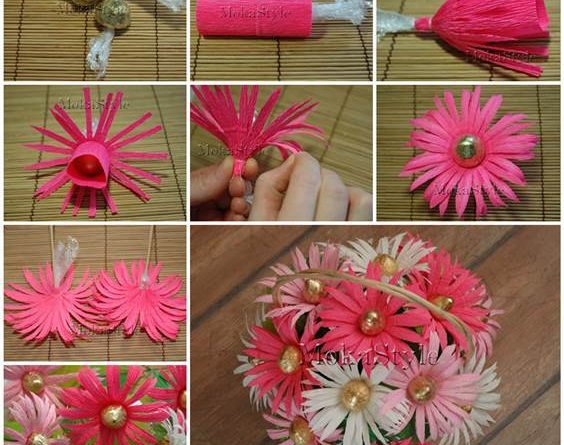
Posted onFebruary 1, 2017inBirthday, Christmas, DIY, Paper Crafts, Step by step, Tutorial, Valentine’s Day, Wedding DIY: Chocolate Gerbera Flower Bouquet
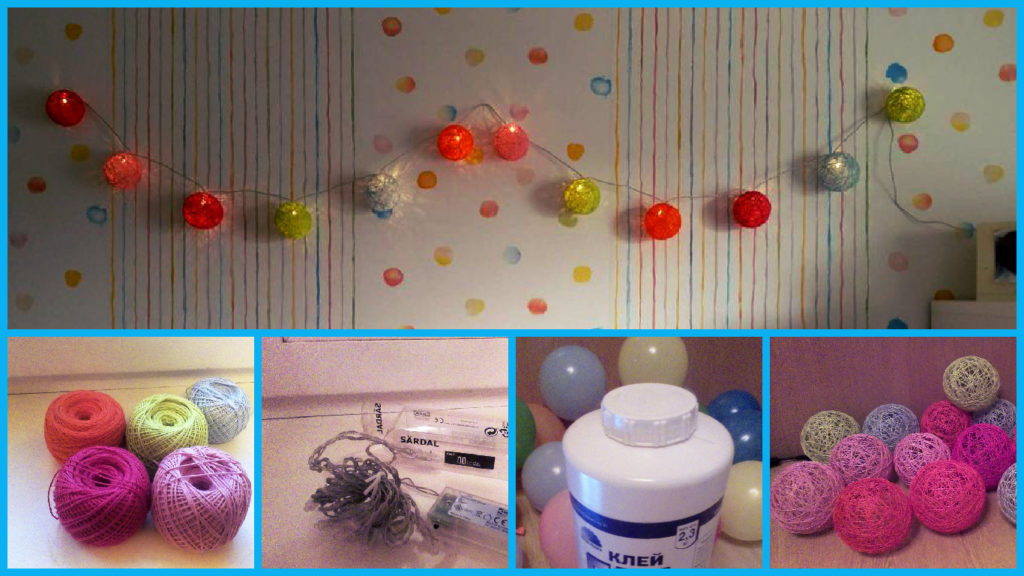
Posted onJanuary 31, 2017inBirthday, DIY, Easter, Home Decor, Step by step, Tutorial DIY: Glowing garland with balls of yarn