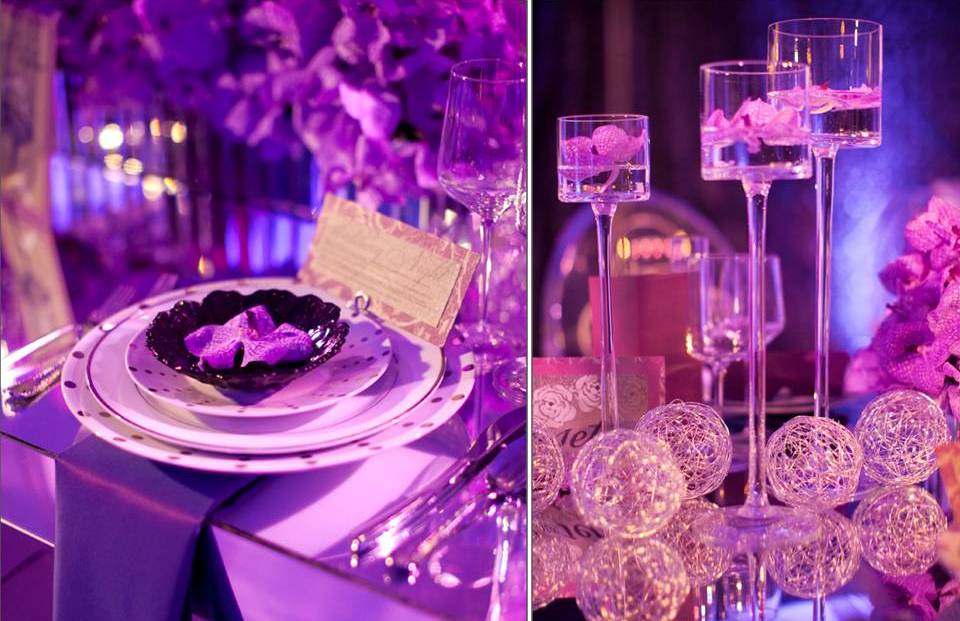
Posted onJanuary 21, 2017inDecorations, DIY, Ideas, Wedding 15 Elagant Wedding Reception Centerpieces Ideas
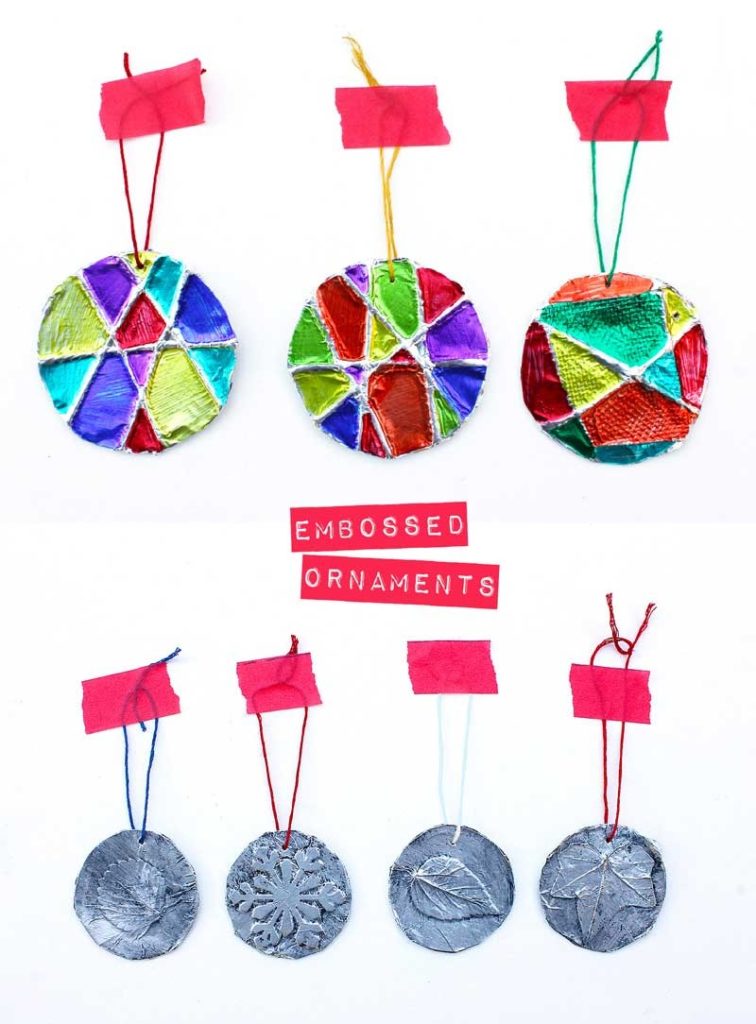
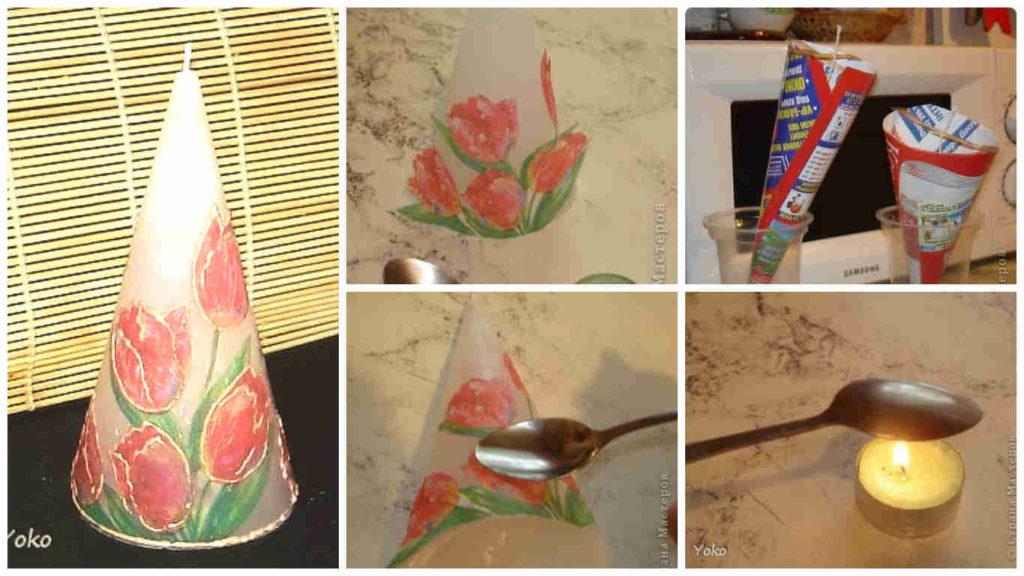
Posted onJanuary 21, 2017inChristmas, Step by step, Tutorial 5-Minute Embossed Ornaments (Christmas Ornaments)
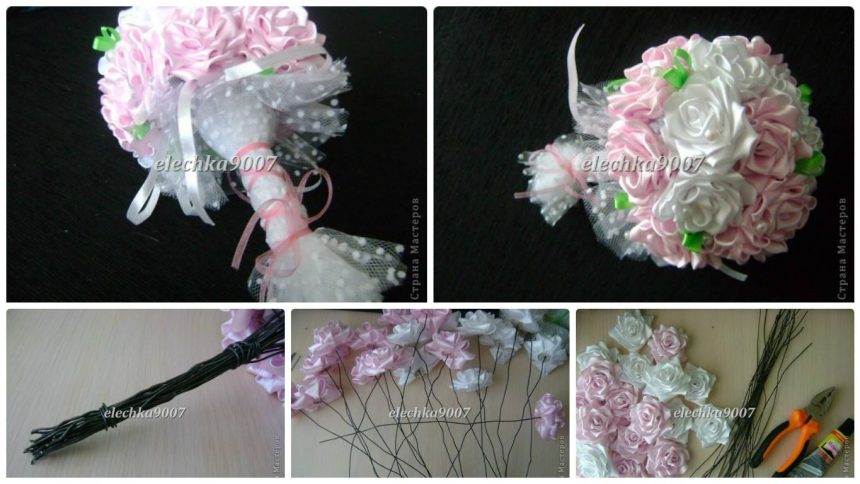
Posted onJanuary 19, 2017inStep by step, Tutorial, Wedding How to make beautiful wedding bouquet of ribbon flowers
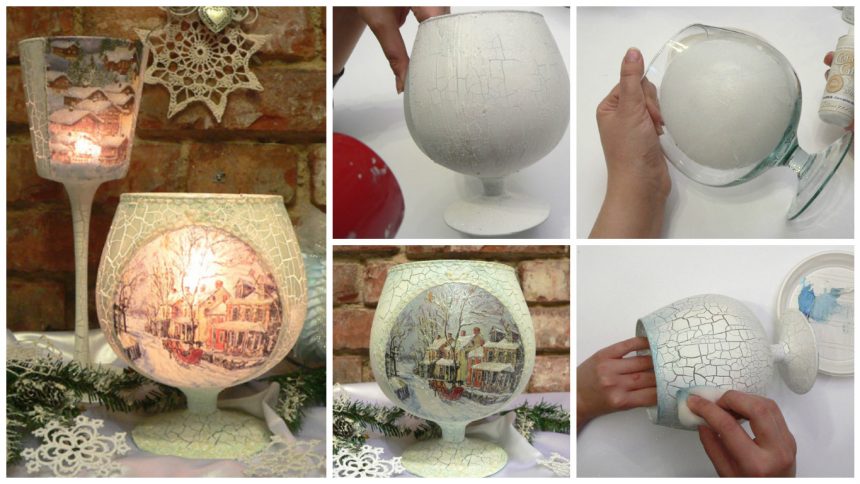
Posted onJanuary 17, 2017March 12, 2017inChristmas, Decorations, Step by step, Tutorial How to make glass christmas candlestick – Step By Step
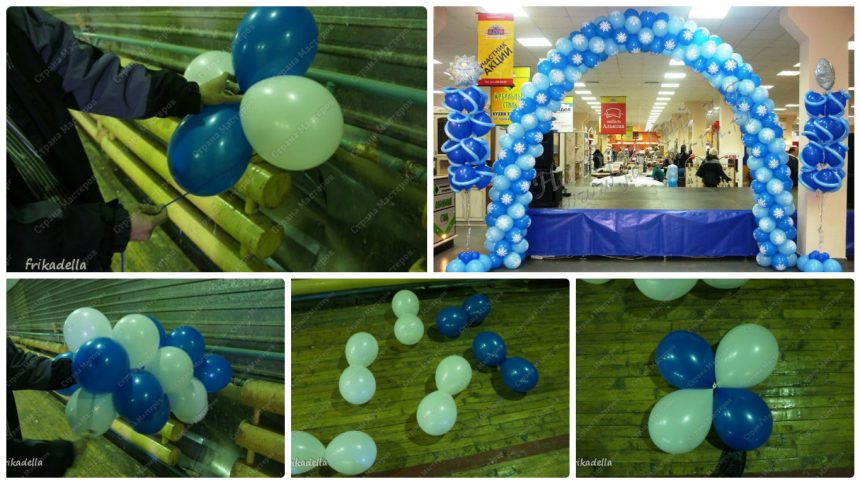
Posted onJanuary 17, 2017inBirthday, Decorations, Step by step, Tutorial How to make beautiful garland of balloons
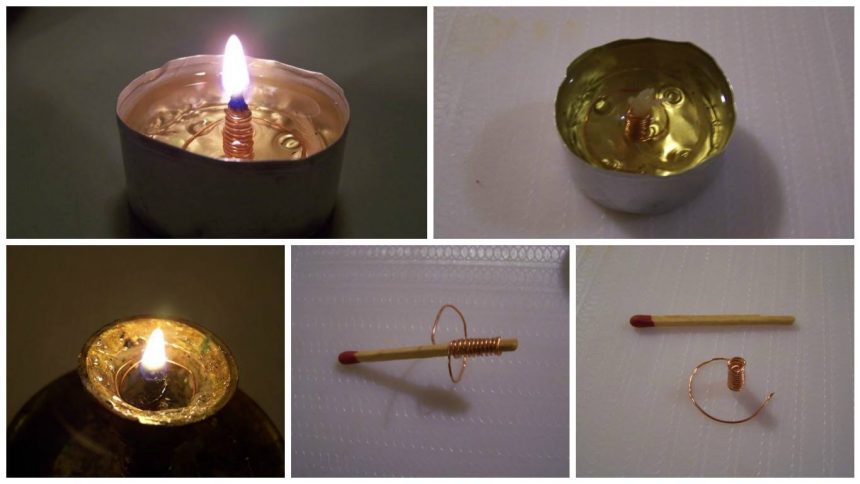
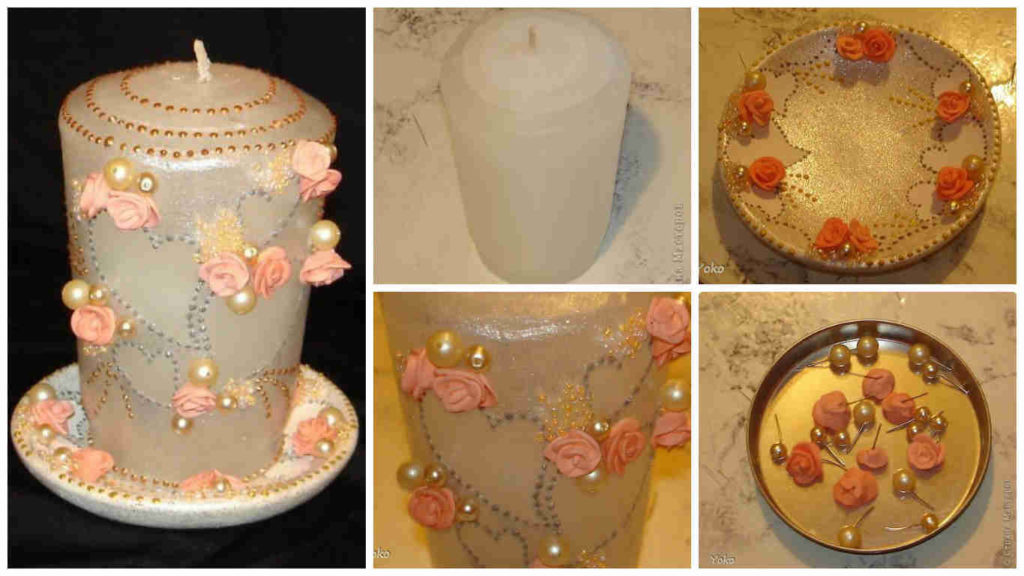
Posted onJanuary 16, 2017inStep by step, Tutorial, Wedding How to make decoupage candle – Step By Step
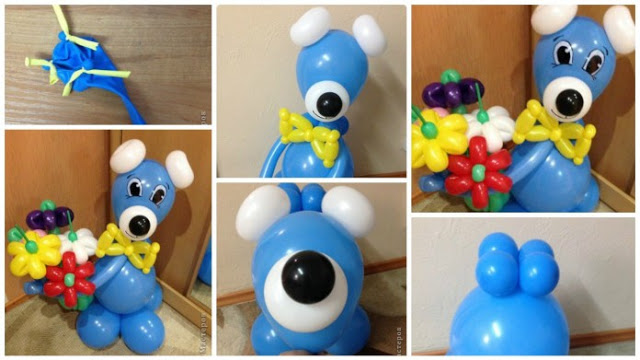
Posted onJanuary 15, 2017inBirthday, DIY, Home Decor, Kids Crafts, Tutorial How to make Bear of balloons