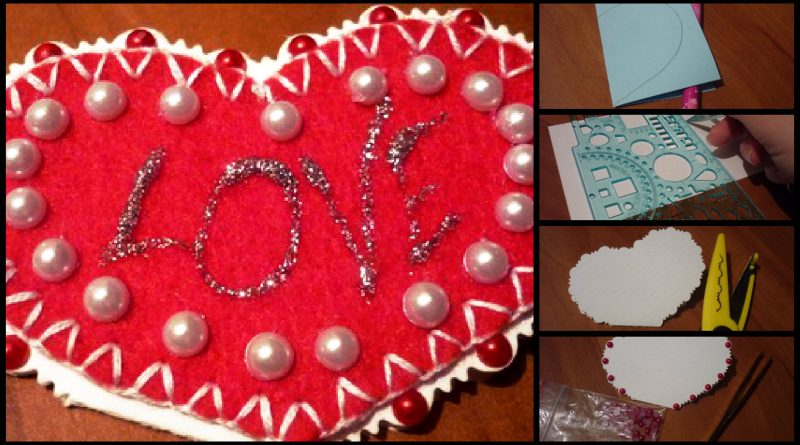
Posted onFebruary 1, 2017February 1, 2017inKids Crafts, Paper Crafts, Step by step, Tutorial, Valentine’s Day Simple and beautiful idea about felt hearts
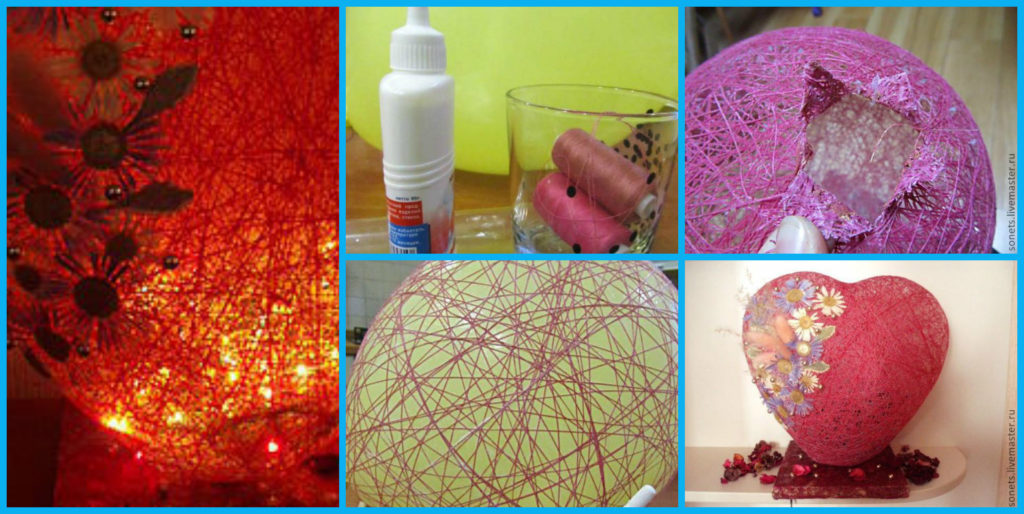
Posted onFebruary 1, 2017February 1, 2017inBest out of Waste, DIY, Home Decor, Step by step, Tutorial, Valentine’s Day DIY: Beautiful (Night Lamp) Heart ball of thread
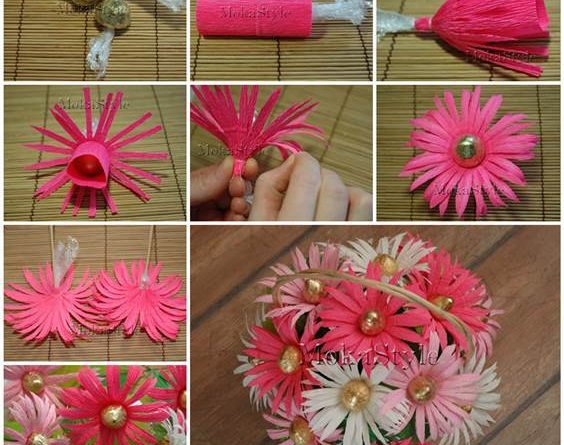
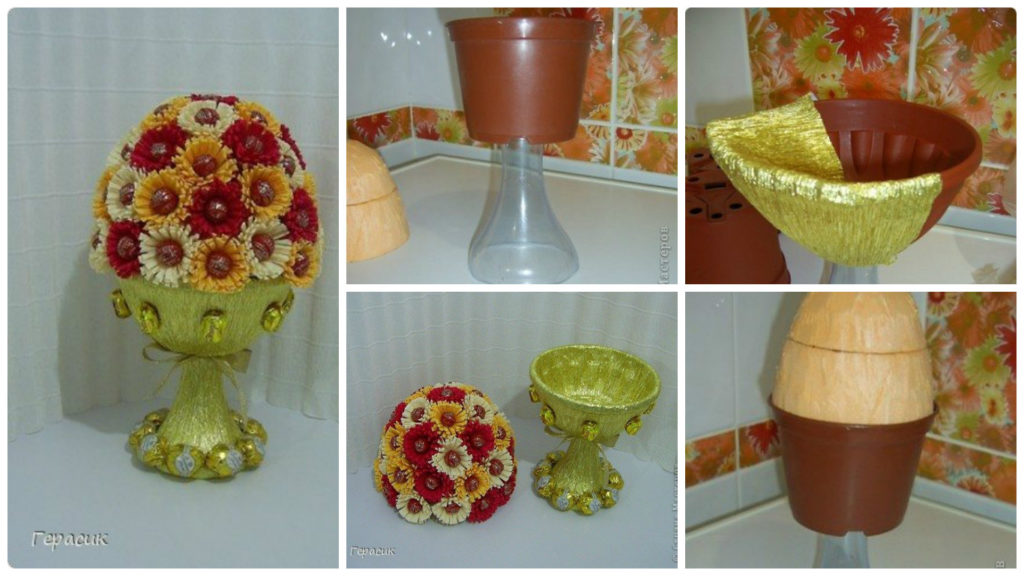
Posted onFebruary 1, 2017inBirthday, Christmas, DIY, Paper Crafts, Step by step, Tutorial, Valentine’s Day, Wedding DIY: Chocolate Gerbera Flower Bouquet
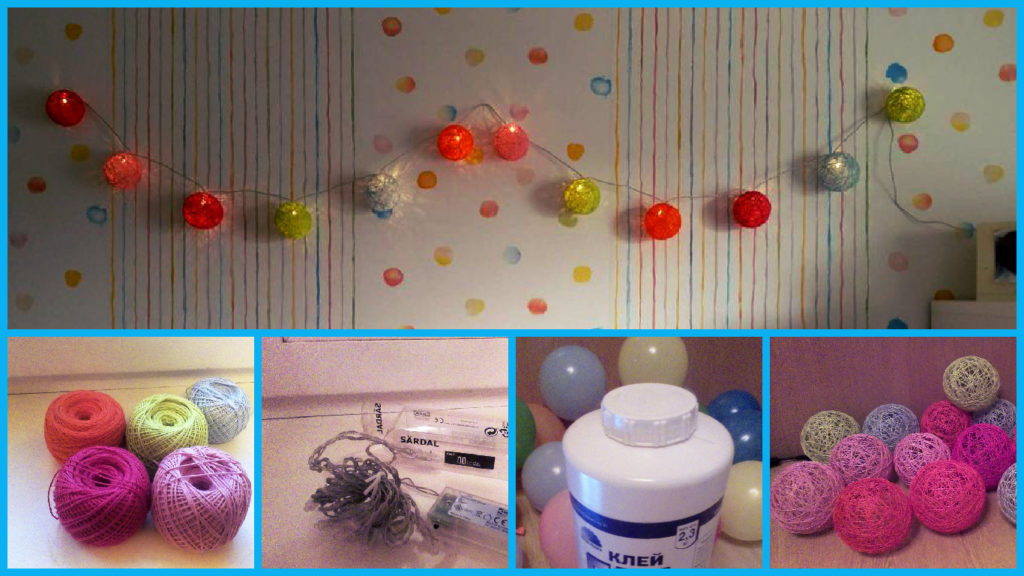
Posted onJanuary 31, 2017inBirthday, DIY, Easter, Home Decor, Step by step, Tutorial DIY: Glowing garland with balls of yarn
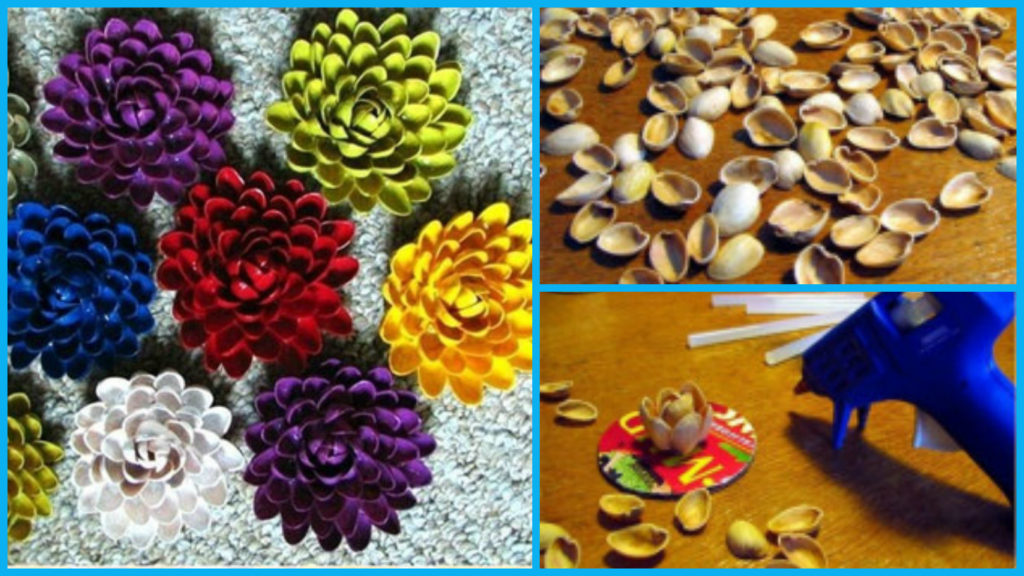
Posted onJanuary 30, 2017inBest out of Waste, Diwali, DIY, Home Decor, Step by step, Tutorial Beautiful flowers out of shells
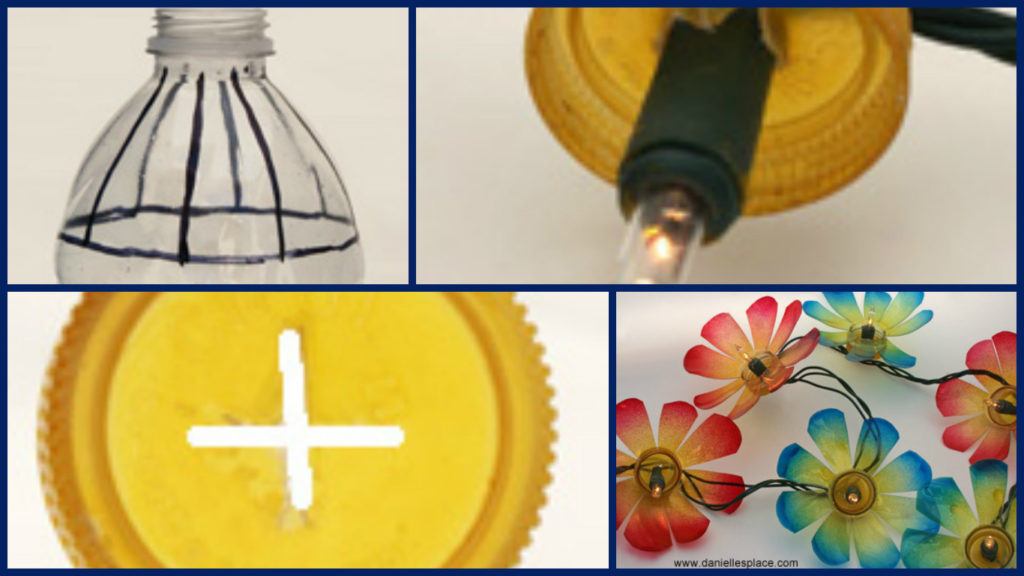
Posted onJanuary 28, 2017inBest out of Waste, Diwali, DIY, Home Decor, Step by step, Tutorial How to make garland of plastic bottles
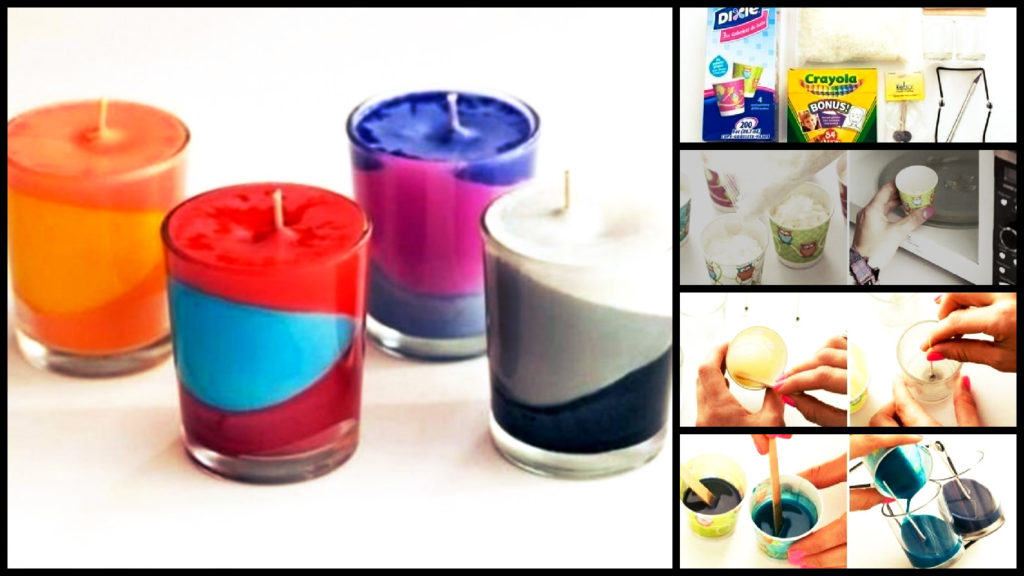
Posted onJanuary 28, 2017inBirthday, Christmas, Diwali, DIY, Home Decor, Step by step, Tutorial How to make color aromatic candles
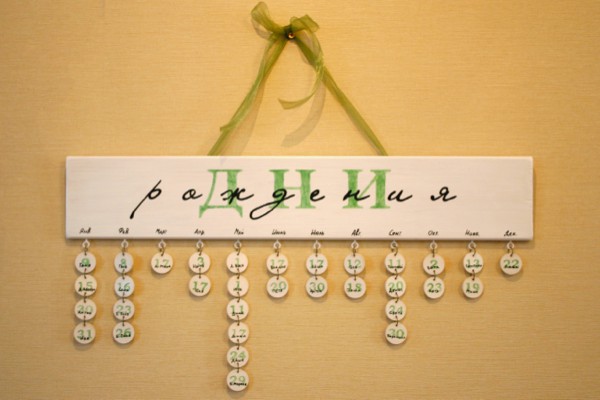
Posted onJanuary 26, 2017inBirthday, Step by step, Tutorial DIY Calendar a reminder of birthdays step by step
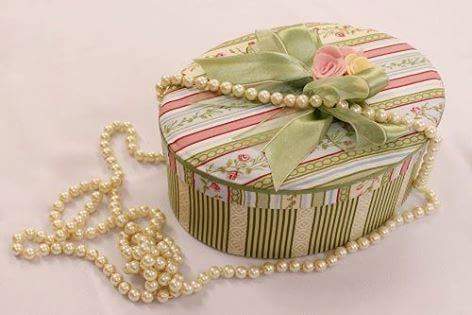
Posted onJanuary 24, 2017inBest out of Waste, Birthday, Mother's Day, Paper Crafts, Step by step, Tutorial DIY Box Decorated Step By Step