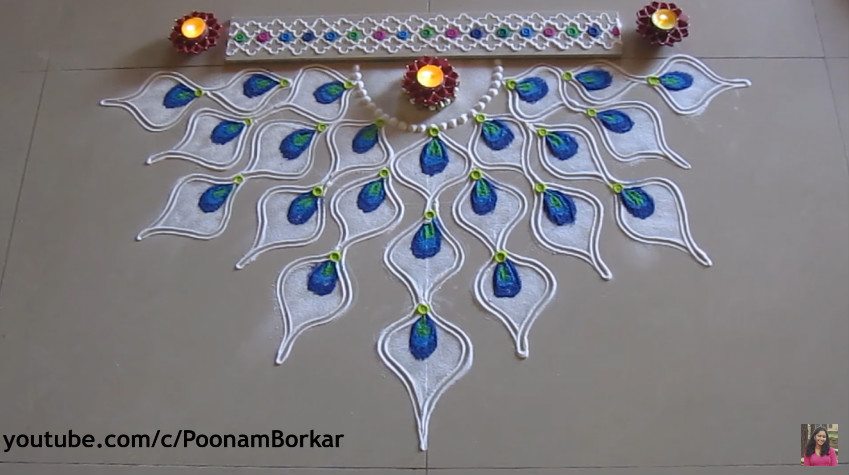
Posted onFebruary 19, 2017November 19, 2022inDiwali, DIY, Rangoli, Step by step, Tutorial DIY: Easy peacock feather rangoli design
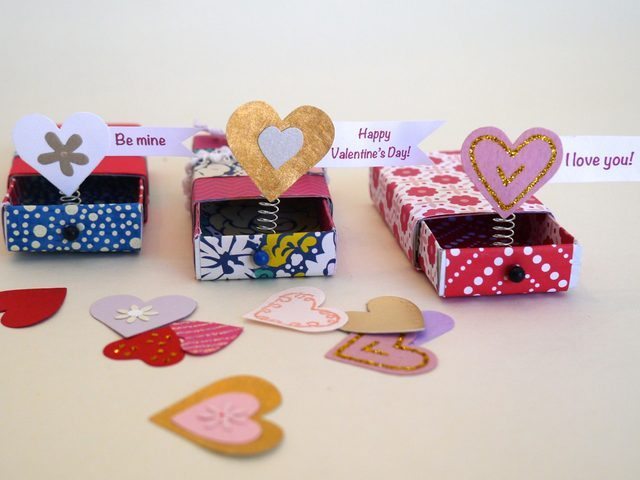
Posted onFebruary 16, 2017inBest out of Waste, DIY, Step by step, Tutorial, Valentine’s Day DIY: Surprise Messages Hidden In Little Matchboxes
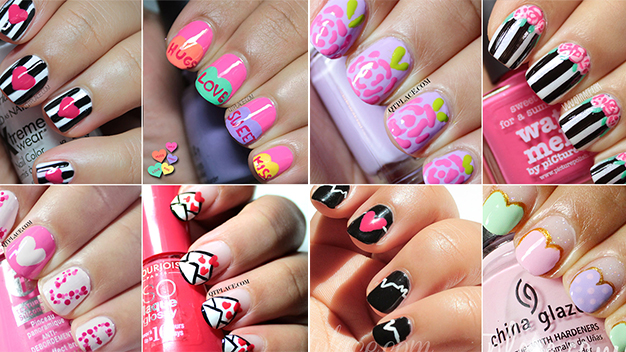
Posted onFebruary 13, 2017February 13, 2017inNail Art, Valentine’s Day Valentine’s Day Nail Art Designs Ideas
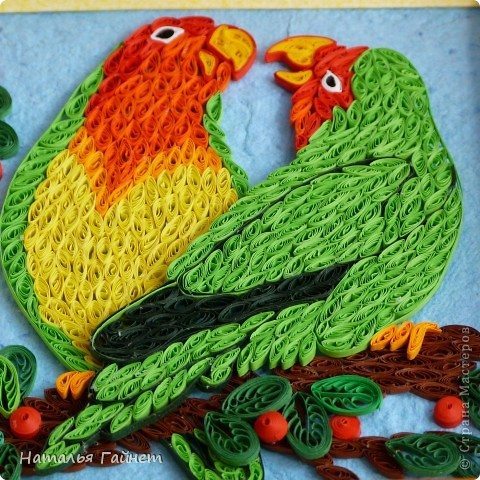
Posted onFebruary 11, 2017inDIY, Quilling, Step by step, Tutorial, Valentine’s Day, Wedding Paper Quilling Beautiful Lovebirds – Happy couple
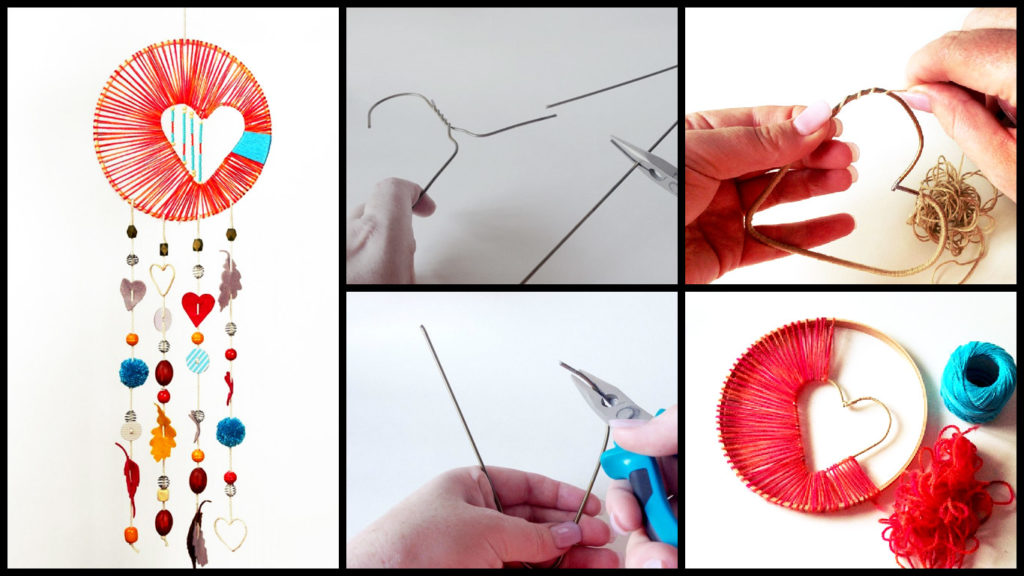
Posted onFebruary 6, 2017inDIY, Home Decor, Step by step, Tutorial, Valentine’s Day How to make a dream catcher
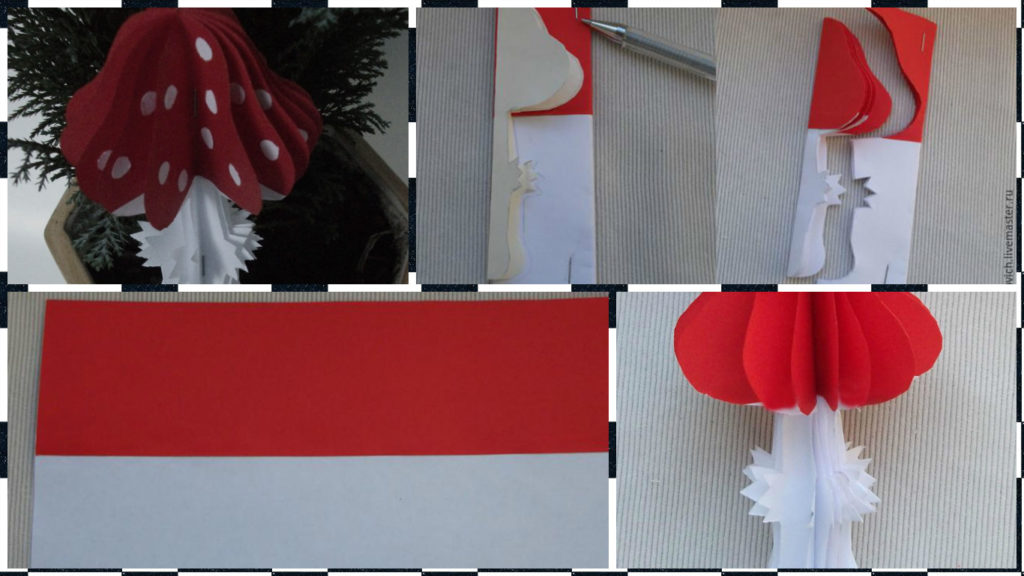
Posted onFebruary 6, 2017inChristmas, DIY, Paper Crafts, Step by step, Tutorial DIY: 3D Paper Mushroom Tutorial
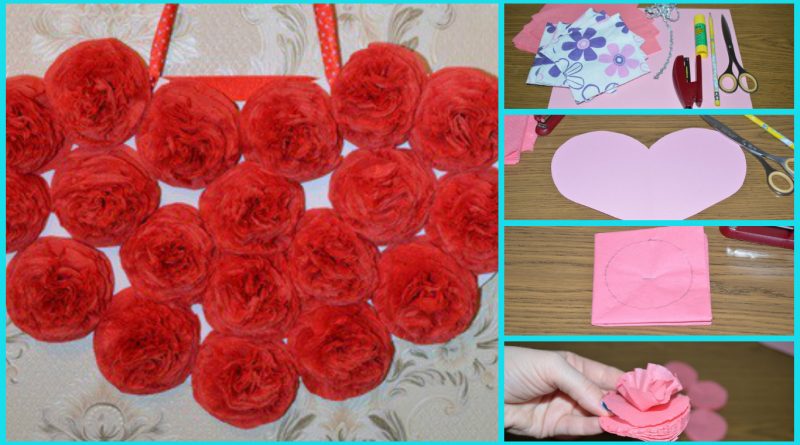
Posted onFebruary 5, 2017inDIY, Flower Crafts, Paper Crafts, Step by step, Tutorial, Valentine’s Day How to Make a Tissue Paper Heart
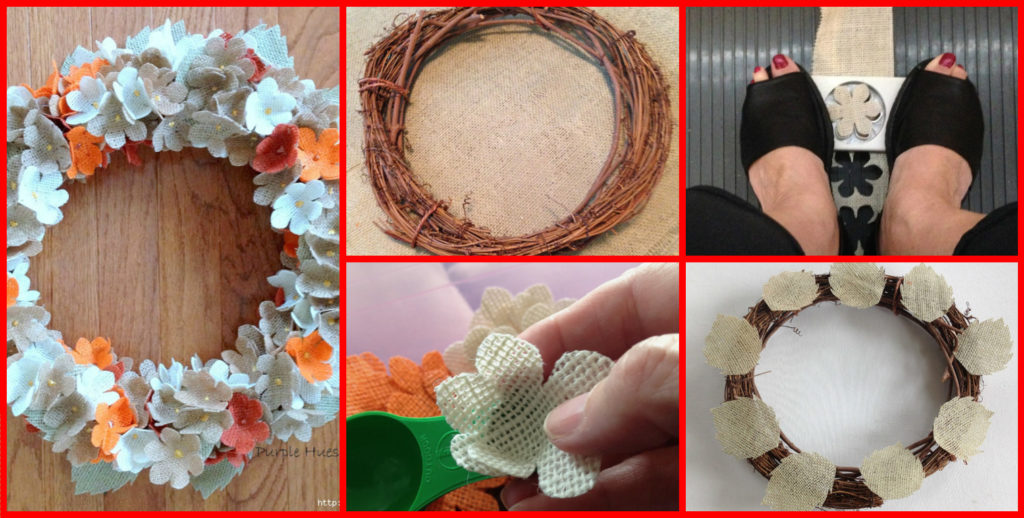
Posted onFebruary 4, 2017inChristmas, DIY, Easter, Home Decor, Step by step, Tutorial, Valentine’s Day Hydrangea Wreath with Burlap
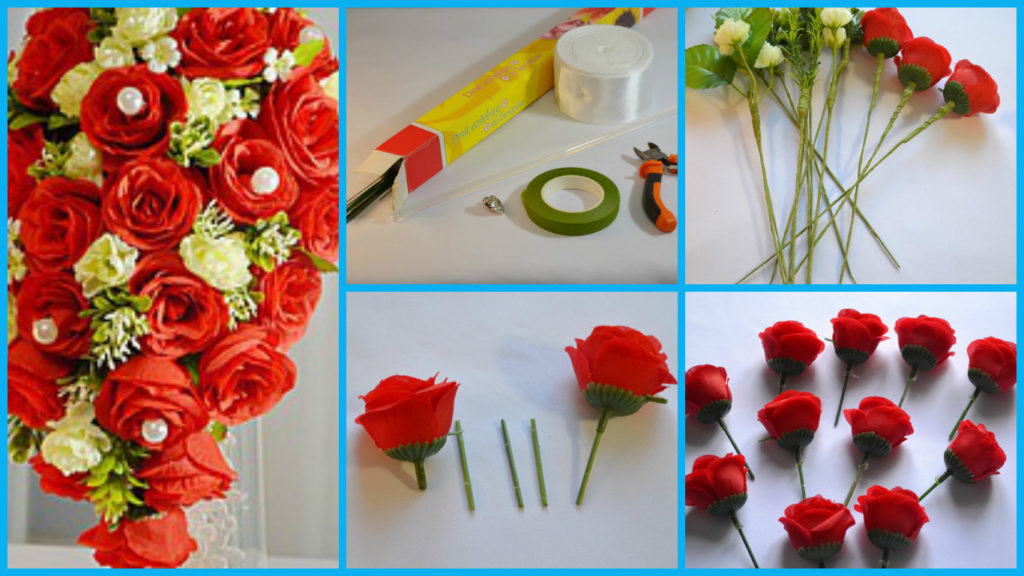
Posted onFebruary 4, 2017inFlower Crafts, Other, Step by step, Tutorial, Valentine’s Day How to create a cascading bouquet of artificial flowers
Posted onFebruary 3, 2017inBirthday, DIY, Other, Step by step, Tutorial DIY: Beautiful bag making tutorial