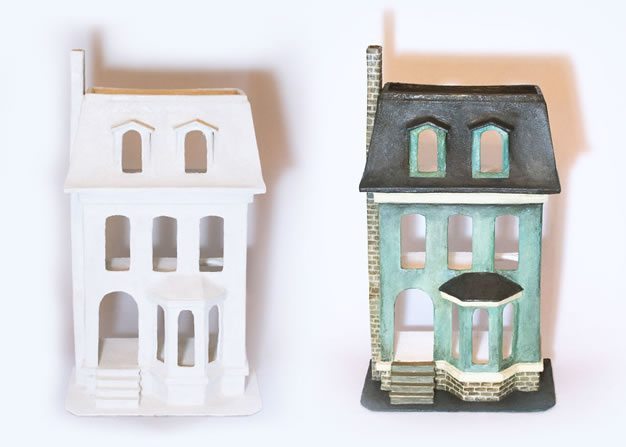
Posted onFebruary 11, 2017February 11, 2017inBest out of Waste, Cardboard Crafts, Step by step, Tutorial How to make a recycled cardboard dollhouse
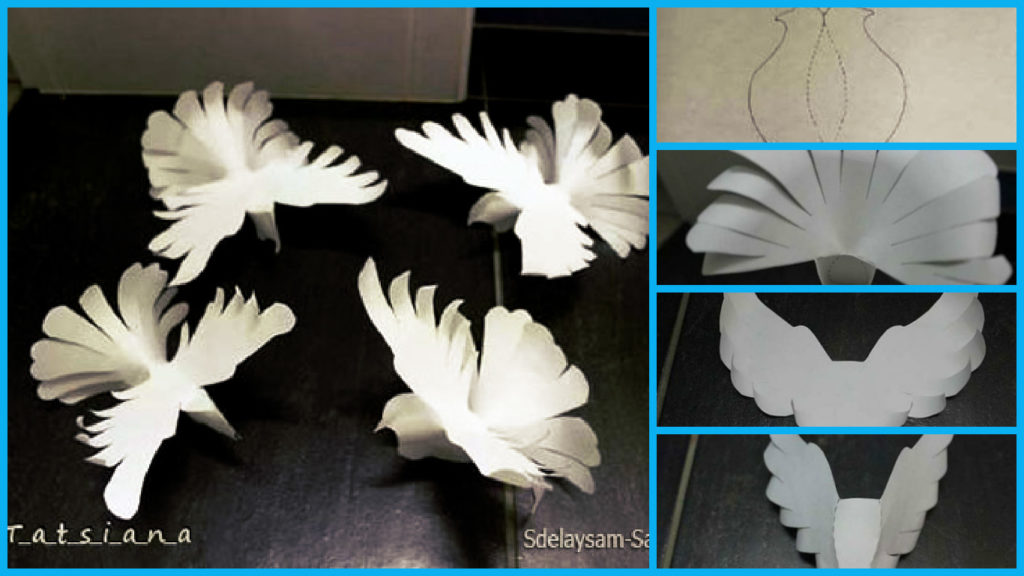
Posted onFebruary 10, 2017November 19, 2022inDIY, Paper Crafts, Step by step, Tutorial How to make paper doves
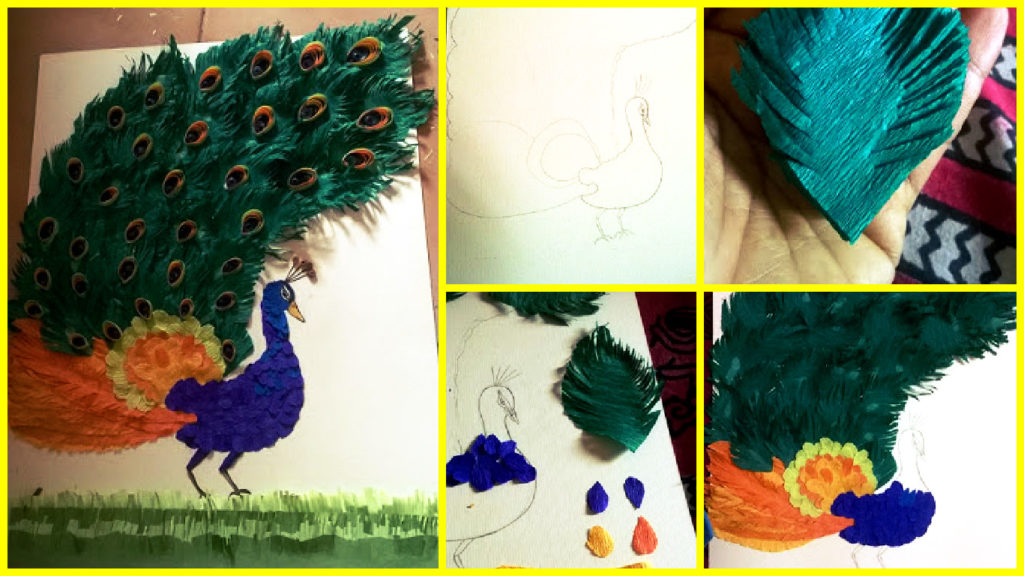
Posted onFebruary 6, 2017inDIY, Kids Crafts, Paper Crafts, Step by step, Tutorial DIY: Peacock paper craft
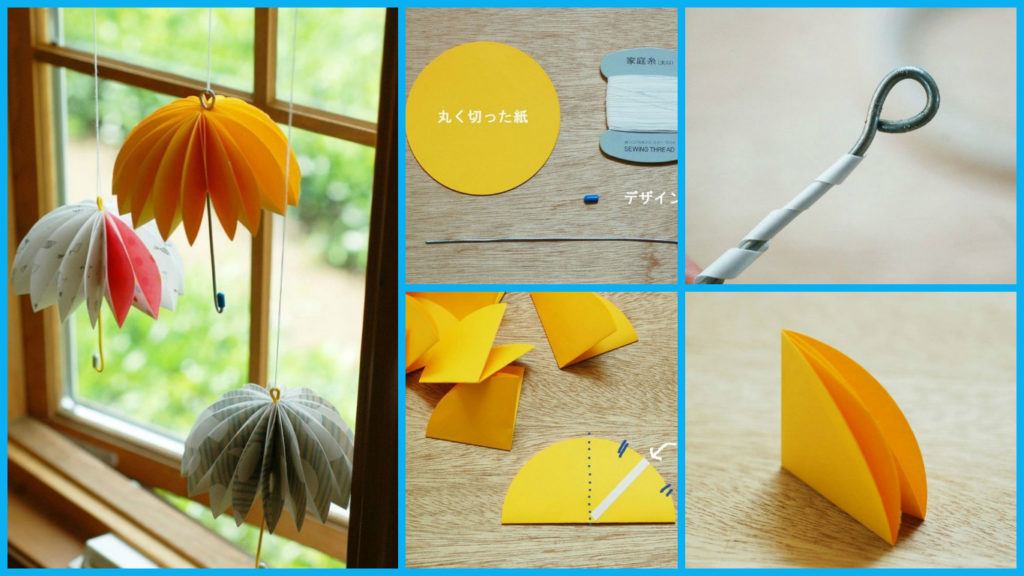
Posted onFebruary 3, 2017inDIY, Home Decor, Kids Crafts, Paper Crafts, Step by step, Tutorial How to make a paper umbrella
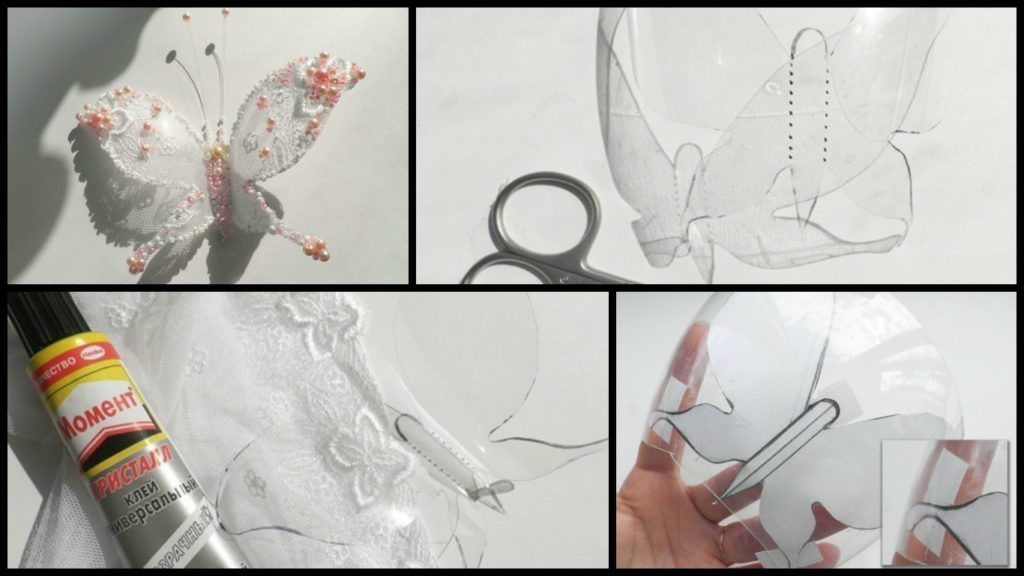
Posted onFebruary 1, 2017inBest out of Waste, DIY, Home Decor, Step by step, Tutorial How to make butterfly from a plastic bottle
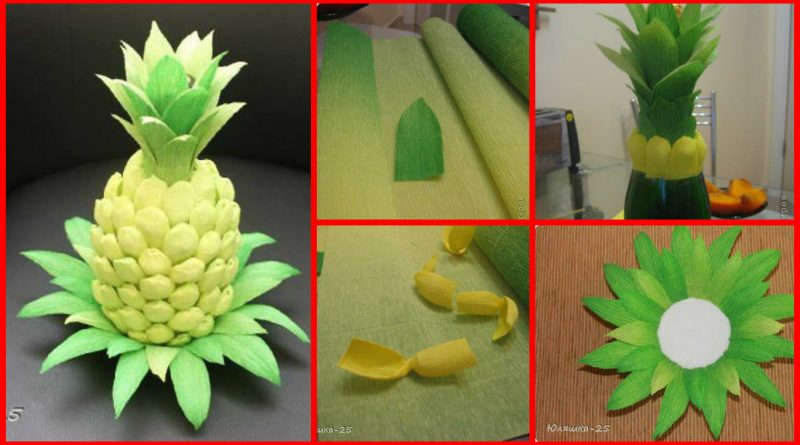
Posted onFebruary 1, 2017inDIY, Kids Crafts, Paper Crafts, Step by step, Tutorial DIY: Pineapple from the bottle
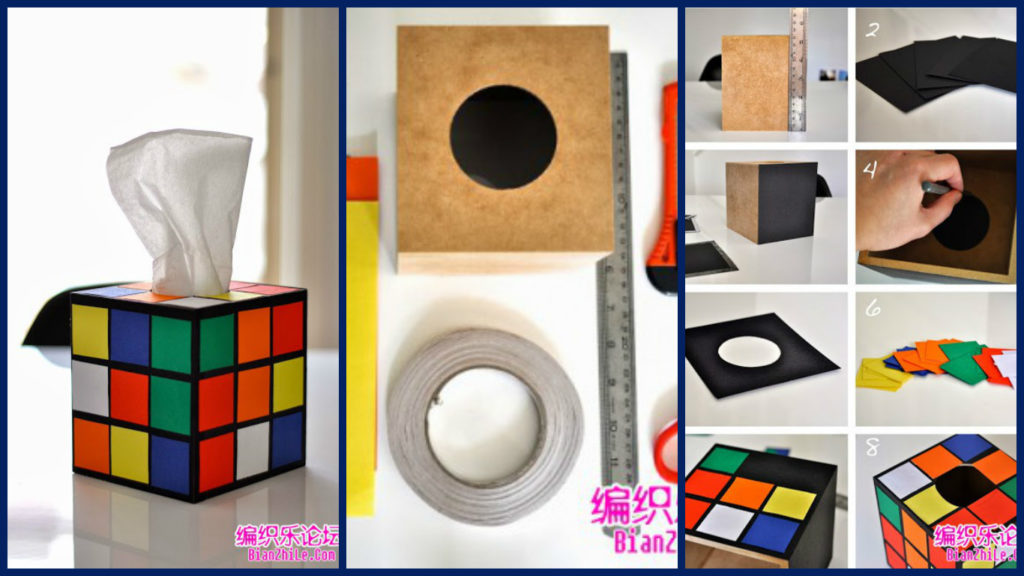
Posted onFebruary 1, 2017inBest out of Waste, DIY, Kids Crafts, Step by step, Tutorial How To Make Rubik’s Cube Tissue Box Cover
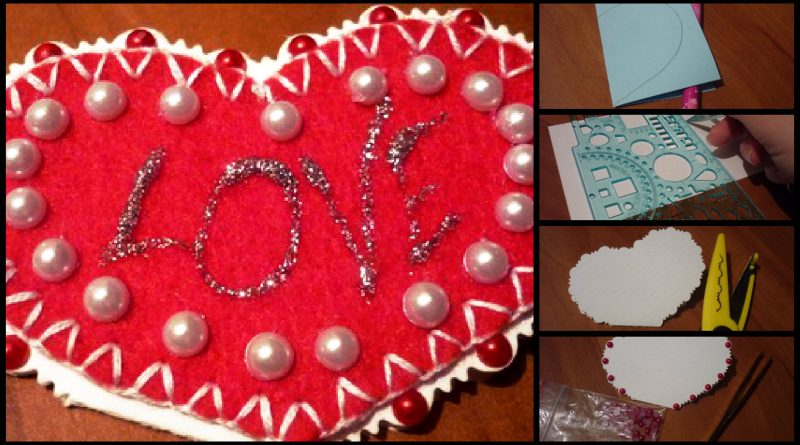
Posted onFebruary 1, 2017February 1, 2017inKids Crafts, Paper Crafts, Step by step, Tutorial, Valentine’s Day Simple and beautiful idea about felt hearts
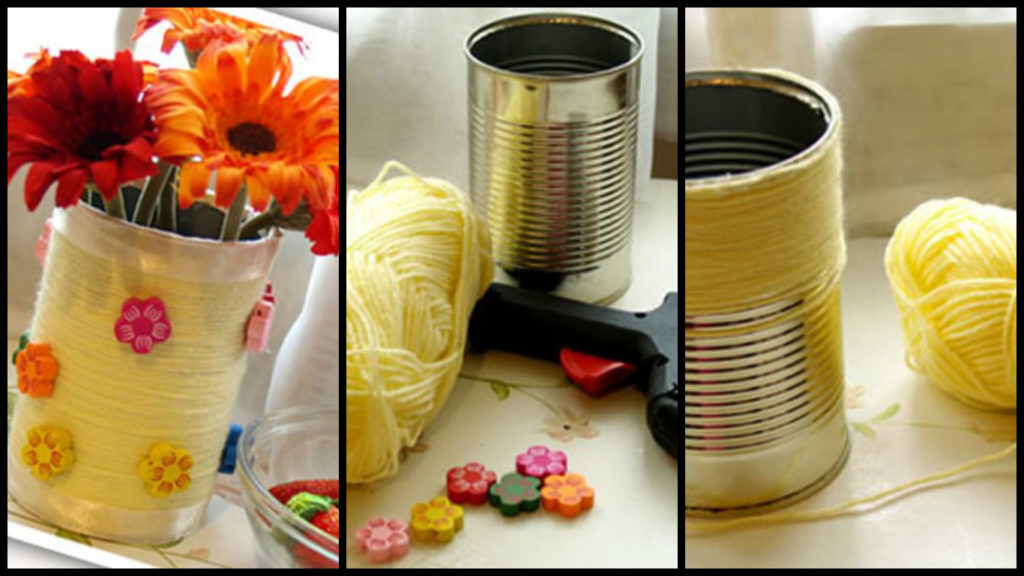
Posted onJanuary 31, 2017inBest out of Waste, DIY, Kids Crafts, Step by step, Tutorial Beautiful crafts with milk can
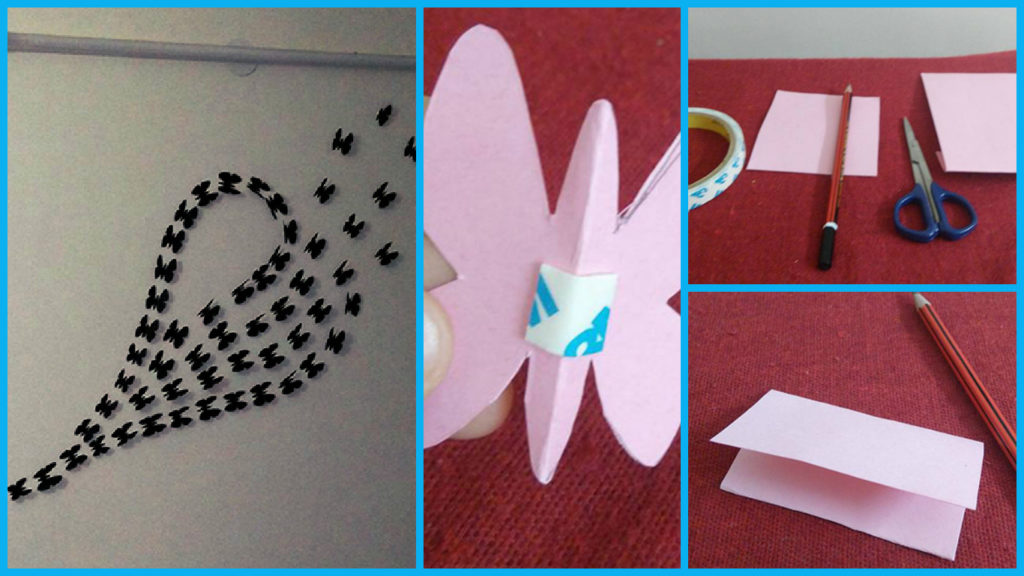
Posted onJanuary 31, 2017inBest out of Waste, DIY, Paper Crafts, Step by step, Tutorial Beautiful butterfly wall art