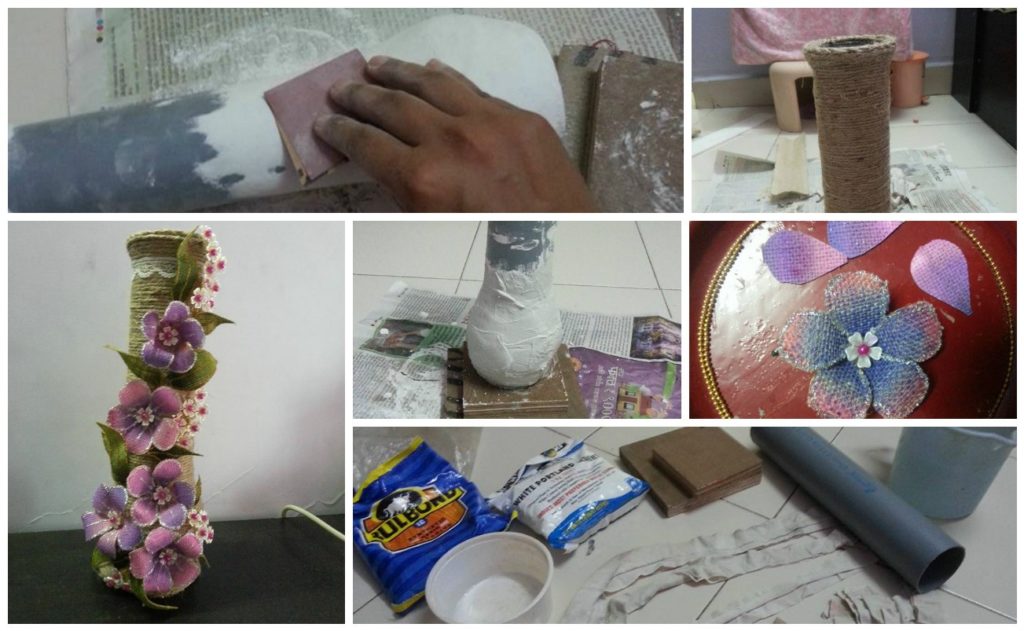
Posted onJanuary 22, 2017January 22, 2017inBest out of Waste, Home Decor, Step by step, Tutorial How to make a beautiful vase
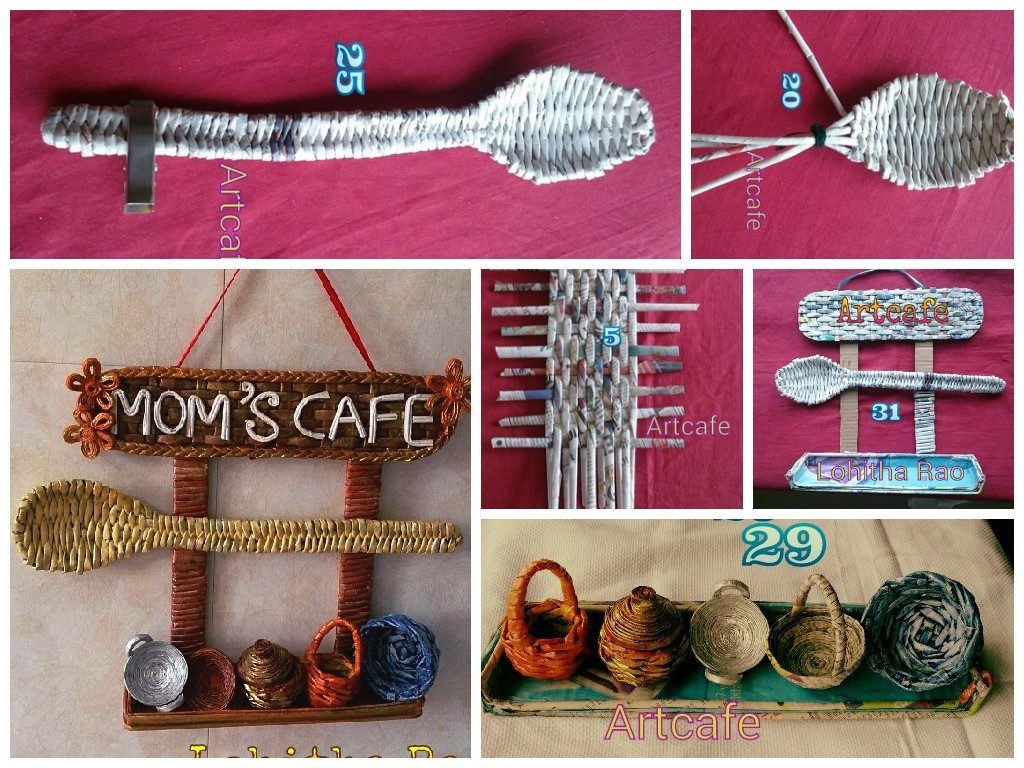
Posted onJanuary 22, 2017inNewspaper Crafts, Step by step, Tutorial How to make Newspaper weaving art for kitchen
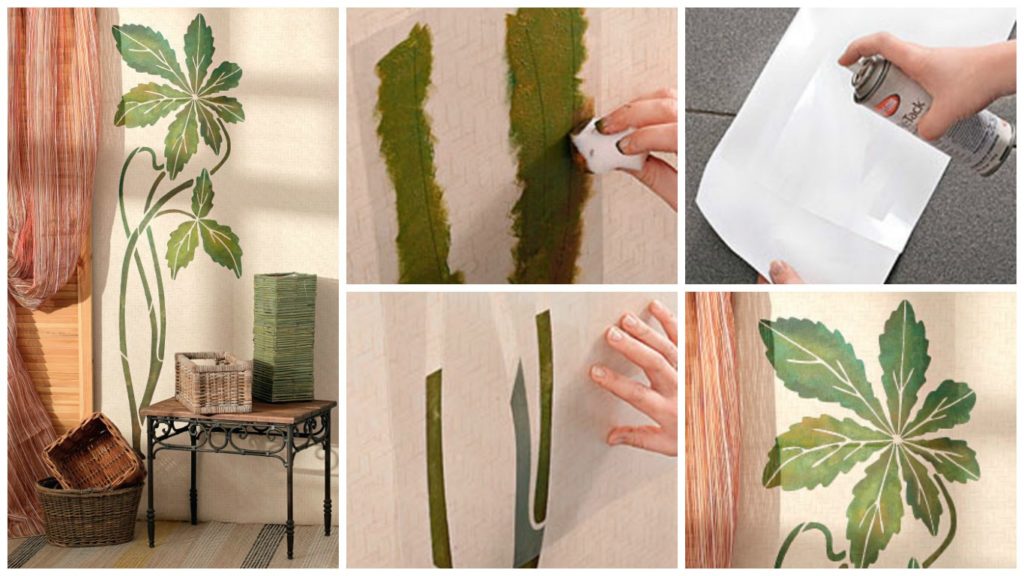
Posted onJanuary 22, 2017inHome Decor, Step by step, Tutorial How to draw herbal mural – Step By Step
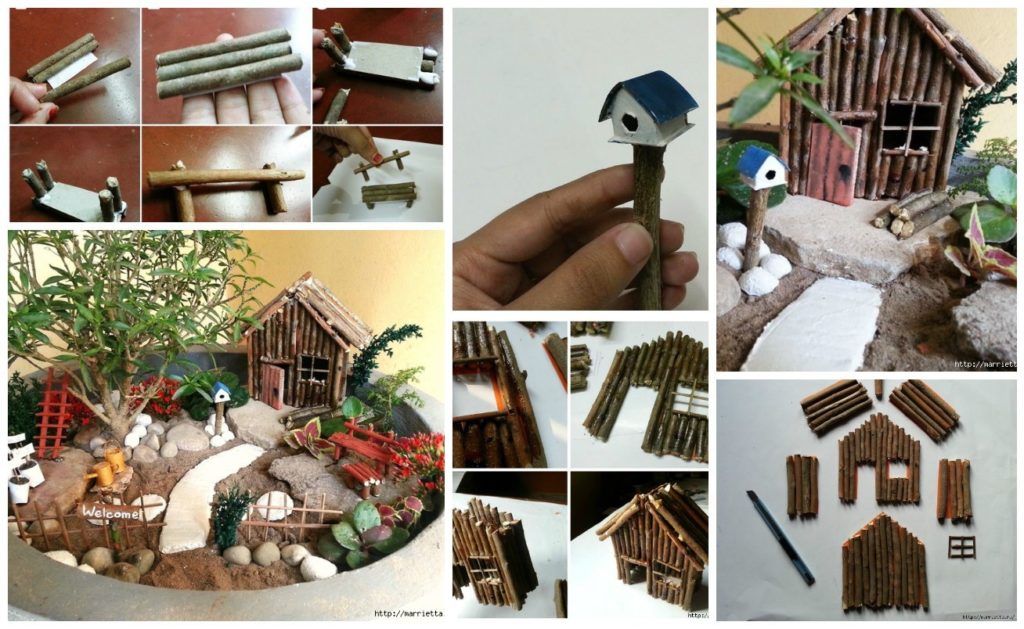
Posted onJanuary 22, 2017inBest out of Waste, Step by step, Tutorial How to make a miniature garden terrace
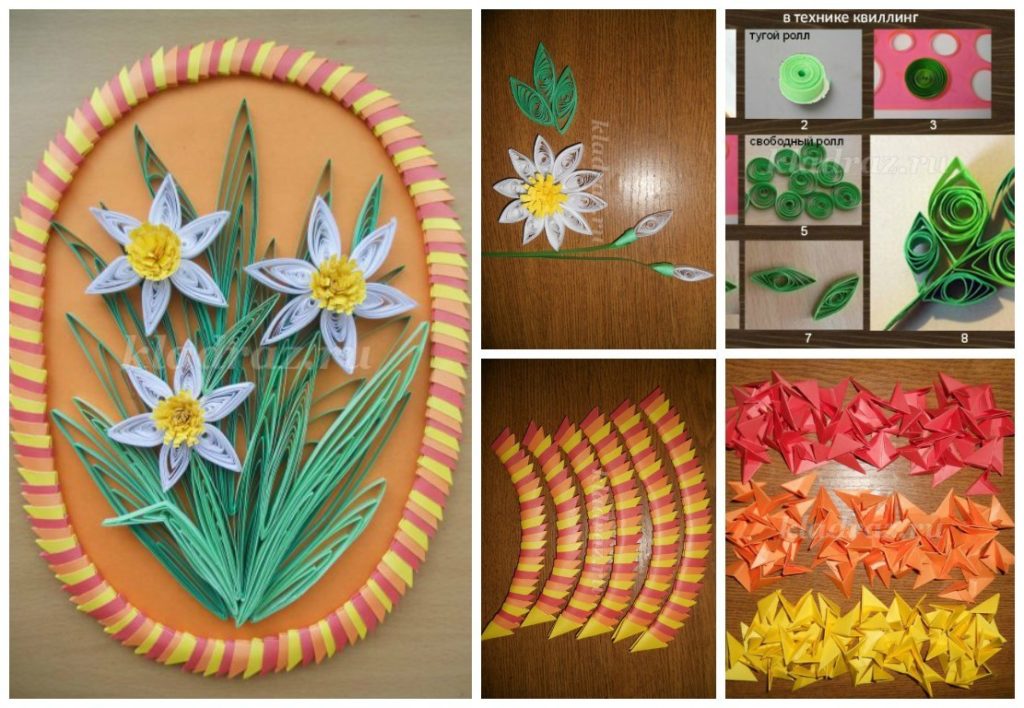
Posted onJanuary 22, 2017inQuilling, Step by step, Tutorial How to make Daffodils from quilling technique
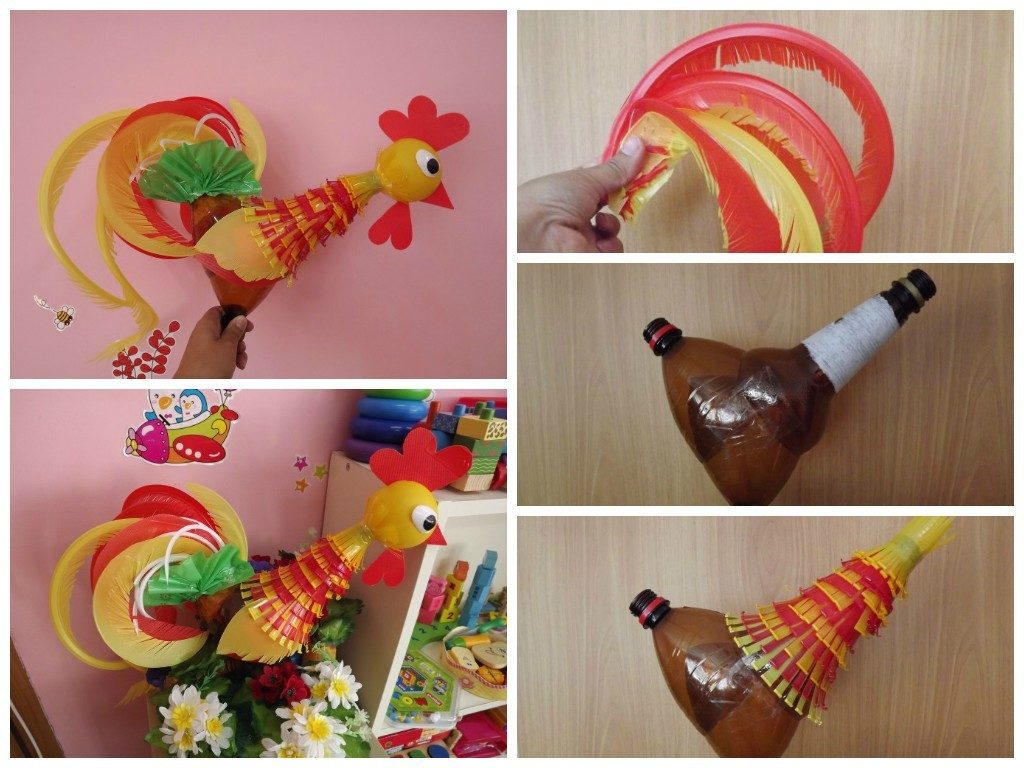
Posted onJanuary 22, 2017inBest out of Waste, Step by step, Tutorial DIY Cock from plastic bottles and disposable tableware
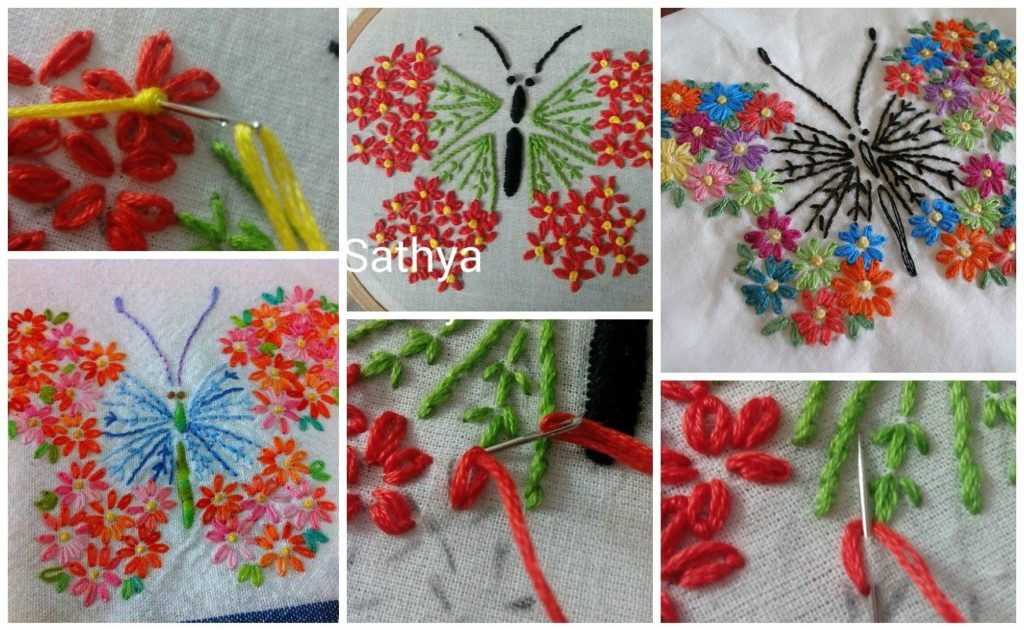
Posted onJanuary 22, 2017inEmbroidery And Sewing, Step by step, Tutorial Beautiful Butterfly from satin stitch
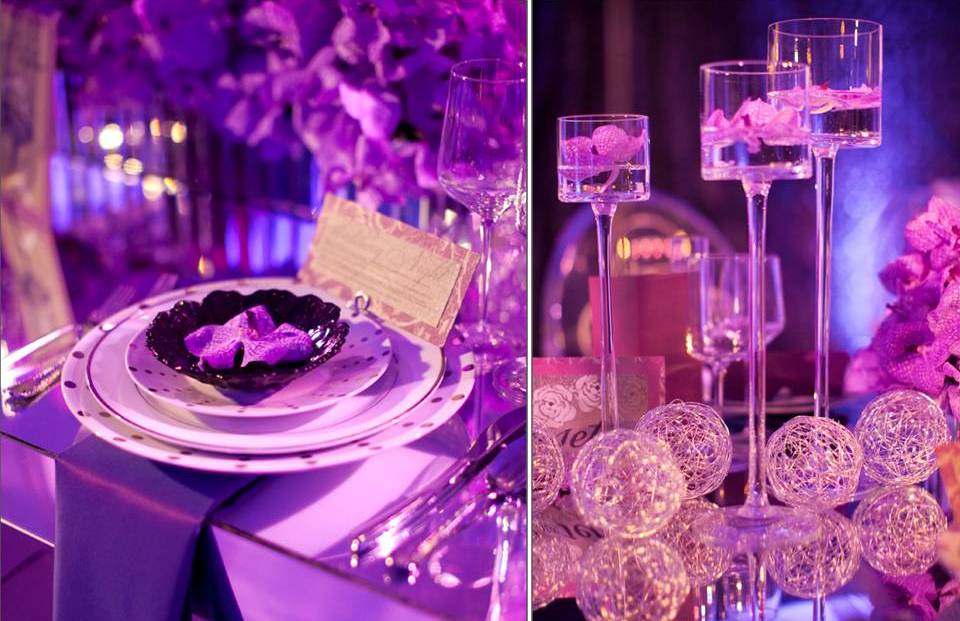
Posted onJanuary 21, 2017inDecorations, DIY, Ideas, Wedding 15 Elagant Wedding Reception Centerpieces Ideas
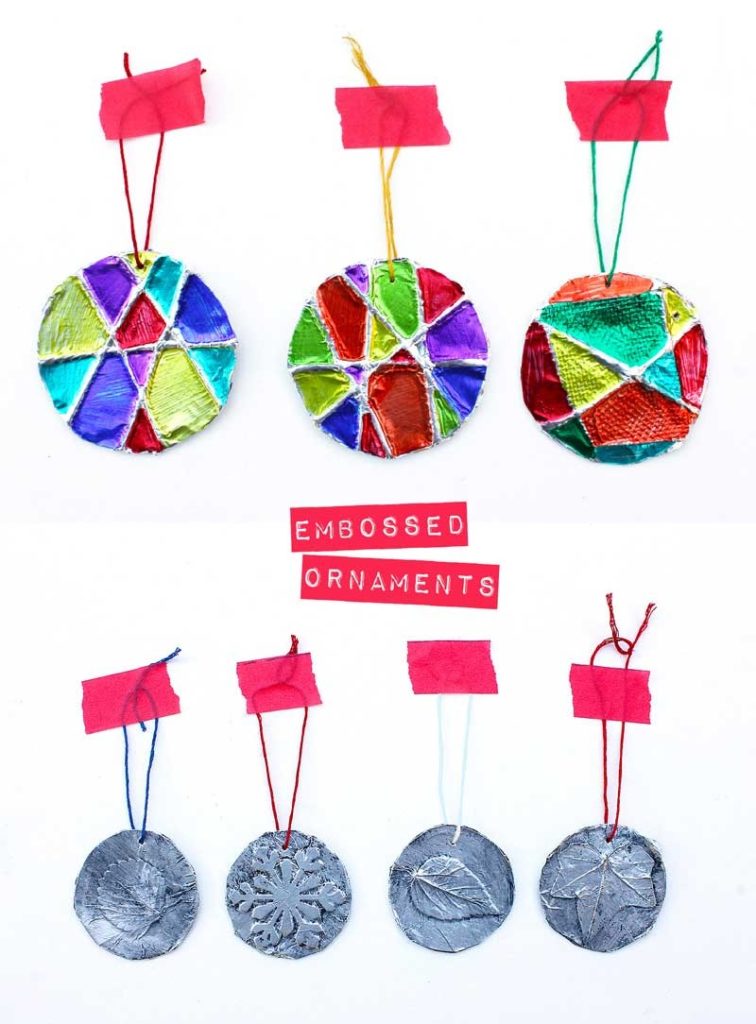
Posted onJanuary 21, 2017inChristmas, Step by step, Tutorial 5-Minute Embossed Ornaments (Christmas Ornaments)
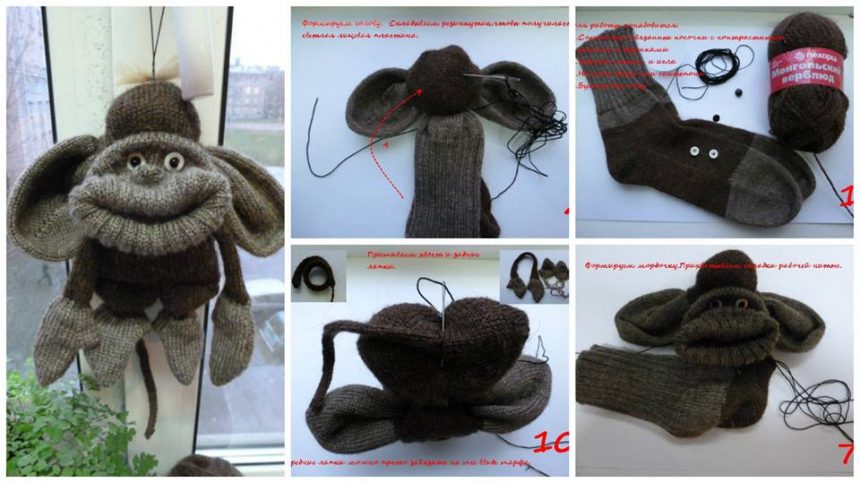
Posted onJanuary 20, 2017inBest out of Waste, Step by step, Tutorial Funny Monkey made from socks and yarn – Step By Step