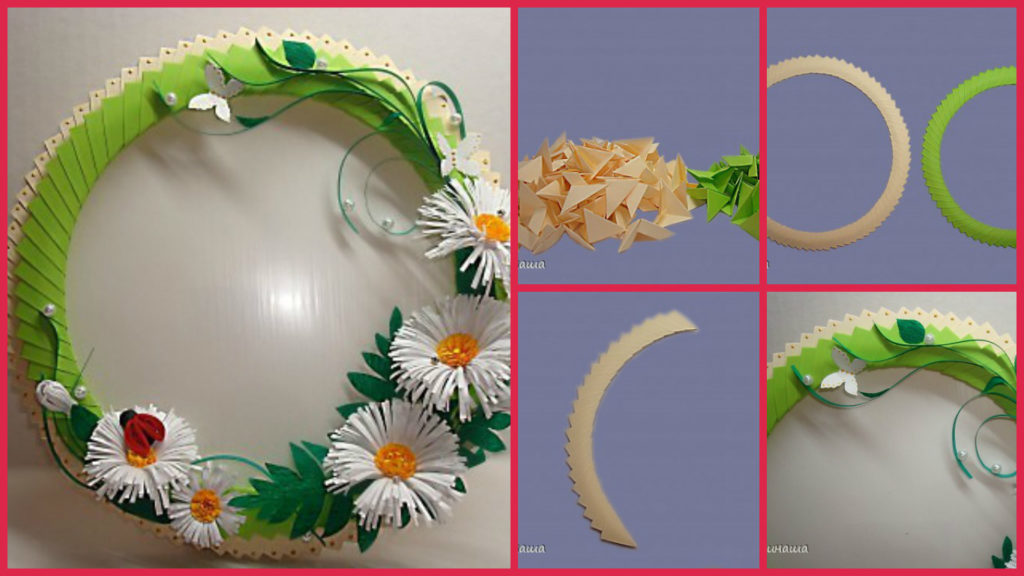
Posted onFebruary 7, 2017inDIY, Origami, Step by step, Tutorial DIY: Handmade frame from origami paper
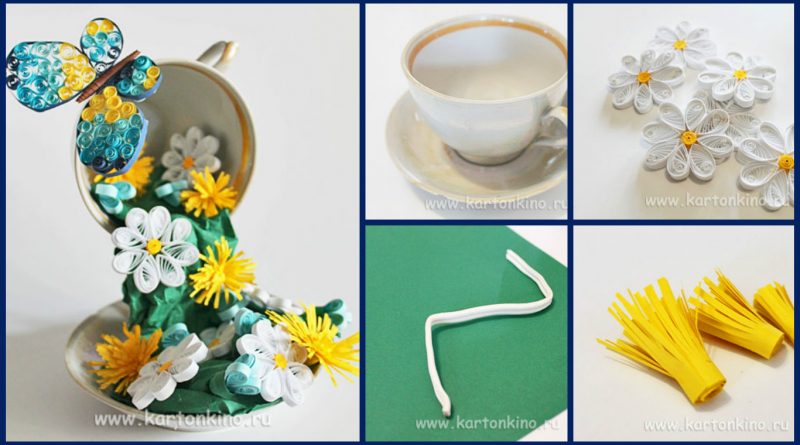
Posted onFebruary 7, 2017inDIY, Home Decor, Quilling, Step by step, Tutorial How to make floating cup with quilling technique
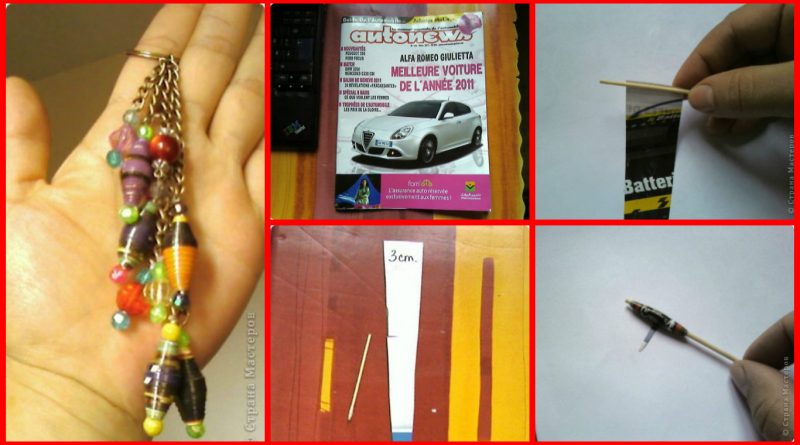
Posted onFebruary 6, 2017inBest out of Waste, DIY, Paper Crafts, Step by step, Tutorial How to make paper key chain
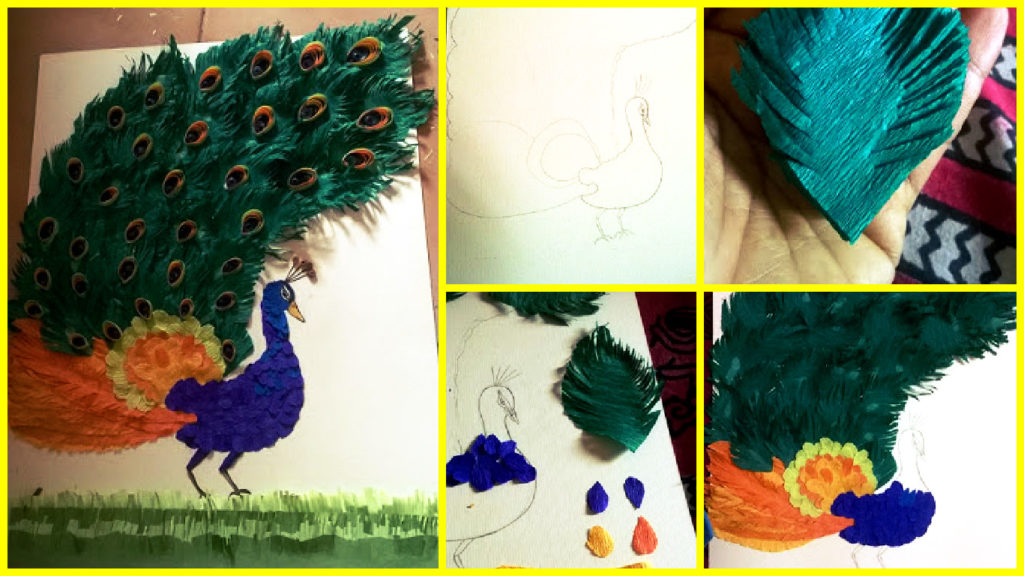
Posted onFebruary 6, 2017inDIY, Kids Crafts, Paper Crafts, Step by step, Tutorial DIY: Peacock paper craft
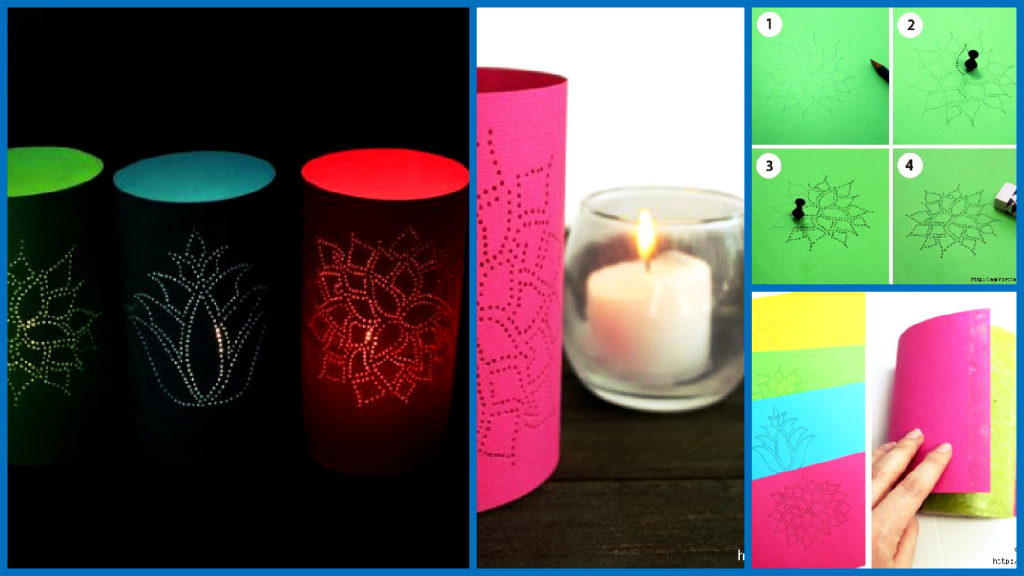
Posted onFebruary 6, 2017inDIY, Home Decor, Paper Crafts, Step by step, Tutorial How to make beautiful paper lanterns
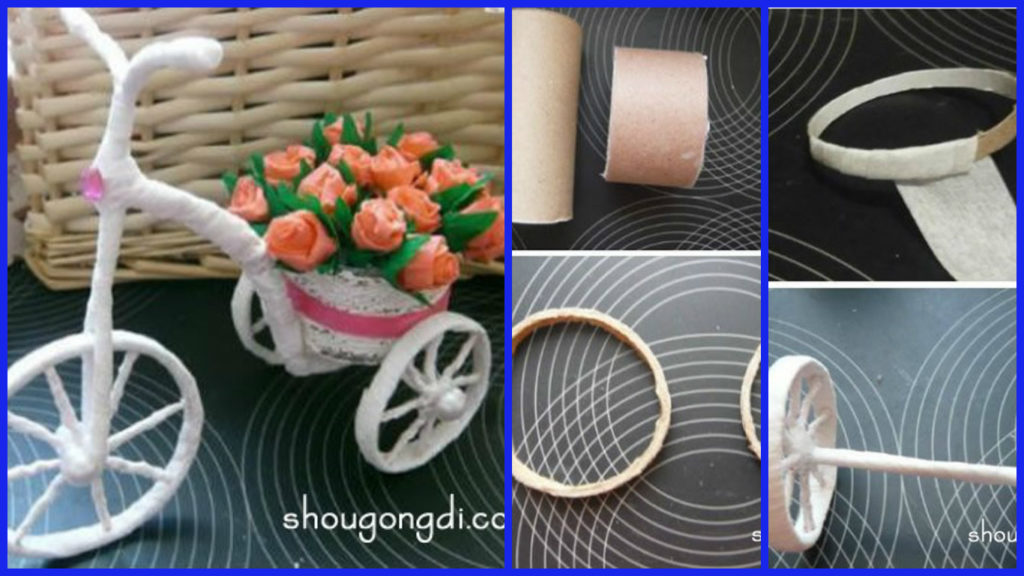
Posted onFebruary 6, 2017inBest out of Waste, DIY, Paper Crafts, Step by step, Tutorial How to make paper core model floats
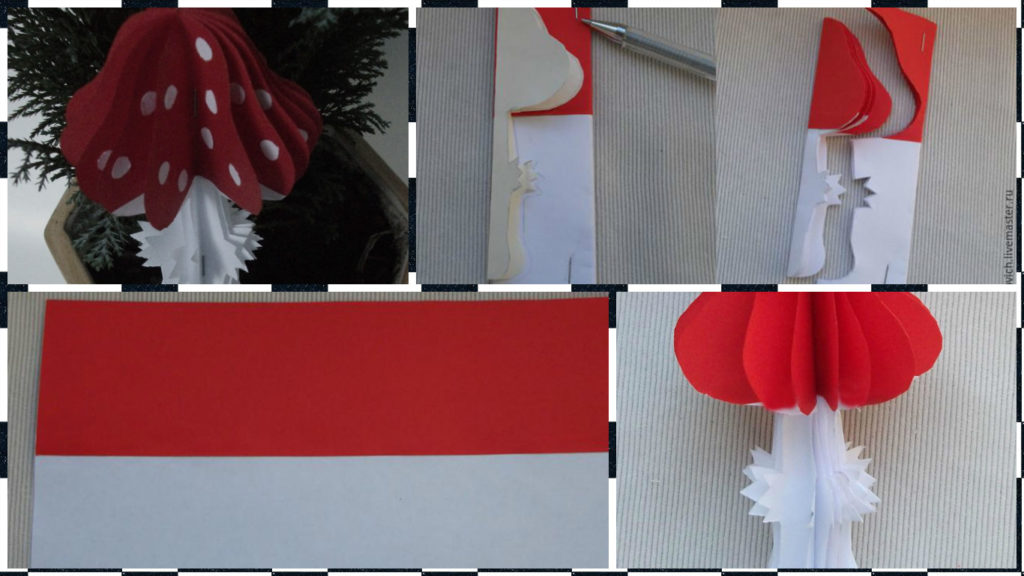
Posted onFebruary 6, 2017inChristmas, DIY, Paper Crafts, Step by step, Tutorial DIY: 3D Paper Mushroom Tutorial
Posted onFebruary 5, 2017inDIY, Home Decor, Quilling, Step by step, Tutorial DIY: Beautiful Quilling Bird
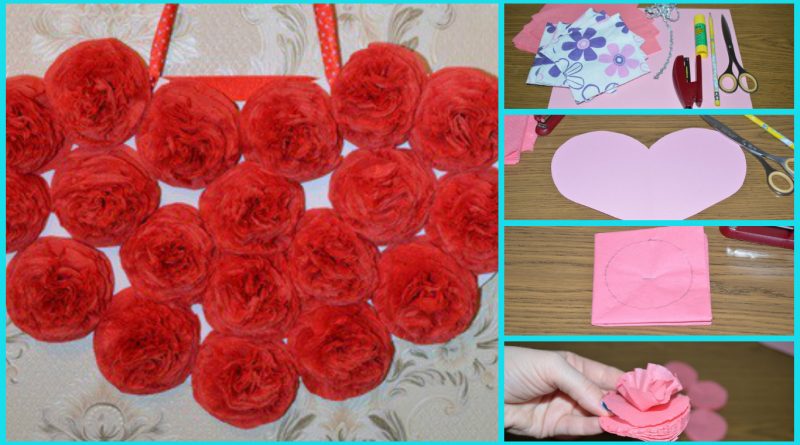
Posted onFebruary 5, 2017inDIY, Flower Crafts, Paper Crafts, Step by step, Tutorial, Valentine’s Day How to Make a Tissue Paper Heart
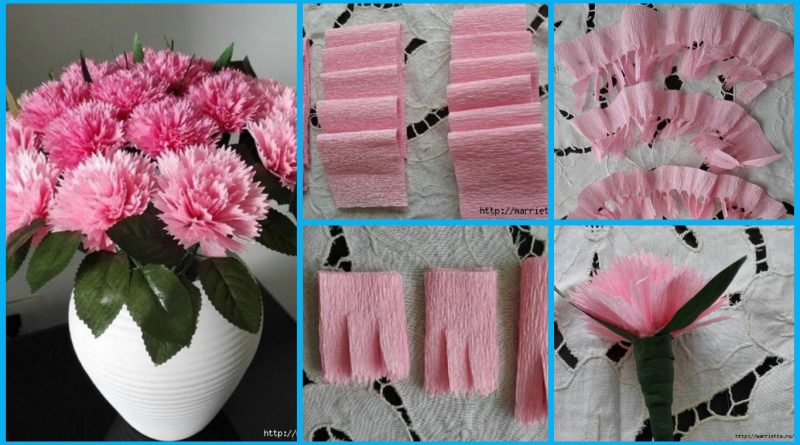
Posted onFebruary 5, 2017inDIY, Flower Crafts, Paper Crafts, Step by step, Tutorial How to make flower from crepe paper