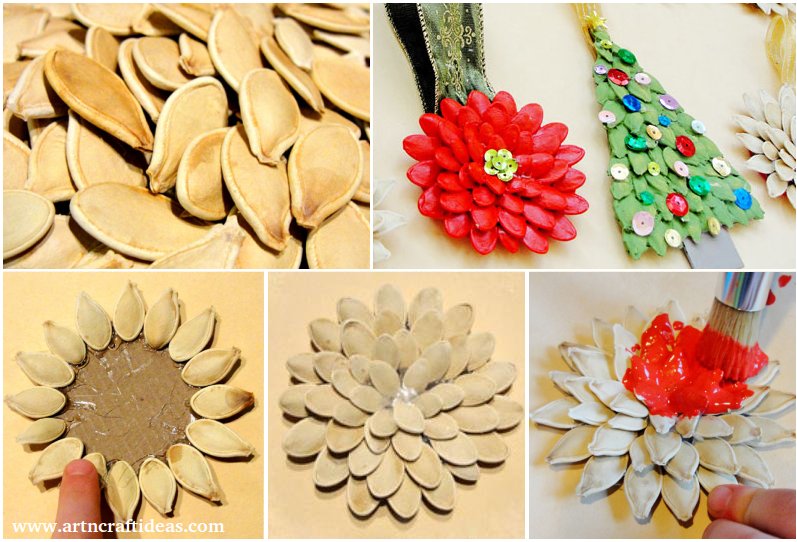
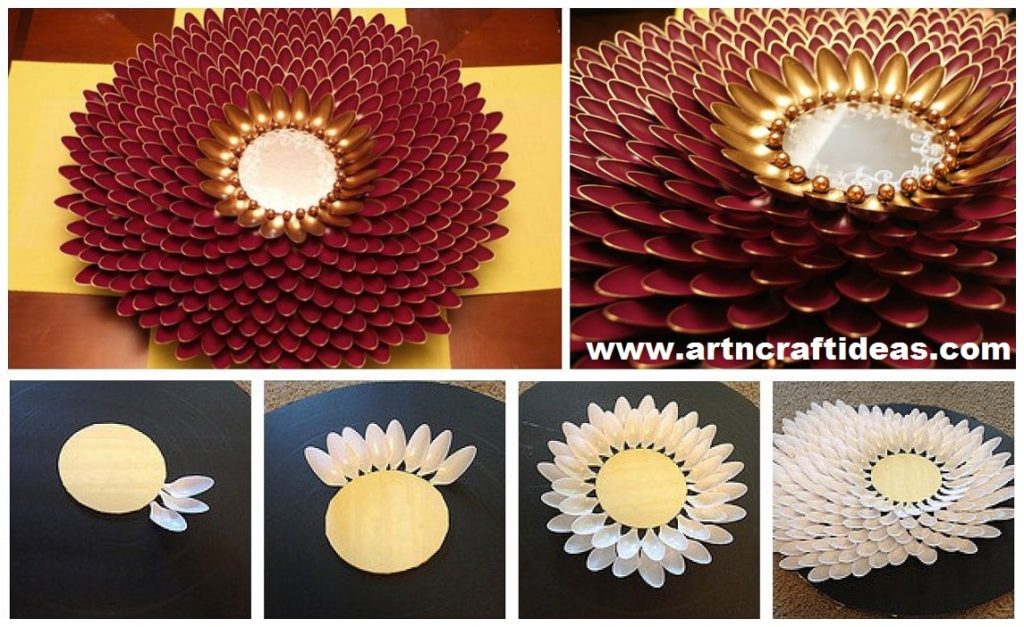
Posted onJuly 1, 2017July 1, 2017inBest out of Waste, Craft, Home Decor, Tutorial How to Make Beautiful And Easy Spoon Sunflower
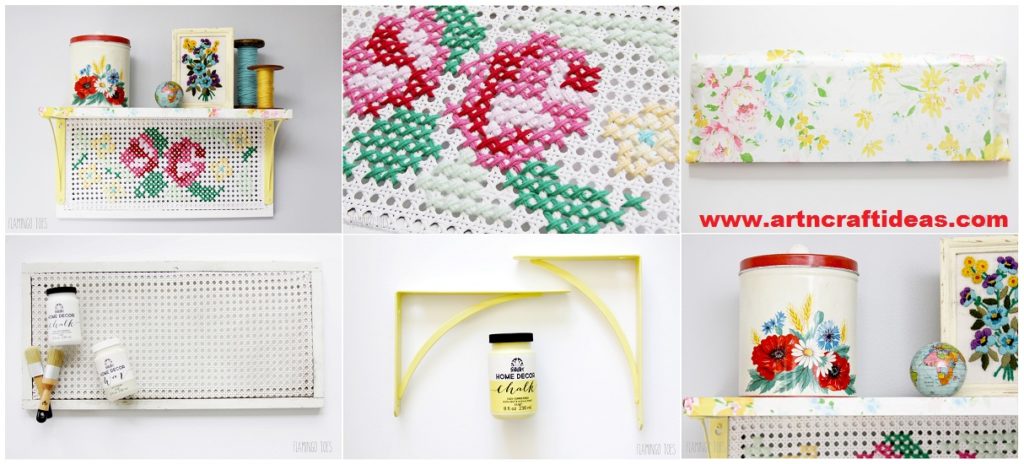
Posted onJuly 1, 2017inDIY, Embroidery And Sewing, Home Decor, Tutorial DIY Vintage Style Cross Stitch Shelf
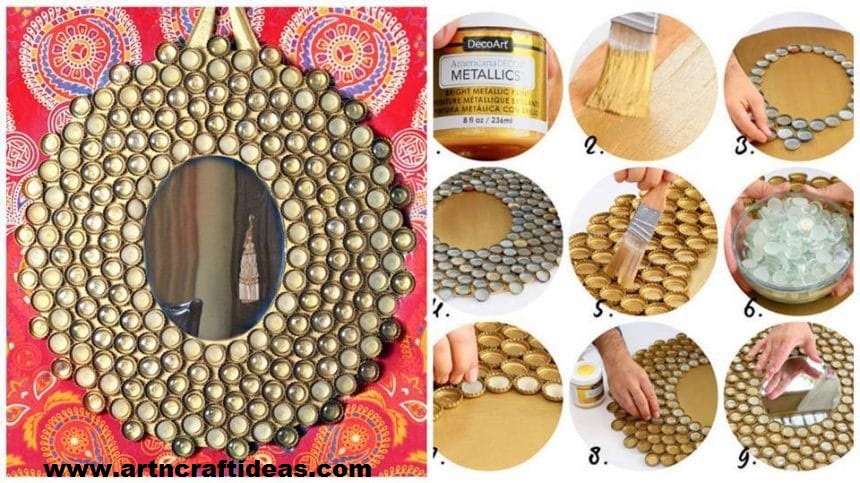
Posted onJune 24, 2017inBest out of Waste, Craft, DIY, Home Decor, Tutorial, Video How to make Boho Bottle Cap Mirror
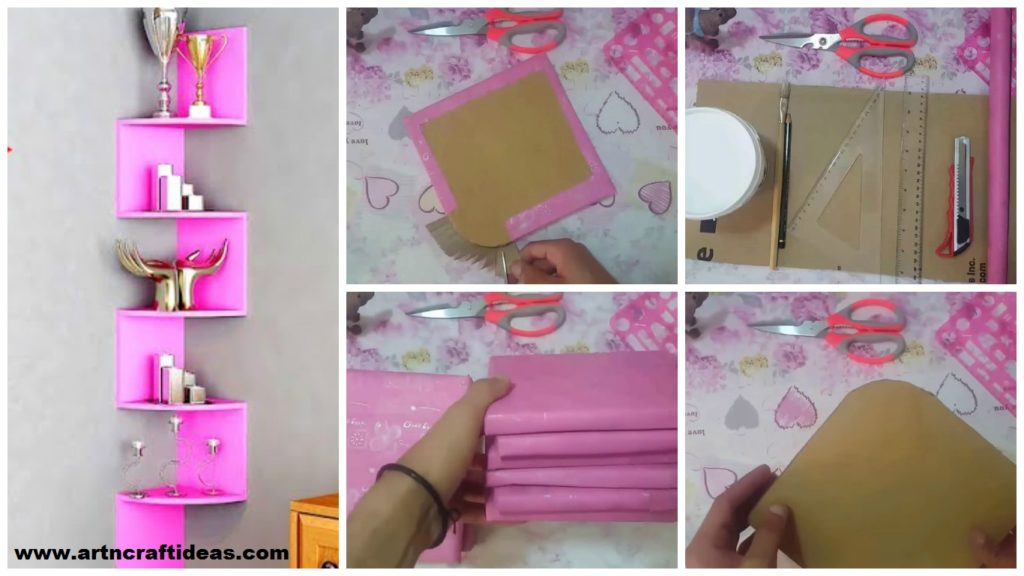
Posted onJune 19, 2017inBest out of Waste, Craft, DIY, Home Decor, Tutorial, Video Simple DIY Corner Shelf For Toys
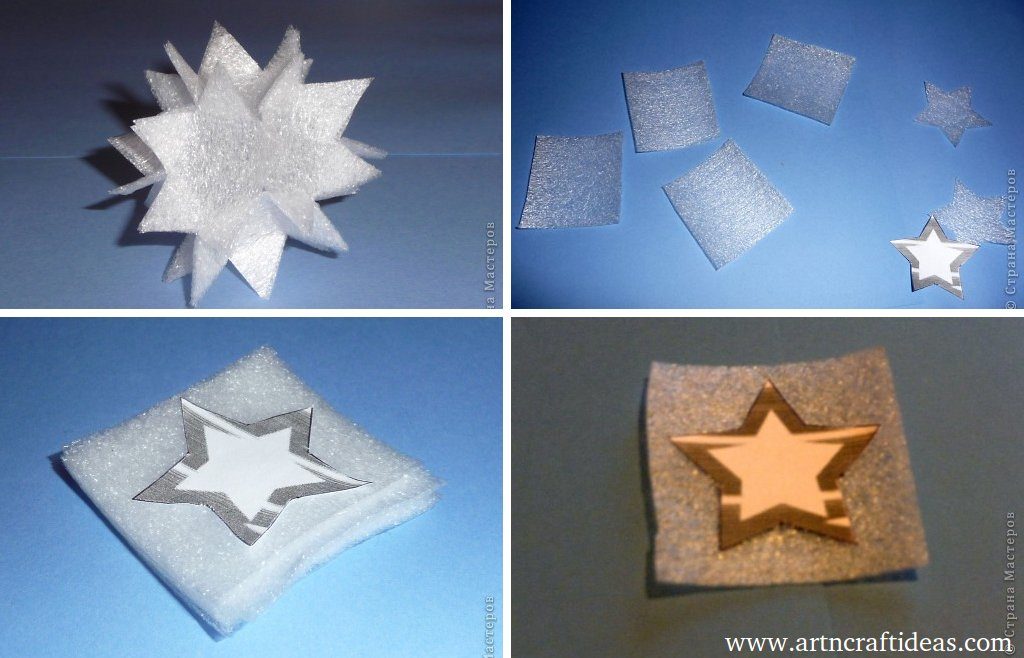
Posted onJune 4, 2017inBest out of Waste, Christmas, Decorations, Tutorial Recycled Craft: Snowflake foam hands (Tutorial)
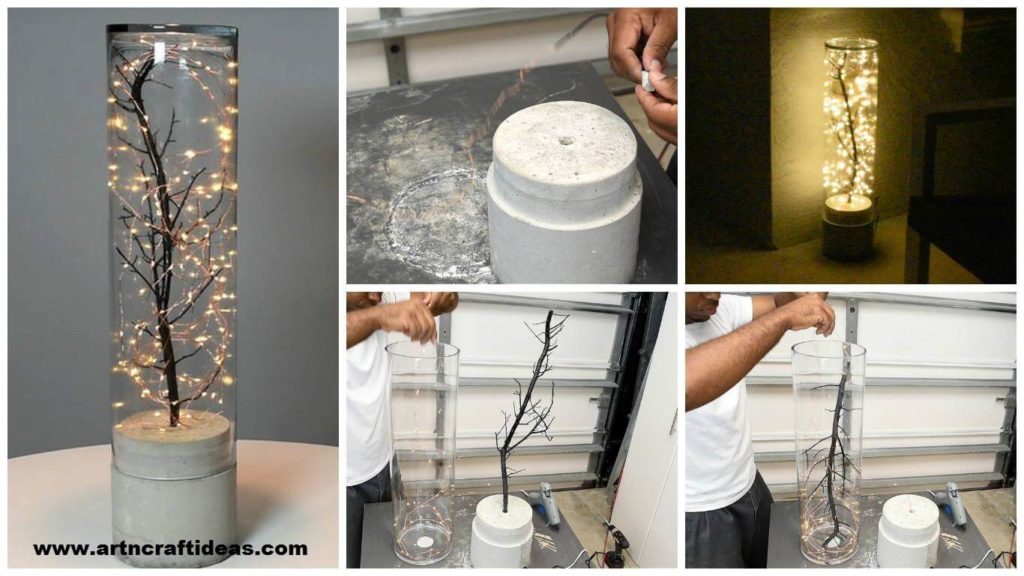
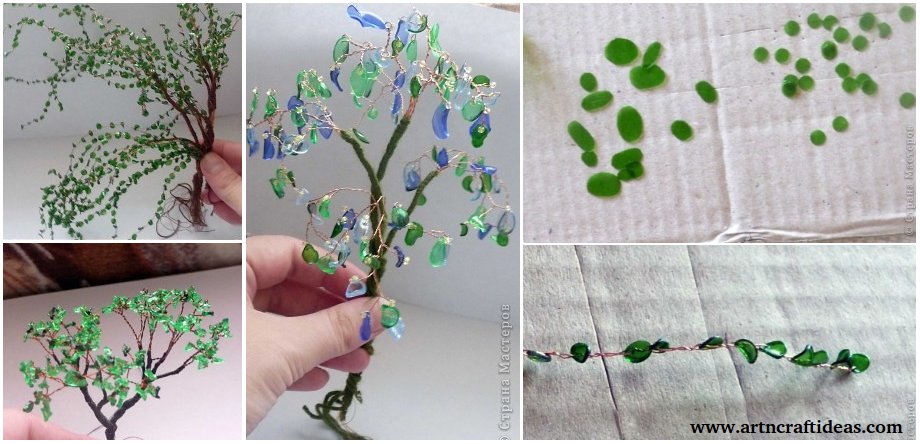
Posted onJune 4, 2017June 4, 2017inBest out of Waste, Home Decor, Tutorial DIY RECYCLED CRAFT: Bonsai Made Of Plastic Bottle (Tutorial)