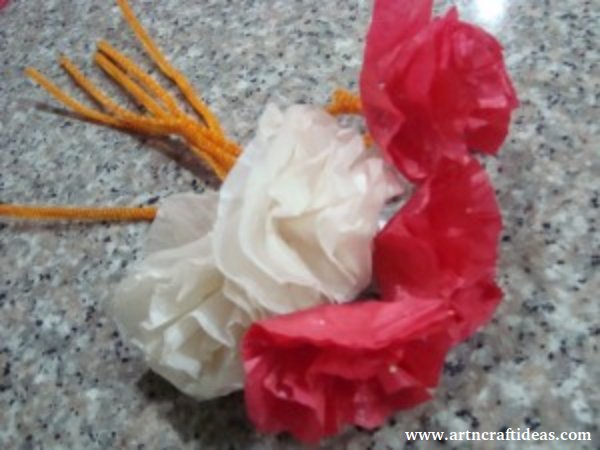
Today I’m going to show you how to make Paper Carnations. Paper Carnations can be used for many things…. Valentine’s Day, for example. Valentine’s Day is coming up in just a couple of weeks. These carnations would be beautiful in a bouquet as a gift for your someone special. Or, for Mother’s Day…. what mother wouldn’t love receiving a bouquet of hand made paper carnations from their child? They would certainly love it. Or, just make these Paper Carnations any day of the week to give to someone special as a surprise. No one could resist them! So, let’s get started.
Required Material-
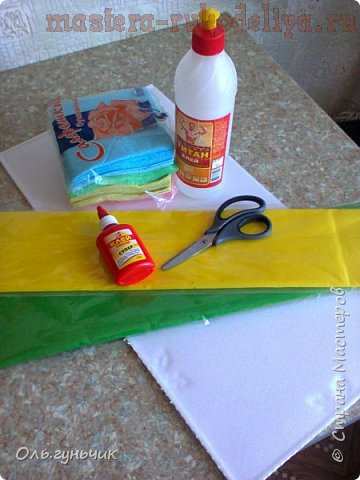
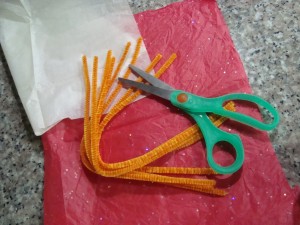
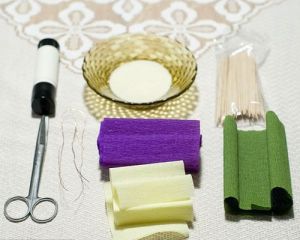
- Tissue papers (the one used for wrapping presents)
- Pipe cleaners/fuzzy wires
- Scissors
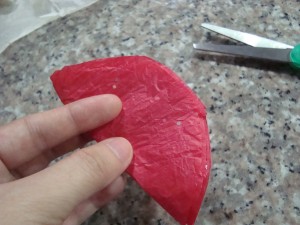
STEP 1
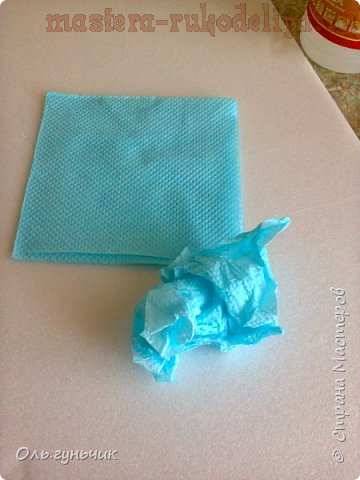
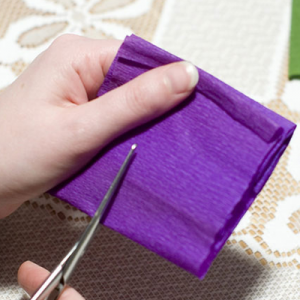
Fold tissue paper into portions, enough to make 3 to 4-inch circles.
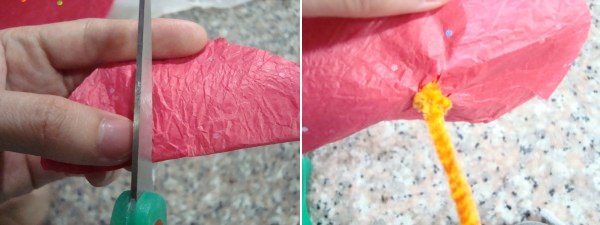
STEP 2
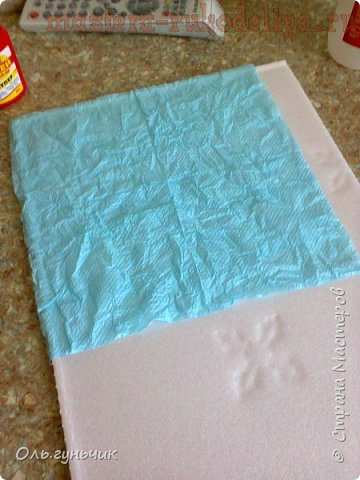
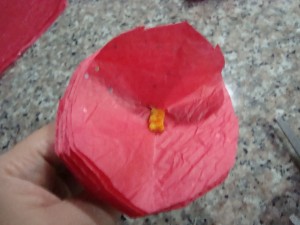
Stack 7-10 pieces of circles and by folding it, make two small slits in the middle. This is where you slip in the tip of the pipe cleaner, then fold it to lock it in place.
STEP 3
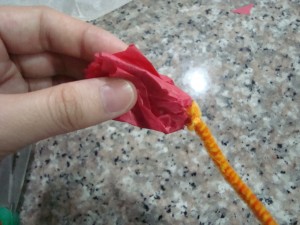
Starting in the middle, gently fold the paper up, until all the side are pulled upwards. Continue doing the same for the other papers underneath.
STEP 4
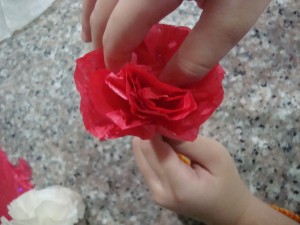
When all the papers are up, gently arrange it to form blooming petals of your carnation flowers.
STEP 5
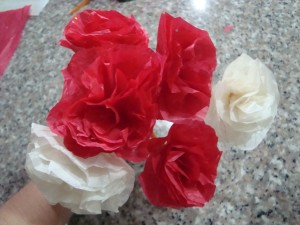
Make a bunch of these flowers and you can place it a flower vase for a more attractive look.
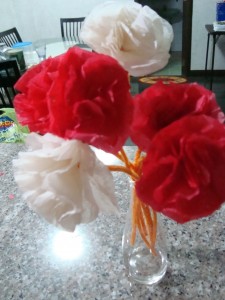
Or better yet, make a bouquet of carnation flowers and give it to somebody for Valentine’s Day. They are sure to love it. How did your carnation flowers turn out? Let me know in the comments below.
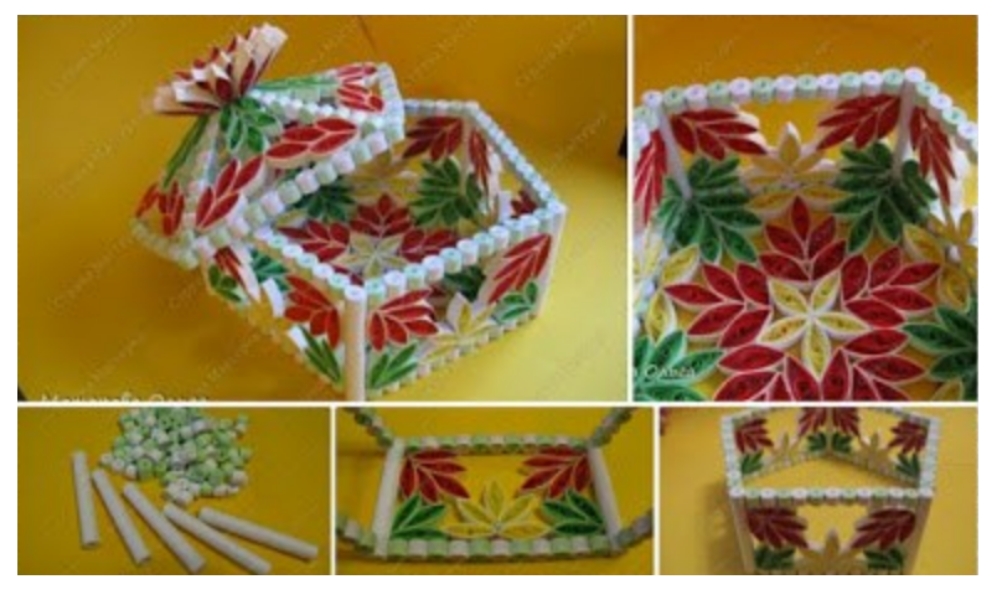
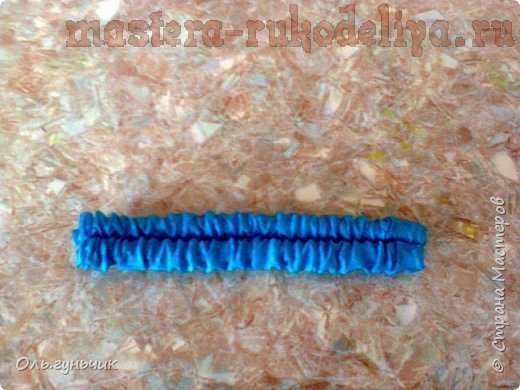
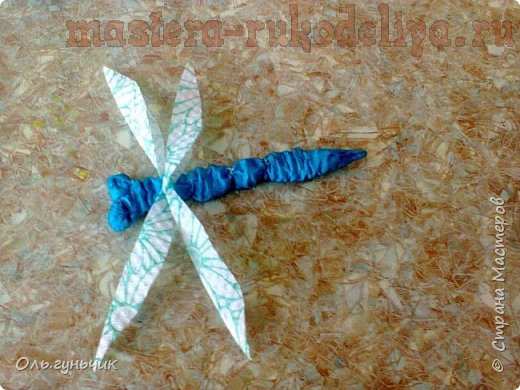
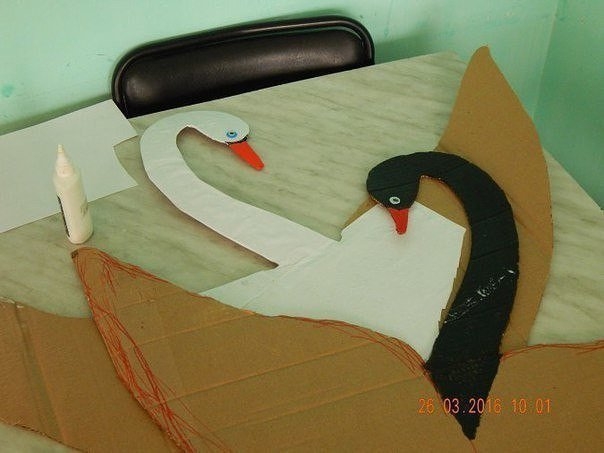
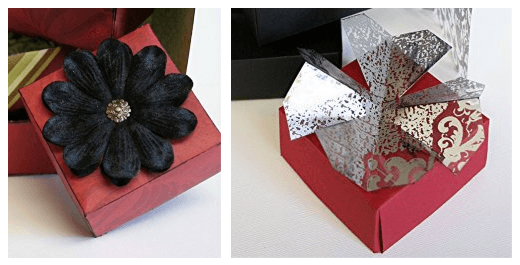
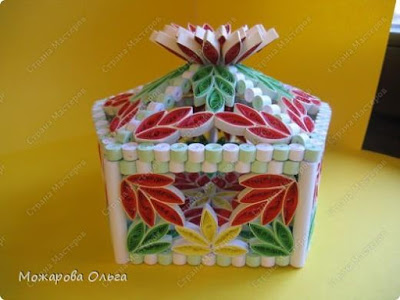
 Making the work piece. Tube 5 cm long.
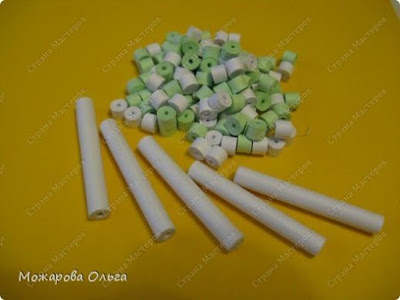 Glue the small details in the strip.
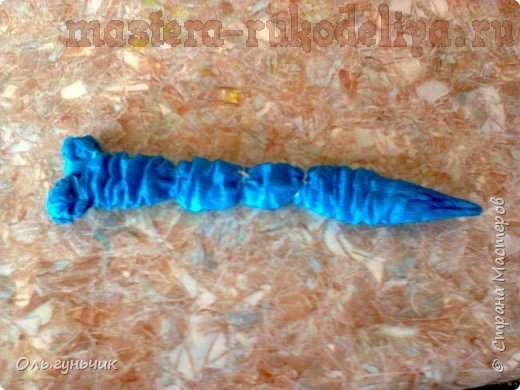
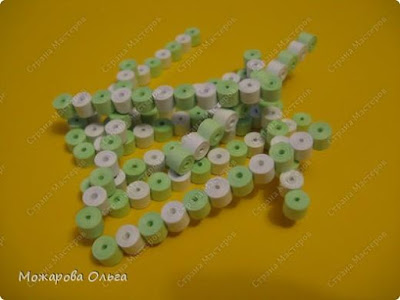 Glue them to the angular ducts.
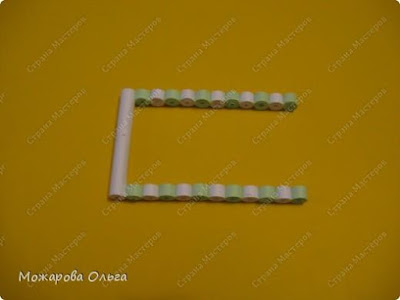 And there are 5 items.
 Glue them together.
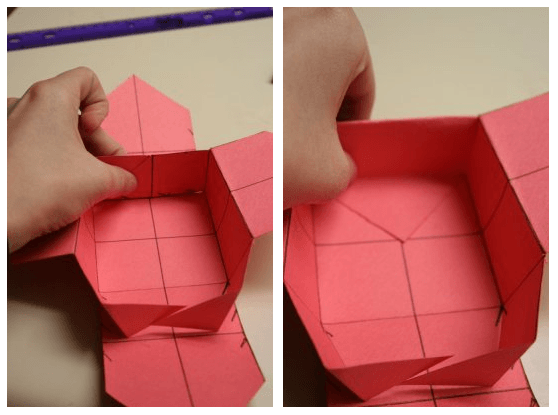
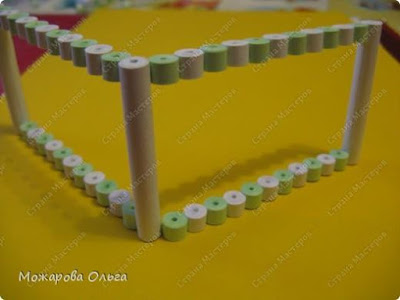 Get in shape in our boxes.
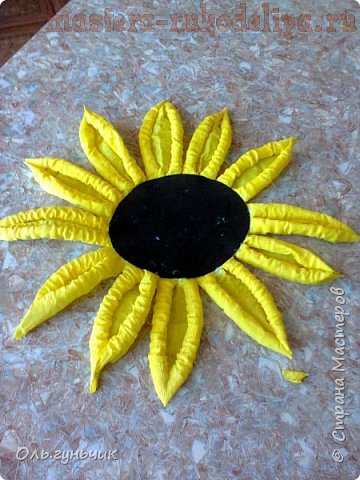
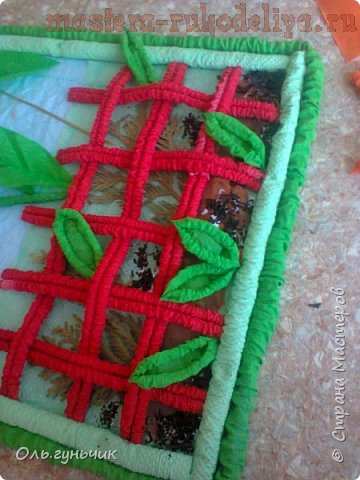
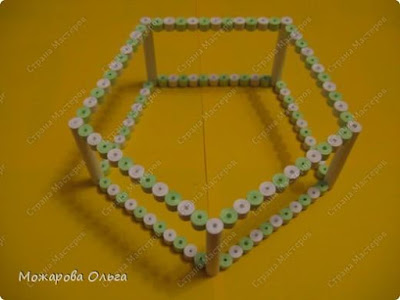 The edges of the petals were light, I made here are blank.
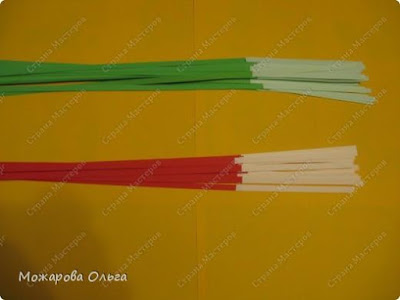 Then twisted details.
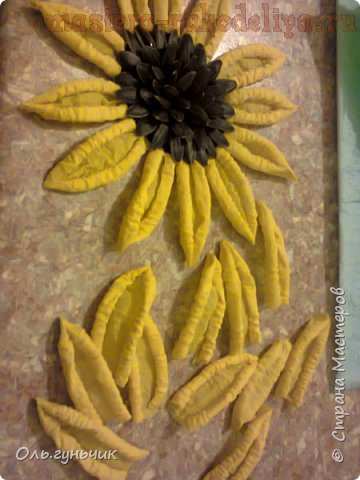
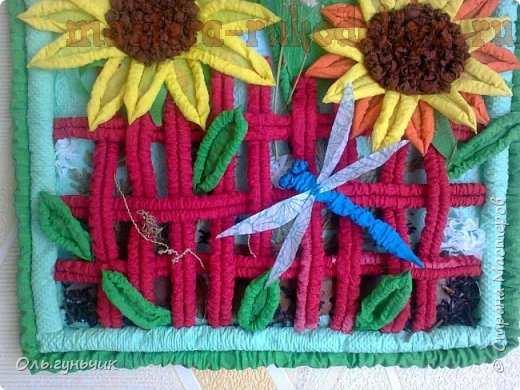
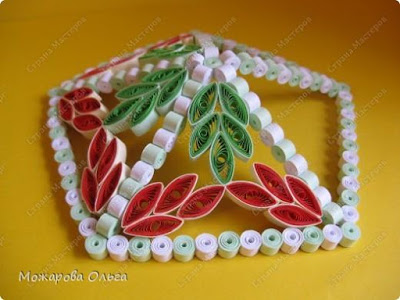
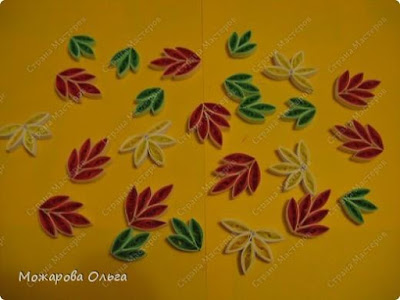 Pasted them into the frame.
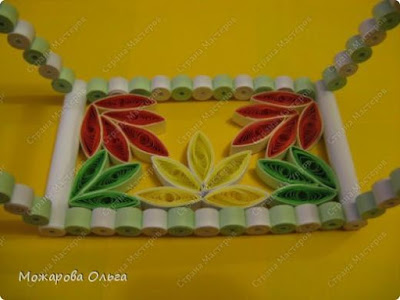 Thus, all the walls are filled.
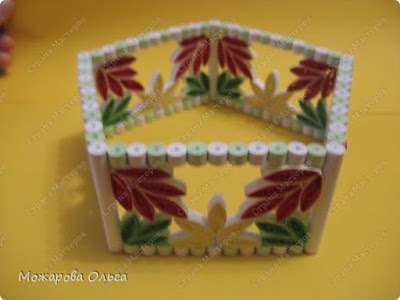 Fill the bottom.
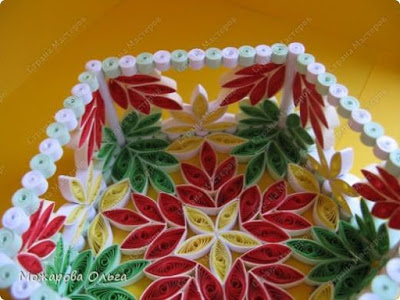 This can be done as the bottom lid.
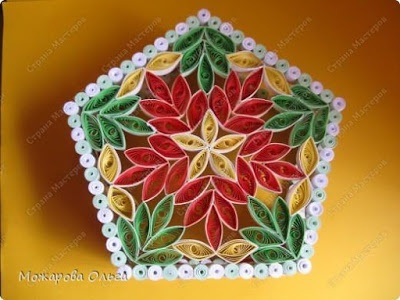 Do cover.
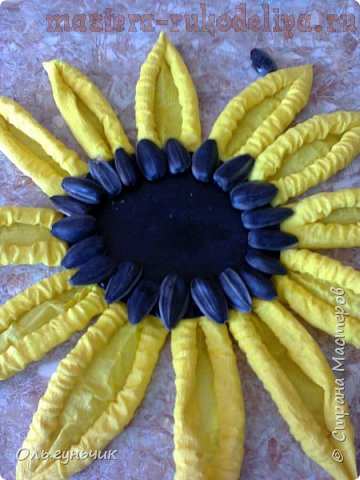
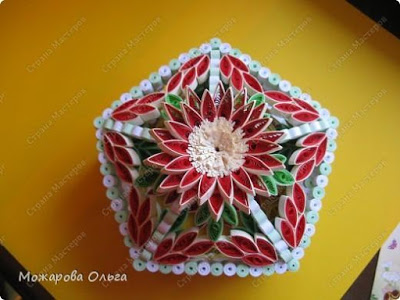
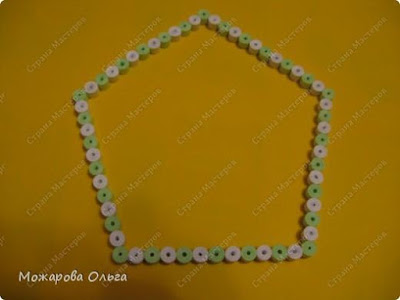 Sticking the central part.
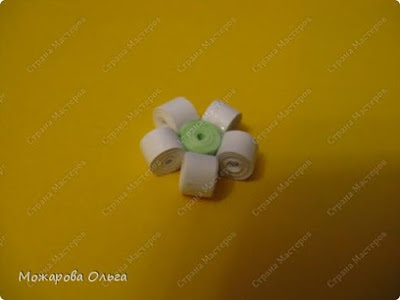 Combine with five ends of the work piece.
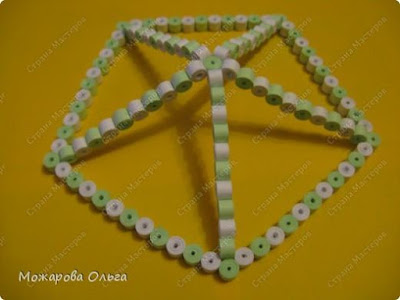 Thus glued corners.
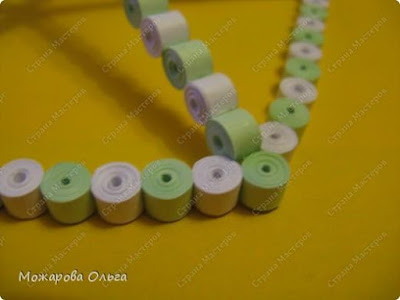 Fill the cover.
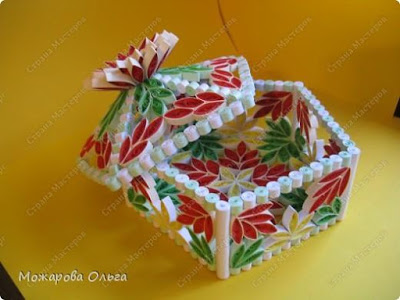
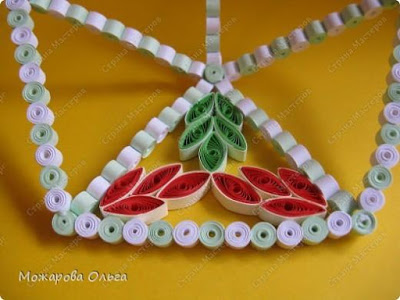
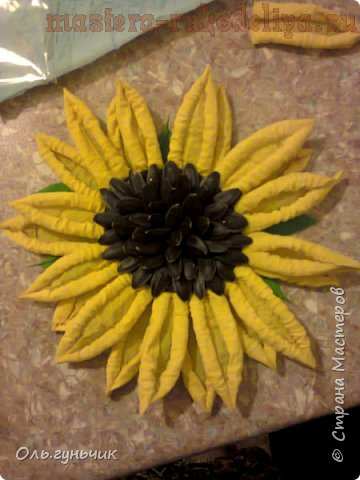
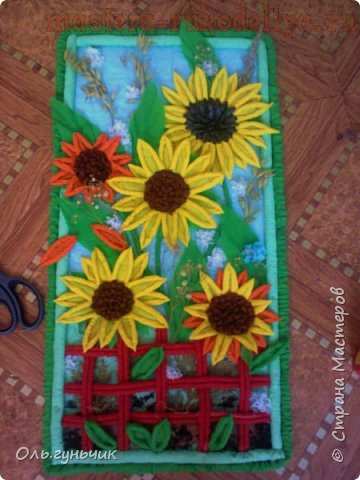
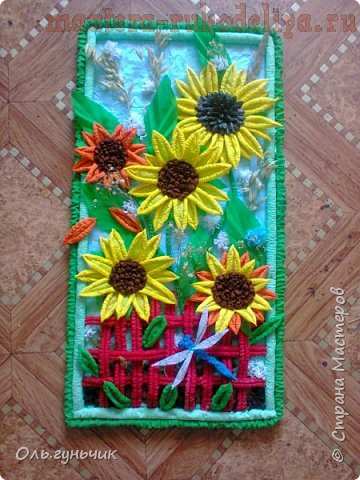
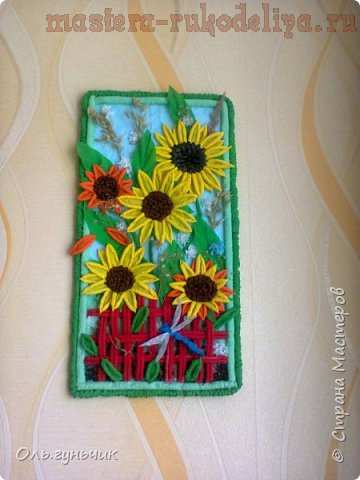
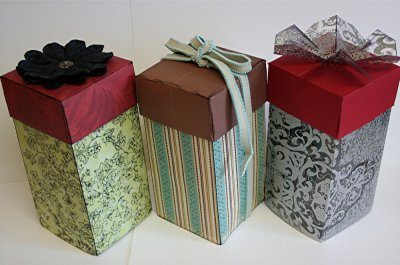
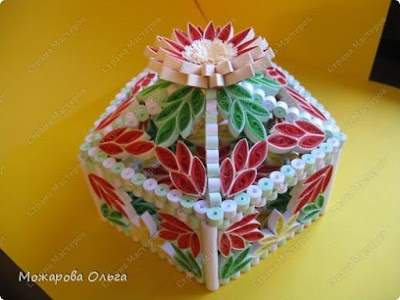
 Here’s what happened.
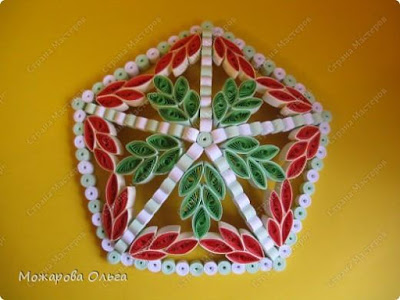 It remains to make a handle for the lid.
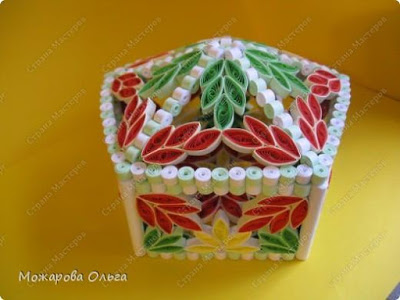
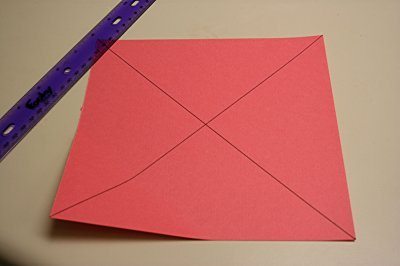
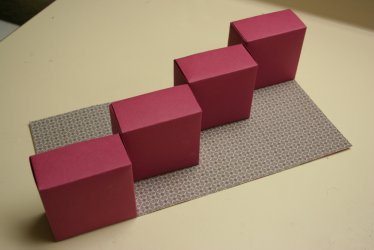
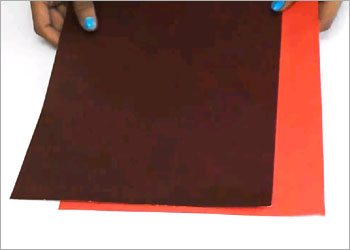
 Cut diamonds on the cardboard, to the size of your preference, to be the dividers of your organizer. Cut two opposing spikes from your diamonds.
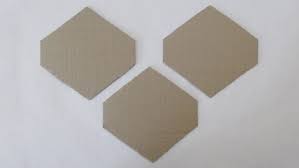 Cut into one of the chosen papers the same amount of diamonds cut into the cardboard. Glue the paper lozenges to the cardboard lozenges.
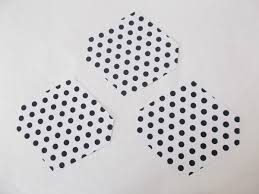 Continuing with the preparation of your vertical organizer step by step , cut strips into another structured paper.
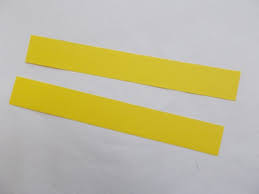 Glue the paper strips to the bottom of the dividers.
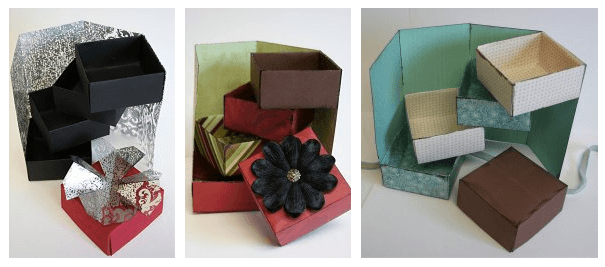
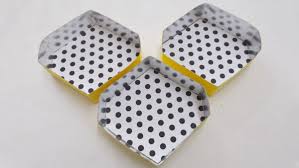 On cardboard, cut strips with the width of the cut nozzle of the dividers and glue these strips on the sides of the pieces, creating the structured one of your organizer. Coat the paper strips with a paper of your choice.
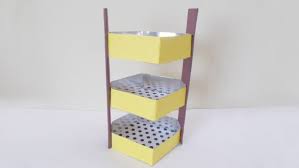 Cut another strip onto the cardboard, cover it – and glue it to the top of your organizer.
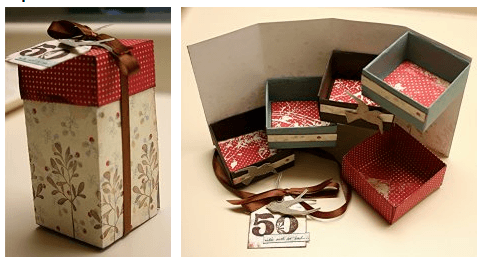
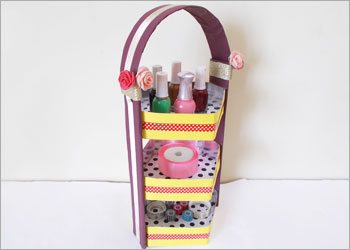
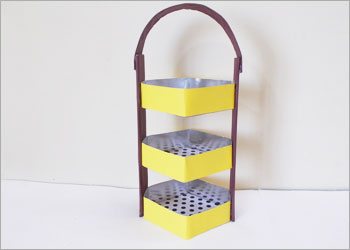 Pass pieces of adhesive tapes through the dividers and the handle of your organizer. To finalize your piece, decorate your organizer with the materials you want. And it’s ready!
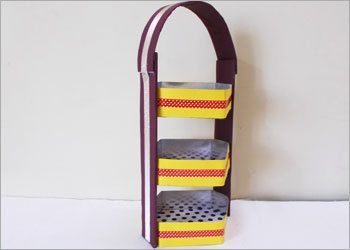 (Photo: recyclart.org)
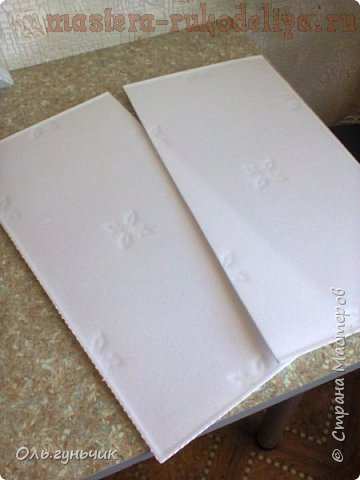
 Glue one rectangle of paper to the other.
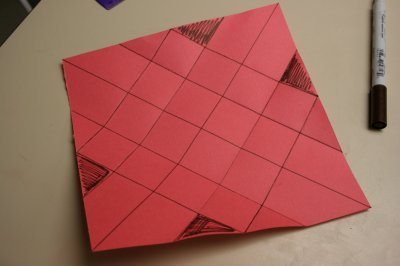
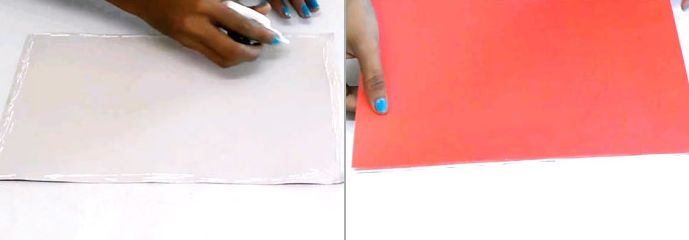 Then divide this rectangle into three equal parts, and on the sides, make strips of 2.5 cm each and leave the center without scratches, but forming a wide strip in the middle of the rectangle in the lengthwise direction.
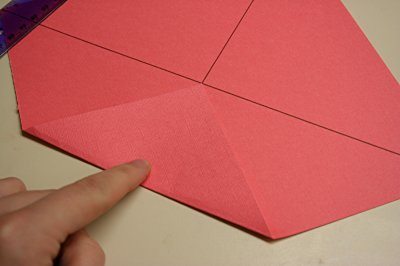
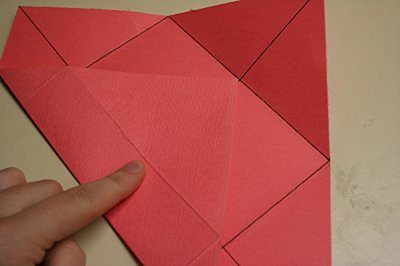
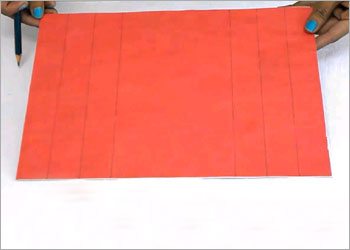 In the square of the side, cut in triangle shape. Do the same on the other side. Cut the side strips.
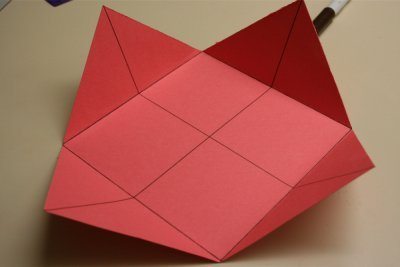
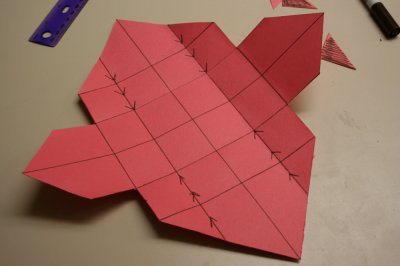
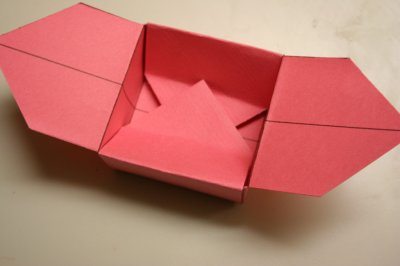
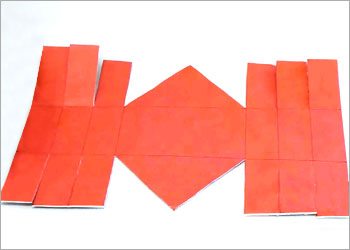 Raise the strips and the middle part.
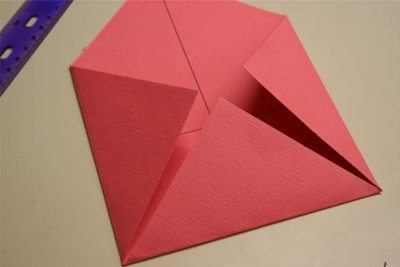
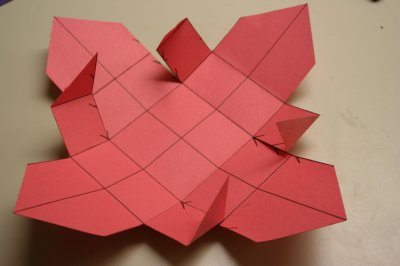
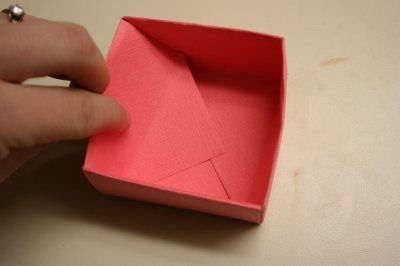
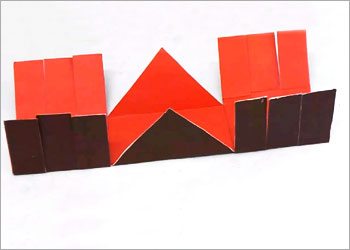 Attach the strips on one side of your piece and glue. Glue the triangle over the striped part. Do the same on the other side.
 Cut the handle, decorate it the way you prefer, with the ribbons you prefer, and stick it in your basket, with the ends of the handle having to stay inside.
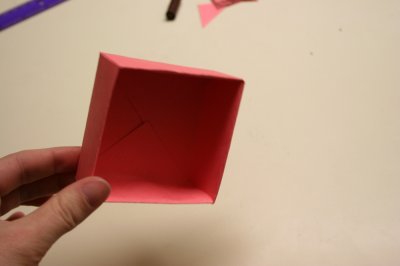
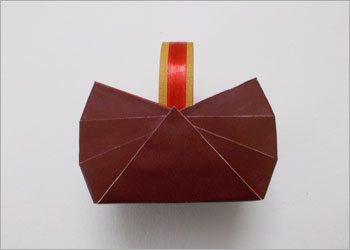 To finish your piece, just finish decorating your paper basket. And it’s ready!
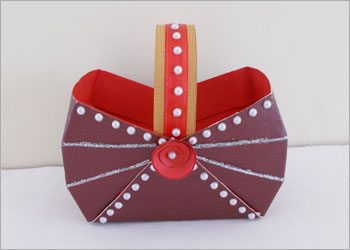
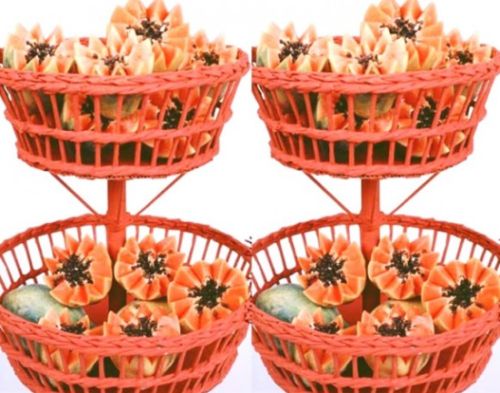
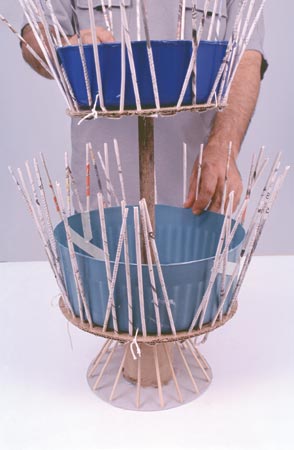
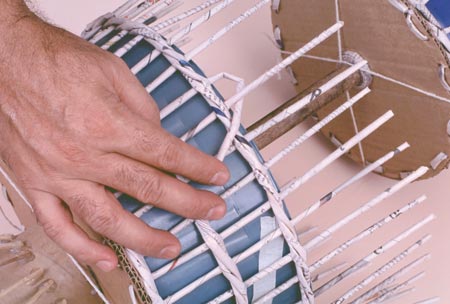
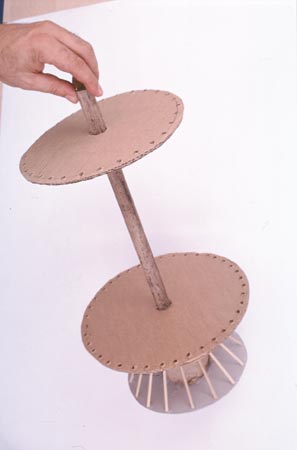 Then place the straw in the holes that are already marked, these will be the straight straw in the upright position. Then tie the 2 bowls (which will serve as shapes).
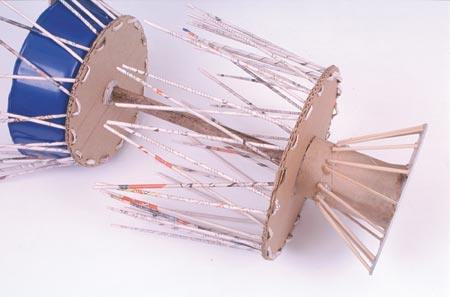
 After that, start a braid with 3 straps, next to the cardboard of the base. Continue braiding as follows, the last behind goes over 2 fixed and under the third.
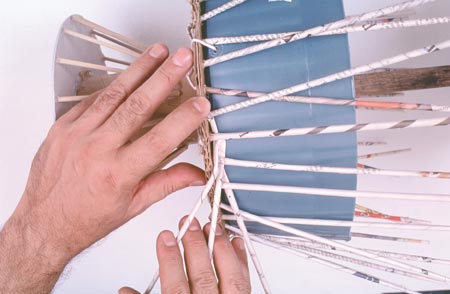 Now, make the second braid at the middle of the bowl. Make sure this braid is level in the middle of the bowl.
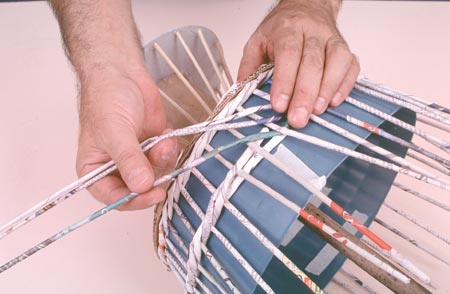 Then repeat the execution of the braid on top of the fruit bowl.
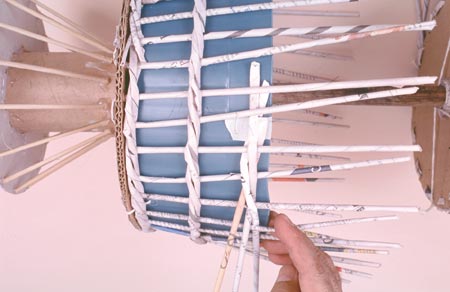

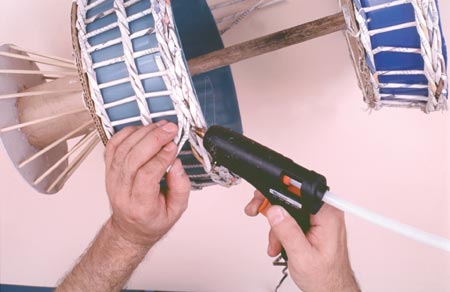 Now, repeat the same process of the braid and finish on the top of the fruit bowl.
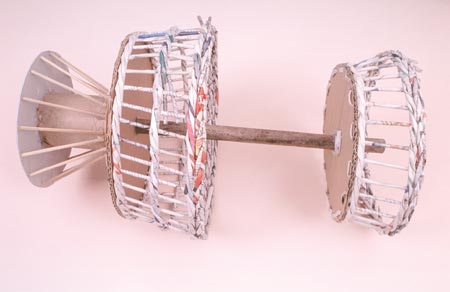 Then, for finishing the lower cardboard spool base, cut a circumference of 20 cm and glue to serve as the bottom base. Next, stick 26 BBQ sticks in the diagonal position mimicking the shape of a cone. Between a toothpick and another there should be a distance of approximately 4 cm.
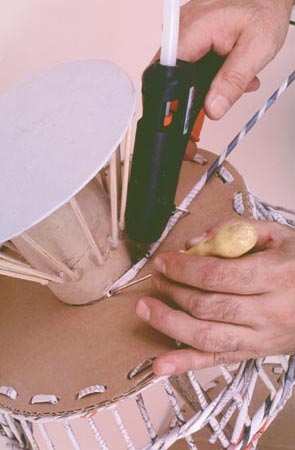 Afterwards, stick a straw next to the cardboard of the first fruit tree and go rolling and tying another 24 straws to serve as fixed.
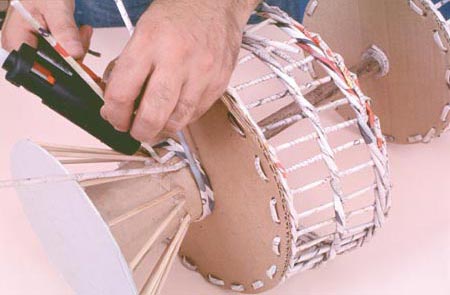 Now, with the same end that you were tying, continue making the weaving, reaching the end make a braid with the tips of the fixed. To finish paint your fruit tree with the latex paint and when it is dry pass the varnish. And it’s ready!
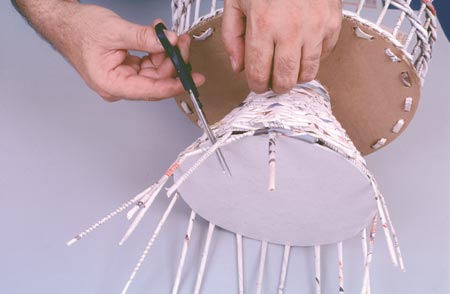
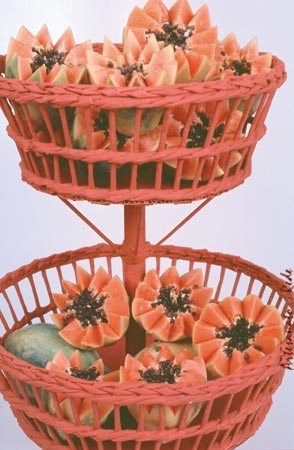 This idea of newspaper fruit was taken from the Solidarium website .
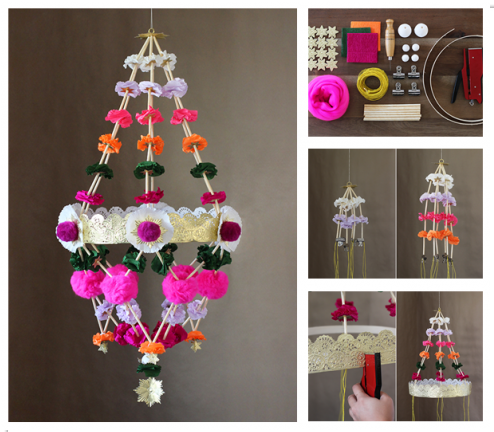

 We’ll start by creating all the components that make up the pajaki. First up are the wool pom poms, which are my favorite new thing to make! Wool roving simply takes the place of yarn, and instead makes for a softer, fluffier pom pom. Depending on the size of the pom pom, you can just pull the roving apart, in pieces, and wrap it around the pom pom maker.
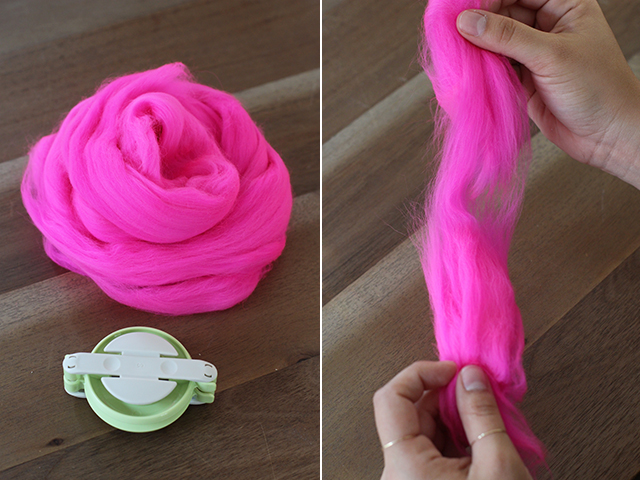 Wrap some roving around one side of the pom pom maker.
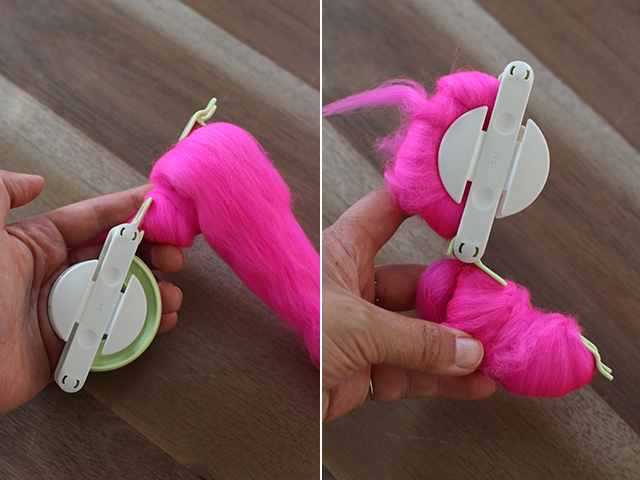 Now wrap the roving around the other side. Cut down the middle.
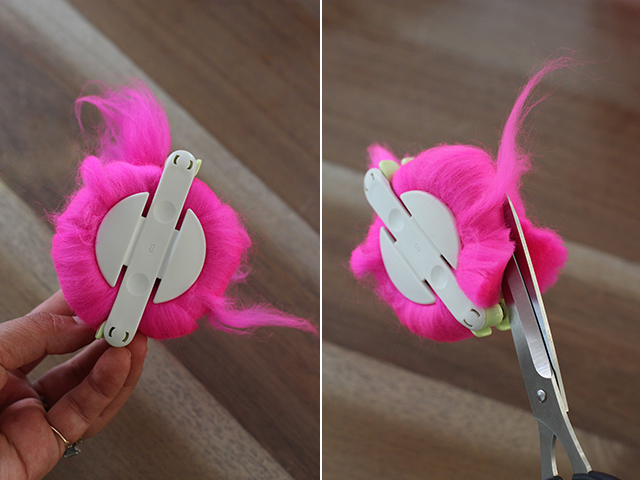 Take a piece of string and wrap it around the pom pom maker and tie in a tight double knot. Remove the pom pom maker from the pom pom.
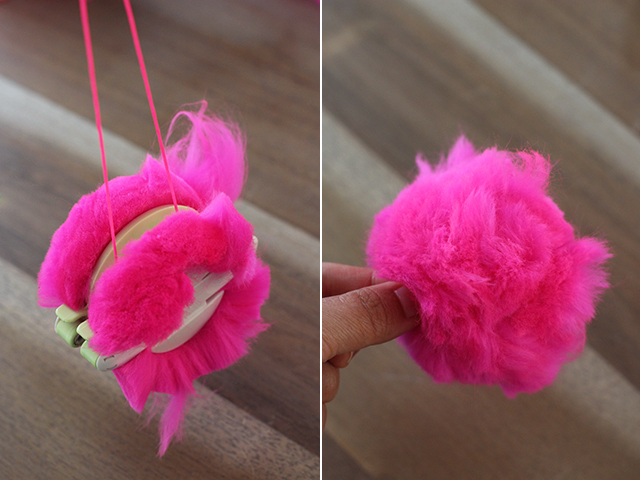 Trim and shape with a sharp pair of scissors and your pom poms are finished! You’ll need at least 6 large pom poms for the pajaki.
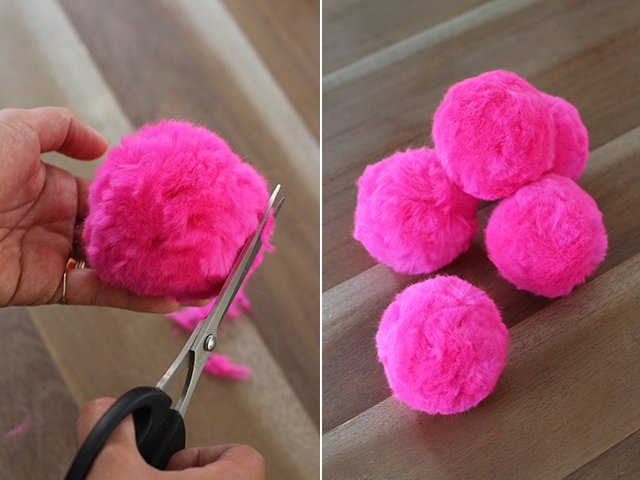 Next up are the flowers, which are made from a few sheets of crepe paper circles. Make a circle template, with a 1″ diameter. Fold a long strip of crepe paper into an accordion fold and using the template, cut the circle shape out. Use a small hole punch and punch out a hole in the middle of circles.
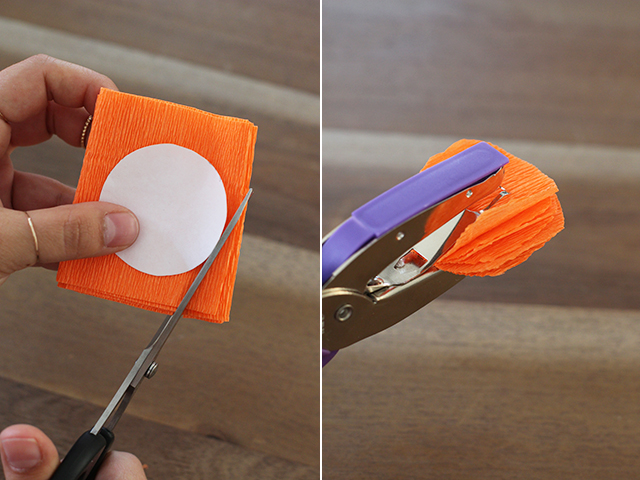 Using a forward and backward motion, stretch the crepe paper apart to create large ripples in the paper. You’ll need at least 250 circles for the pajaki.
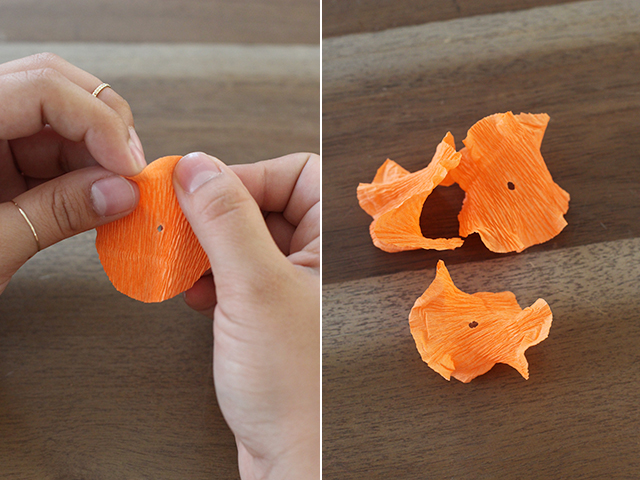 Next are the medallions, which are used on the border of the pajaki and totally optional. Cut a 5 x 1″ strip of paper, against the grain, with a pair of pinking shears. Stretch the paper to create ripples.
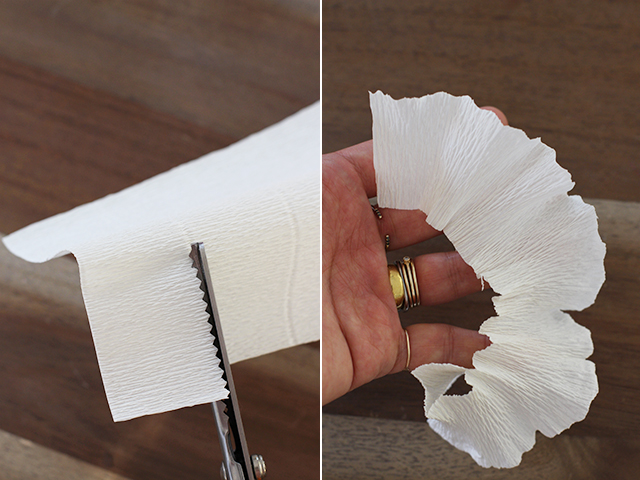 Pleat the paper and create a circle. Staple it closed along the seam and save them for later. You’ll need at least 6.
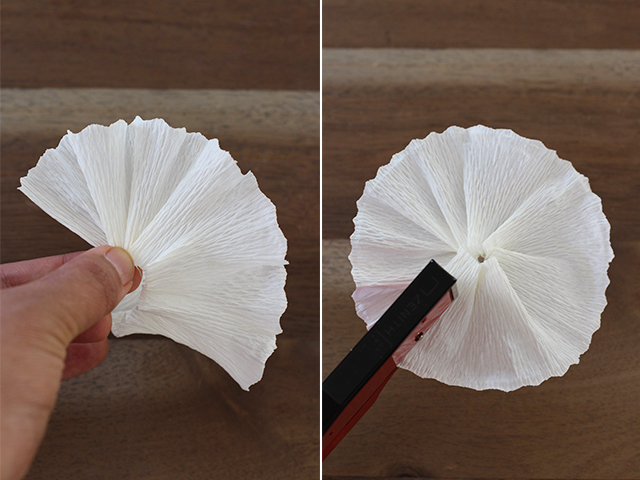 Punch holes in the middle of each mini Dresden rosette. Cut them out to prepare them for use. You’ll need approximately 40-60 pieces.
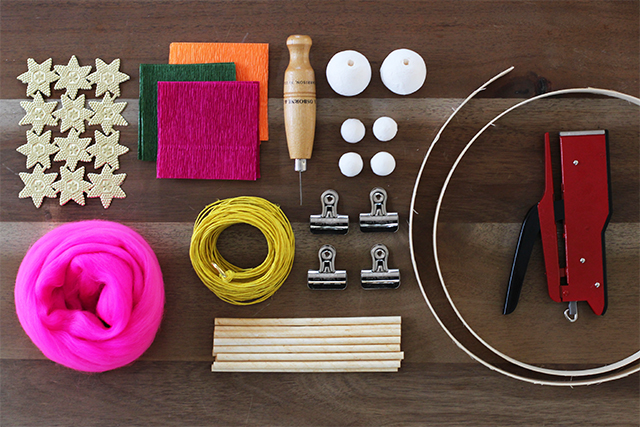
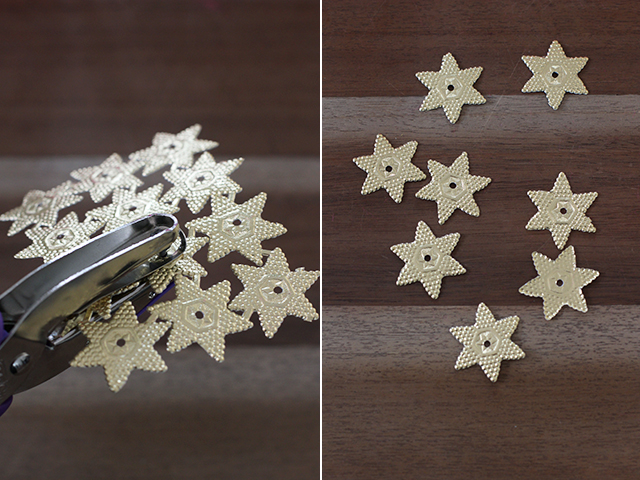 So now you should have ruffled crepe paper rounds in a variety of colors, 6 large pom poms, 6 medium pom poms, Dresden rosettes with holes punched through the middle, paper straws cut in half, 6 large crepe paper medallions and a few strips of Dresden trim.
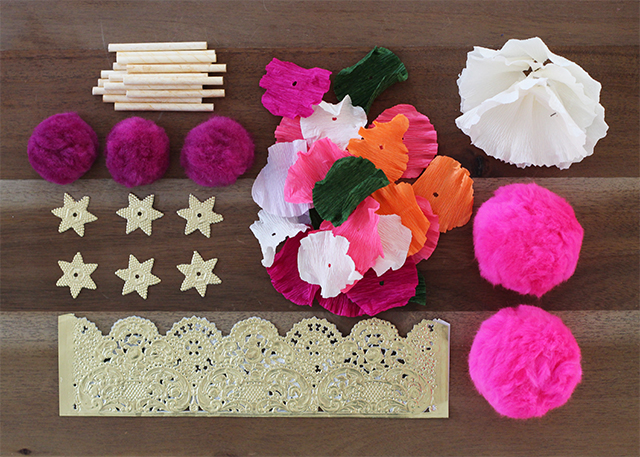 Start by hanging the hoop from the ceiling at eye height. This will make assembling the pajaki very easy. Once it’s hung, you will notice there are 12 strings hanging from it. Thread a large medallion onto all 12 strands, with the pattern facing down.
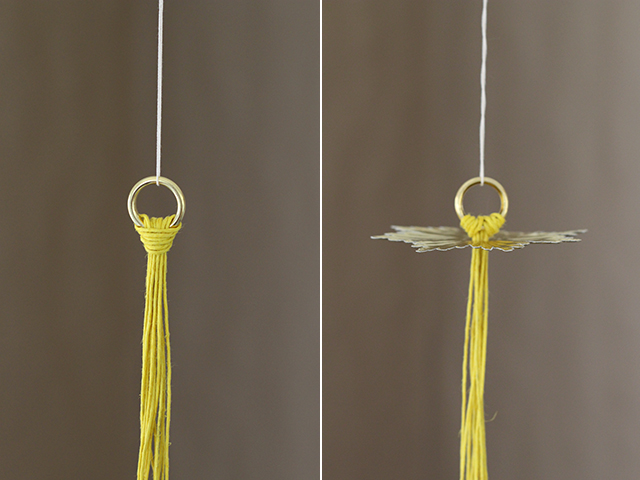 You will divide the 12 strands in to 6 sections by threading on a paper straw onto every 2 strands of string. Use the clips to hold every strand in place while you work. You should have 6 straws stemming from the top of the pajaki.
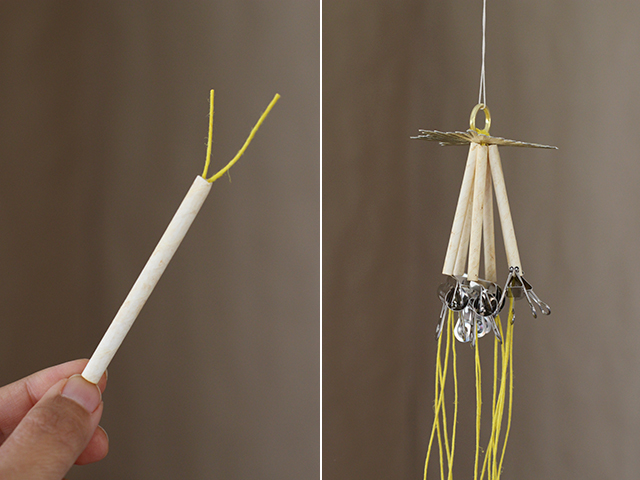 Then thread on 3 crepe paper rounds onto each of the six sections. Finish each set with a mini Dreden rosette, with the pattern facing down.
 Repeat these steps by continuing to add straws, crepe paper and rosettes.
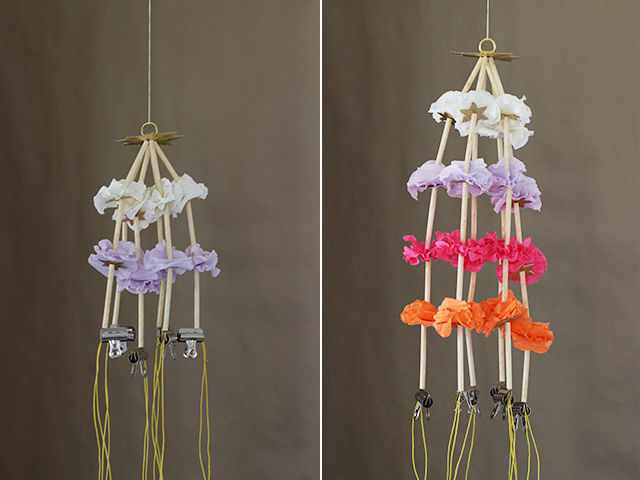 Stop after about 7-8 sections.
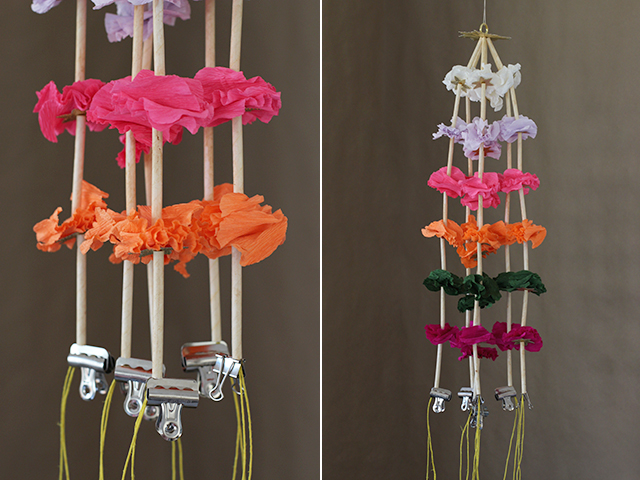 Take the wooden hoop frame and starting about an inch from one end, divide it into into 8″ sections with a hashmark. You should have approximately an inch leftover on both ends of the frame. Overlap the hoop to form a circle and so that the two hashmarks meet.
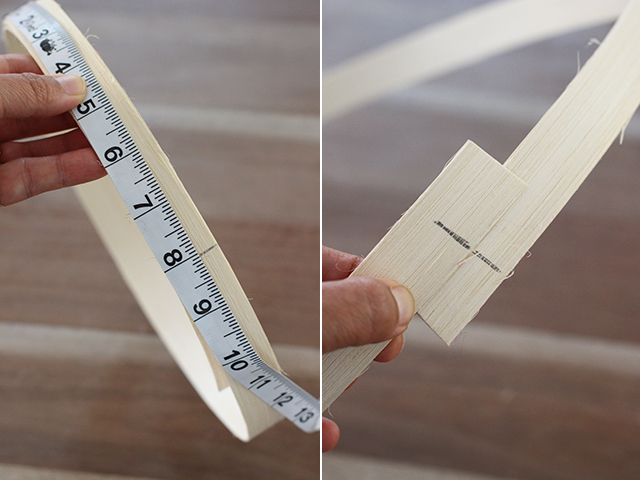 Staple it closed. Match each of the 6 double strands to the outside of the hoop, lining them up against the hashmarks.
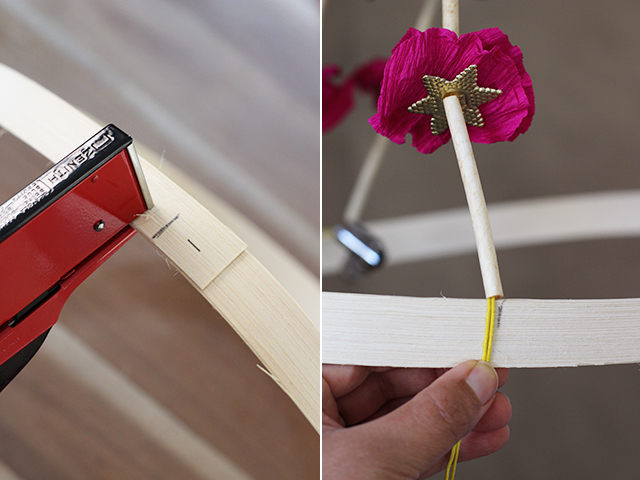 Make sure the straws and flowers are snug and tightened along the strands before stapling them to the hoop.
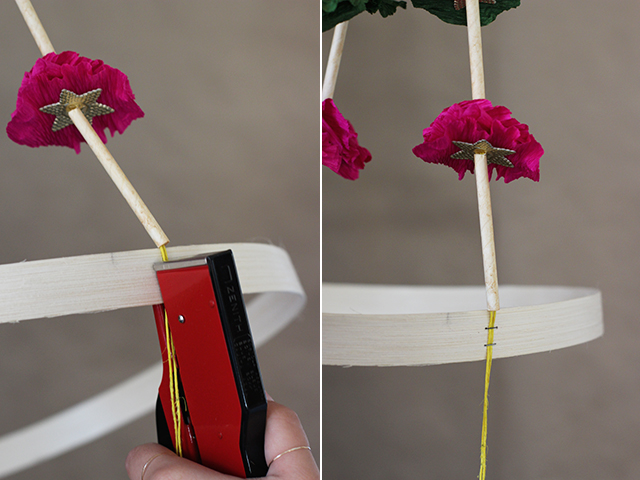 This is what you pajaki should look like thus far.
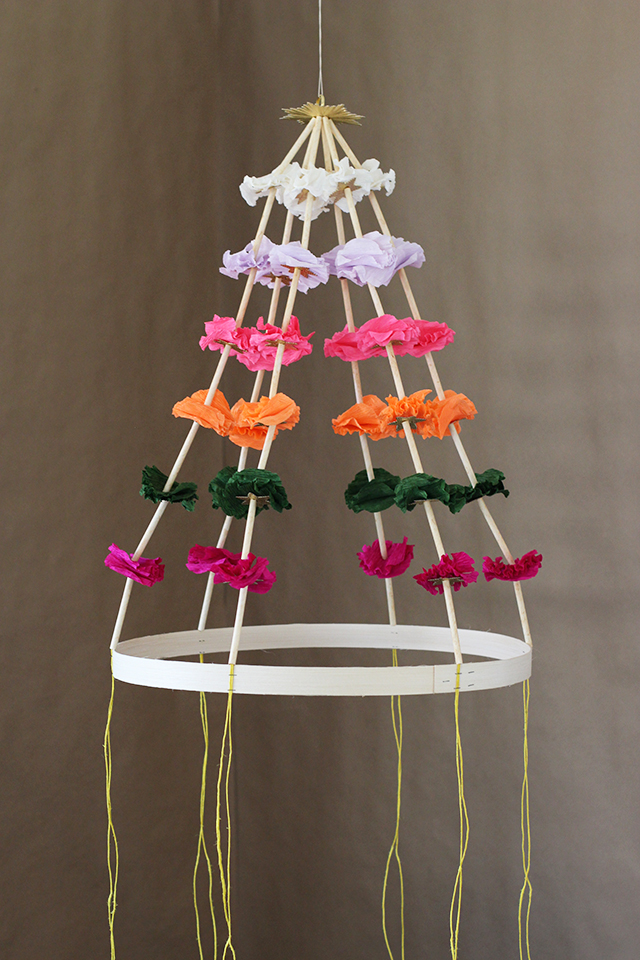 Now cover the wooden hoop by stapling on thick Dreden trim. It’s okay if the trim runs out – simply overlap them at the seam and continue stapling.
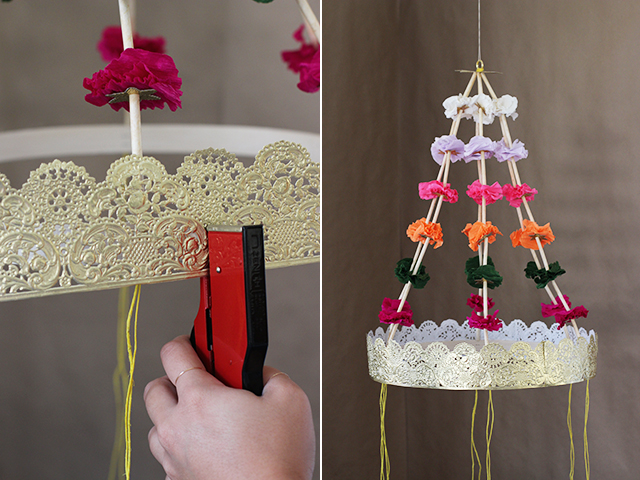 Staple on each of the crepe paper medallions to the 6 sections. Use a hot glue gun to attach the Dresdem medallion.
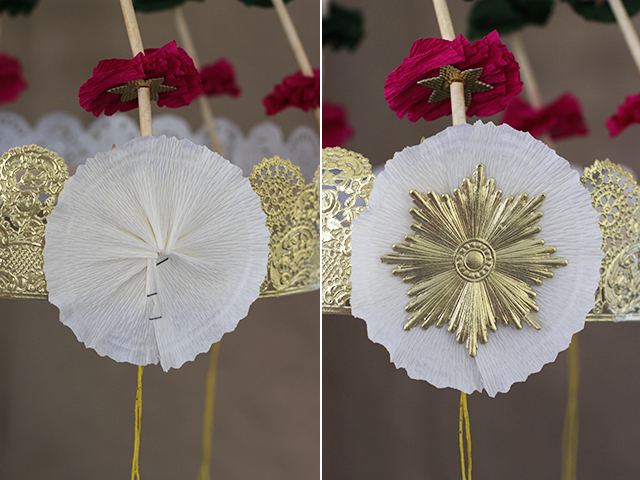 Now glue the pom pom to the center of the medallion. Again this step is totally optional and really, you can do anything to the center hoop like leaving it completely blank or omitting any of the components mentioned above.
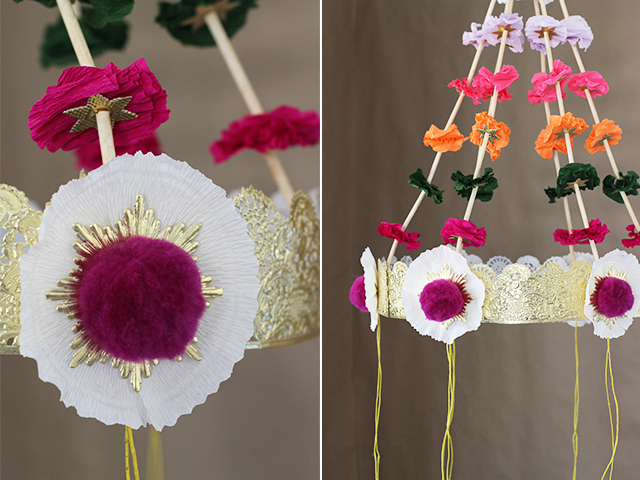 Now take each set of strings, and divide them in half with a paper straw and crepe paper flower on each strand. Bring the neighboring strands together to create a V shape.
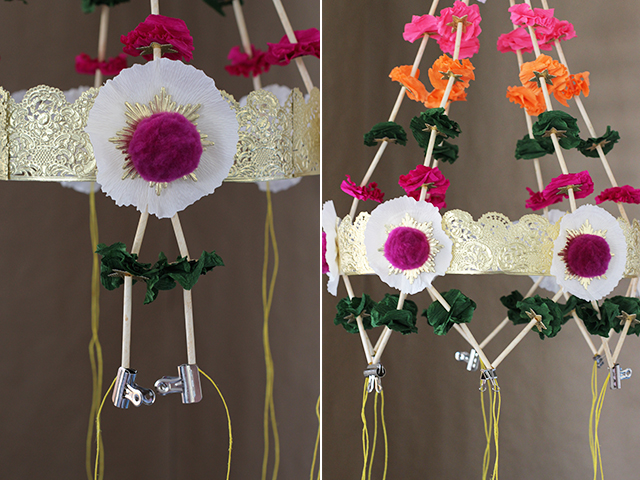 Thread each set of double strands onto a large embroidery needle. Thread the pom pom onto the needle.
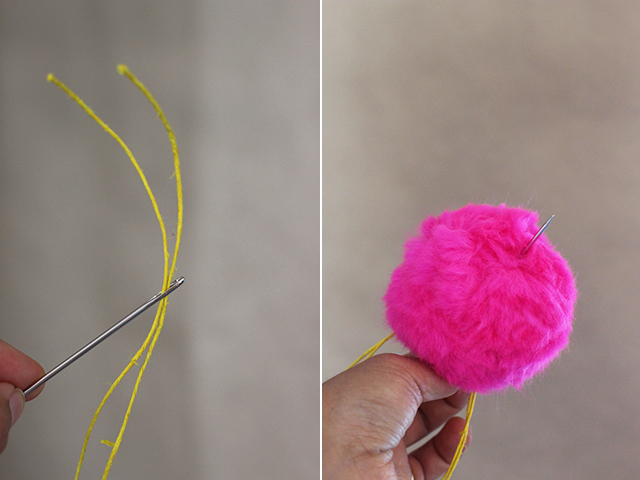 Pull the pom pom up. Again make sure all the straws are taut and evenly spaced.
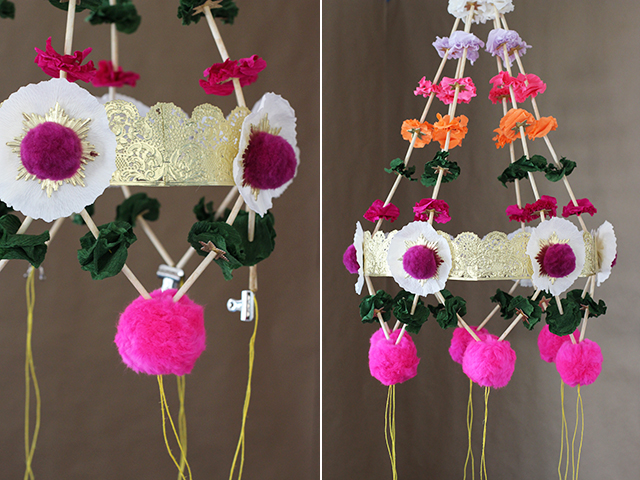 Divide each set again with paper straws, a set of crepe paper flowers and another straw, one on each strand. Put alternating colors on each set so that every other neighboring strand matches in color.
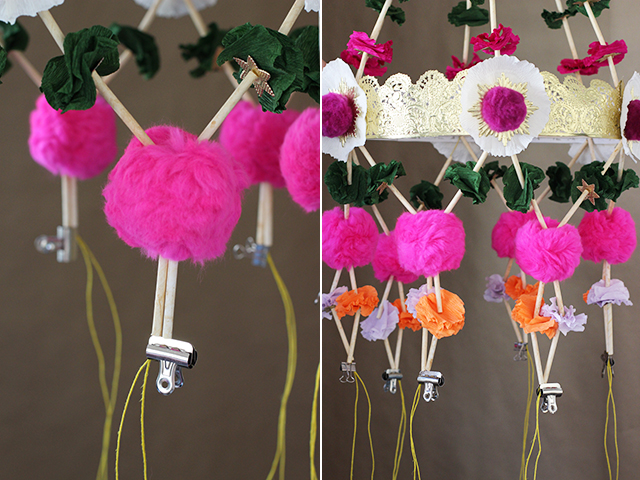 Pull the matching colors together to create a V and bring them all together in the center of the pajaki. String on a large cotton ball to keep it all in place. Adjust the tension and tie into a double knot. Finish it however you wish. I added some Dreden medallions and smaller cotton ball.
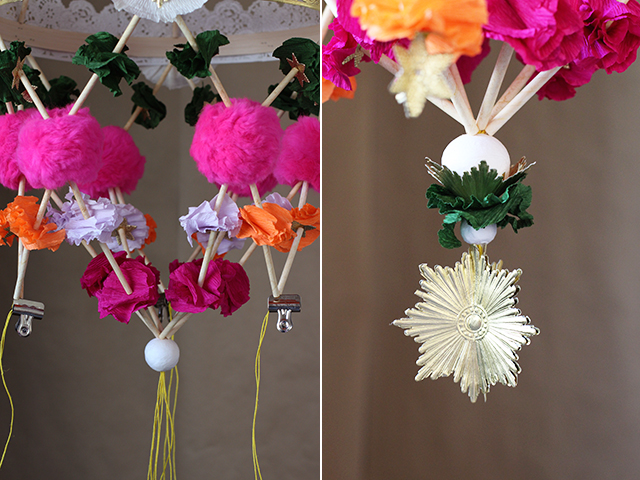 For the outside perimeter, bring the matching color strands together to create 3 Vs. Finish off each set with a small cotton ball, a crepe paper flower, a Dresden rosette and double knot. **Note that I decided to replaced 2 small straws with one large straw here. Remember, there is no real right or wrong way to do this. Play around with the pattern, formation and colors – it will all look beautiful in the end!
 Trim away the rest of the strings and your pajaki is finished!!!
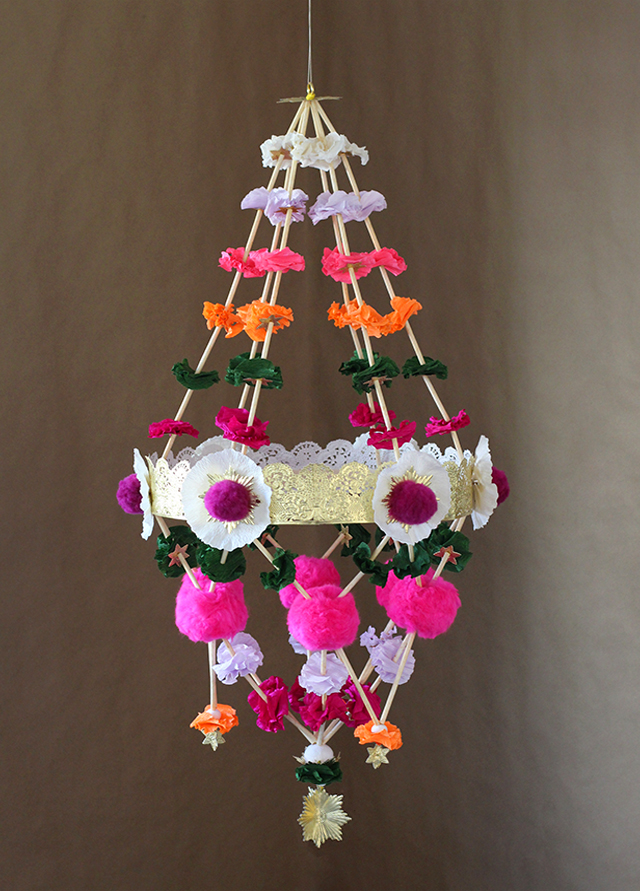 Hang it in a special corner and marvel at it from below. Have fun!!
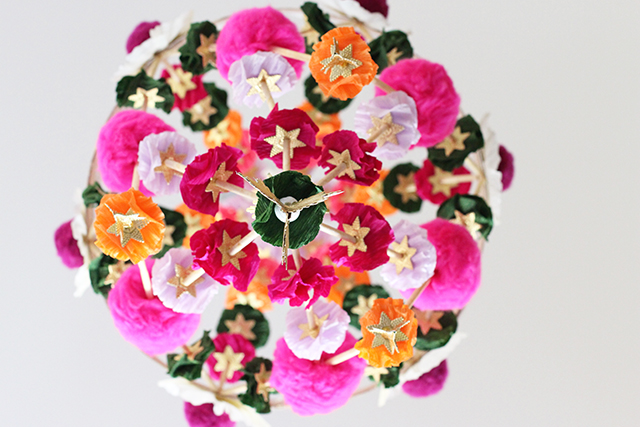 (images by HonestlyWTF)
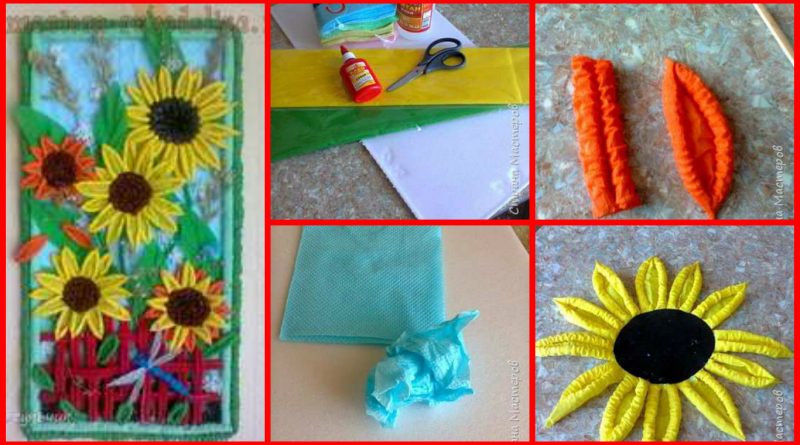
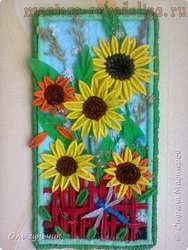
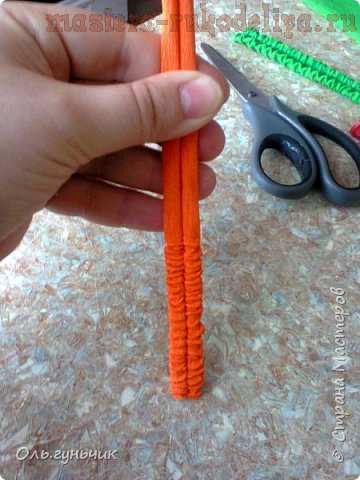
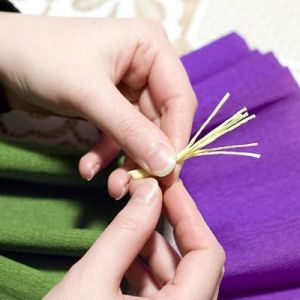
 2. Cut small squares of yellow, cut fringe on them, before reaching the edge of about a quarter of the size.
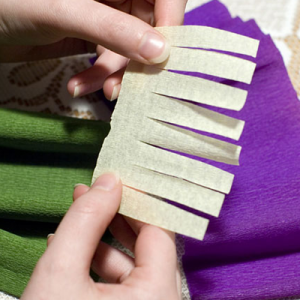 3. We turn off the item in a tube, tighter curl each narrow strip of fringe – it will flower stamens, dipped them in glue.
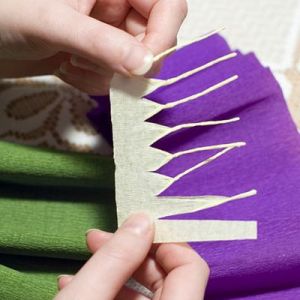
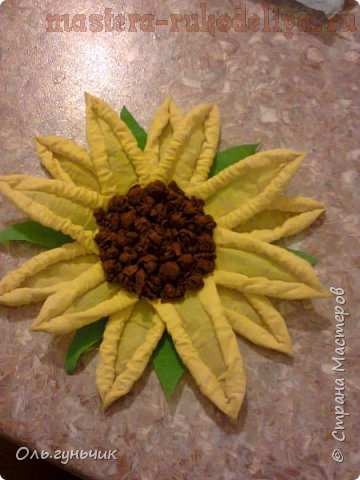
 4. Winding-serdtsevinki stamens of the flower petals, superimposing them and gradually consolidating each subsequent adhesive tab.
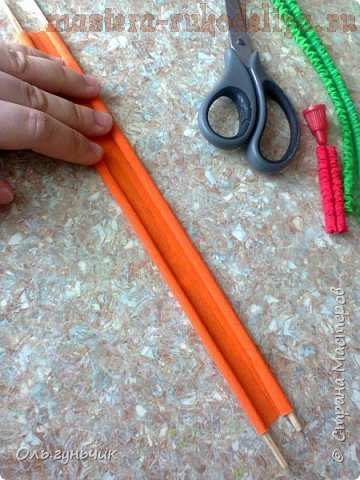
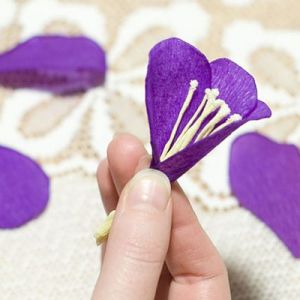 5. Insert the skewer, fixing the petals on a stick with a piece of wire.
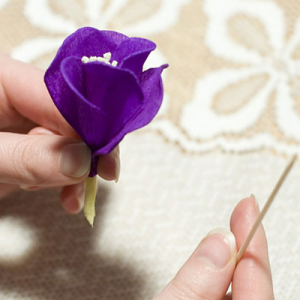
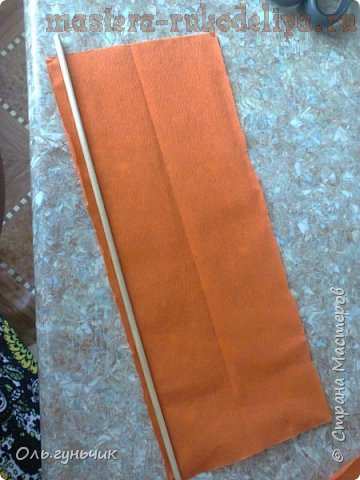
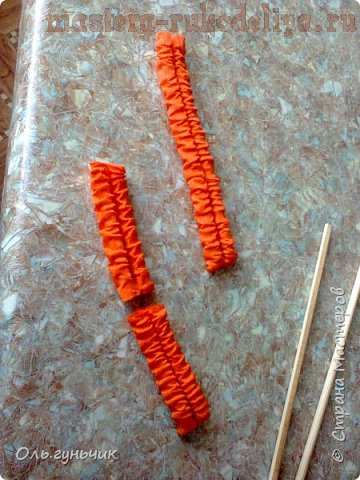
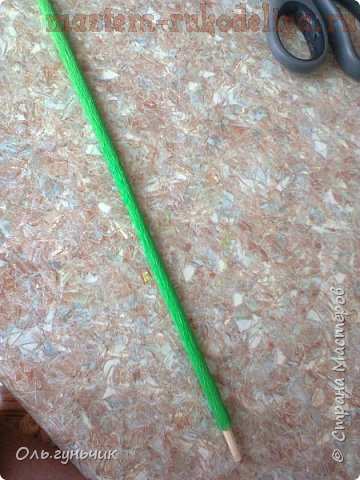
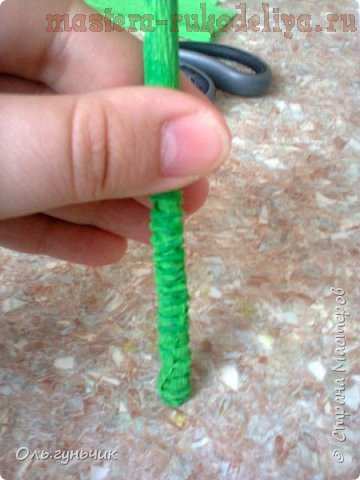
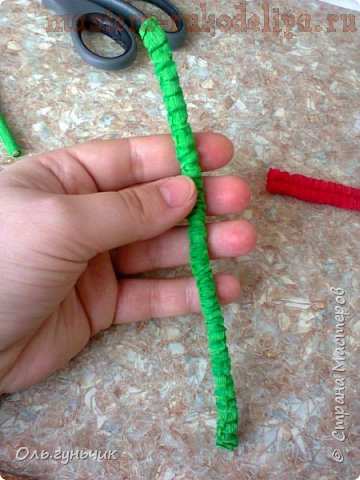
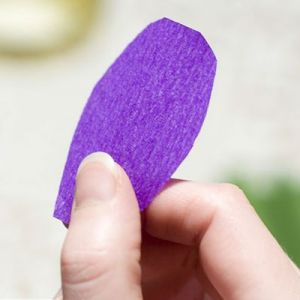
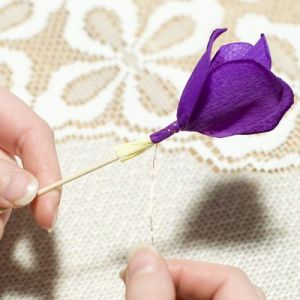 6. Wrapped with ribbon stalk, chopped of green crepe paper.
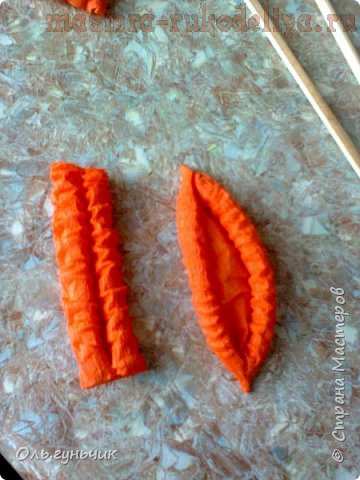
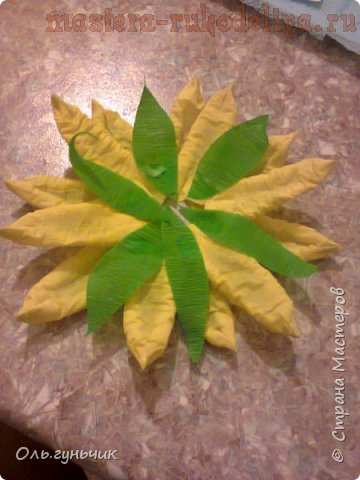
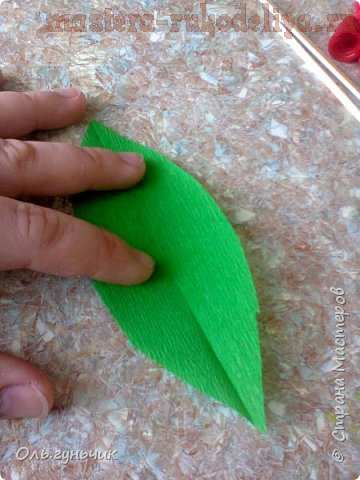
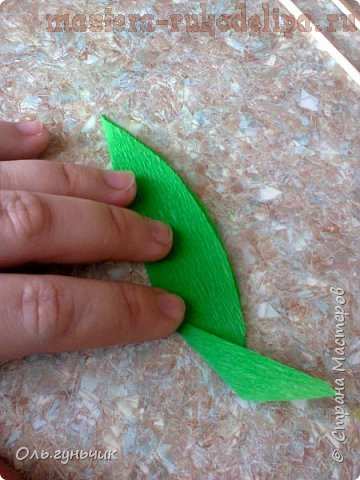
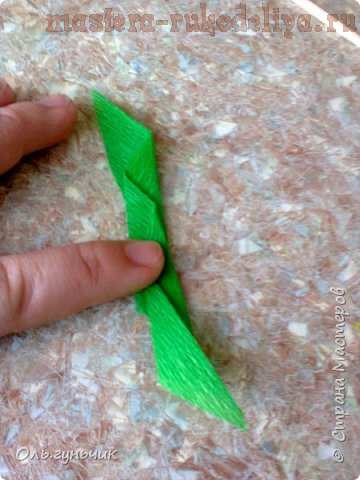
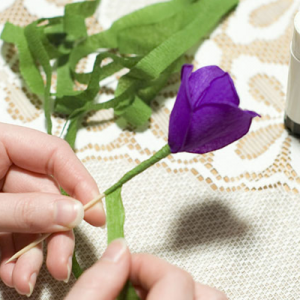 7. Cut pointy parts for leaves. To make bulk leaflets lightly wrap the edge of the perimeter.
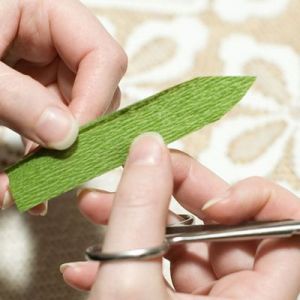
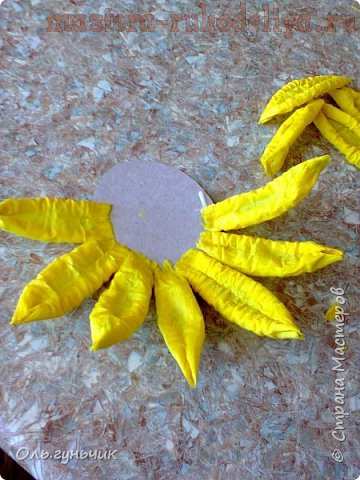
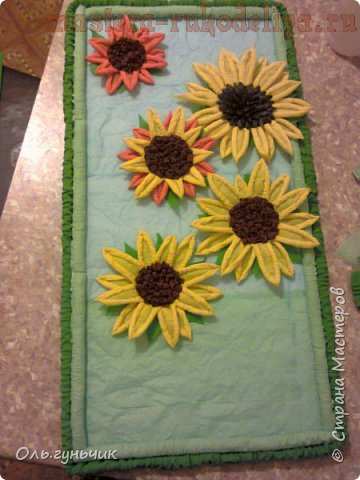
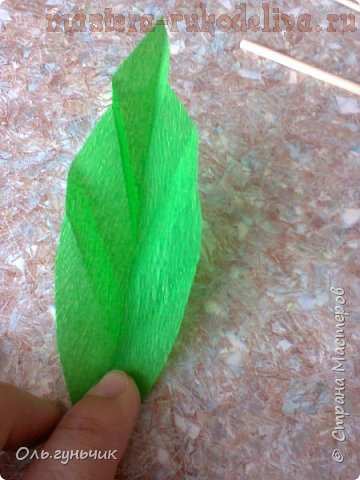
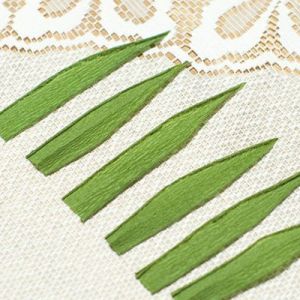 8. Imposing leaves at each other, glue on each stem leaves 3-5.
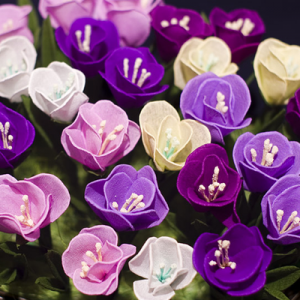
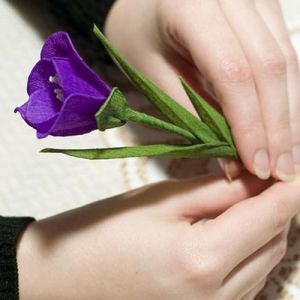 Our MC for the crocuses used corrugated paper in different shades of blue, but you can use paper of different colors.