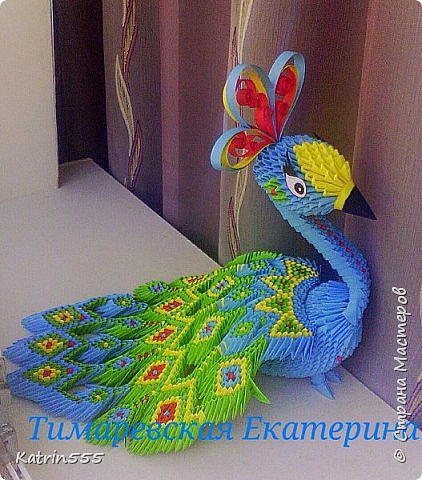
We need:
- blue 1253;
- green 678,
- yellow 371,
- rose 93;
- Total: 2395.
- The size of the modules 1/32.
Let’s start with the body.
Putting 2 rows of 10 modules, make a chain.
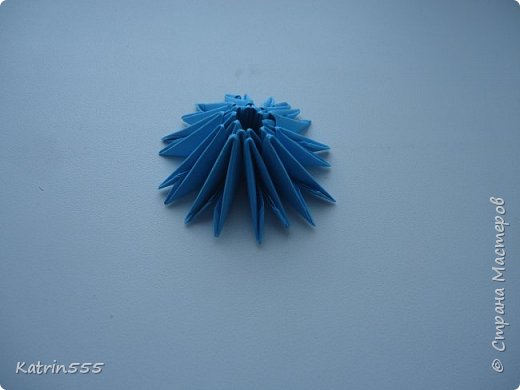 3 series of 20 moduley.Odevaem way (picture shown in a different color).
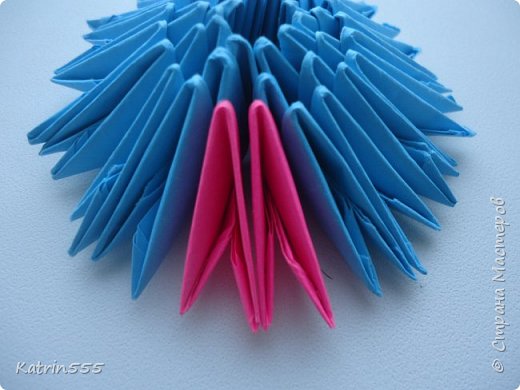 4,5,6,7,8,9y ranks dress ….. 20 modules in each row.
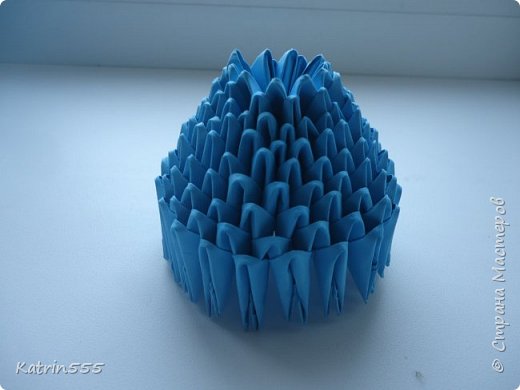 In a series of dress 10 m 3 modules typically ray of a 2 by 2, 3, usually 2 2 ray of, etc. It turns out 25 pieces. in the row.
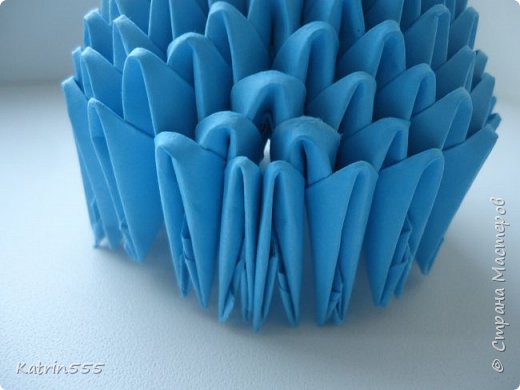 11,12 and 13 in the series of 25 modules, 14th series of dress 18 modules, 14 ray of reserve.
Next to these 18 dress 17 modules, and then again 18, then 17 and 18y number again 18 modules, 19 series of 17 modules, 20y- 18 modules.
I do so, leaving a hole in the trunk for hvosta.Vy and can not bother to wear until the 21st series of 25 modules.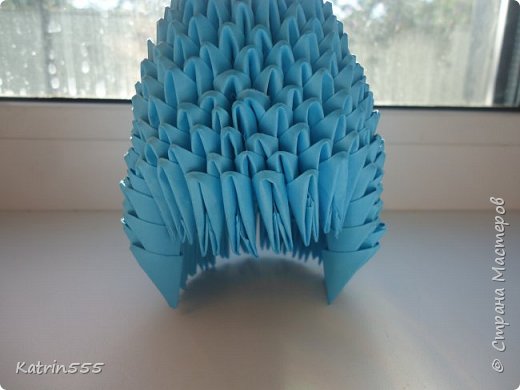 21 and 22 series in 30 moduley.Vot so looks a hole in the trunk.
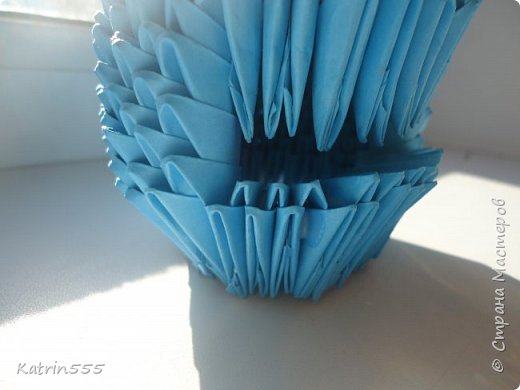 23rd series of dress one ray of module 3, poluchaetsya 20 modules ryadu.Po middle one pink dress.
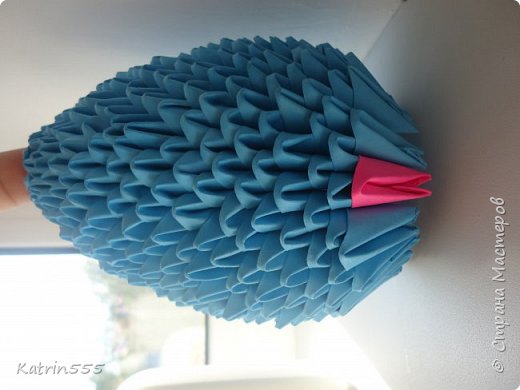 In the 24m row 1 module pink dress pink 2, the other 18 blue.
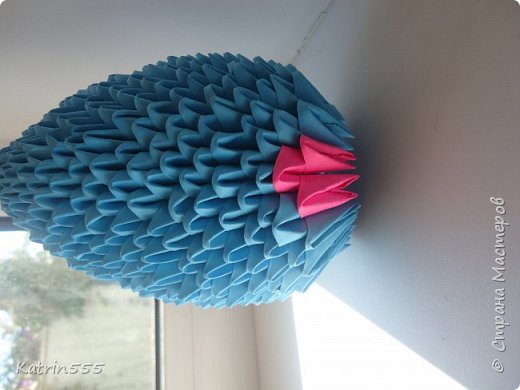 25th number 1 pink, 19 sinih.Odevaem way.
Our body is ready.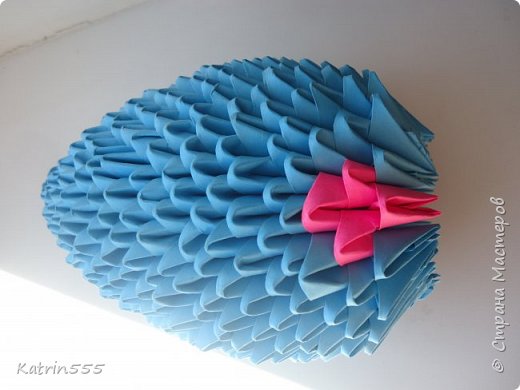 We proceed to the neck.
Putting 4 ryada.V first row of 8 modules, a second series of 9 modules, the third row again 8 modules, the fourth series of 9 modules, the center 1 pink.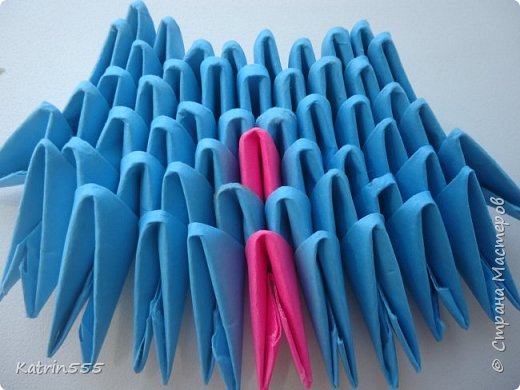 7th series of 10 blue.
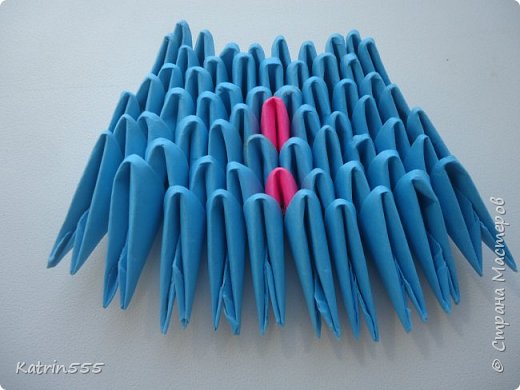 8th series of 8 blue, 1 pink.
9th number 10 blue.
10th series of 8 blue, 1 pink.
11th number 10 blue.
12th series of 8 blue, 1 pink.
13th number of the first module of a three ray of the second, too, three ray of 4 module typically, 7th module as well as the first ray of a three and three-eighth ray of. Thus, among the leaves 8 modules.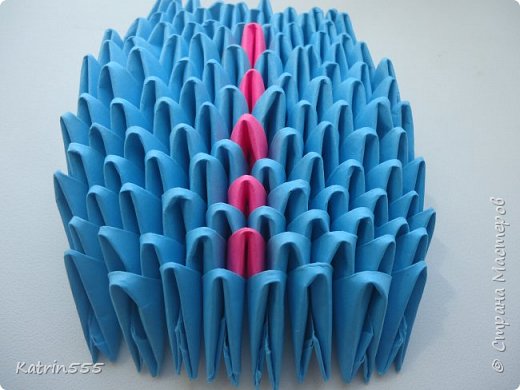 14th number again reducing, 1 pink dress in the usual way and 4 blue on the sides of each ray of three. Leaves 5 pieces in a row.
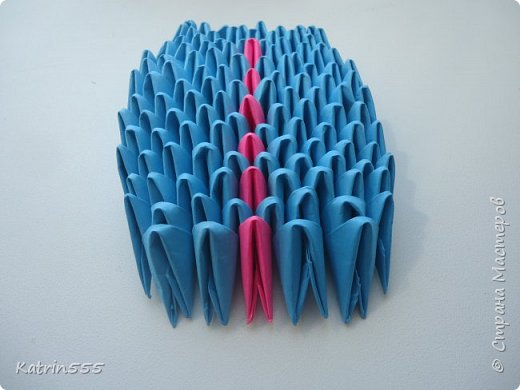 15th number 6 blue dress as usual.
16th number 1 pink, 4 blue.
17th number 6 blue.
18y number 1 pink, 4 blue.
19y number 6 blue.
20th number 1 pink, 4 blue.
21y number 6 blue.
22nd row 1 pink, 4 blue.
23rd number 6 blue.
24y number 1 pink, 4 blue.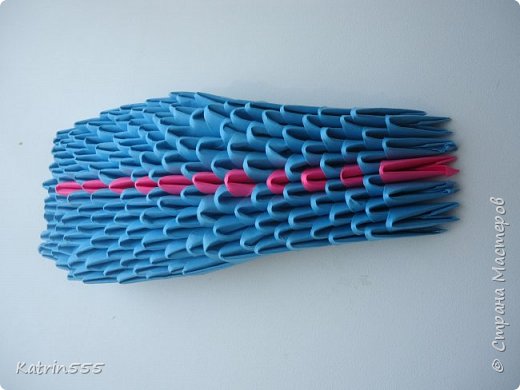 25th series make the cut, 4 blue dress.
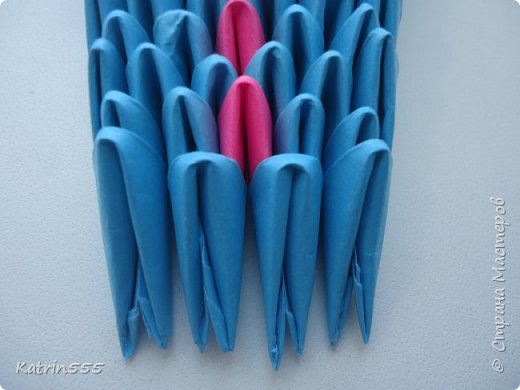 26th number 1 pink in the center, 2 blue on the sides.
27y number 4 blue.
28y number 1 pink, 2 blue.
29y number 4 blue.
30th number 1 pink, 2 blue.
31y number 4 blue.
32nd number 1 pink, 2 blue .
33rd number 4 blue.
34th number 1 pink, 2 blue.
35th row 4 blue.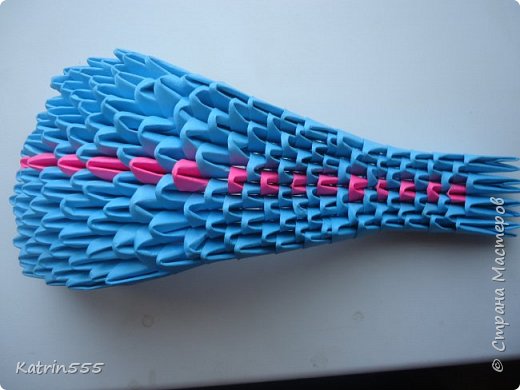 36th series of pink in the center, 2 extreme dress every 3 luchika.Takim way out in a series of 3 shtuki.Sverhu on them in the middle, 2 blue dress.
Neck ready.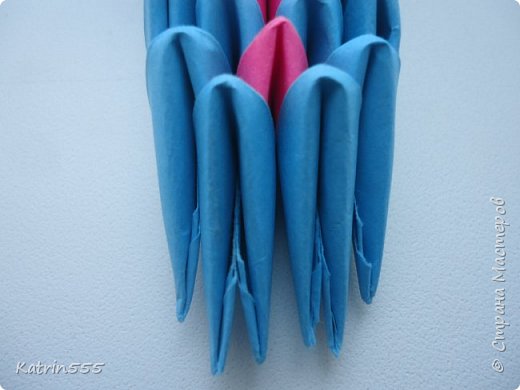 Now head.
Take the 13 units, 13 more top dress, but the short side of the module naruzhu.Kazhdy better prokleivat.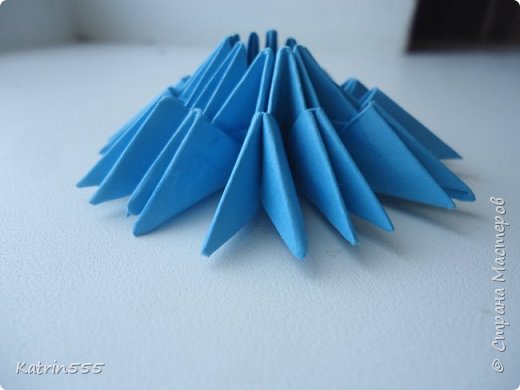 holding the edges to turn out blank.
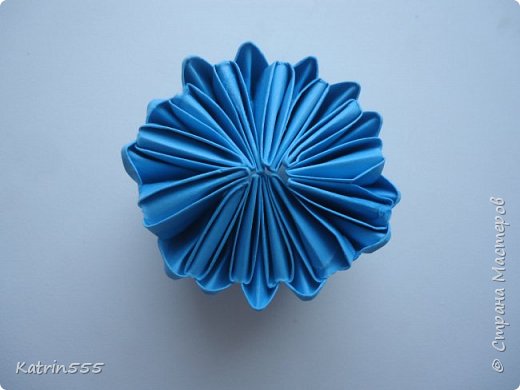 The third and fourth series of 13 pieces each.
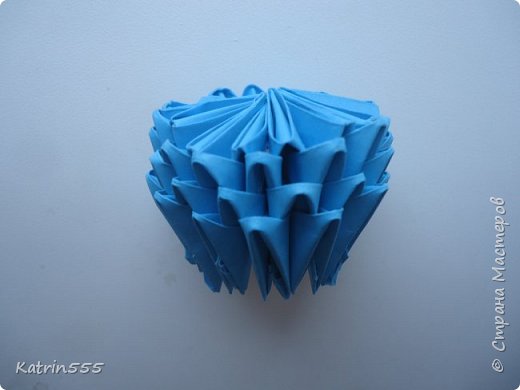 In the fifth row we add 4 modulya.Odevaem 3 modules as usual, 2 modules in the ray of 2, 3, as usual, the ray of 2 to 2, etc. At the other photo shows tsvetom.Vyhodit 17 pieces in a row.
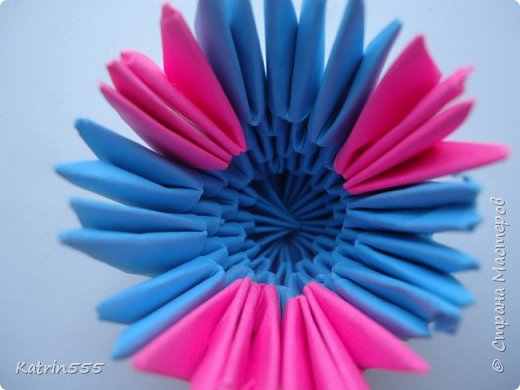 In a series of 8 blue 6m modules, 1 green, 7 blue, 1 green.
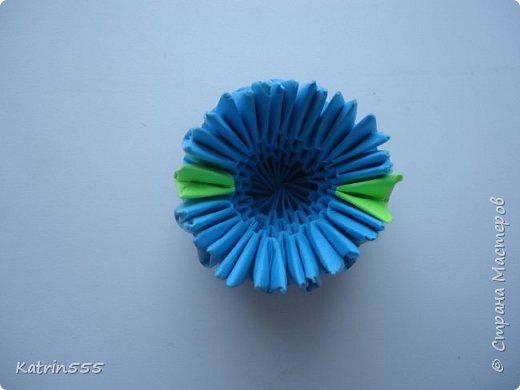 The 7m number 2 green, 7 blue, 2 green, 6 blue.
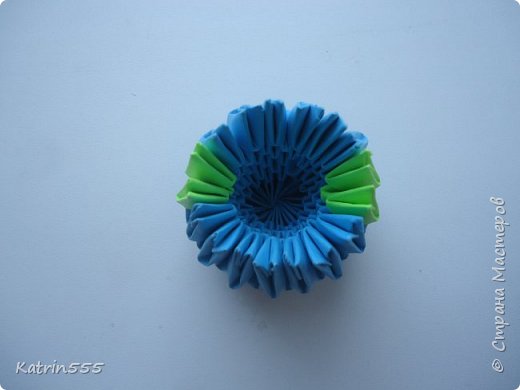 In the 8th row 1 green, 1 pink, 1 green, 6 blue, 1 green, 1 pink, 1 green, 5 blue.
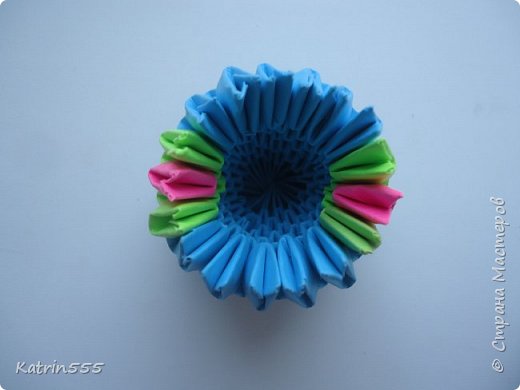 9th row 2 green, 3 blue, 1 yellow, 3 blue, 2 green, 6 blue,
10th number 1 green, 3 blue, 2 yellow, 3 blue, 1 green, 7 blue;
11th series of 3 yellow, the other blue;
12th series 4 yellow;
13th series of 5 yellow;
14th series go to umenshenie.Odevaem 4 yellow, every ray of module 3, blue dress like obychno.Vyhodit 15 pieces in a row.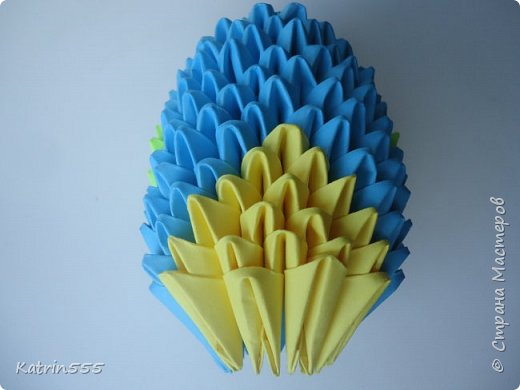 15th row 5 yellow, 2 blue dress on the sides as usual, and 4 blue dress from the bottom every 3 luchika.Vyhodit 13 pieces in a row.
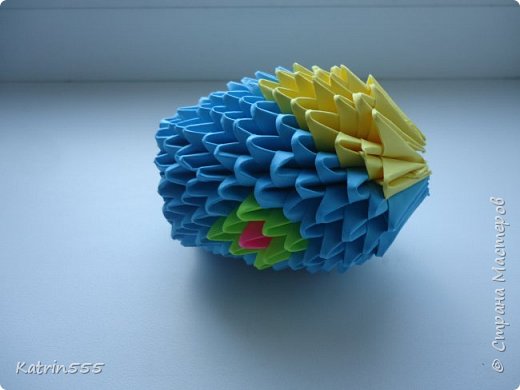 And the last, 16th ryad.Odevaem yellow 4 modules, each ray of 3, 7 as the blue obychno.Golova gotova.Oformim later)
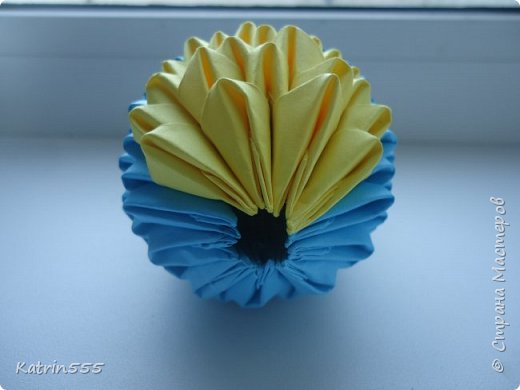 We proceed to the tail.
Collect 3 ryada.V the first 19 units, the second series of 18 modules, the third 17 units.
!!! Each module prokleivat PVA better, but in this case the tail once, during assembly, it is necessary to curve shape.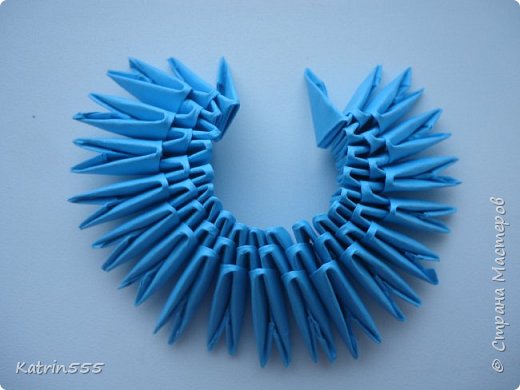 4th series of 18 yellow.
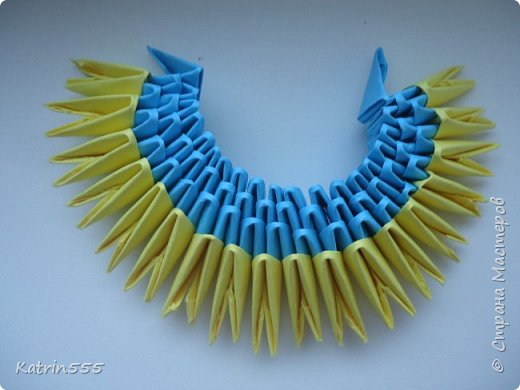 5th row 1 blue, 1 yellow, 3 green, 1 yellow, 3 green, 1 yellow, 3 green, 1 yellow, 3 green, 1 yellow, 1 blue.
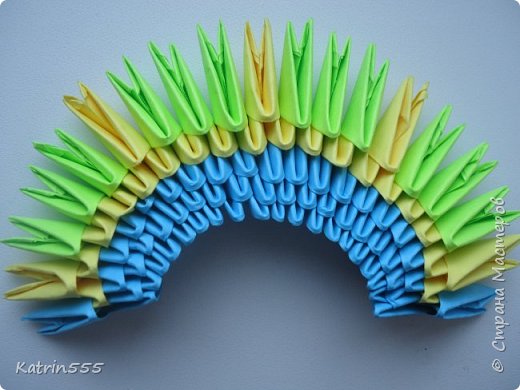 6th row 1 blue, 1 yellow, 2 green, 2 yellow, 2 green, 2 yellow, 2 green, 2 yellow, 2 green, 1 yellow, 1 green siniy.Mezhdu a pink paste.
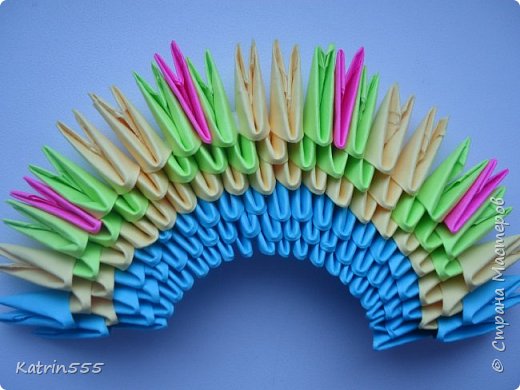 1 blue, 1 yellow, 2 green, 1 yellow, 1 blue, 1 yellow, 2 green, 1 yellow, 1 blue, 1 yellow, 2 green, 1 yellow, 1 blue, 1 yellow, 2 green, 1 yellow, 1 blue .
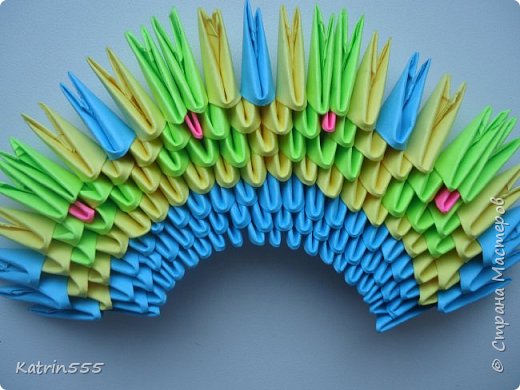 1 blue, 1 yellow, 1 green, 1 yellow, 2 blue, 1 yellow, 1 green, 1 yellow, 2 blue, 1 yellow, 1 green, 1 yellow, 2 blue, 1 yellow, 1 green, 1 yellow, 1 blue .
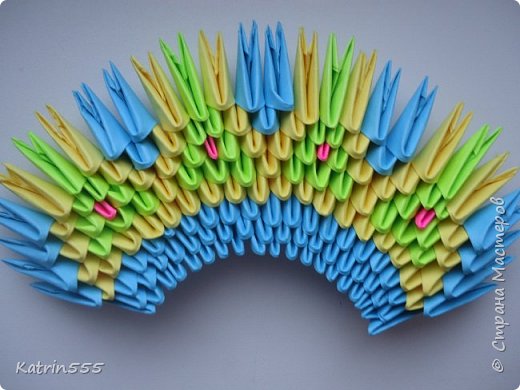 1 blue, 2 yellow, 1 blue, 2 ray of missing, again one blue, etc.
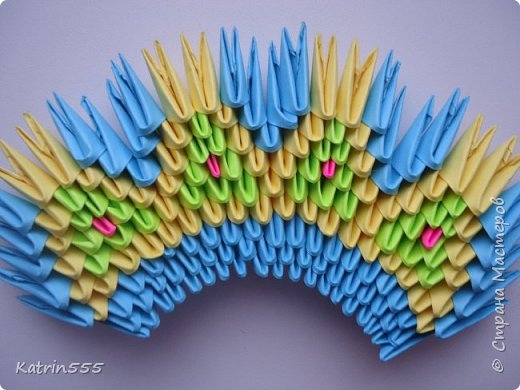 on top of the yellow dress one yellow, one on each side of the blue.
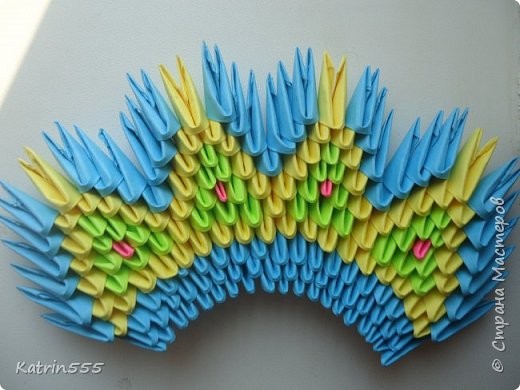 Top two blue on them one by one.
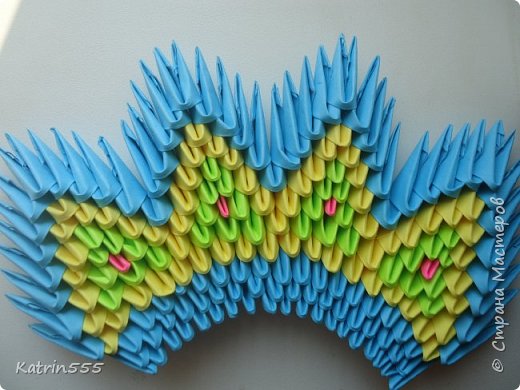 Make peryshki.Odevaem 1 blue, 1 green, 1 blue, 2 on top of the blue, 1 green on them.
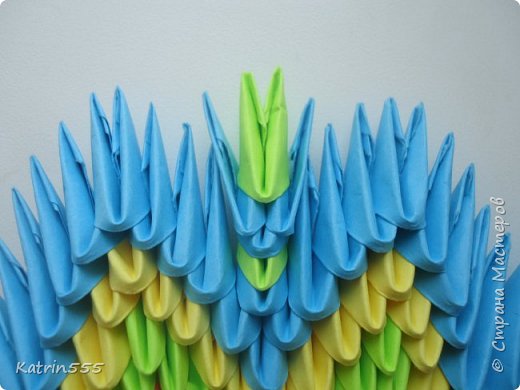 Next to the green, one blue dress on a blue ray.
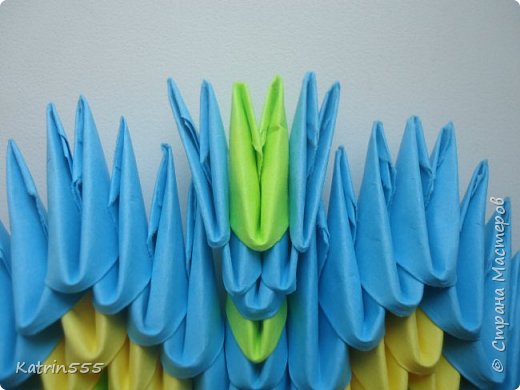 Top two green and blue on the sides as in the previous ryadu.Sverhu one yellow to green, flanked by the green and one blue.
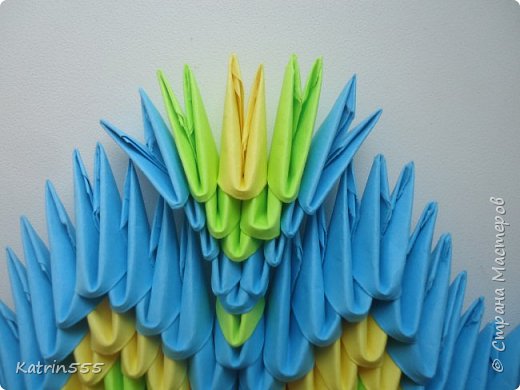 Top 2 green, next to the blue.
 Next 1 green, next to the blue and top them sinih.Delaem 2 of 3 more.
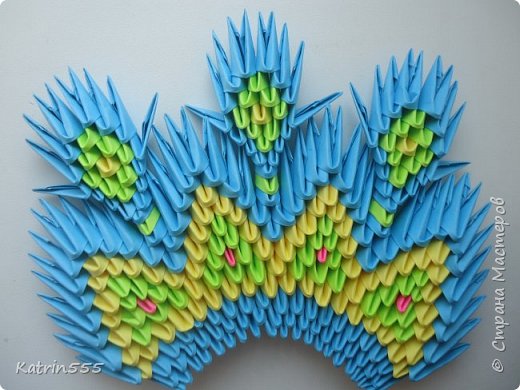 Now green peryshki.Odevaem one module 2 blue green, then one again, 2,1,2,1,2.
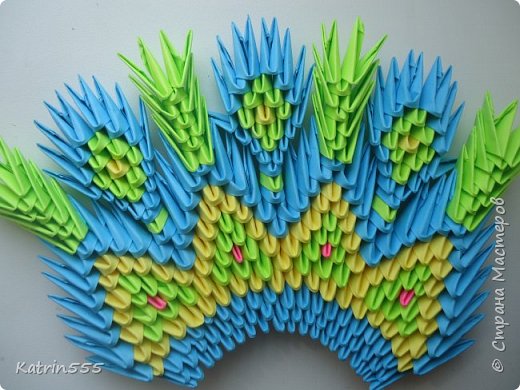 Dress 2 green yellow and one on each side of the green, then yellow, and the top two on the sides of the green.
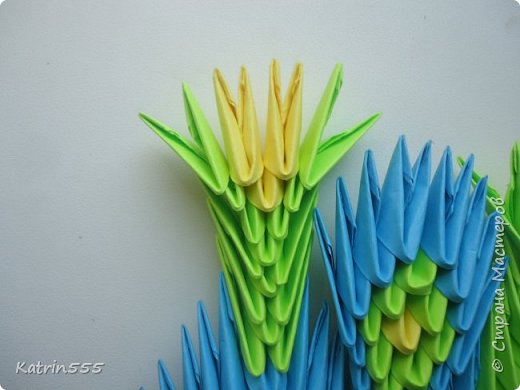 In the center of the blue near yellow, flanked by two blue zelenye.Sverhu next yellow on the sides of the green.
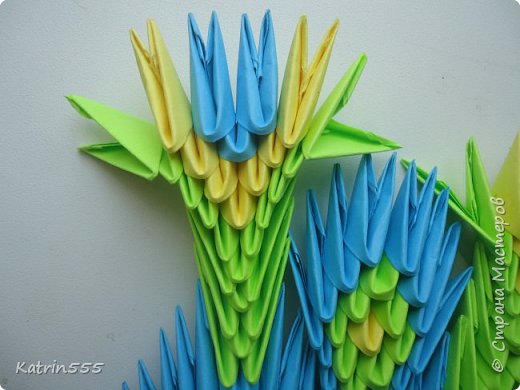 Then dress the center 1 pink, next to blue, then yellow and sides zelenye.Sverhu 2 blue, 2 yellow, 2 green, then blue 1, 2 yellow, 2 zelenyh.Posle 2 yellow, 2 green above 1 yellow, 2 green , 2 green top and the top 1 of 4 zelenyy.Delaem.
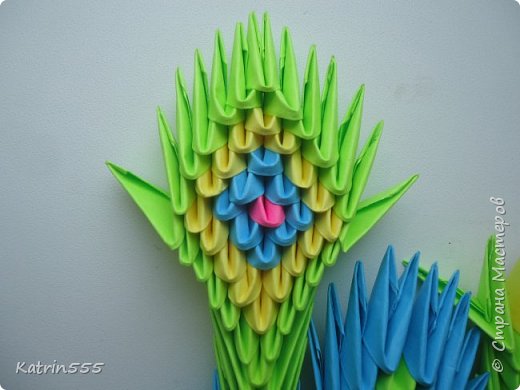 Nearby peryshki.Odevaem 2 blue, they are green, two blue, green, 2 blue, green.
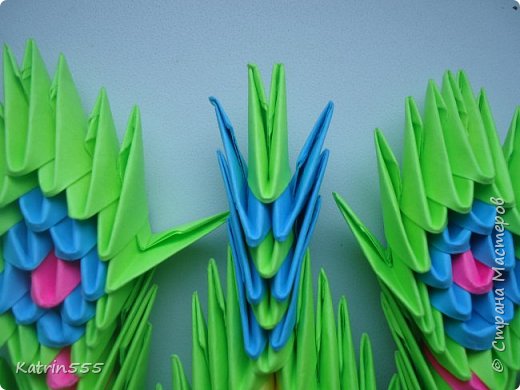 On each side of the green 2 blue, 2 green on, 2 blue, above the yellow, 2 green, 2 blue, 2 green on, 2 blue, still above the green and 2 blue, 2 blue above, the uppermost one of siniy.Delaem 3.
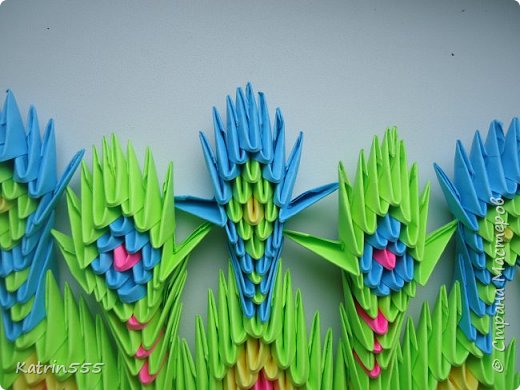 On the lower two feathers that in the center, dress 2 blue, 1 green, 2 blue, 1 green.
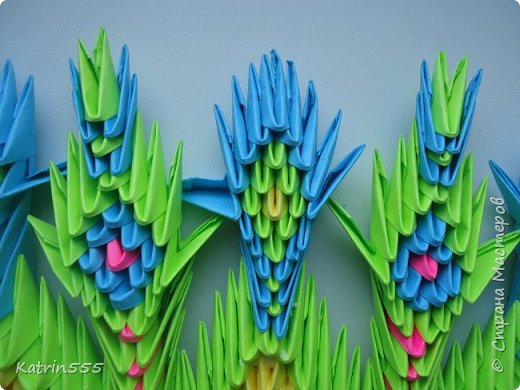 Making 4 arochki.V one arch modules 5 on one side, five on the other and one in the center.
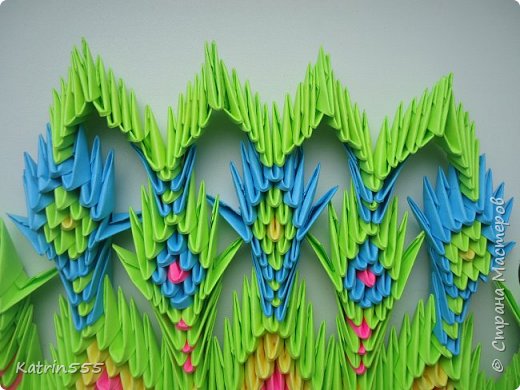 Top blue dress.
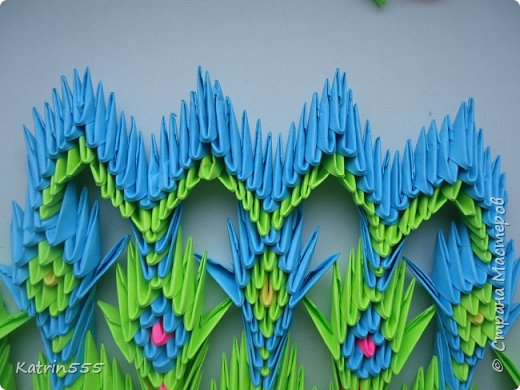 In the center of a pink dress 1, 2 above zelenyh.Posle 1 yellow, 2 green, then 2 yellow, 2 green after 1 pink, 2 yellow and 2 green.
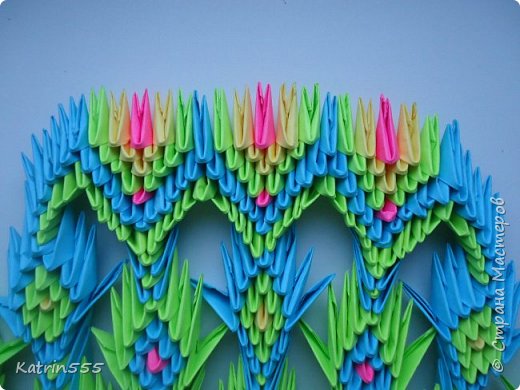 Then, on top of 2 yellow, 2 green above 1 yellow, 2 green, 2 blue, 2 green after 2 blue, then 1 green, 2 blue, 2 blue and on the tip 1 siniy.Takih 3 pieces.
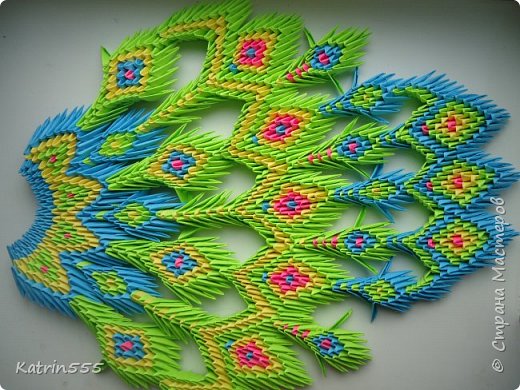
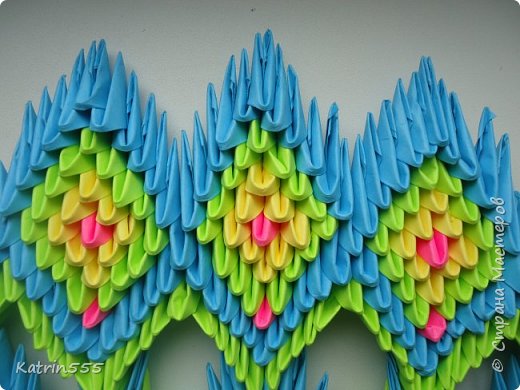 And here is our little tail))
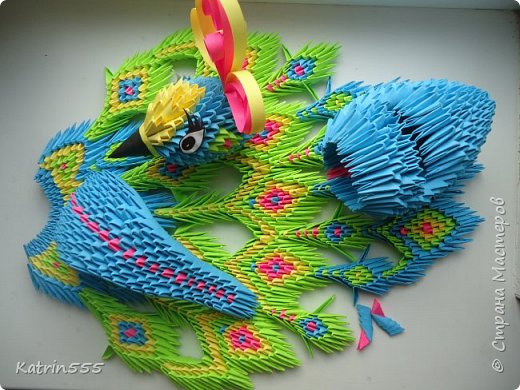
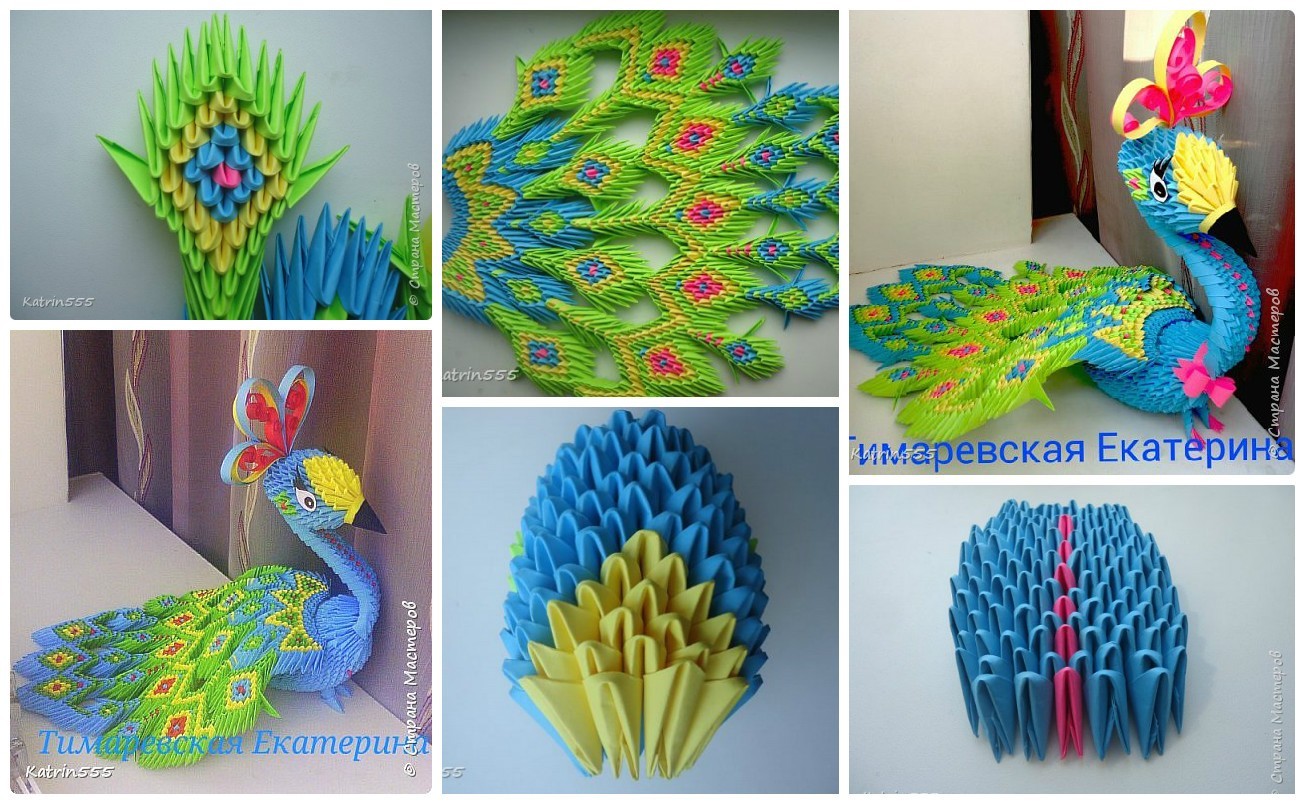
 That’s all detali.Prikleivaem beak, eyes, hoholok.Soedinyaem all parts with Thermo)
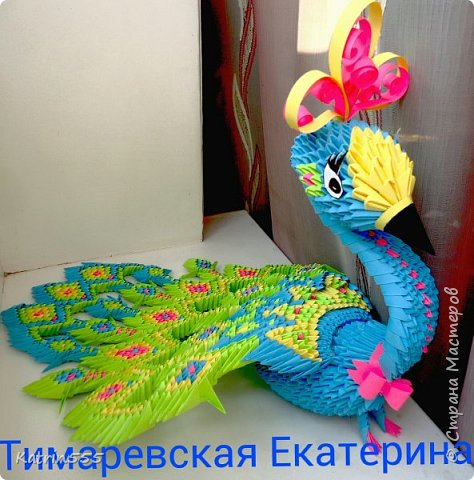
 Our peacock 🙂
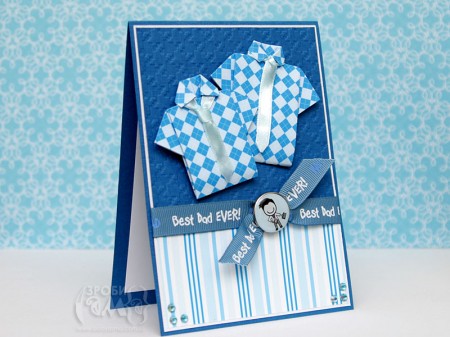
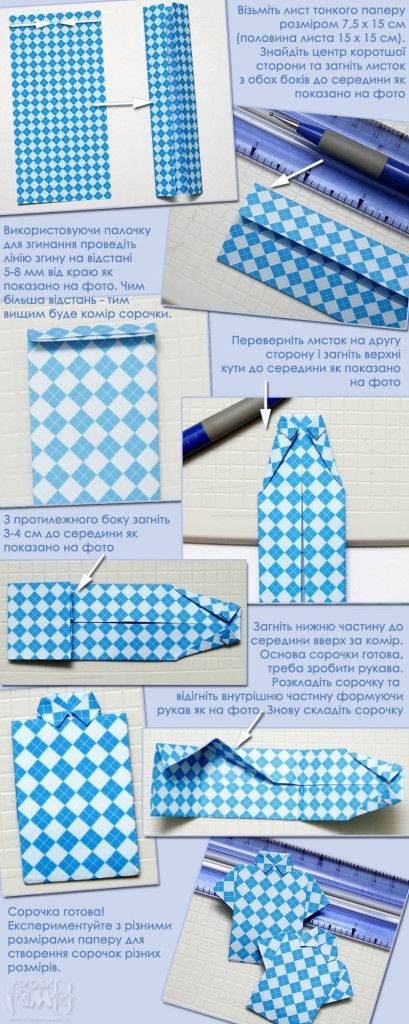
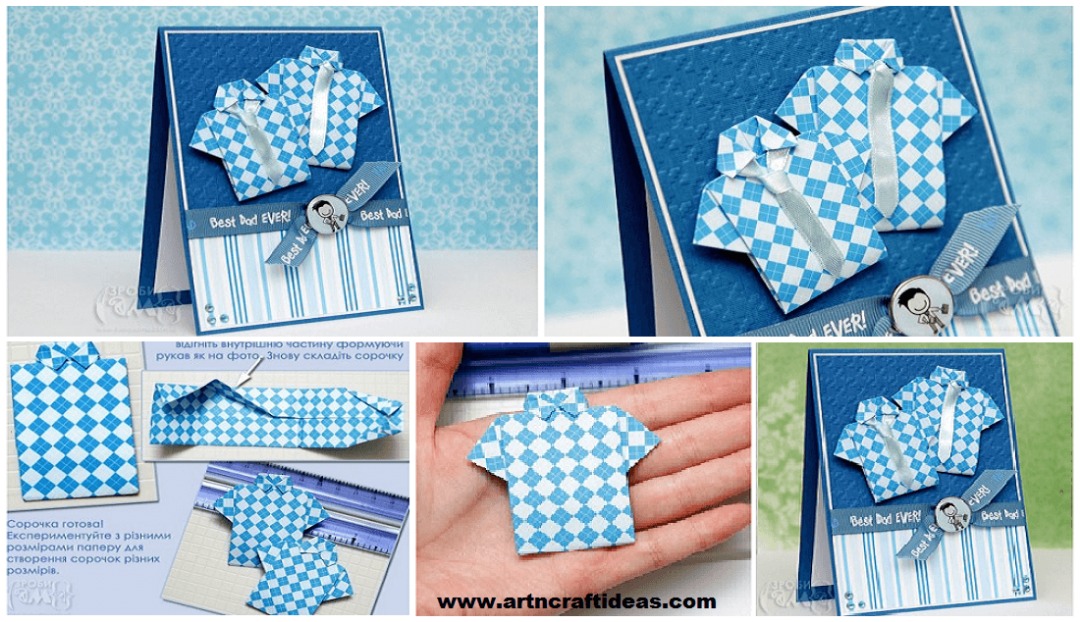
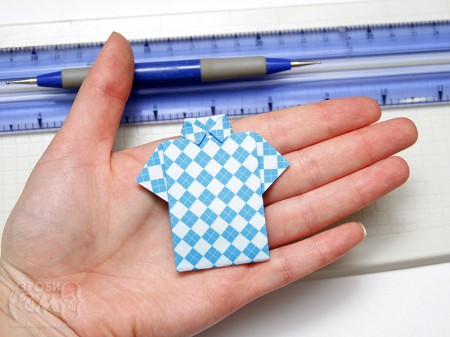 Quite realistic, is not it? On the Internet you will find plenty of instructions to help you add up a shirt in 3 minutes! Here is my version of these instructions, adapted to the size of paper 15 x 15 cm (with a single sheet can be done two shirts). Bend piece from two sides towards the center fold line swipe colonies in the region of 5-7 mm from the upper edge, turn the sheet and bend the top corners at the middle, with the other side of 4 cm to bend the middle, then fold the lower portion (up collar). Lay the foundation shirts and fold the inner edges forming a sleeve, and then fold the shirt.
 The shirt will serve as the centerpiece of my cards. Actually I made these shirts and two ties complement them with tape.
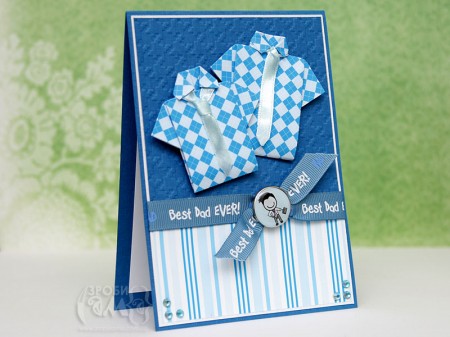
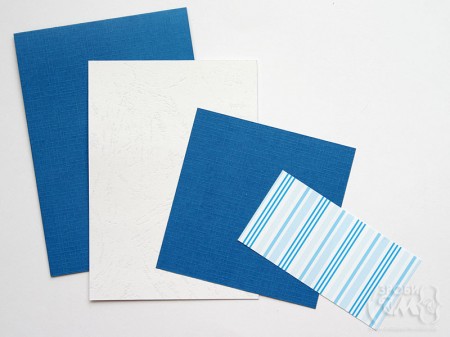
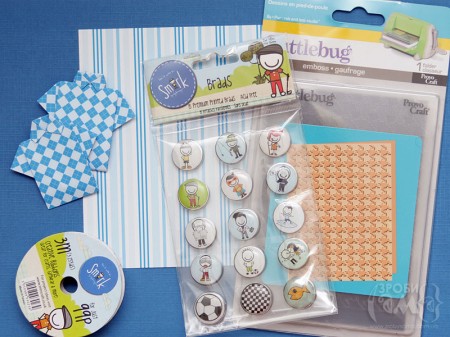 Size cards – 10.5 x 14.5 cm (half an A4 sheet). For a card I cut the white lining Size 10.1 x 14.3 cm and a blue square (the size of 9.8 x 9.8 cm), and another strip of scrap paper size of 9.8 x 5 cm.
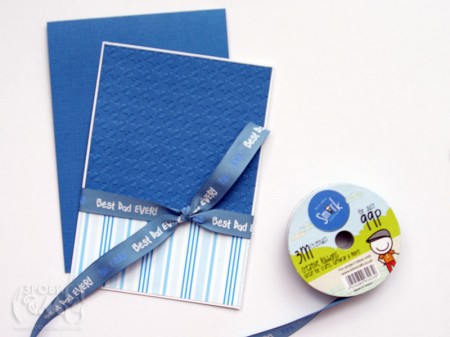
 Blue square I squeezed through the machine for embossing that there was a certain texture. But if the machine is not present, then you can do without it. Tied ribbon.
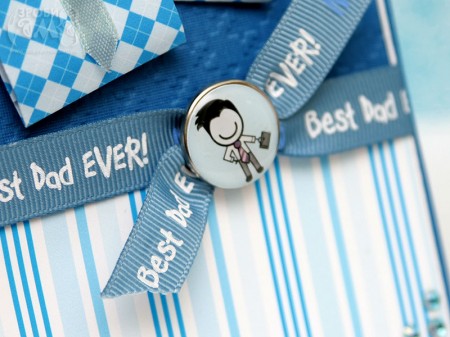
 Knot the ribbon I decorated the icon with a funny image.
 I also graced the back of a postcard and glue the white paper in the middle, so that you can write on it greetings.
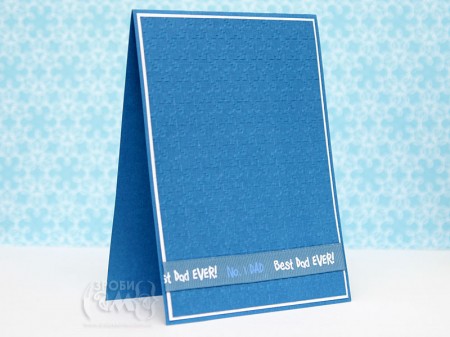
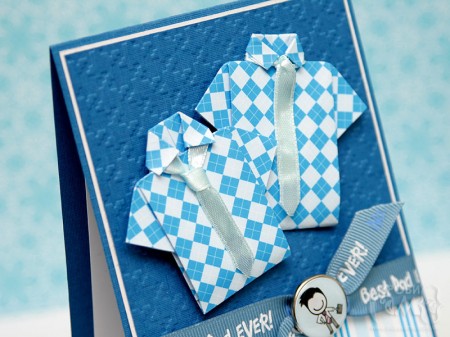 Here is a get the original “Father’s Day card”!

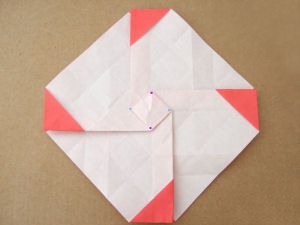
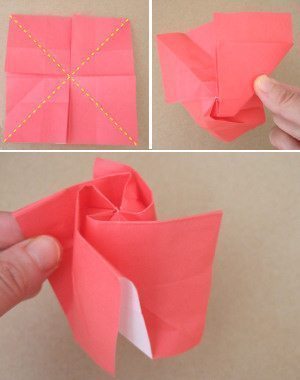
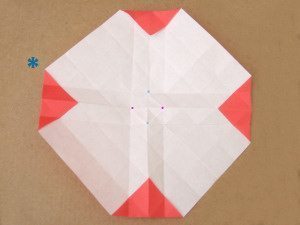 Fold the corner inside.
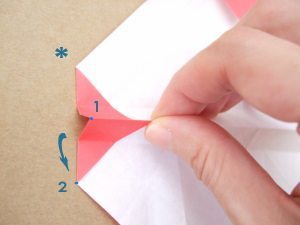 Win the song.
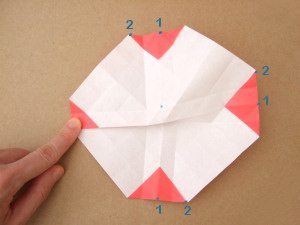 Do the same with the other songs.
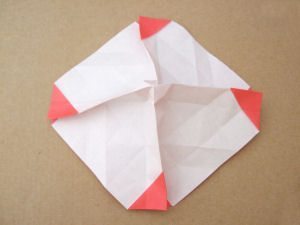 Raise the center of the part.
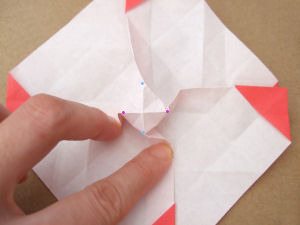 Also link the center.
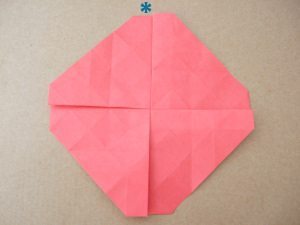
 Part behind the piece.
 In one corner, take the center and some side folds.
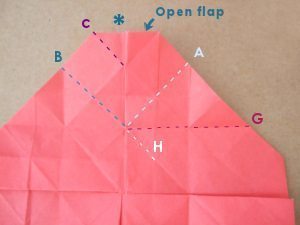
 Raise the other part.
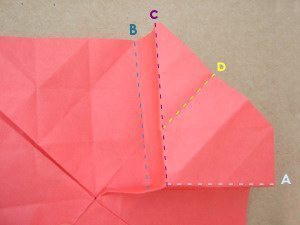 Do the same with all the songs.
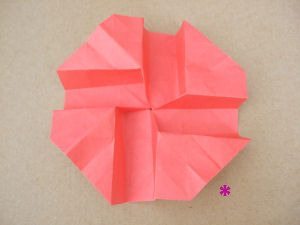 Take the recessed part of one of the corners.
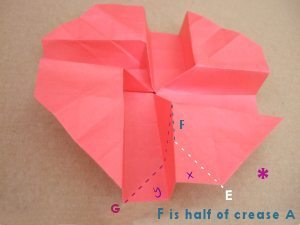 Fold this part.
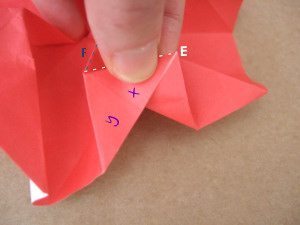 Tape the bent part.
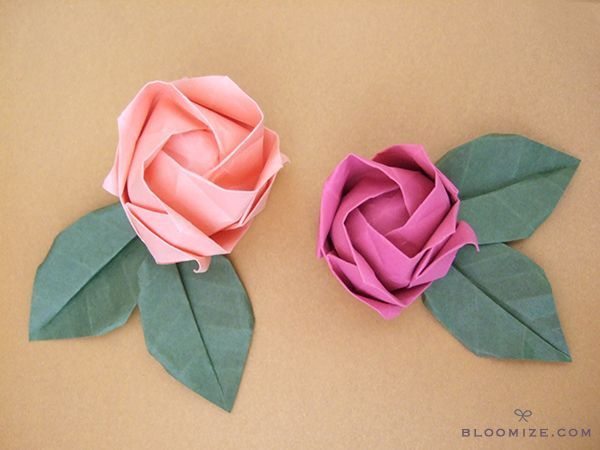
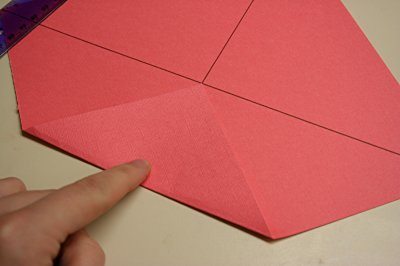
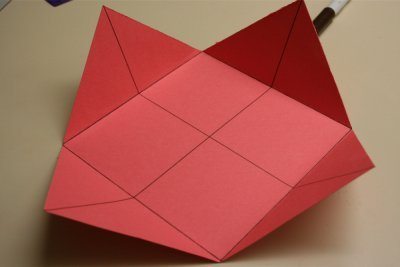
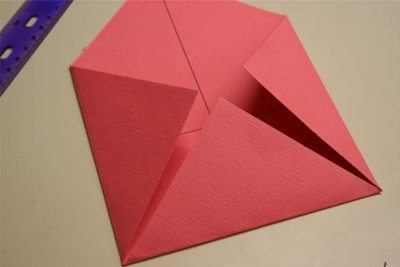
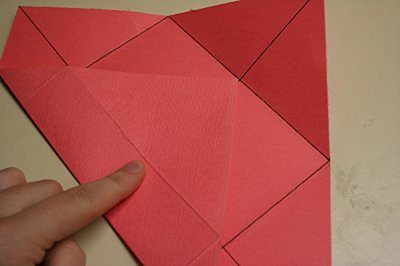
 Do the same with all the corners and “twist” the piece. Your rose is created. The leaves for your roses can have the template you want and you can glue the leaves at the base of your roses with the aid of ordinary white glue, double-sided tape or stick glue, depending on your preference for glue to work With paper.
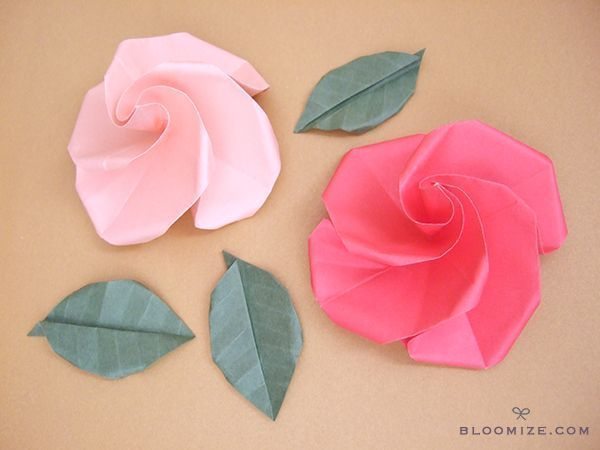 To make the button, fold another square of paper, but with smaller size, wring the sides, raise the center and twist.
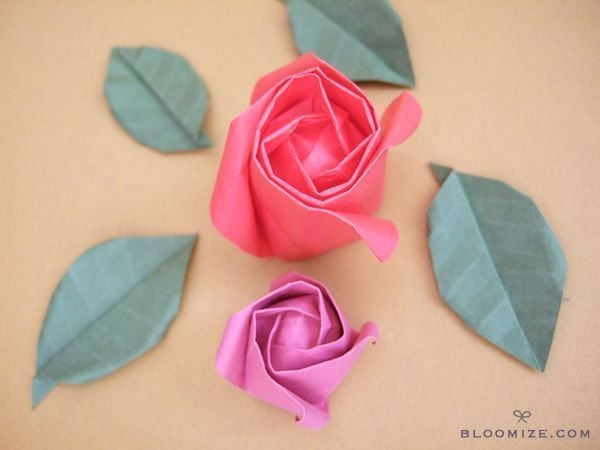 (Photo: bloomize.com)
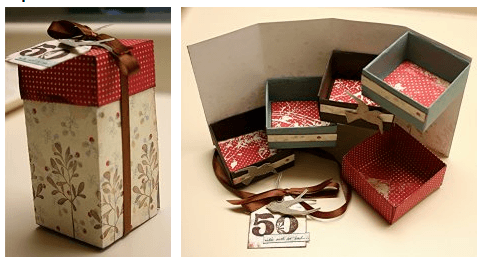
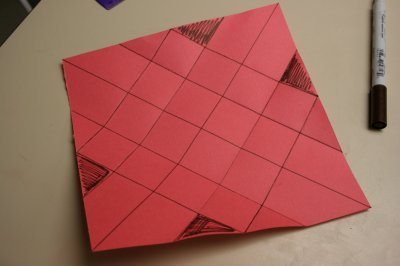
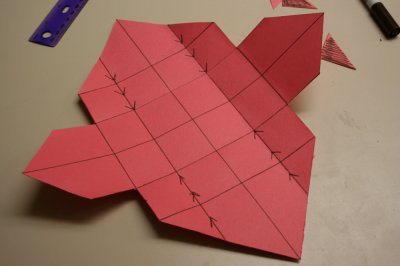
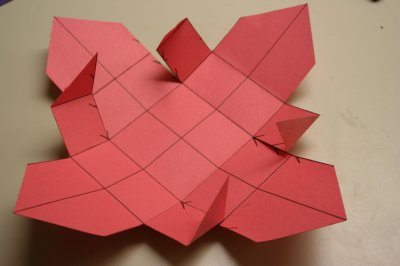
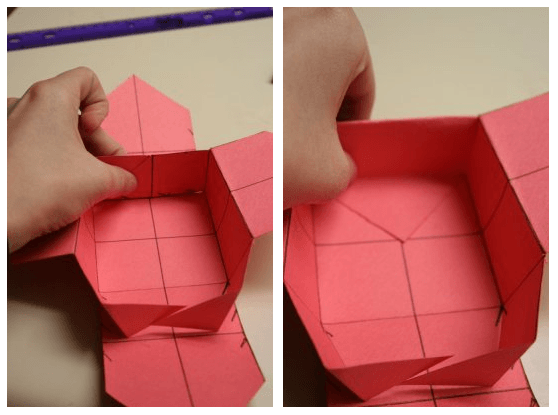
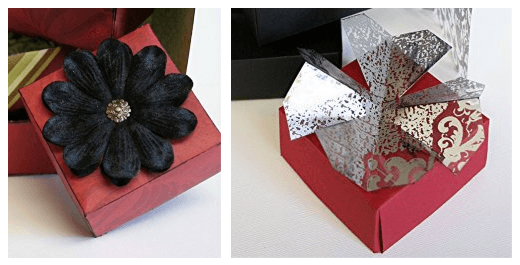
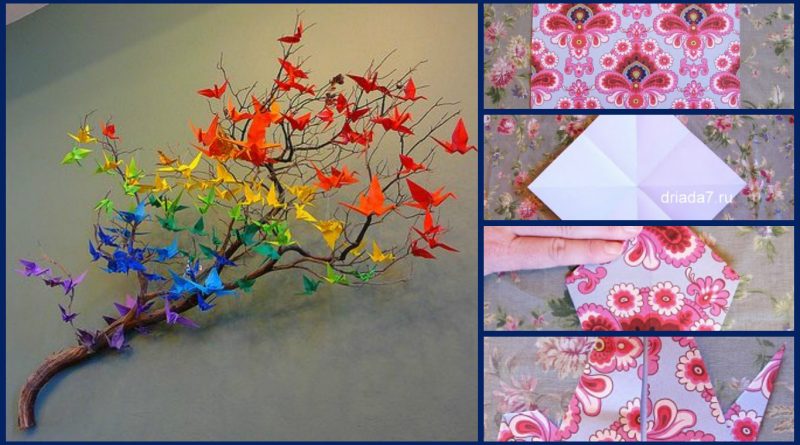
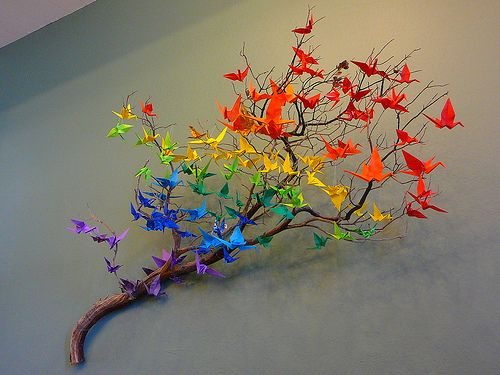
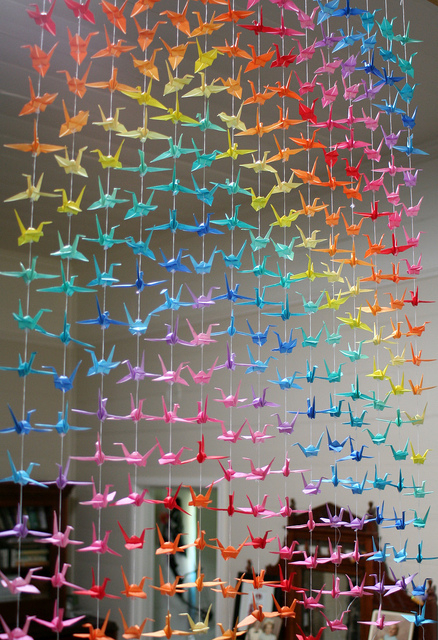 Well, how to resist and not to get to work (desire in all of us and is always there – in store)))
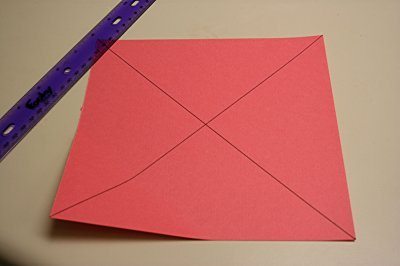
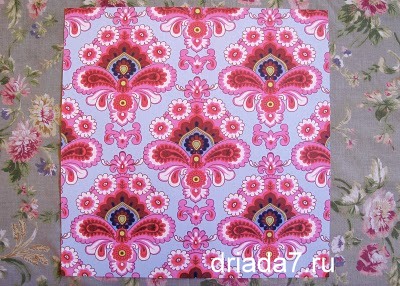
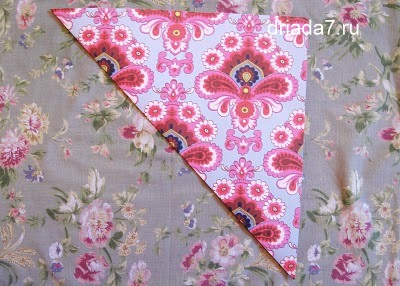
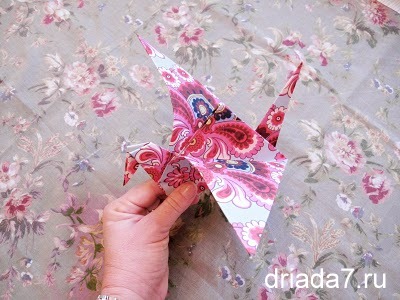 Prepare a sheet of paper with color – eg the white color and the sides – so you will be easier to navigate while working.
 Svernite sheet diagonally colored side out.
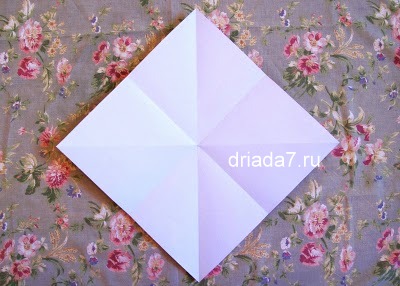
 Then, the resulting triangle folds in half and then fold the triangle in half, aligning the fold line.
 Squeeze together the two corners of one diagonal
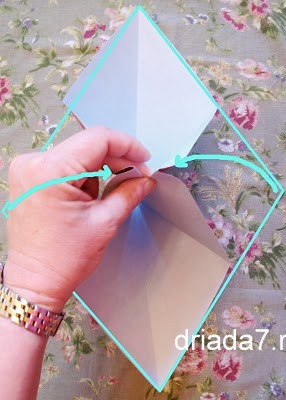 Fold them into the bottom corner, addressed to you
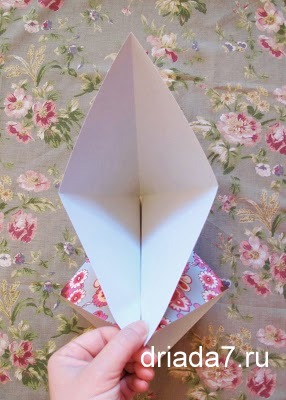 Fold the second part as well, lowering the upper corner of the sheet. Here’s what happened.
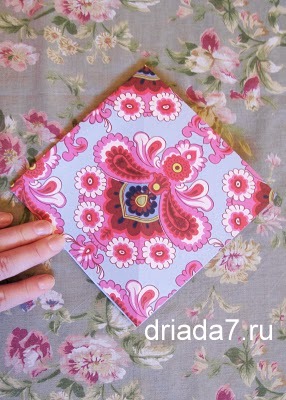 Inside can be seen rolling in “side” squares.
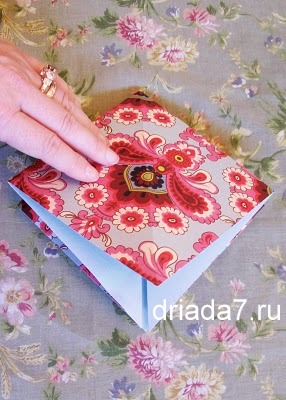
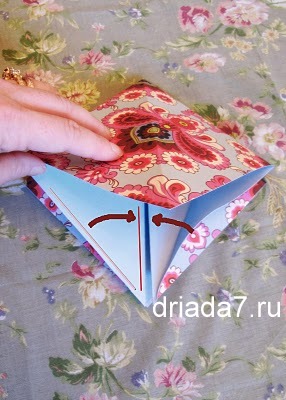 Upper square lift.
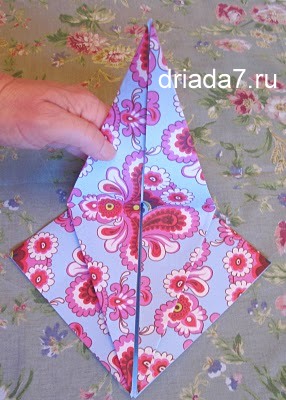
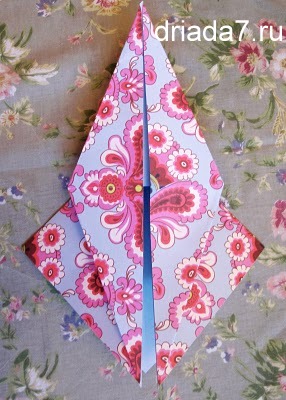 8. Here’s what you should have.
 9. Turn the folded sheet, repeat the last two steps with the other half of the sheet
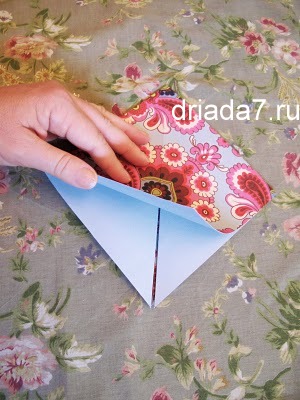 10. Right angle remained at the center of the sheet, turned his sharp outer corners.
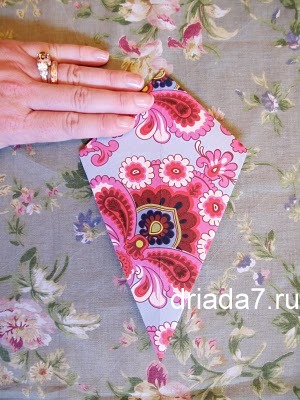 The folded sheet must lie an acute angle to you.
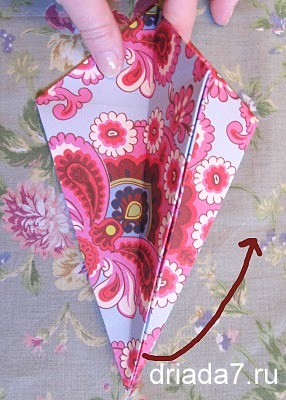 Hold the center of the blank hand, wrap the inner corner towards the first right.
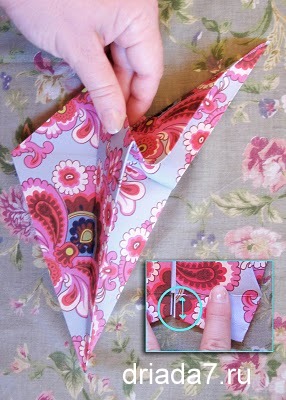 urting the fold line. The result was the tail of a crane.
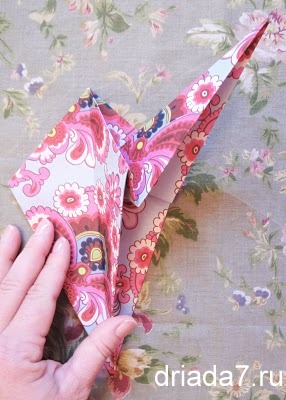 The blank will take the following form:
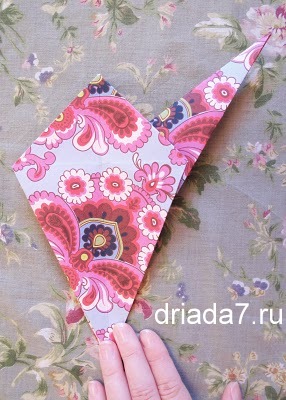 Similarly, make left corner lies within wrap outwardly. This neck.
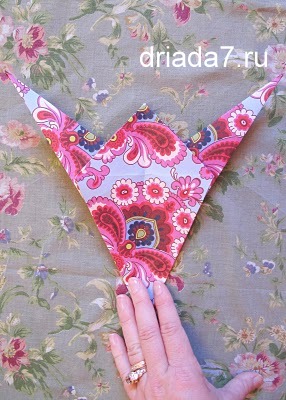 Bend of the acute angle. Get your head crane.
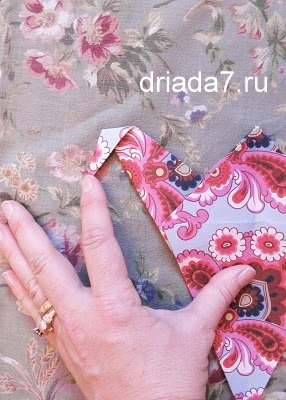 Front view of the head. Hurting the fold line.
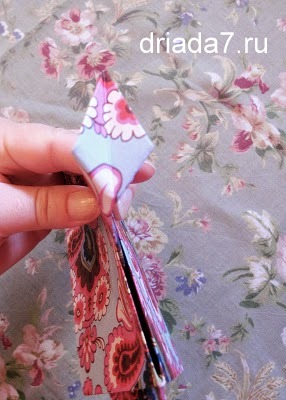 turns away from the workpiece two other angle – wings.
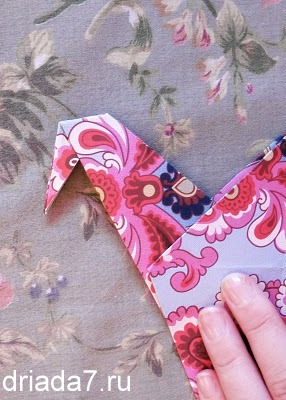 denote folding lines for the wings.
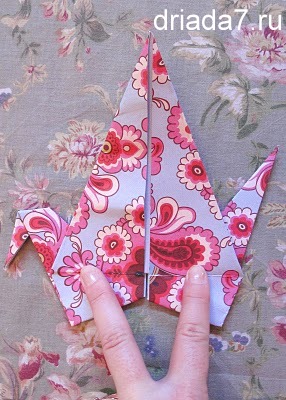
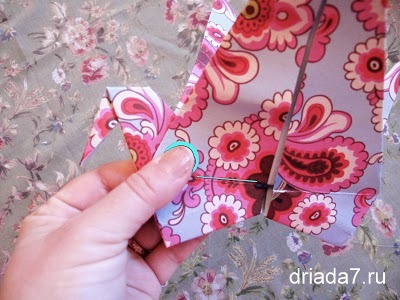
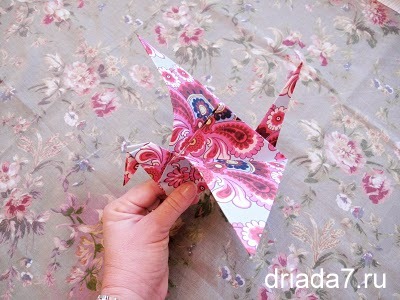 Expand the sides wings.
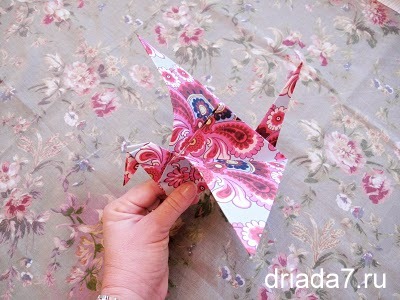
 Crane is ready!
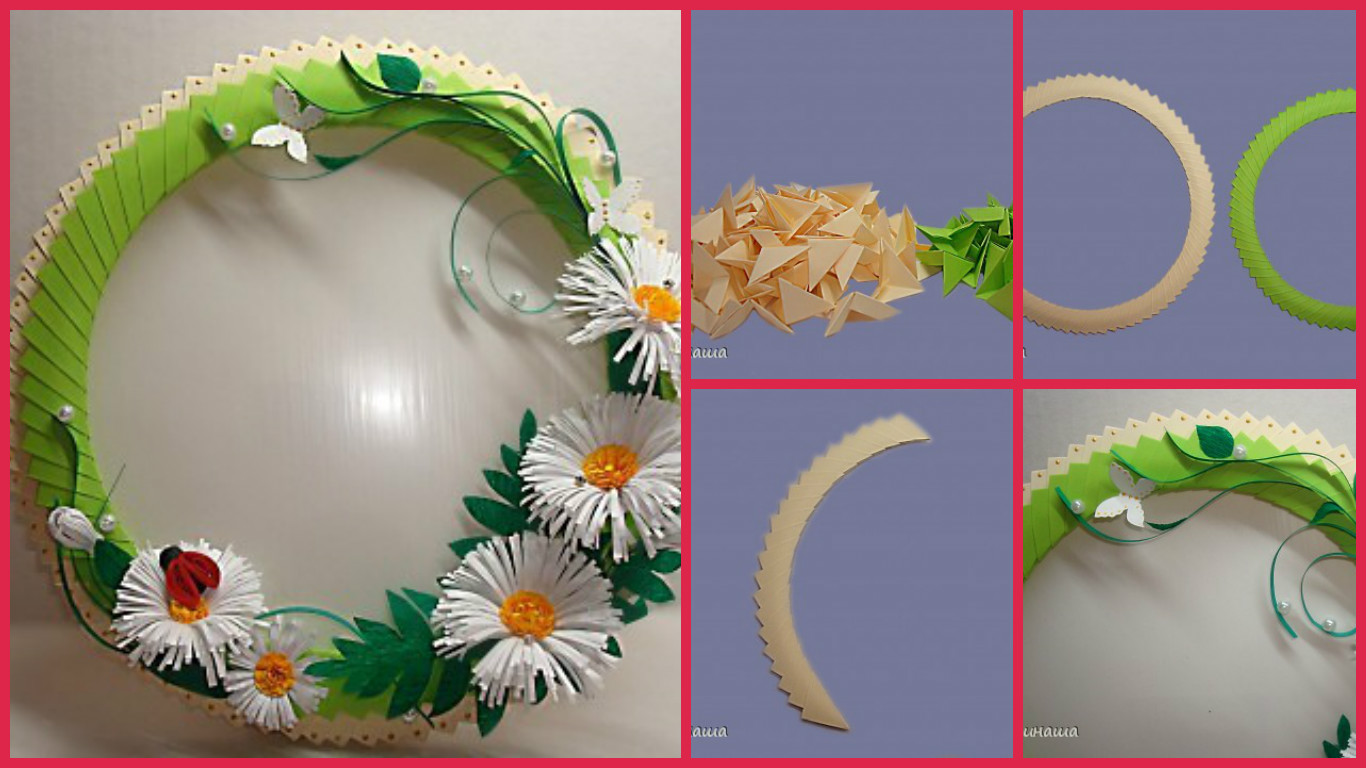
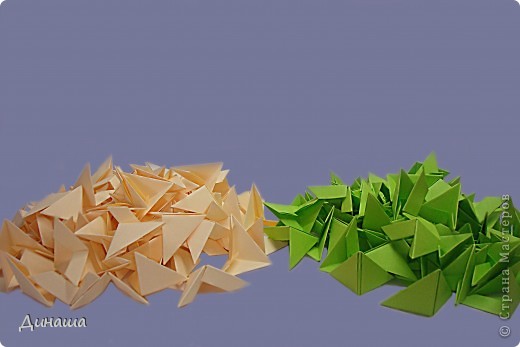
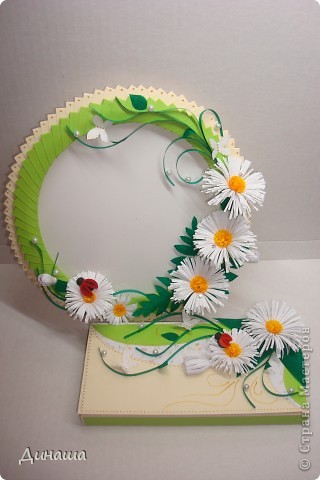
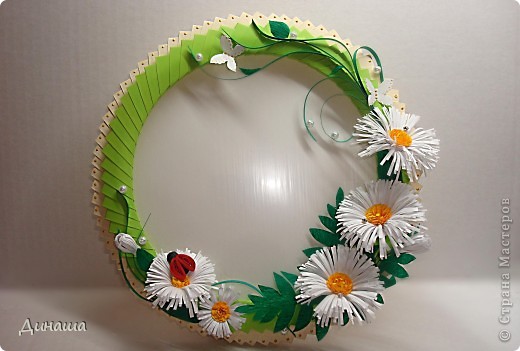 For the manufacture of frames with a diameter of about 21 cm., We need five sheets of pale yellow and 5 sheets of green paper format A-4 for triangular modules. From a single sheet obtained 16 rectangles measuring 5 cm to 7 cm. So, for the yellow blanks necessary to wind the 80 modules for the green-70.
 We connect the modules to each other, rounding them up and slowly forming a circle. The fastening is not very tight! Clay did not use!
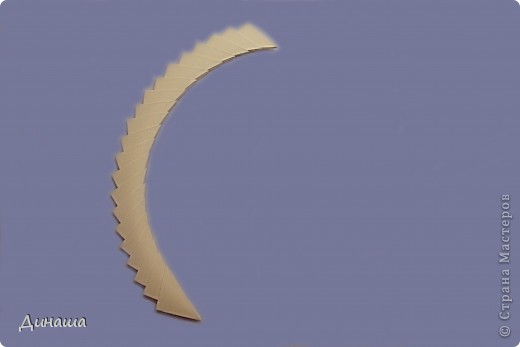
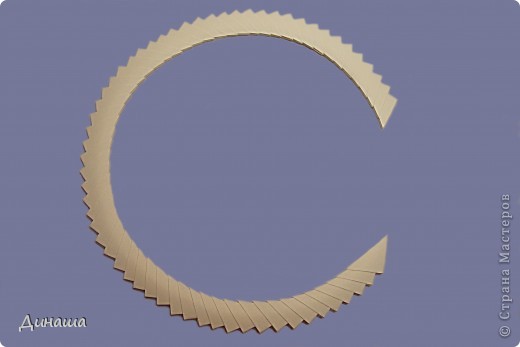 The diameter of the resulting circle is equal to approximately 23 cm. Furthermore tightly connect the modules. The circle becomes smaller, about 21 cm.
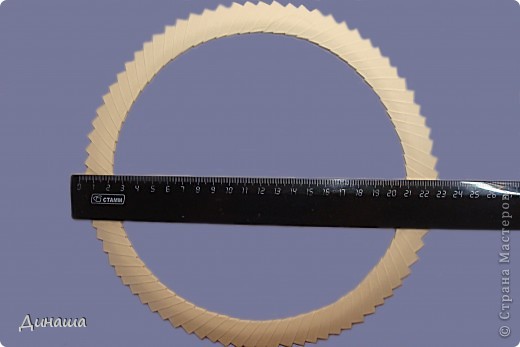 Likewise, we do green preform. It consists of 70 modules and will be less. Its initial diameter of 21 cm., And the final 19-cm.
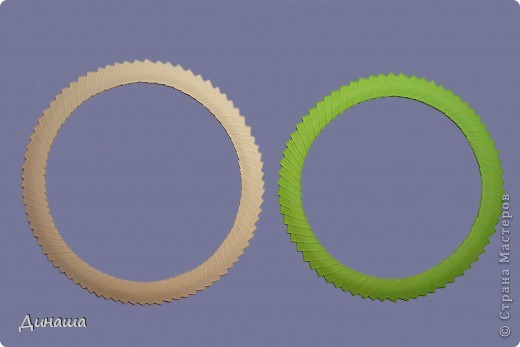
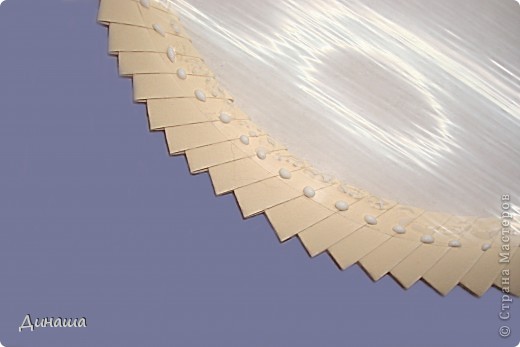
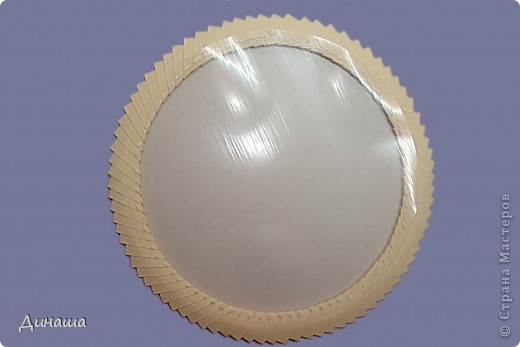 Glue the transparent circle. Smoothes everything to be exactly. PVA glue allows this, it is not directly grasped, and in which case, an error can be corrected. On top of the transparent film to apply the adhesive, so that it fell on the “glass”, and modules.
 Top glue green procurement. Presses more tightly to the glue grabbed. This is the front side of the frame.
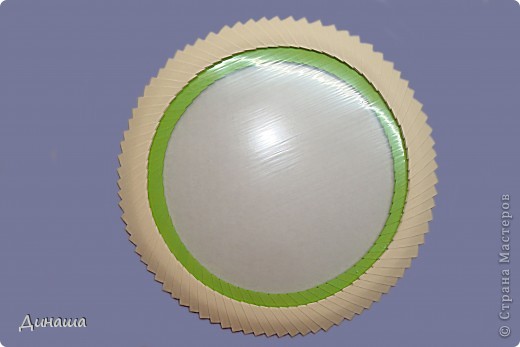
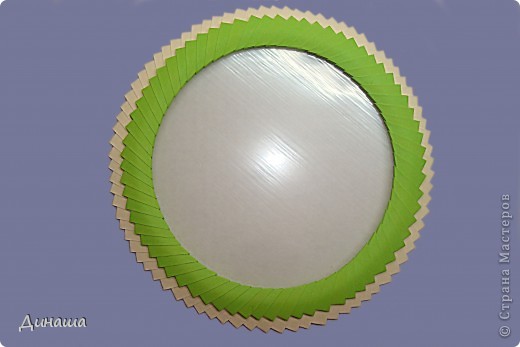 And wrong side.
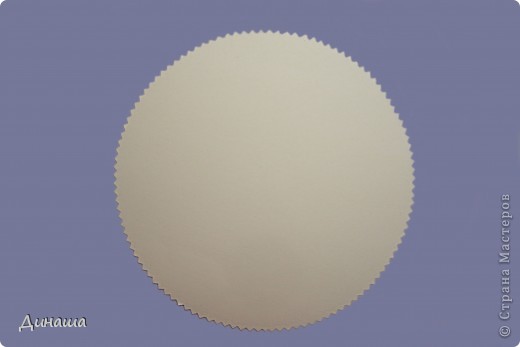
 Further, the cardboard cut out a circle of diameter 19 cm. Cut curved scissors that looked spectacular.
 Apply glue along the contour of the frame from the inside, but only half (pictured ruler marked limits application of the adhesive).
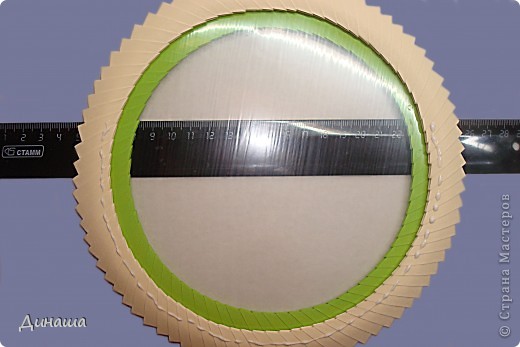 Glue.
Glue.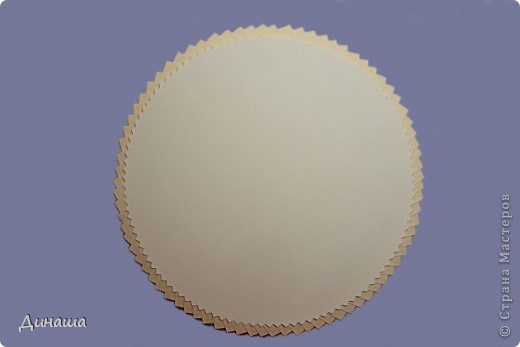 In the final frame should have a window. This picture will be inserted.
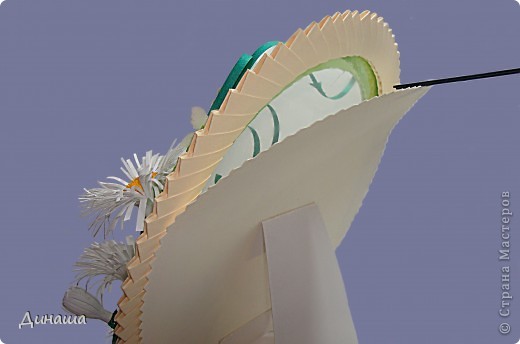 The last step pedestal. I’m doing it here on such a scheme.
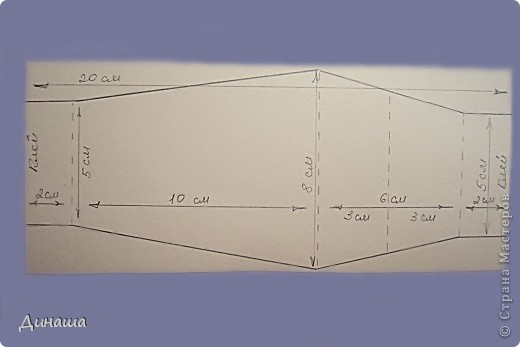 Cut along the lines outlined. The dashed-line fold line. Bend like the picture.
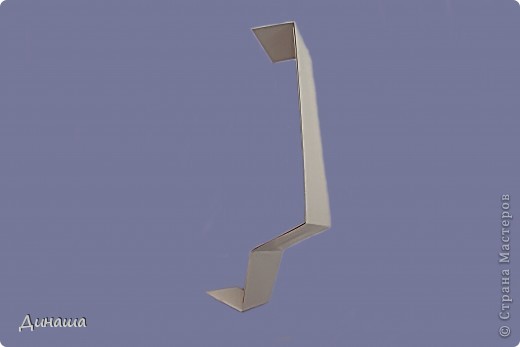 To stand is desirable to take a thick cardboard. I board not tight, so do double. Bend, apply the adhesive and glue.
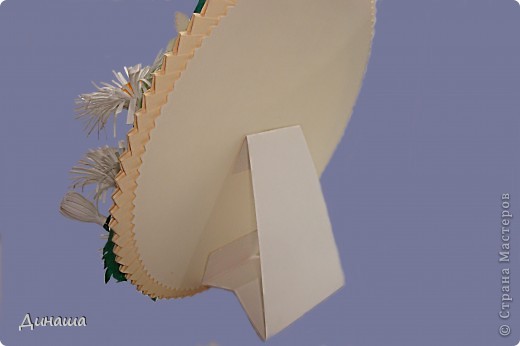
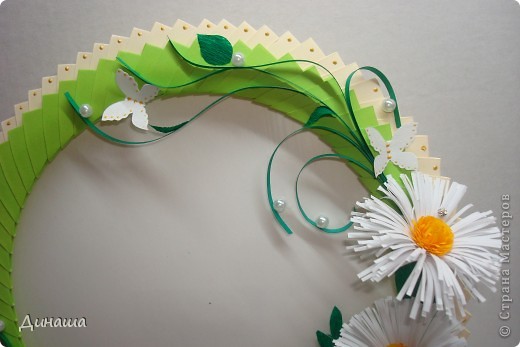
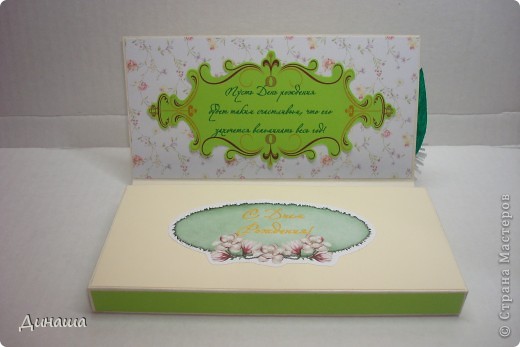
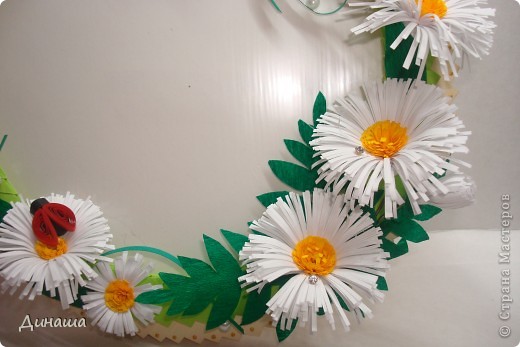 Frame made complete with packaging for chocolates. That’s a set turned.
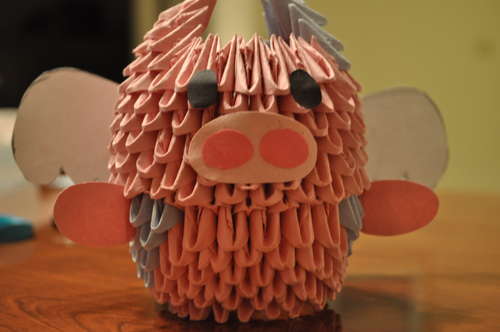
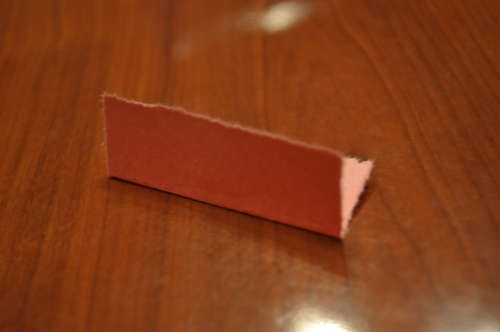
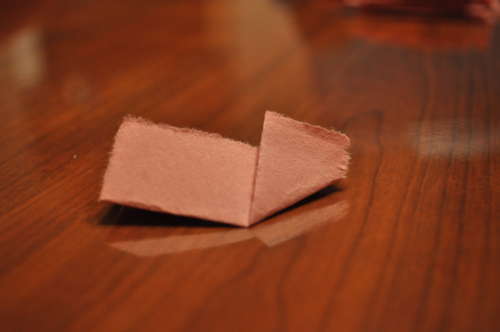

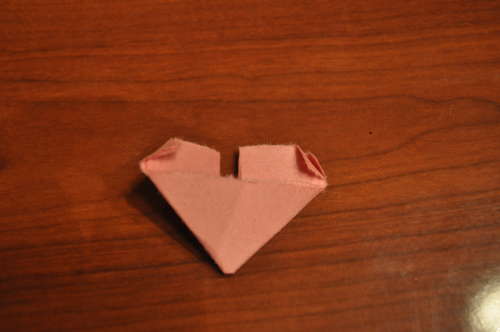

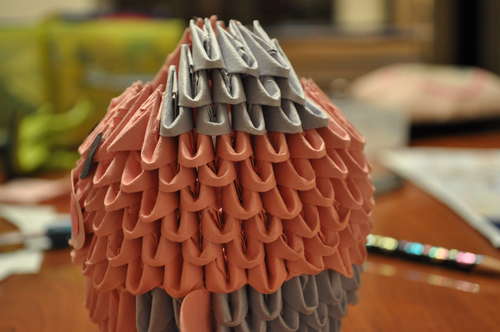
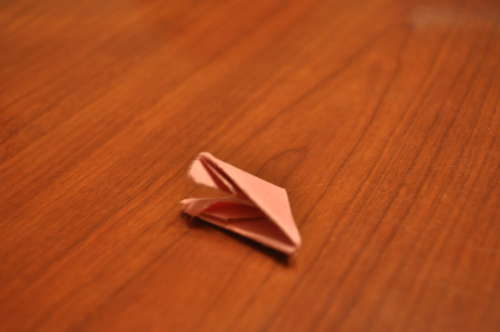 Step 2: Once you have made at least half of the pieces, it is time to put them together. Each row consists of 23 parts.
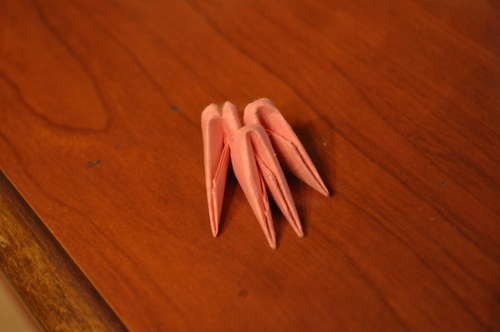
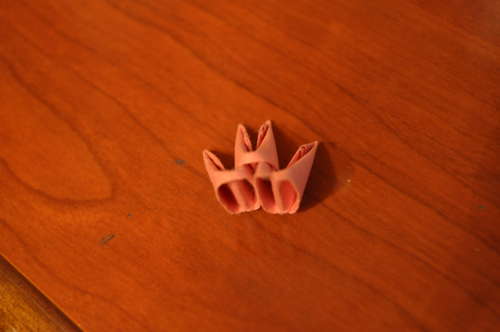
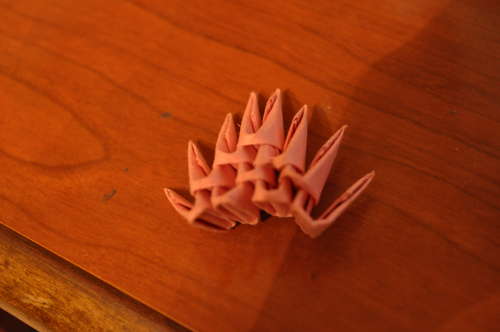
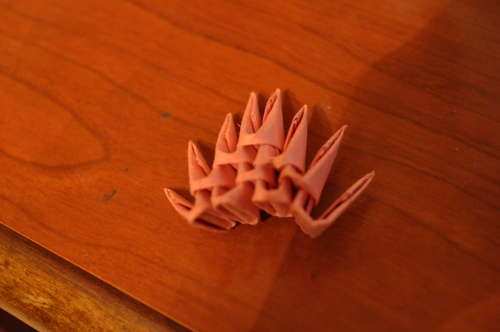 Step 3: When you have reached the sixth row, you must reverse the way in which the pieces are placed.
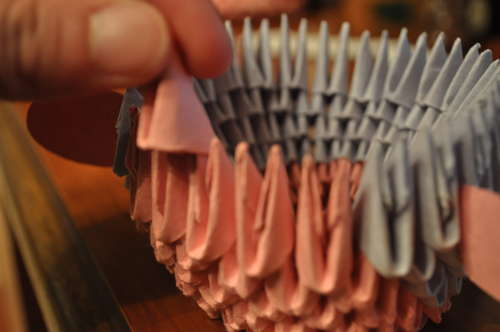
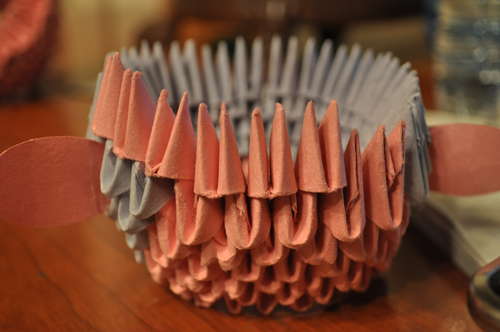 Step 4: Once you have added six more rows, you must create the ears.
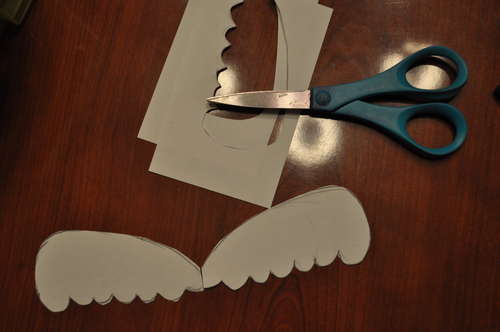
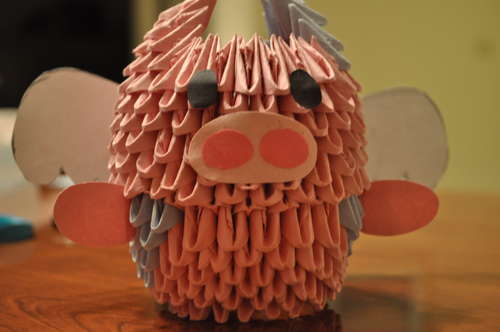
  Step 5: Now just must draw on cardboard muzzle, eyes and pig wings. Cut them out and glue.

 3 series of 20 moduley.Odevaem way (picture shown in a different color).
 4,5,6,7,8,9y ranks dress ….. 20 modules in each row.
 In a series of dress 10 m 3 modules typically ray of a 2 by 2, 3, usually 2 2 ray of, etc. It turns out 25 pieces. in the row.
 11,12 and 13 in the series of 25 modules, 14th series of dress 18 modules, 14 ray of reserve.
 21 and 22 series in 30 moduley.Vot so looks a hole in the trunk.
 23rd series of dress one ray of module 3, poluchaetsya 20 modules ryadu.Po middle one pink dress.
 In the 24m row 1 module pink dress pink 2, the other 18 blue.
 25th number 1 pink, 19 sinih.Odevaem way.
 We proceed to the neck.
 7th series of 10 blue.
 8th series of 8 blue, 1 pink.
 14th number again reducing, 1 pink dress in the usual way and 4 blue on the sides of each ray of three. Leaves 5 pieces in a row.
 15th number 6 blue dress as usual.
 25th series make the cut, 4 blue dress.
 26th number 1 pink in the center, 2 blue on the sides.
 36th series of pink in the center, 2 extreme dress every 3 luchika.Takim way out in a series of 3 shtuki.Sverhu on them in the middle, 2 blue dress.
 Now head.
 holding the edges to turn out blank.
 The third and fourth series of 13 pieces each.
 In the fifth row we add 4 modulya.Odevaem 3 modules as usual, 2 modules in the ray of 2, 3, as usual, the ray of 2 to 2, etc. At the other photo shows tsvetom.Vyhodit 17 pieces in a row.
 In a series of 8 blue 6m modules, 1 green, 7 blue, 1 green.
 The 7m number 2 green, 7 blue, 2 green, 6 blue.
 In the 8th row 1 green, 1 pink, 1 green, 6 blue, 1 green, 1 pink, 1 green, 5 blue.
 9th row 2 green, 3 blue, 1 yellow, 3 blue, 2 green, 6 blue,
 15th row 5 yellow, 2 blue dress on the sides as usual, and 4 blue dress from the bottom every 3 luchika.Vyhodit 13 pieces in a row.
 And the last, 16th ryad.Odevaem yellow 4 modules, each ray of 3, 7 as the blue obychno.Golova gotova.Oformim later)
 We proceed to the tail.
 4th series of 18 yellow.
 5th row 1 blue, 1 yellow, 3 green, 1 yellow, 3 green, 1 yellow, 3 green, 1 yellow, 3 green, 1 yellow, 1 blue.
 6th row 1 blue, 1 yellow, 2 green, 2 yellow, 2 green, 2 yellow, 2 green, 2 yellow, 2 green, 1 yellow, 1 green siniy.Mezhdu a pink paste.
 1 blue, 1 yellow, 2 green, 1 yellow, 1 blue, 1 yellow, 2 green, 1 yellow, 1 blue, 1 yellow, 2 green, 1 yellow, 1 blue, 1 yellow, 2 green, 1 yellow, 1 blue .
 1 blue, 1 yellow, 1 green, 1 yellow, 2 blue, 1 yellow, 1 green, 1 yellow, 2 blue, 1 yellow, 1 green, 1 yellow, 2 blue, 1 yellow, 1 green, 1 yellow, 1 blue .
 1 blue, 2 yellow, 1 blue, 2 ray of missing, again one blue, etc.
 on top of the yellow dress one yellow, one on each side of the blue.
 Top two blue on them one by one.
 Make peryshki.Odevaem 1 blue, 1 green, 1 blue, 2 on top of the blue, 1 green on them.
 Next to the green, one blue dress on a blue ray.
 Top two green and blue on the sides as in the previous ryadu.Sverhu one yellow to green, flanked by the green and one blue.
 Top 2 green, next to the blue.
 Next 1 green, next to the blue and top them sinih.Delaem 2 of 3 more.
 Now green peryshki.Odevaem one module 2 blue green, then one again, 2,1,2,1,2.
 Dress 2 green yellow and one on each side of the green, then yellow, and the top two on the sides of the green.
 In the center of the blue near yellow, flanked by two blue zelenye.Sverhu next yellow on the sides of the green.
 Then dress the center 1 pink, next to blue, then yellow and sides zelenye.Sverhu 2 blue, 2 yellow, 2 green, then blue 1, 2 yellow, 2 zelenyh.Posle 2 yellow, 2 green above 1 yellow, 2 green , 2 green top and the top 1 of 4 zelenyy.Delaem.
 Nearby peryshki.Odevaem 2 blue, they are green, two blue, green, 2 blue, green.
 On each side of the green 2 blue, 2 green on, 2 blue, above the yellow, 2 green, 2 blue, 2 green on, 2 blue, still above the green and 2 blue, 2 blue above, the uppermost one of siniy.Delaem 3.
 On the lower two feathers that in the center, dress 2 blue, 1 green, 2 blue, 1 green.
 Making 4 arochki.V one arch modules 5 on one side, five on the other and one in the center.
 Top blue dress.
 In the center of a pink dress 1, 2 above zelenyh.Posle 1 yellow, 2 green, then 2 yellow, 2 green after 1 pink, 2 yellow and 2 green.
 Then, on top of 2 yellow, 2 green above 1 yellow, 2 green, 2 blue, 2 green after 2 blue, then 1 green, 2 blue, 2 blue and on the tip 1 siniy.Takih 3 pieces.
 And here is our little tail))
 That’s all detali.Prikleivaem beak, eyes, hoholok.Soedinyaem all parts with Thermo)
 Our peacock 🙂
