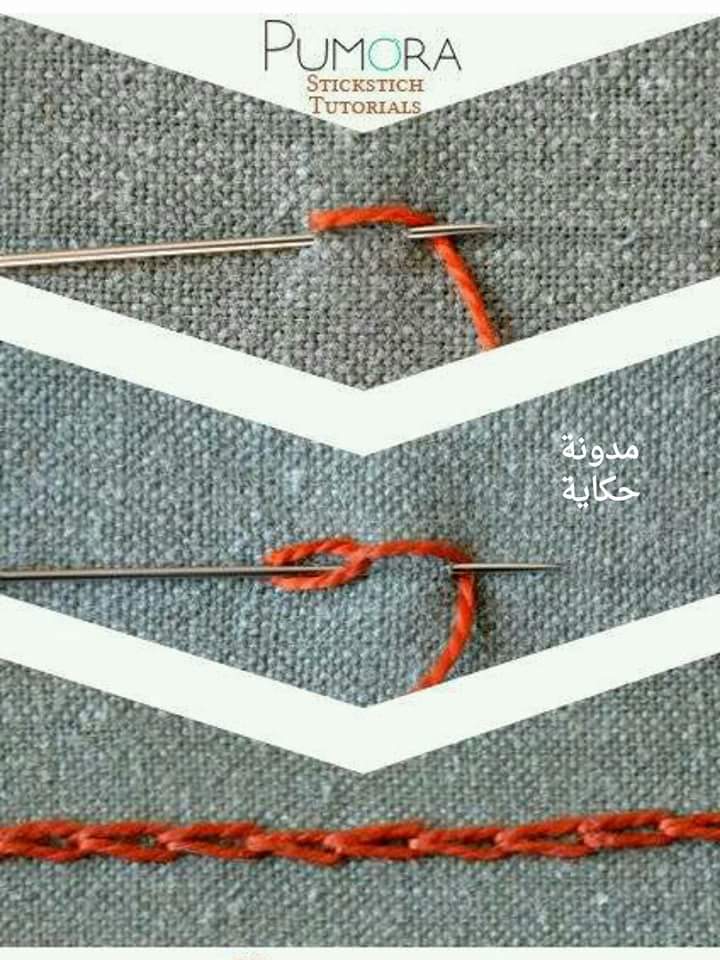
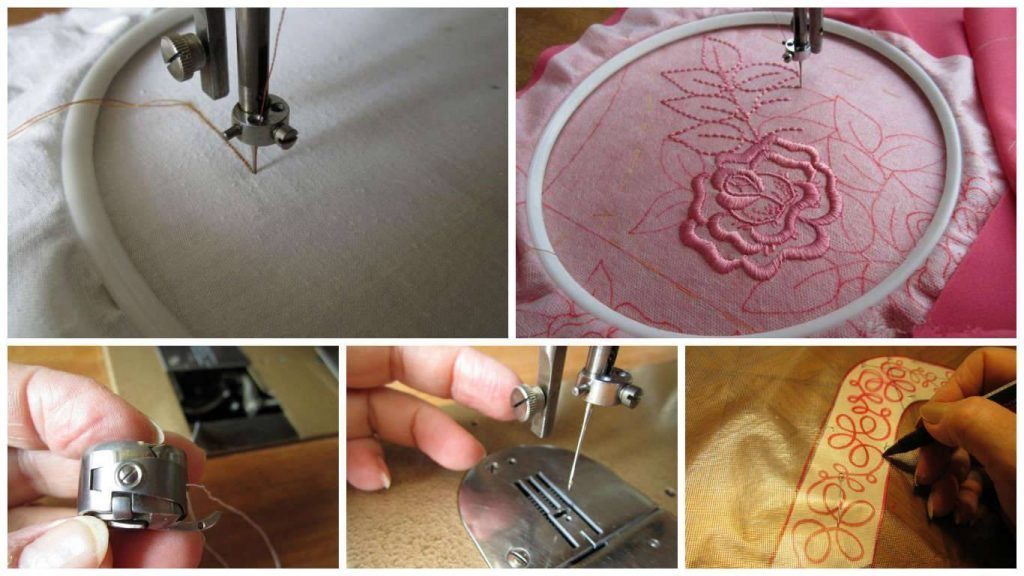
Posted onJanuary 25, 2017inEmbroidery And Sewing, Step by step, Tutorial Hand embroidery for beginners (Tutorials)
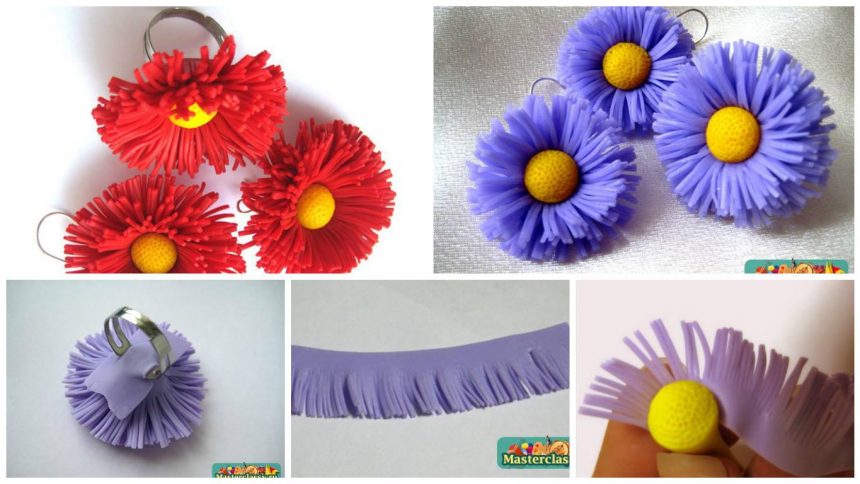
Posted onJanuary 20, 2017inFlower Crafts, Jewellery, Step by step, Tutorial How to make beautiful astry flower jewellery
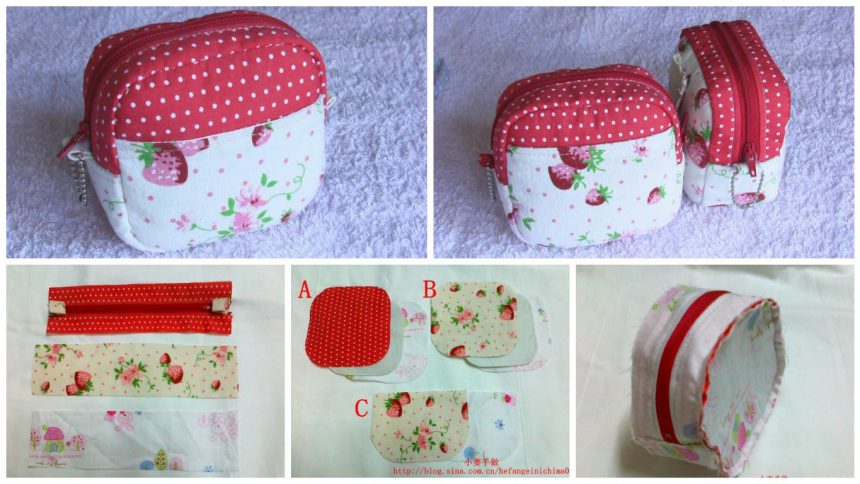
Posted onJanuary 19, 2017inPatchwork Crafts, Step by step, Tutorial How to make beautiful bag on a belt
Posted onJanuary 13, 2017inJewellery, Step by step, Tutorial How to make ring sphere “Paris” of the epoxy resin – Step by Step
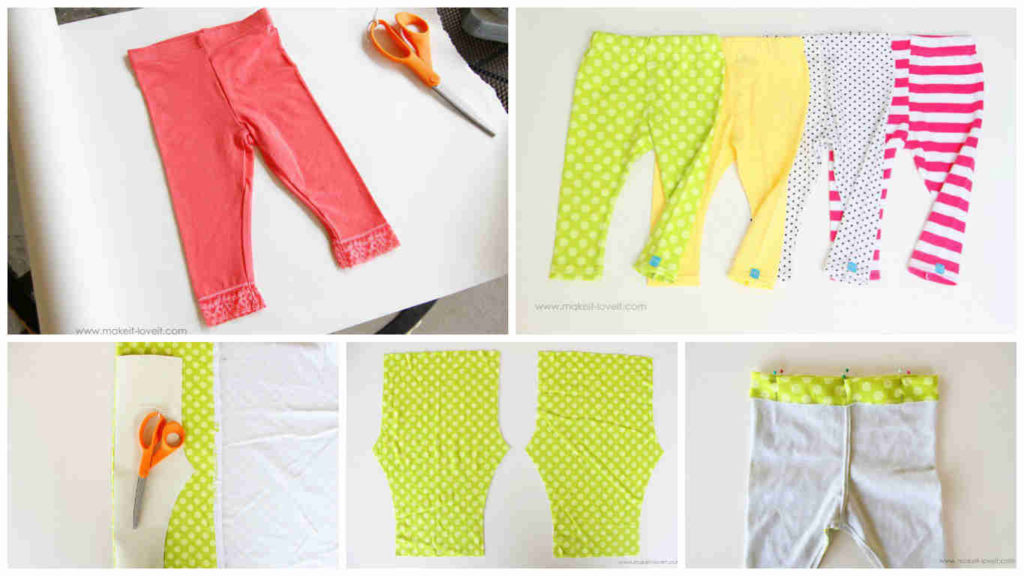
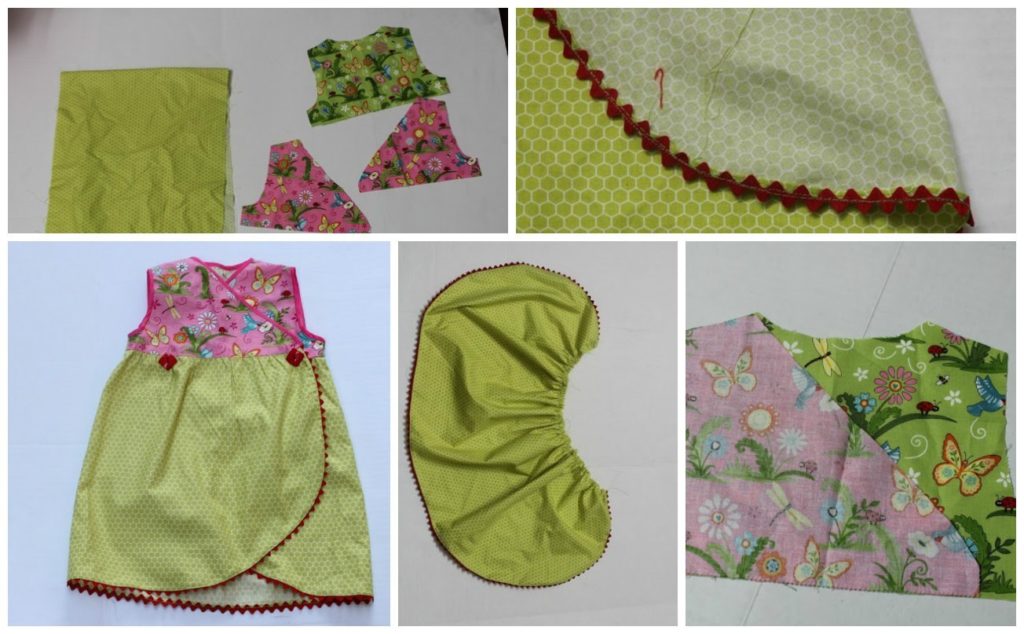
Posted onJanuary 10, 2017November 19, 2022inClothing, Kids Corner, Patchwork Crafts, Tutorial Beautiful Handmade Dress for girls
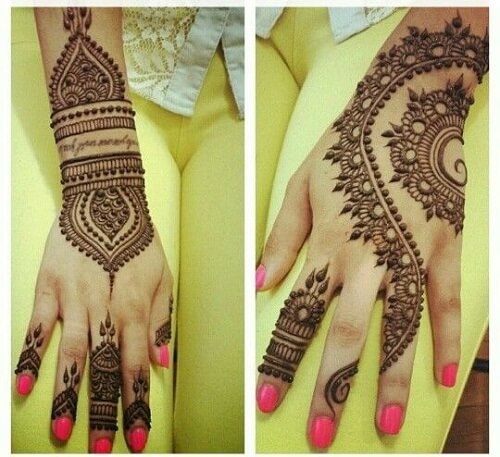
Posted onJanuary 10, 2017inBirthday, Diwali, Ideas, Mehndi, Wedding 10+ Simple Arabic Mehndi Designs [2017]
Posted onJanuary 10, 2017inDIY, Embroidery And Sewing, Home Decor, Step by step, Tutorial How to embroider the simplest sewing machine – Step by step