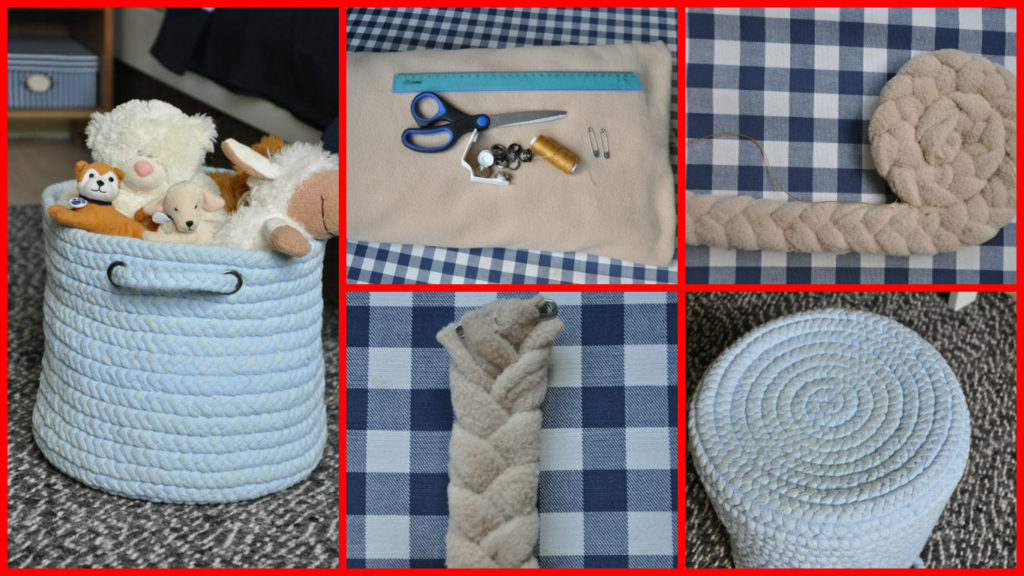
Posted onFebruary 4, 2017inBest out of Waste, DIY, Step by step, Tutorial How to create a basket of toys
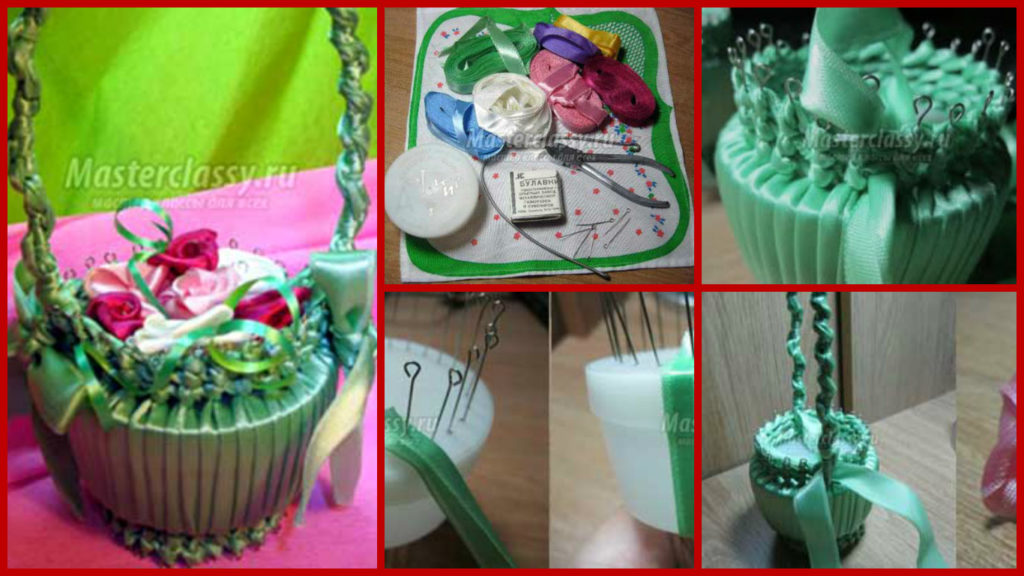
Posted onJanuary 31, 2017inDIY, Step by step, Tutorial DIY: Beautiful basket with flowers ribbons and plastic boxes
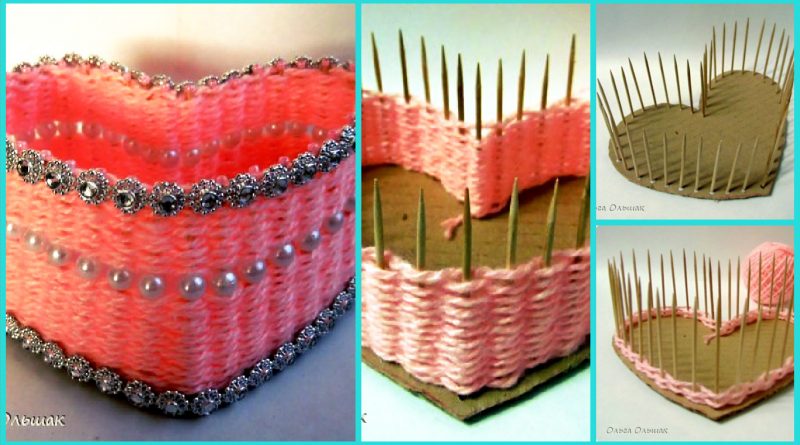
Posted onJanuary 28, 2017inBest out of Waste, DIY, Step by step, Tutorial How to make beautiful heart shaped basket
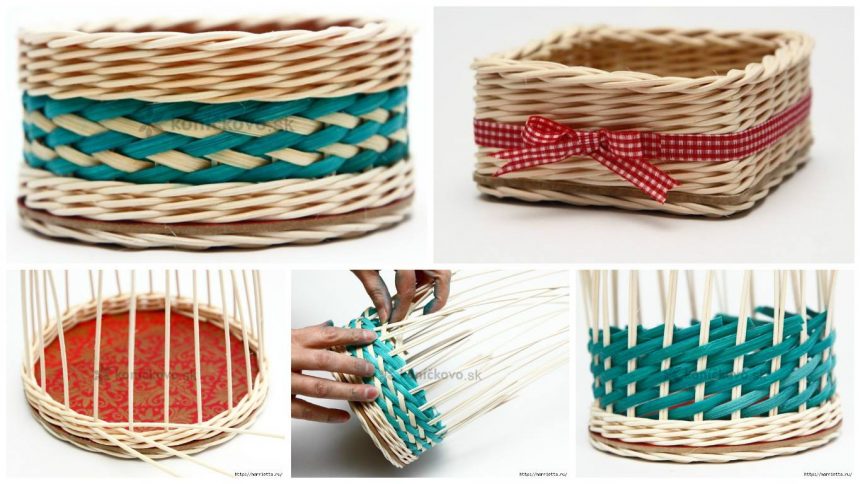
Posted onJanuary 27, 2017inBest out of Waste, Newspaper Crafts, Step by step, Tutorial How To Make Weaving Newspaper Colorful Platter
Posted onJanuary 27, 2017inBest out of Waste, Newspaper Crafts, Step by step, Tutorial How to make wicker vases, candy
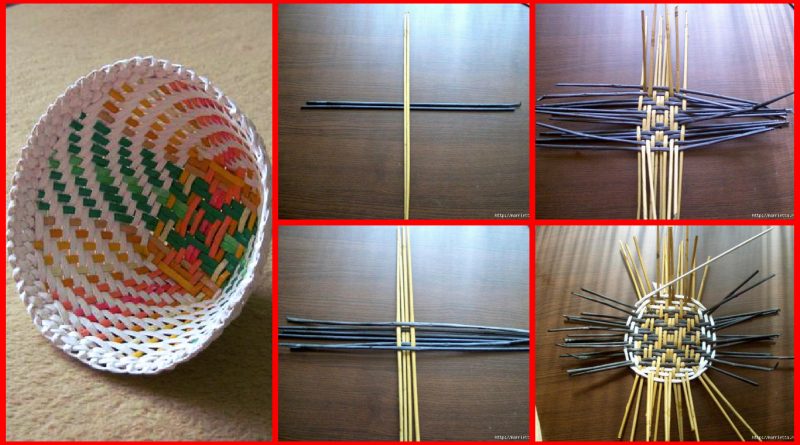
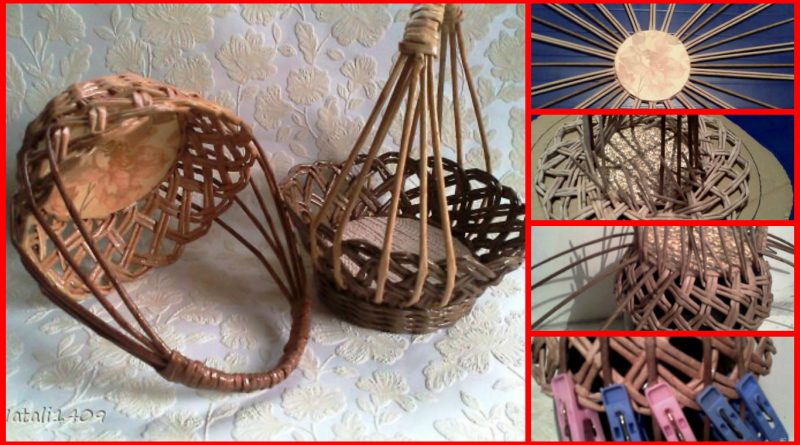
Posted onJanuary 17, 2017inBest out of Waste, DIY, Newspaper Crafts, Step by step DIY How to basket woven of twigs
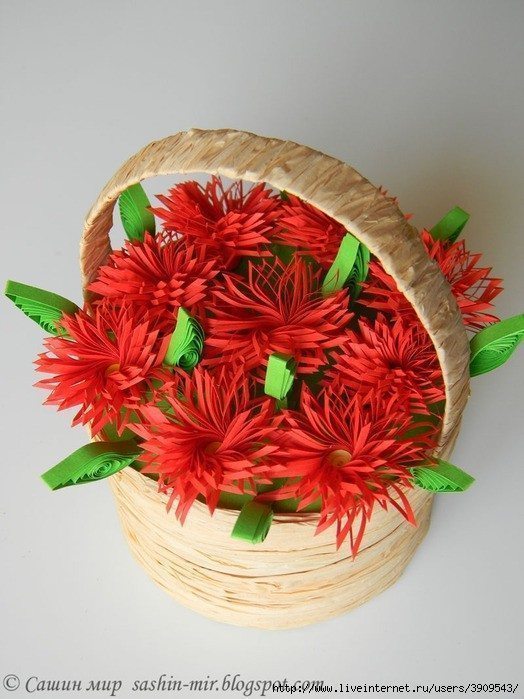
Posted onJanuary 8, 2017January 8, 2017inDIY, Paper Crafts, Step by step, Tutorial Beautiful Spring Basket