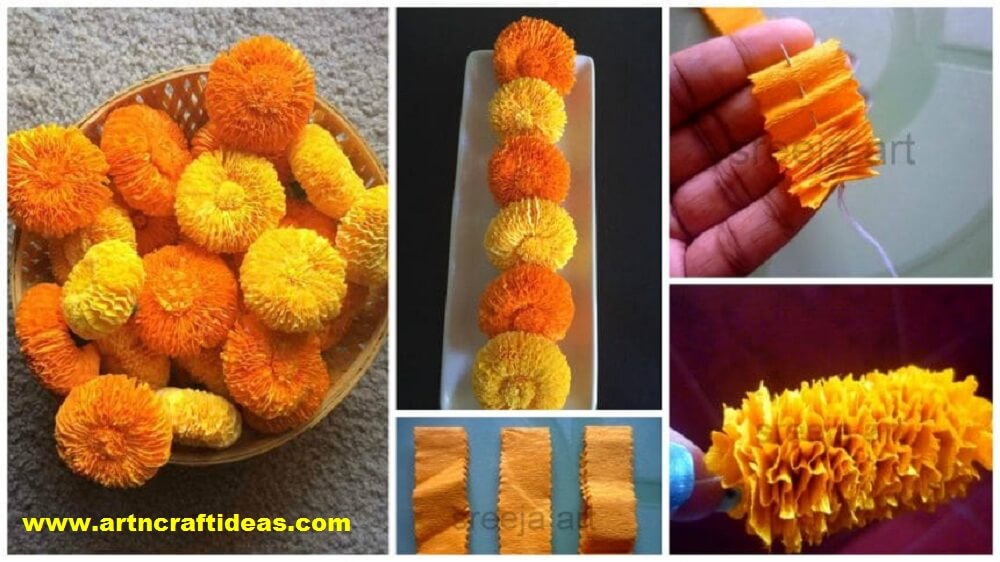
Posted onJune 24, 2017November 19, 2022inDiwali, Flower Crafts, Paper Crafts, Tutorial How to make marigold flower with crepe paper
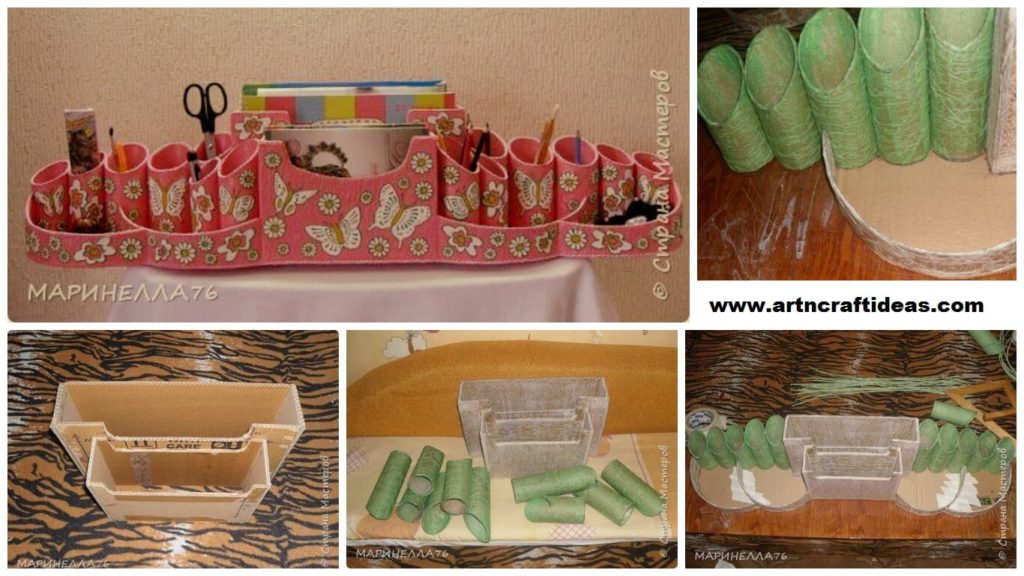
Posted onJune 20, 2017inBest out of Waste, Cardboard Crafts, Craft, Tutorial How to Make Cardboard Mega Organizer
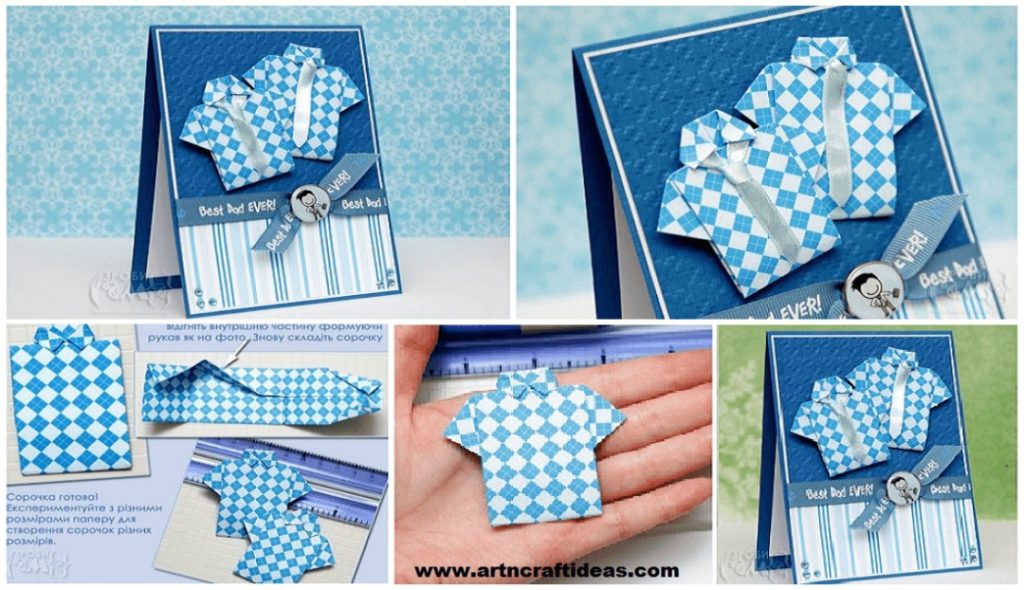
Posted onJune 3, 2017June 3, 2017inCraft, Father's Day, Origami, Tutorial Father’s Day Cards – card with origami-shirt
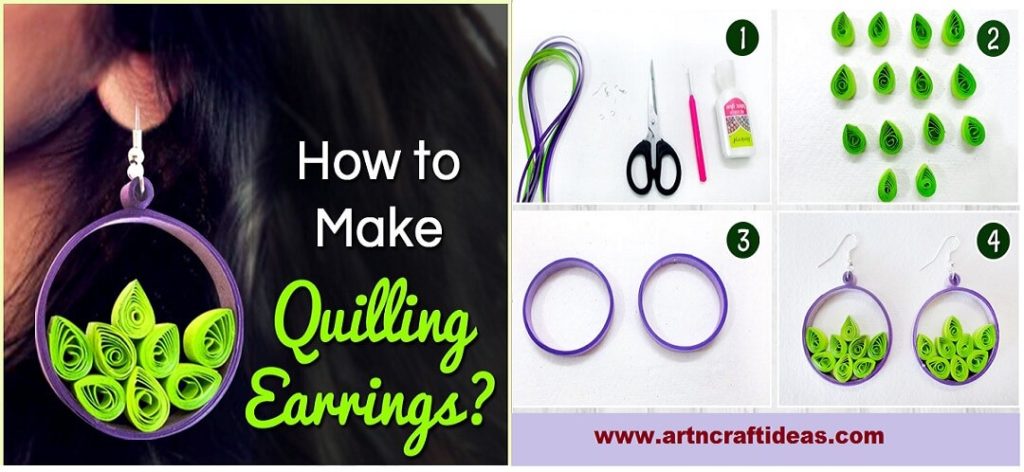
Posted onJune 3, 2017June 3, 2017inJewellery, Quilling, Tutorial, Video how to make Quilling Earrings
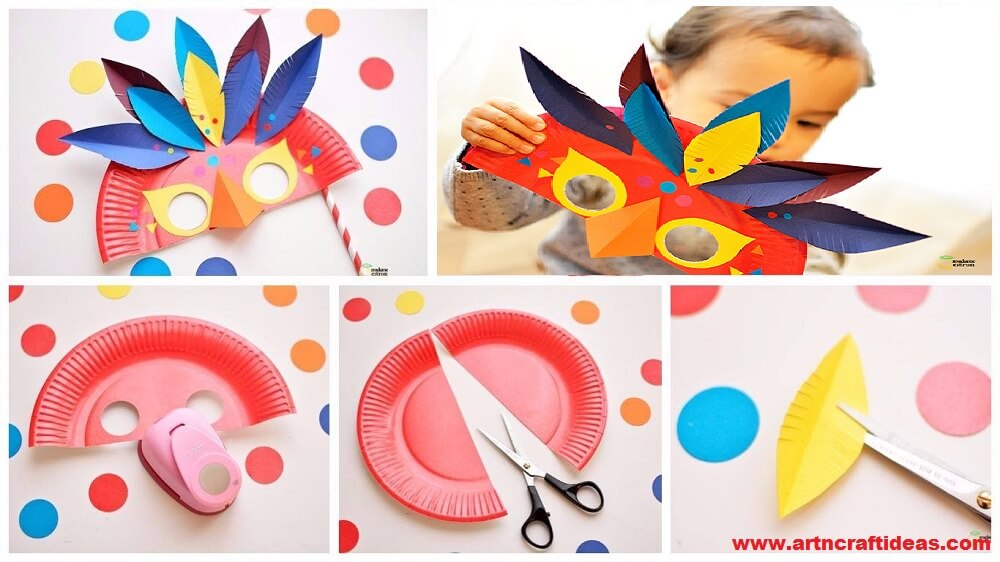
Posted onJune 2, 2017inBest out of Waste, Kids Crafts, Paper Crafts, Tutorial How to make feathered carnival mask
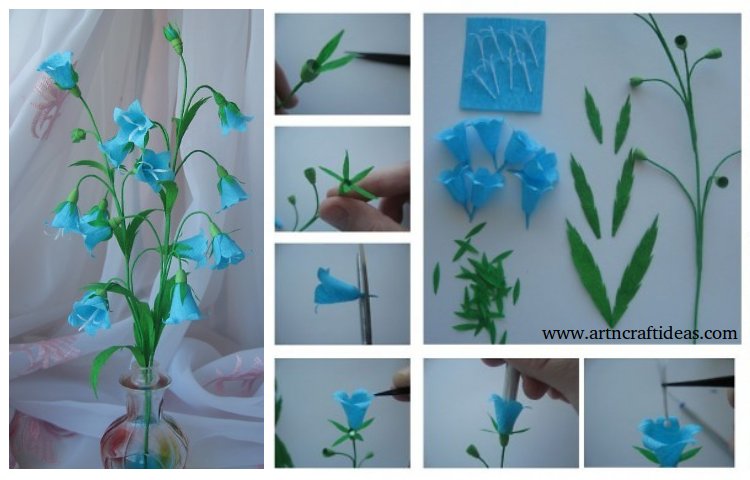
Posted onMay 16, 2017May 16, 2017inDIY, Home Decor, Paper Crafts, Tutorial How to make paper flowers bells – Step by step
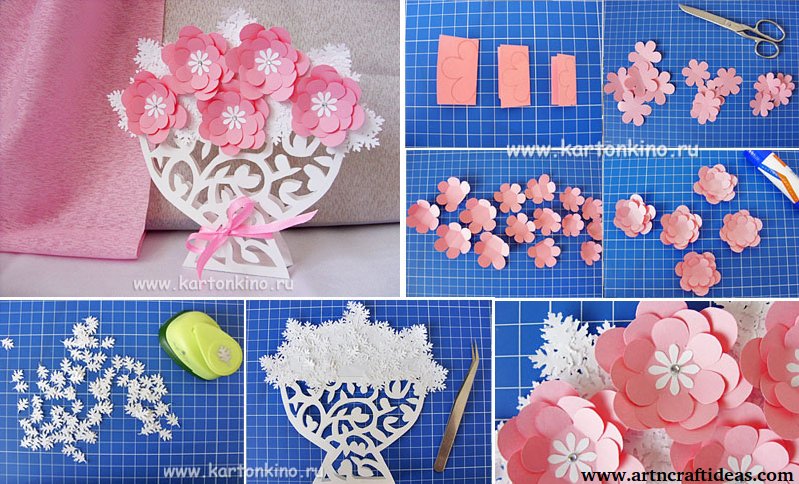
Posted onMay 15, 2017inFeatured, Mother's Day, Paper Crafts, Tutorial Vase with flowers – Mother’s Day Gift (Tutorial)
Posted onMay 15, 2017inDIY, Home Decor, Paper Crafts, Tutorial DIY Beautiful roses from watercolor paper – Step by step