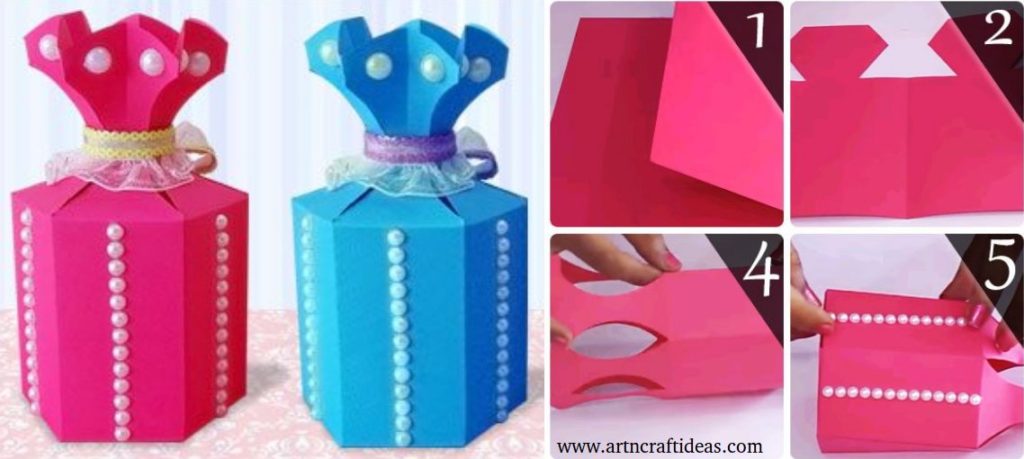
Posted onJuly 13, 2017July 13, 2017inDIY, Paper Crafts, Tutorial, Wedding DIY Paper Craft: Paper Gift Bags/Goody Bags
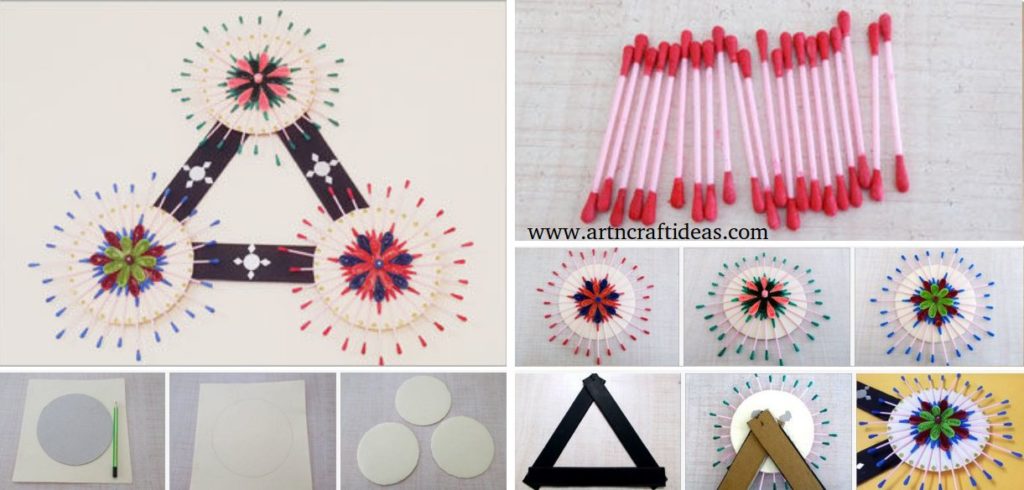
Posted onJuly 13, 2017July 13, 2017inDIY, Home Decor, Paper Crafts, Quilling, Tutorial How to Make Quilling & Earbud Wall Hanging
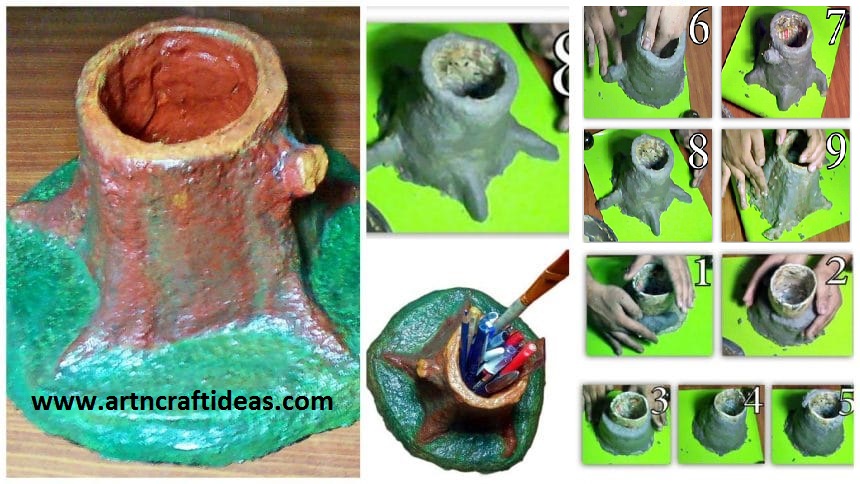
Posted onJuly 8, 2017July 8, 2017inBest out of Waste, Craft, Newspaper Crafts, Tutorial, Video DIY: Handmade Paper Mache Pencil Holder
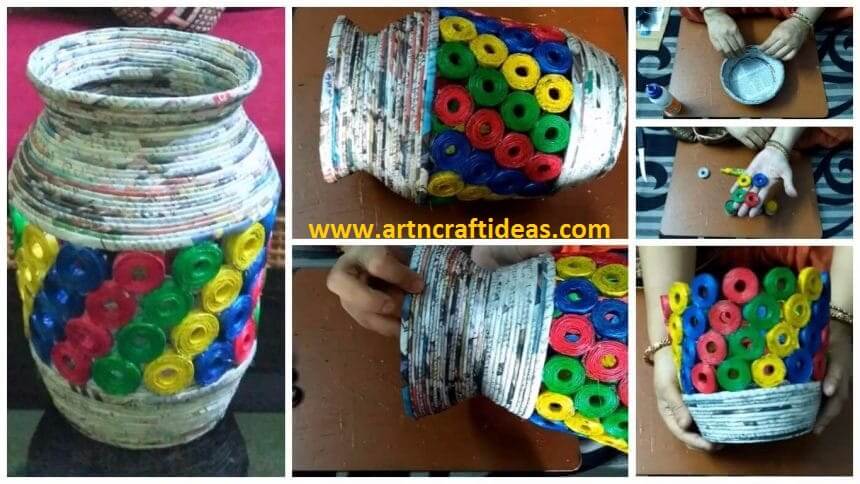
Posted onJuly 8, 2017inBest out of Waste, Craft, Newspaper Crafts, Tutorial How to make a newspaper tubes jar or vase
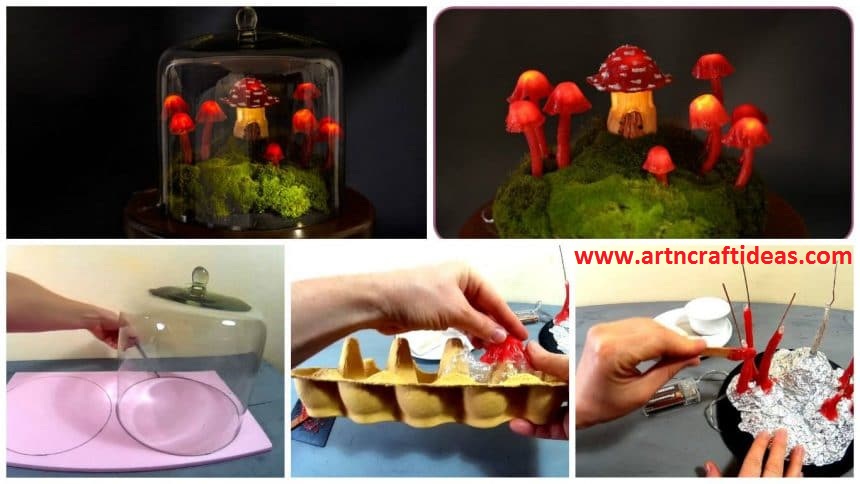
Posted onJuly 8, 2017inCraft, DIY, Home Decor, Tutorial DIY Miniature Fairy Garden Terrarium – Enchanted Mushroom Lights
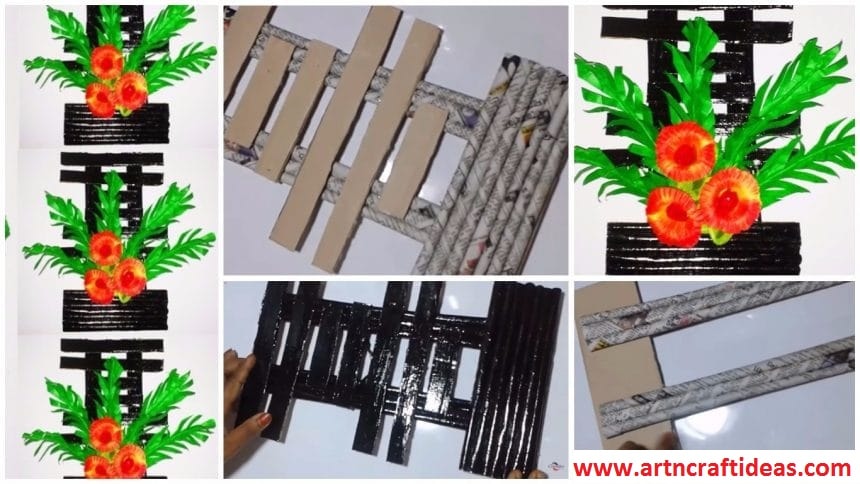
Posted onJuly 6, 2017inBest out of Waste, Craft, Home Decor, Newspaper Crafts, Tutorial How to Make Handmade Newspaper Wall Hanging
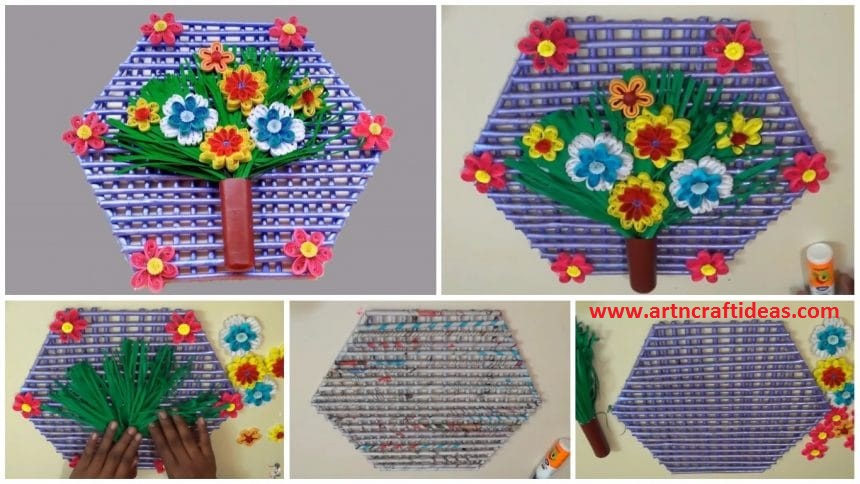
Posted onJuly 6, 2017inBest out of Waste, Craft, Newspaper Crafts, Quilling, Tutorial Paper quilling wall hanging design for room decoration
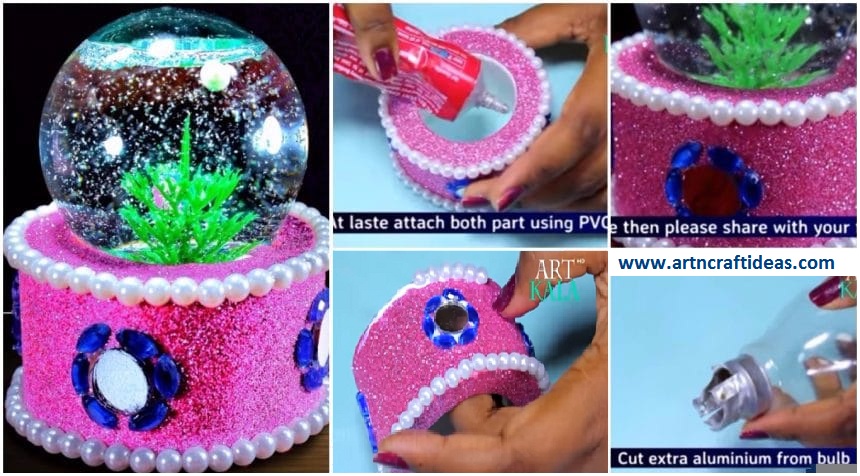
Posted onJuly 5, 2017July 5, 2017inBest out of Waste, Craft, DIY, Tutorial How to make snow globe from waste fuse bulb best out of waste
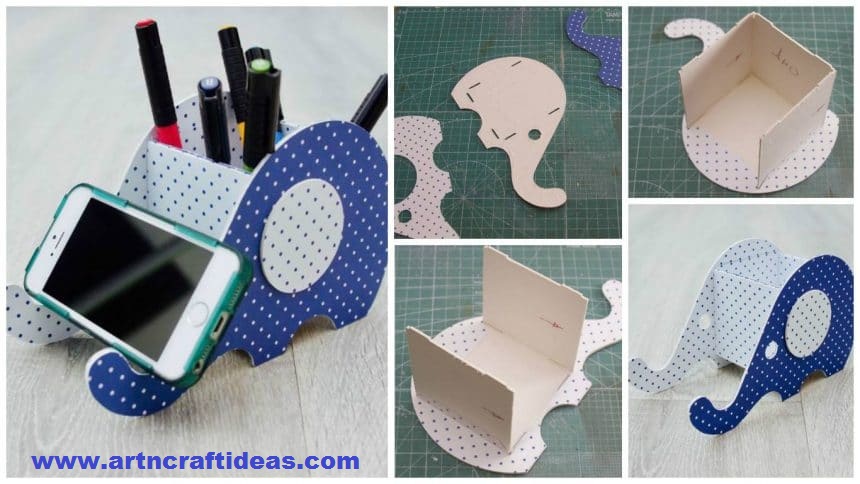
Posted onJuly 2, 2017inBest out of Waste, Cardboard Crafts, Craft, Paper Crafts, Step by step, Tutorial How to make paper and cardboard stand-organizer “Elephant” for the tablet
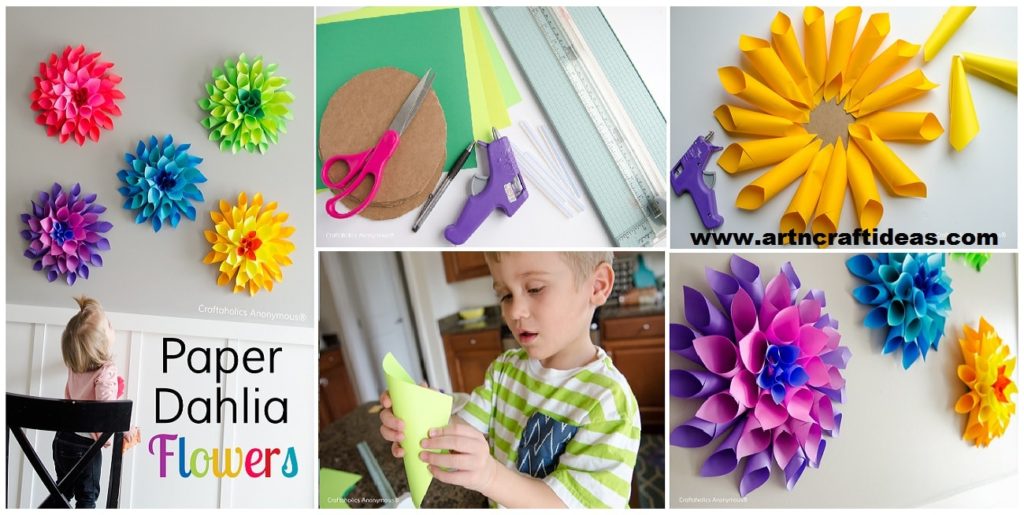
Posted onJuly 1, 2017inCraft, DIY, Kids Crafts, Paper Crafts, Tutorial How to Make Paper Dahlia Flowers