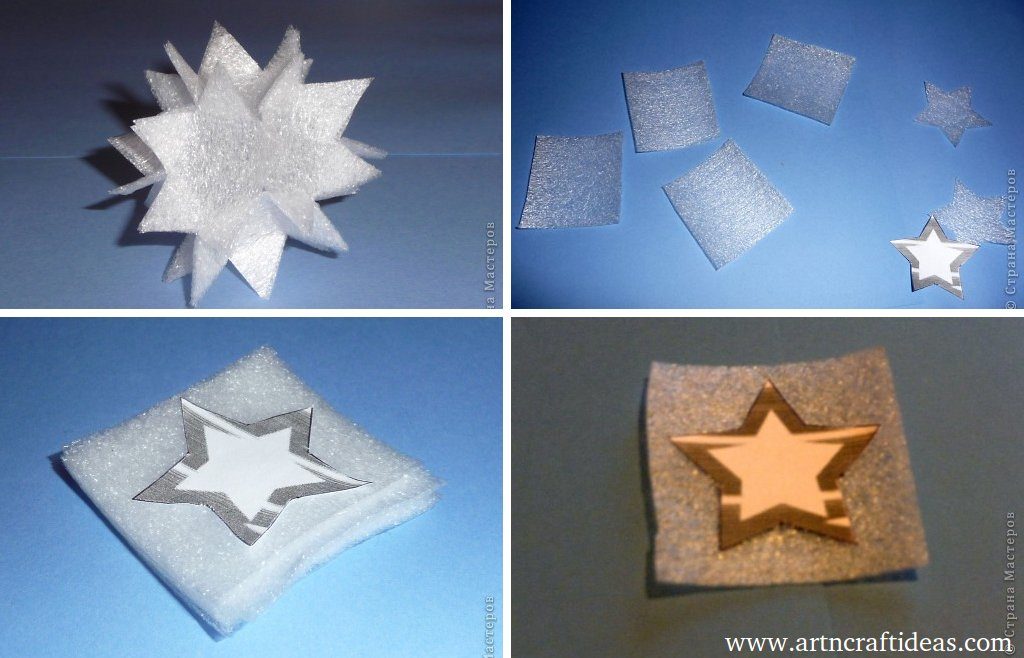
Posted onJune 4, 2017inBest out of Waste, Christmas, Decorations, Tutorial Recycled Craft: Snowflake foam hands (Tutorial)
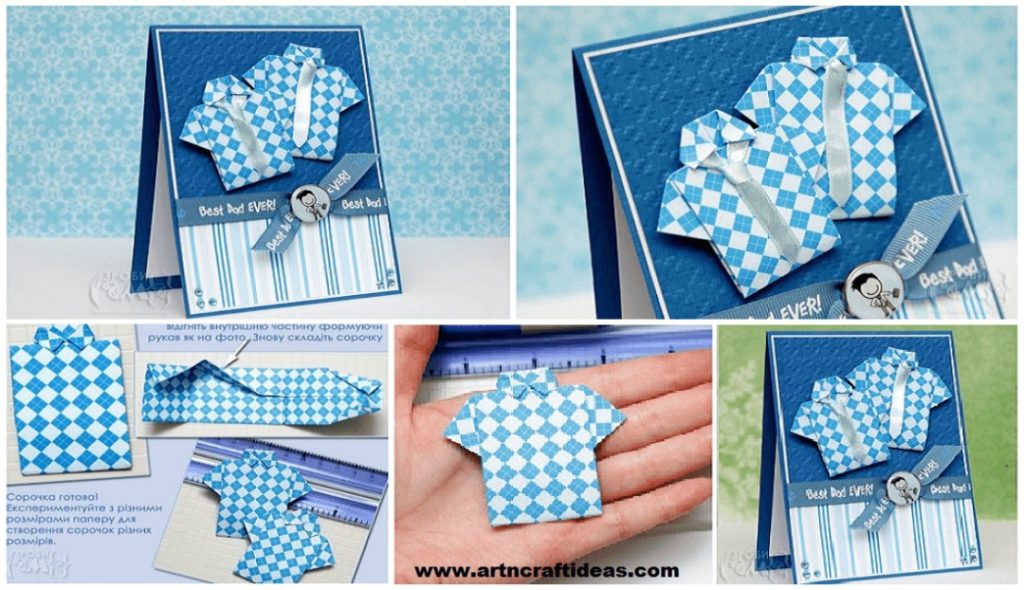
Posted onJune 3, 2017June 3, 2017inCraft, Father's Day, Origami, Tutorial Father’s Day Cards – card with origami-shirt
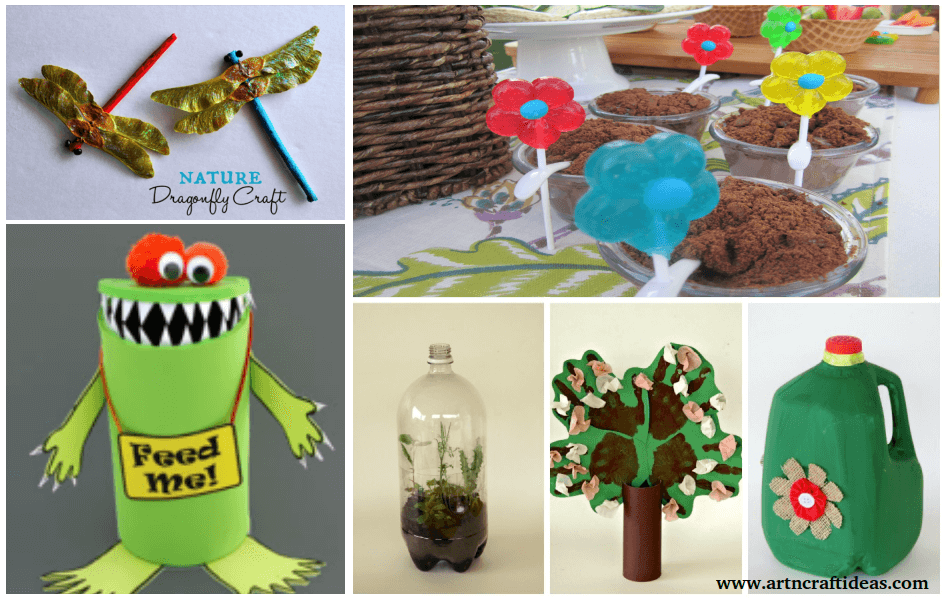
Posted onJune 3, 2017September 8, 2025inBest out of Waste, Kids Crafts, Tutorial, World Environment Day RECYCLED Craft for World Environment Day
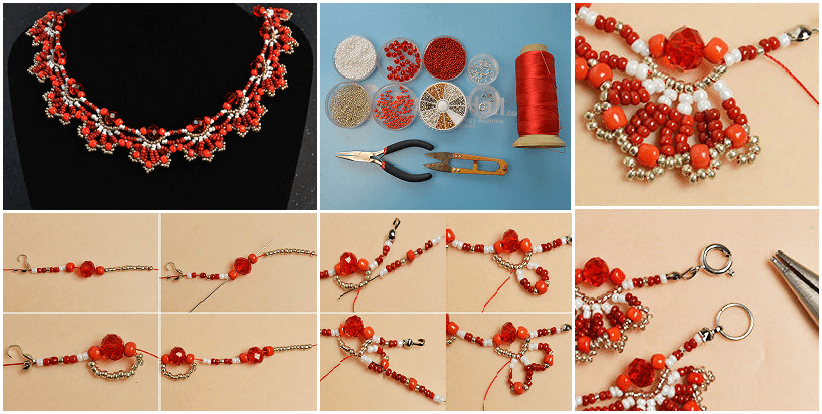
Posted onMay 28, 2017inJewellery, Mother's Day, Tutorial How to Make a Delicate Red Flower Choker Necklace With Beads
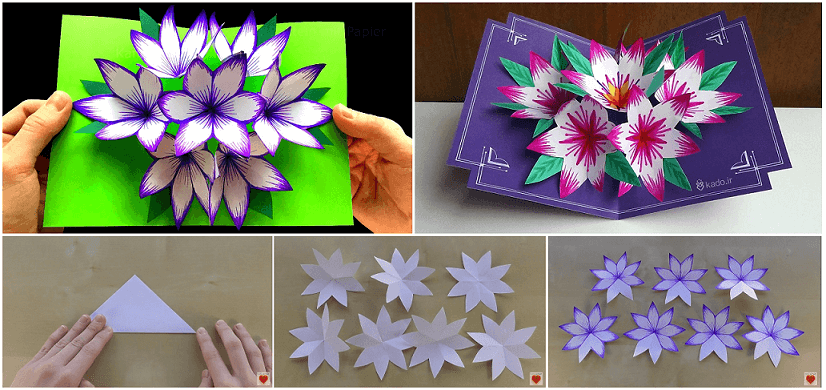
Posted onMay 27, 2017May 28, 2017inFeatured, Mother's Day, Paper Crafts, Tutorial, Video How to Make 3D Flower Pop-Up Card
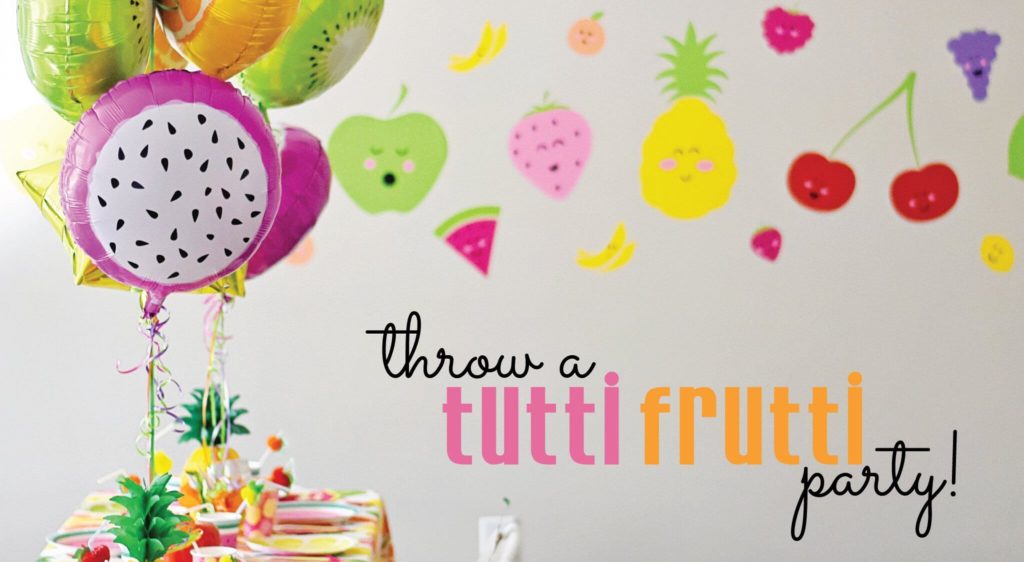
Posted onMay 18, 2017inBirthday, Decorations, Ideas, Kids Corner DIY Cute and Colorful Tutti Frutti Birthday Party Decoration Ideas
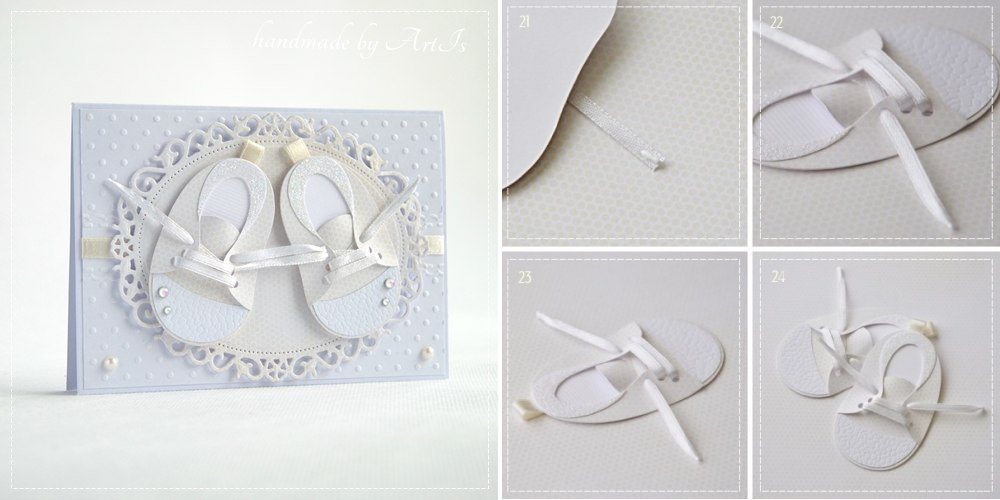
Posted onMay 16, 2017inBirthday, Ideas, Kids Corner, Tutorial DIY Handmade Newborn child’s birthday Card
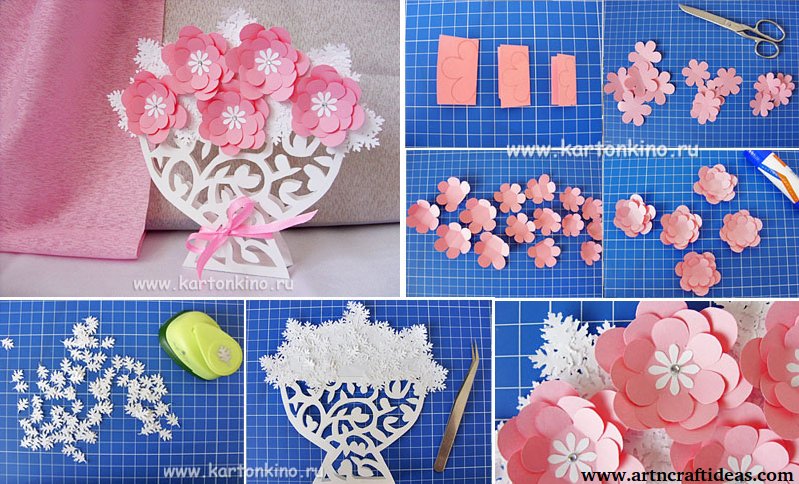
Posted onMay 15, 2017inFeatured, Mother's Day, Paper Crafts, Tutorial Vase with flowers – Mother’s Day Gift (Tutorial)