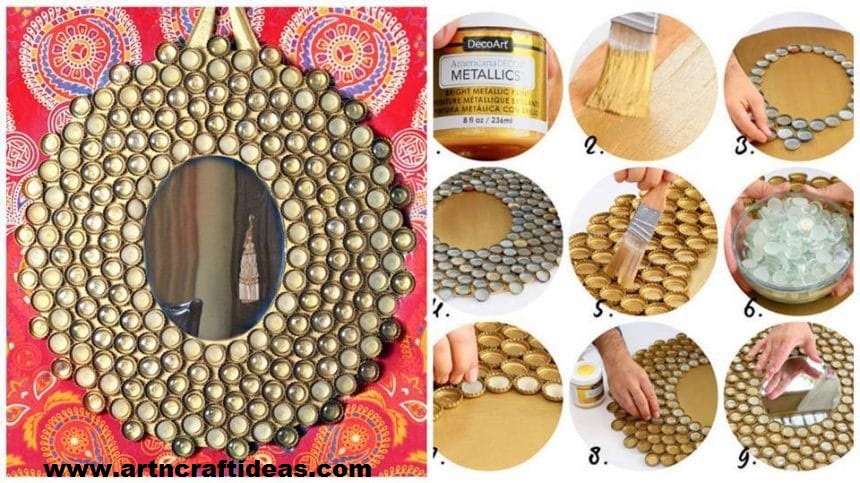
Posted onJune 24, 2017inBest out of Waste, Craft, DIY, Home Decor, Tutorial, Video How to make Boho Bottle Cap Mirror
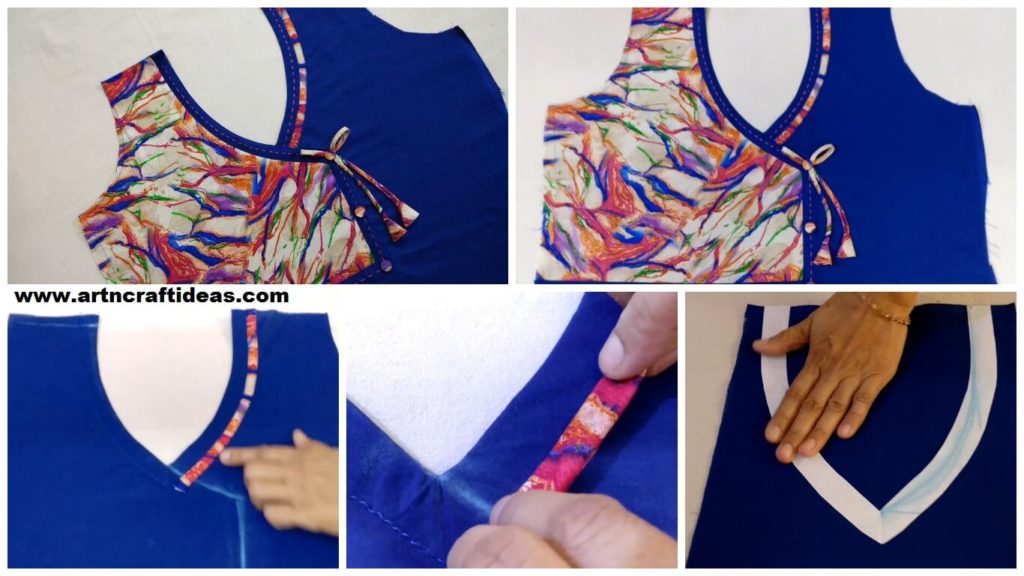
Posted onJune 16, 2017inClothing, Embroidery And Sewing, Patchwork Crafts, Tutorial, Video Designer Kurti Neck Design Cutting and Stitching
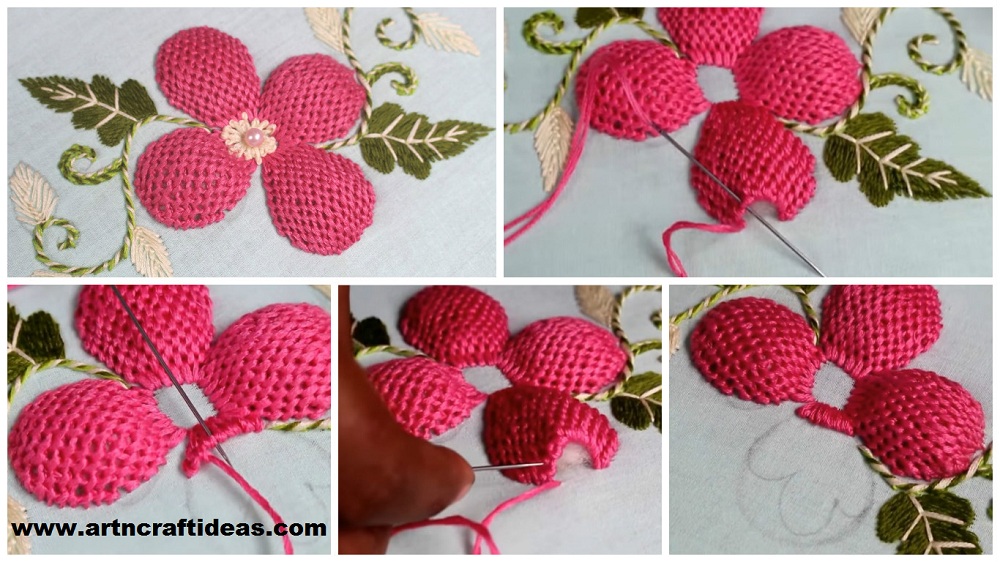
Posted onJune 2, 2017inEmbroidery And Sewing, Tutorial, Video Pump Lace Stitch Flower Embroidery Designs
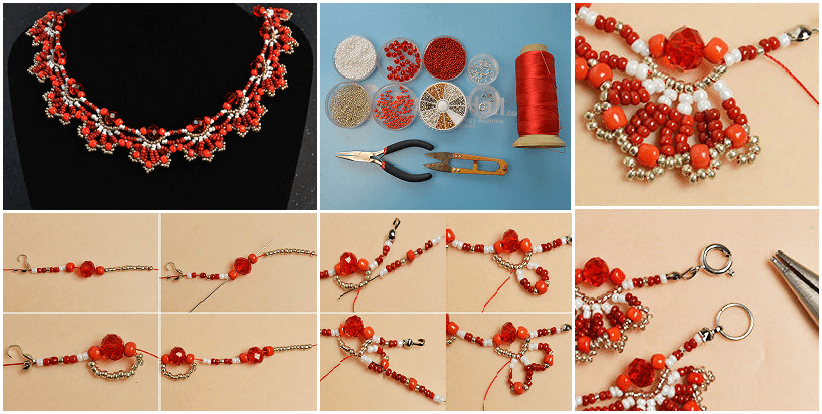
Posted onMay 28, 2017inJewellery, Mother's Day, Tutorial How to Make a Delicate Red Flower Choker Necklace With Beads