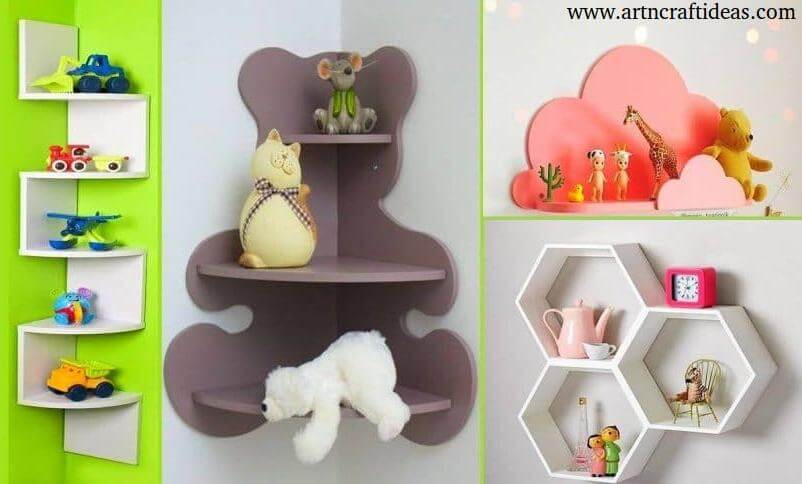
Posted onOctober 31, 2017August 16, 2023inCardboard Crafts, DIY, Step by step DIY ROOM DECOR: Easy Cardboard Crafts Ideas at Home
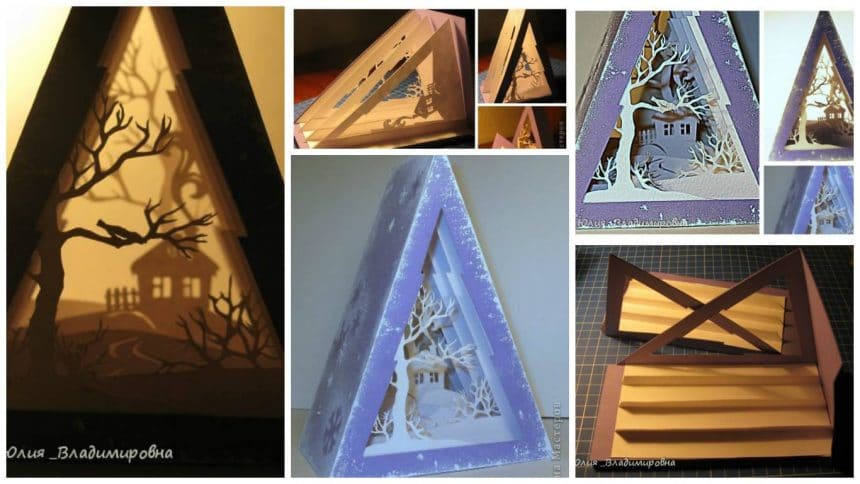
Posted onSeptember 14, 2017September 8, 2025inHome Decor, Paper Crafts, Step by step, Tutorial How to make herringbone tunnel – Step By Step
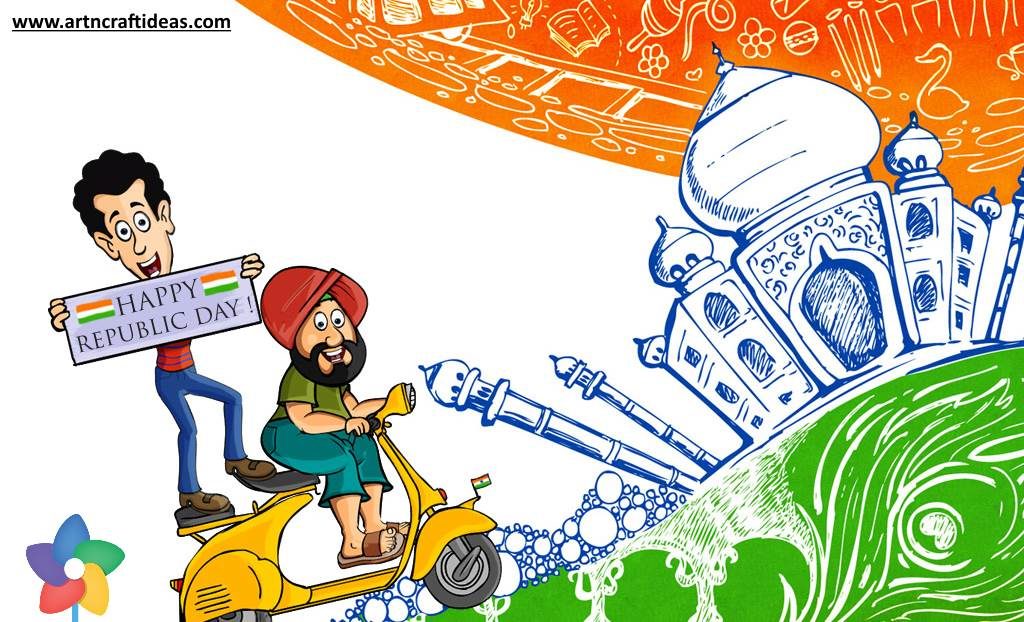
Posted onSeptember 14, 2017January 19, 2018inDecorations, Ideas, Republic Day 20+ Decoration Ideas for India Republic Day Celebration
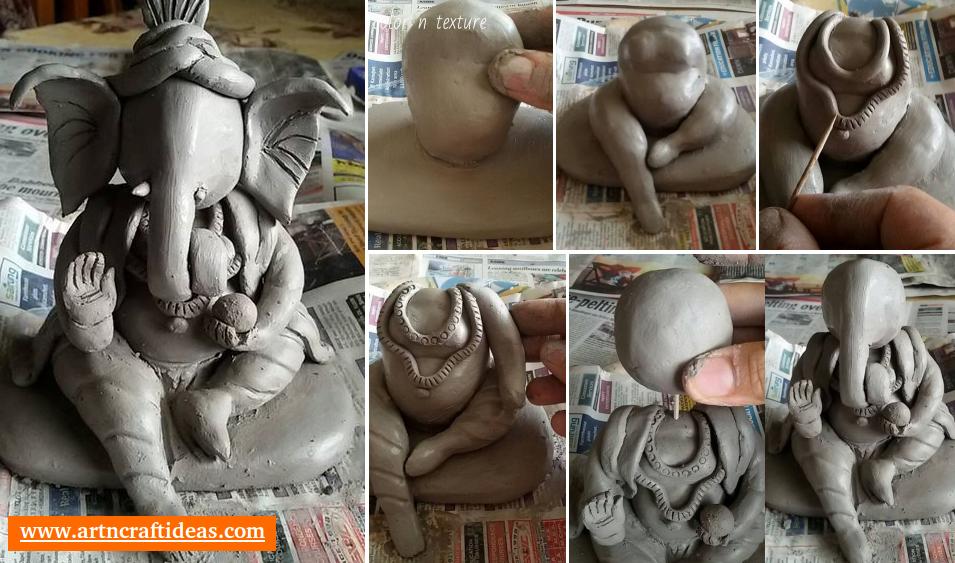
Posted onAugust 24, 2017August 21, 2025inCelebrations, Clay, DIY, Ganesh Chaturthi, Step by step, Tutorial How to make Eco-friendly Ganesh Idol at Home – Step by Step Image Tutorial
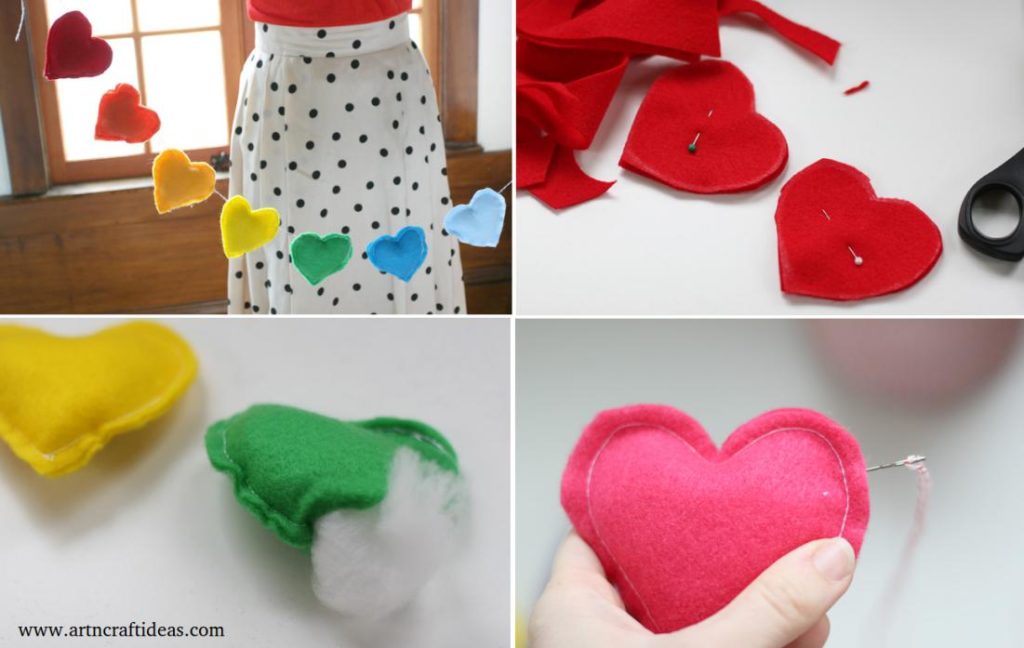
Posted onJuly 17, 2017inCelebrations, Decorations, DIY, Home Decor, Tutorial, Valentine’s Day DIY: Valentine’s Day Rainbow Banner
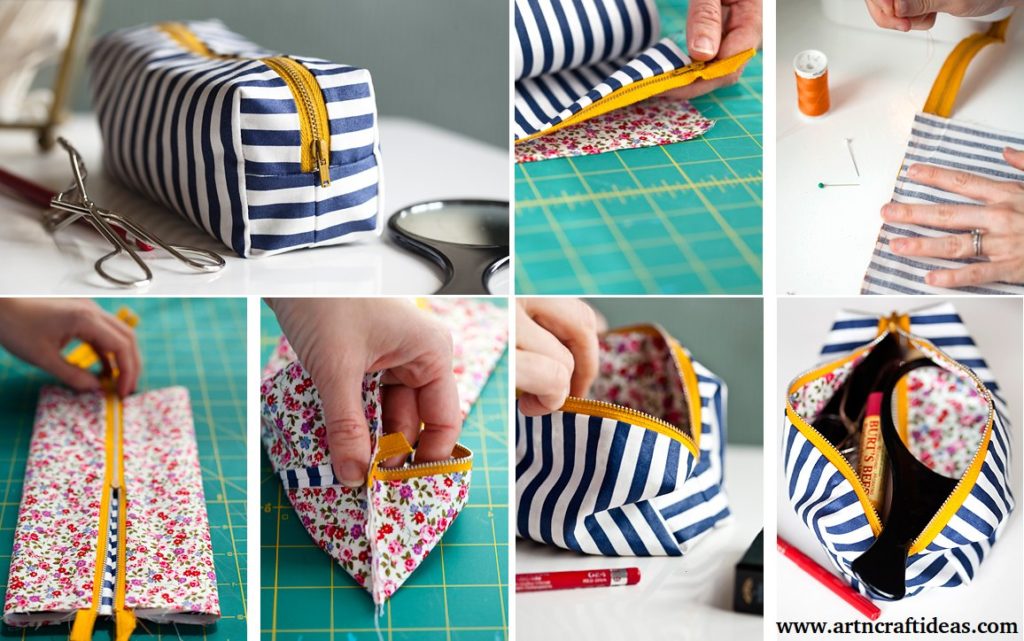
Posted onJuly 17, 2017inClothing, DIY, Fashion, Tutorial DIY Tutorial: Make Your Own Mini Boxy Makeup Bag
Posted onJuly 13, 2017July 13, 2017inDIY, Paper Crafts, Tutorial, Wedding DIY Paper Craft: Paper Gift Bags/Goody Bags
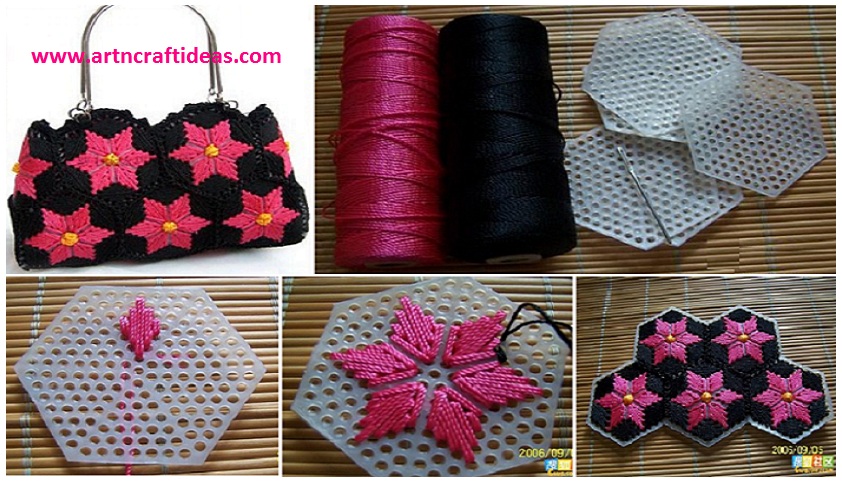
Posted onJuly 10, 2017July 10, 2017inDIY, Fashion, Tutorial How to Make Pretty Hand Bag from Stitch on Plastic Canvas
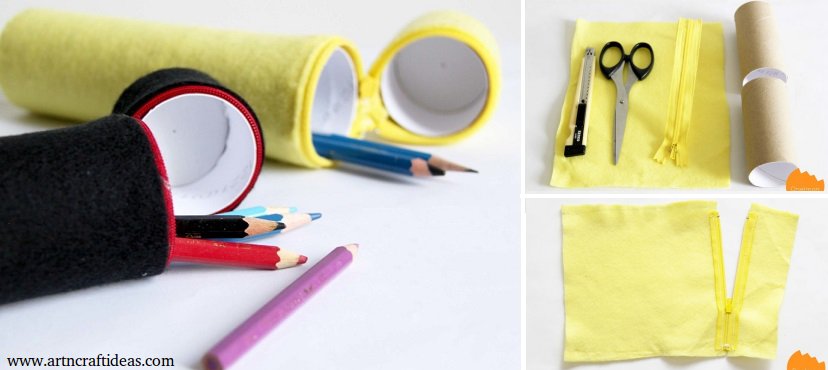
Posted onJuly 10, 2017September 23, 2023inDIY, Kids Corner, Kids Crafts, Tutorial DIY Crafts: How to Make Cardboard Tube Pencil case