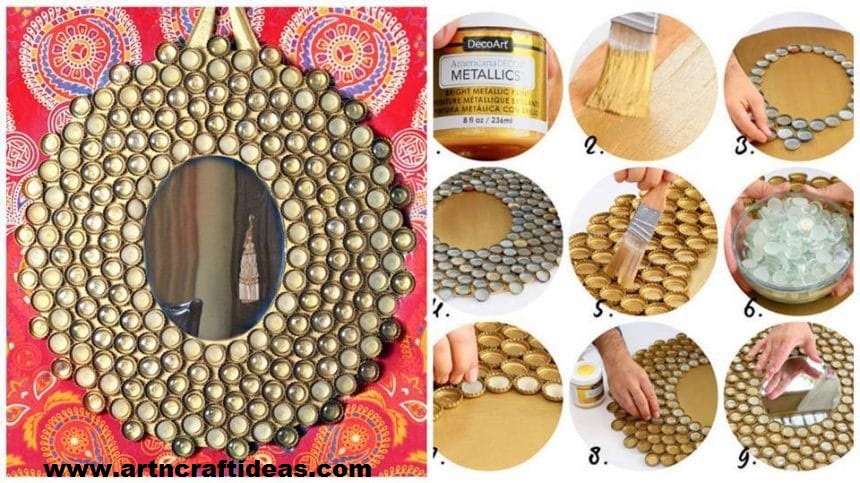
Posted onJune 24, 2017inBest out of Waste, Craft, DIY, Home Decor, Tutorial, Video How to make Boho Bottle Cap Mirror
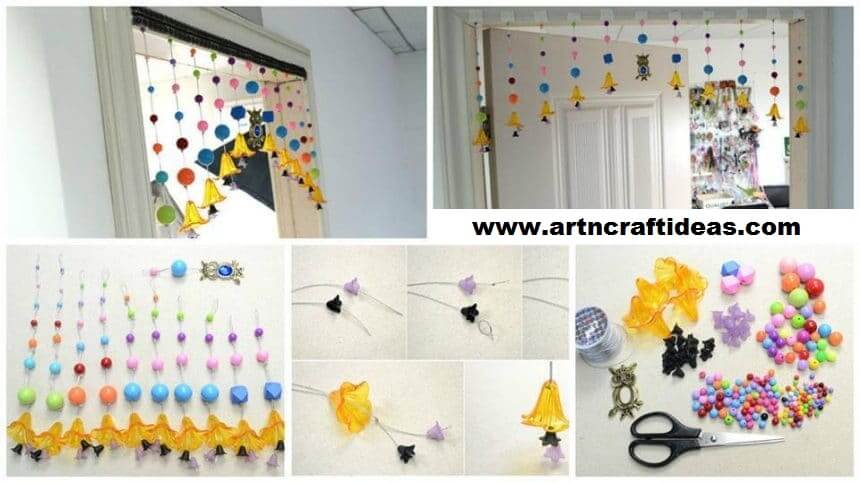
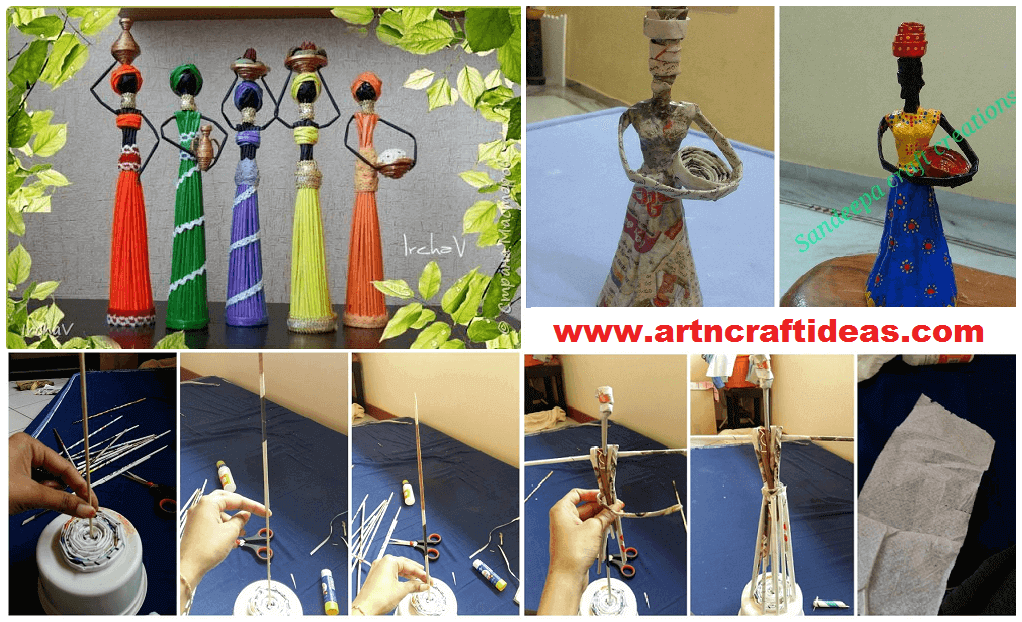
Posted onJune 24, 2017inBest out of Waste, Craft, Newspaper Crafts, Tutorial How to Make African Doll from Newspaper Tubes
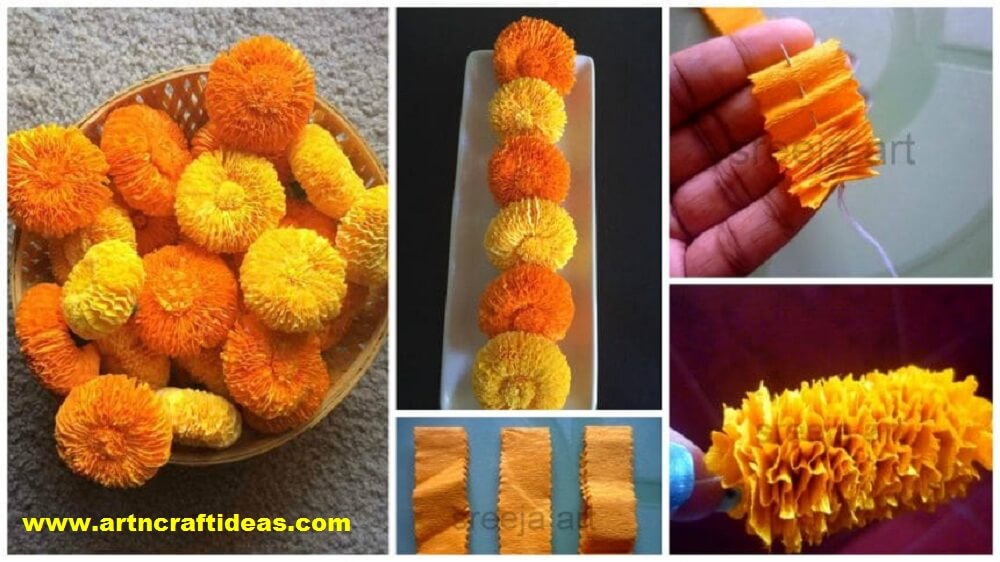
Posted onJune 24, 2017November 19, 2022inDiwali, Flower Crafts, Paper Crafts, Tutorial How to make marigold flower with crepe paper
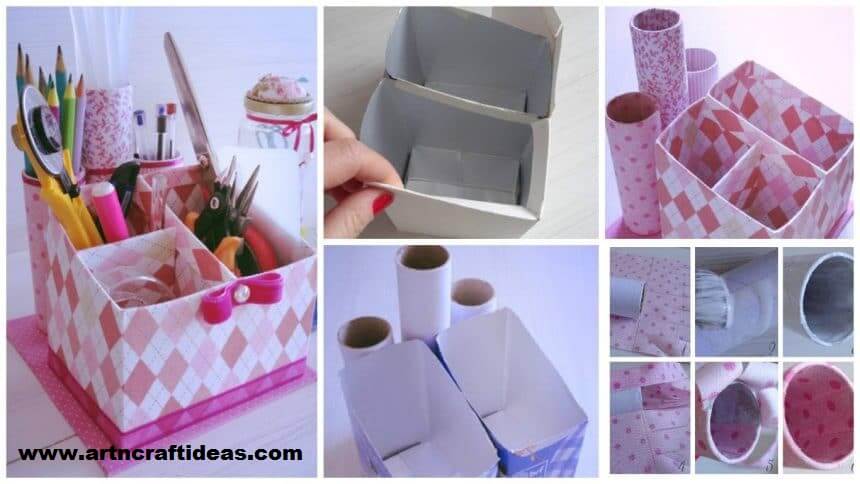
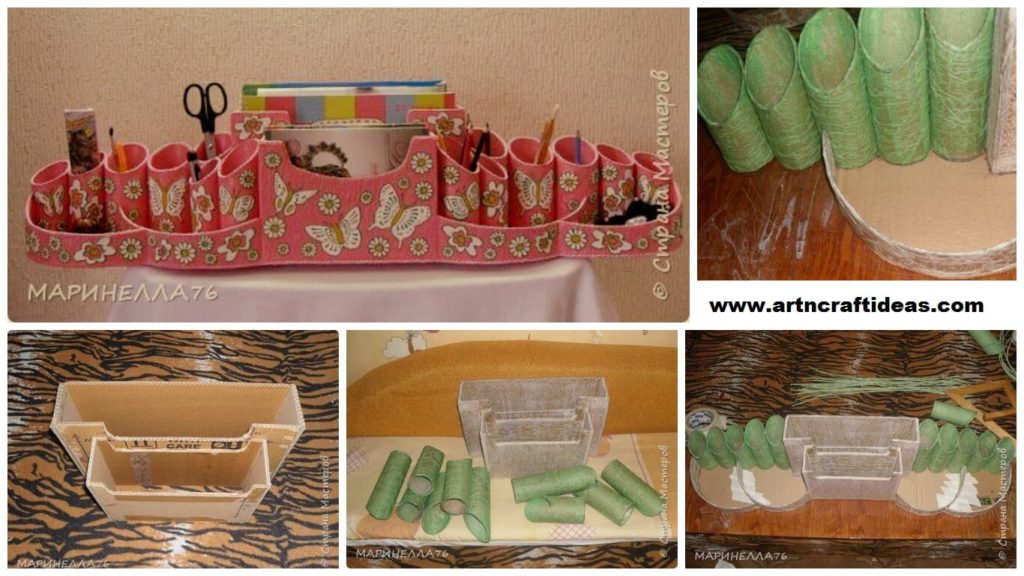
Posted onJune 20, 2017inBest out of Waste, Cardboard Crafts, Craft, Tutorial How to Make Cardboard Mega Organizer
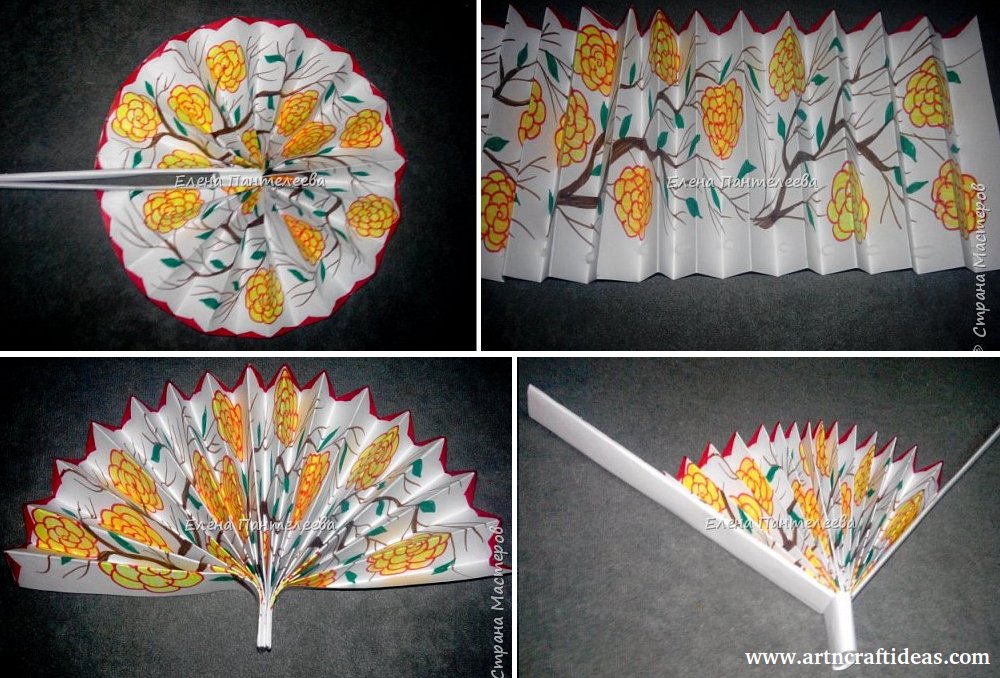
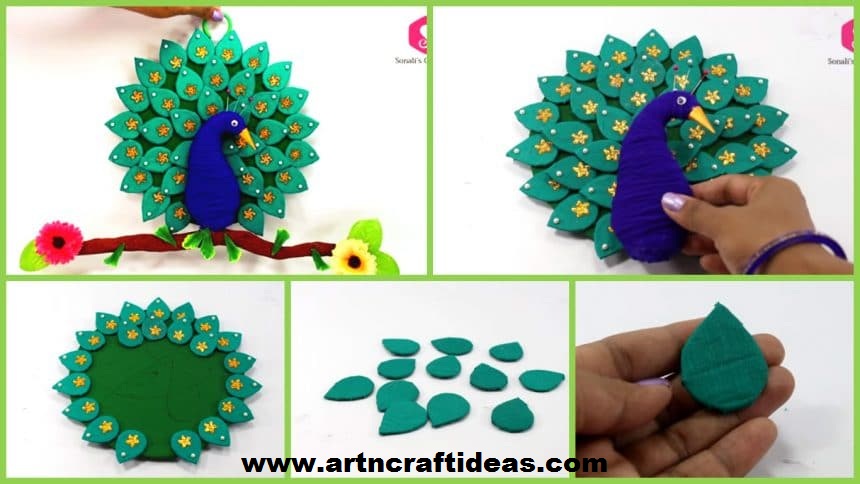
Posted onJune 20, 2017inCardboard Crafts, Craft, Tutorial, Video How to Make Cardboard Peacock Wall Hanging For Home Decor
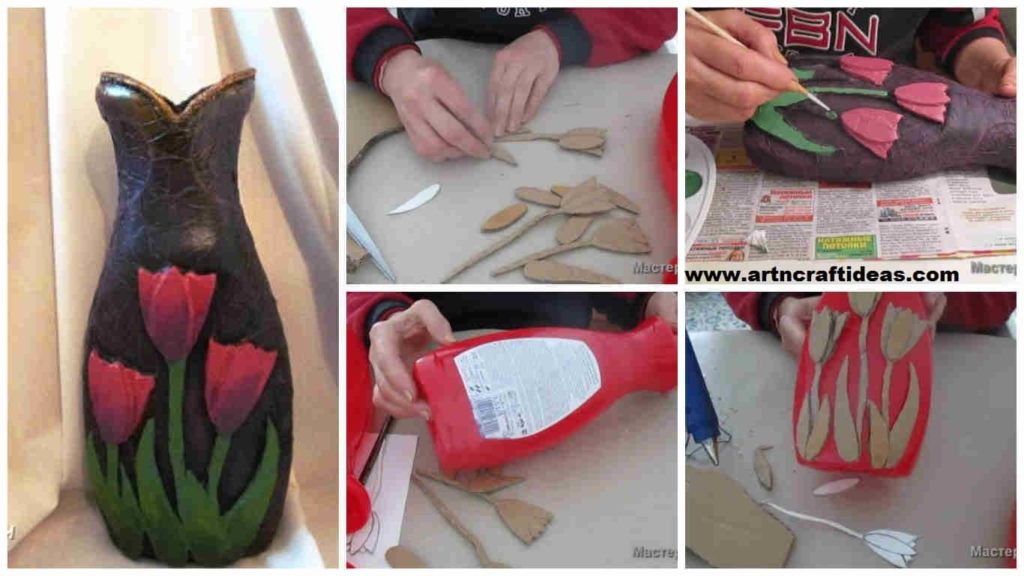
Posted onJune 20, 2017inBest out of Waste, Cardboard Crafts, Tutorial How to make vase from plastic bottle