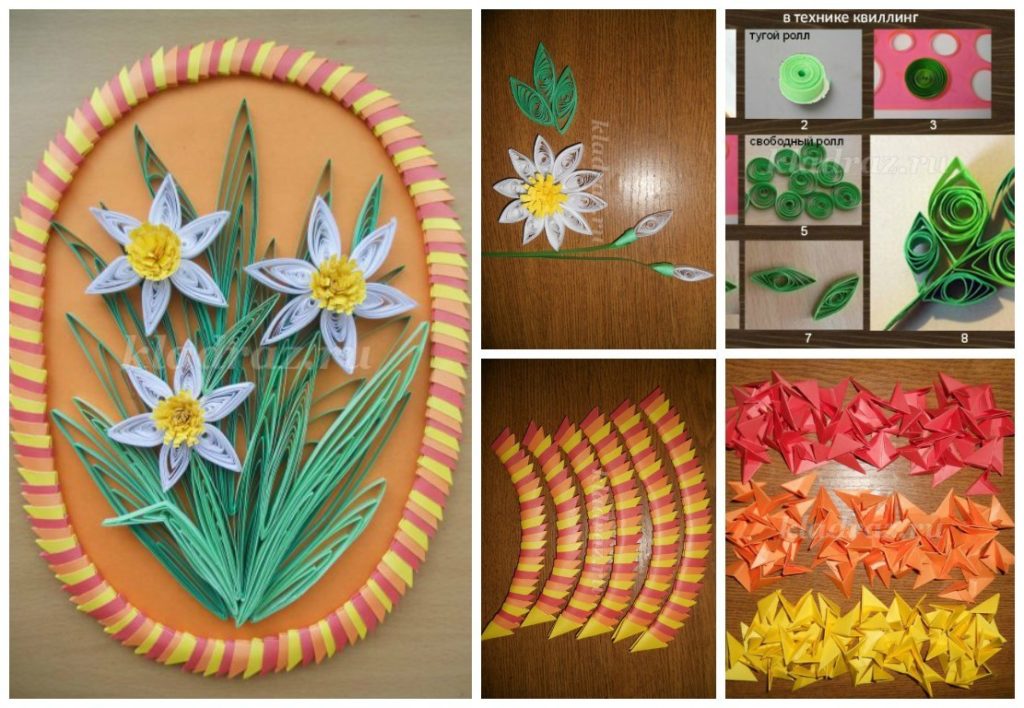
Posted onJanuary 22, 2017inQuilling, Step by step, Tutorial How to make Daffodils from quilling technique
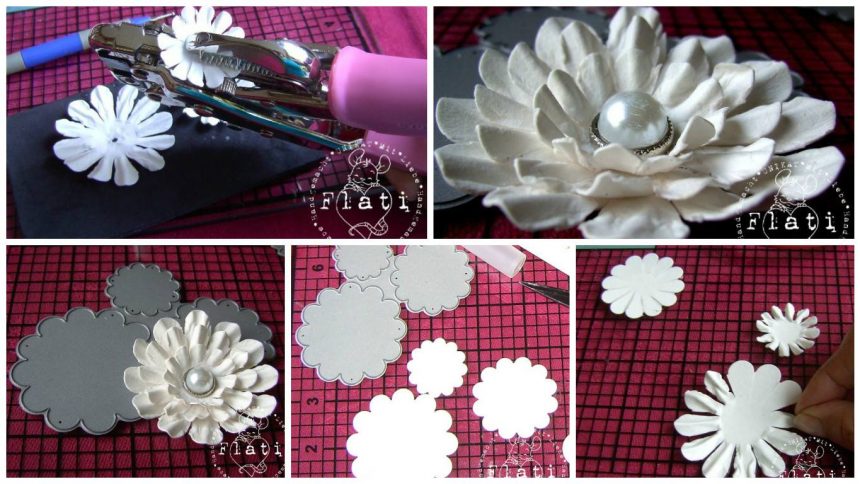
Posted onJanuary 19, 2017inFlower Crafts, Paper Crafts, Step by step, Tutorial How to make beautiful elegant flower scrap of watercolor paper
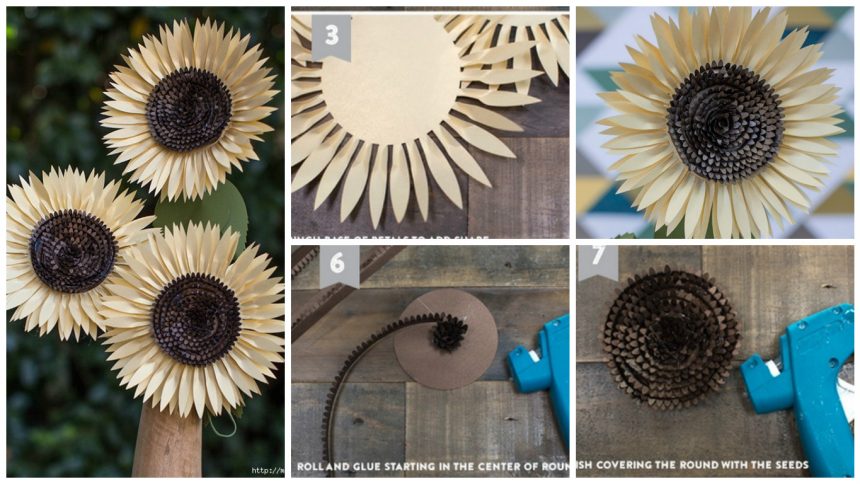
Posted onJanuary 18, 2017January 18, 2017inPaper Crafts, Step by step, Tutorial How to make beautiful sunflowers
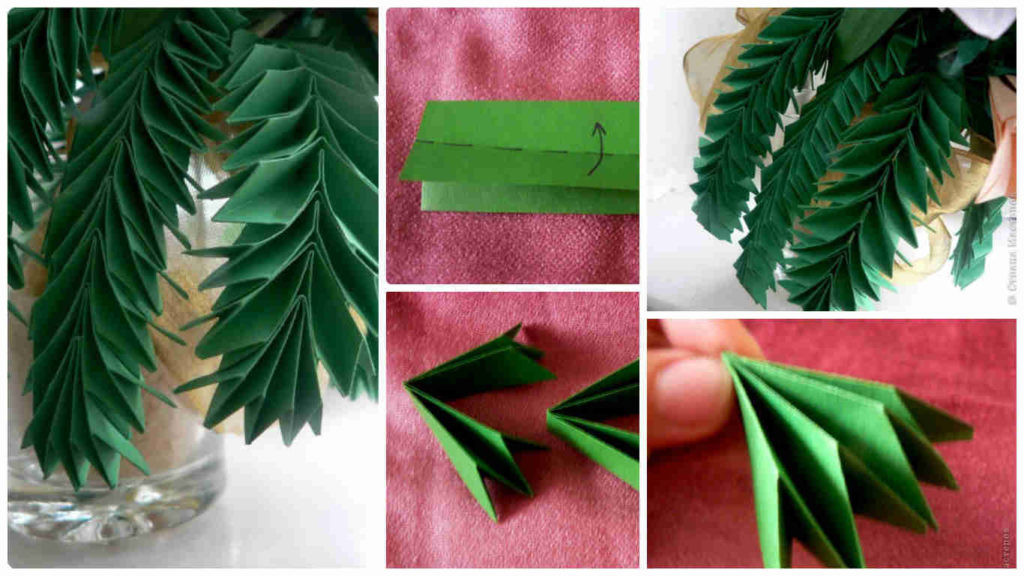
Posted onJanuary 18, 2017inPaper Crafts, Step by step, Tutorial How to make spruce twigs – Step By Step
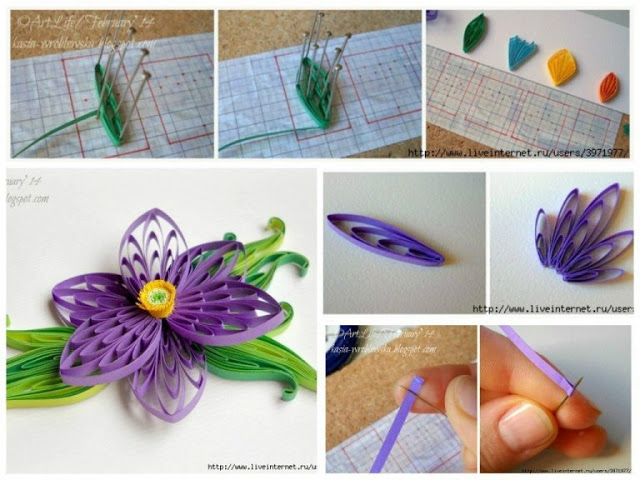
Posted onJanuary 15, 2017inDIY, Flower Crafts, Home Decor, Quilling Husking quilling paper idea – step by step
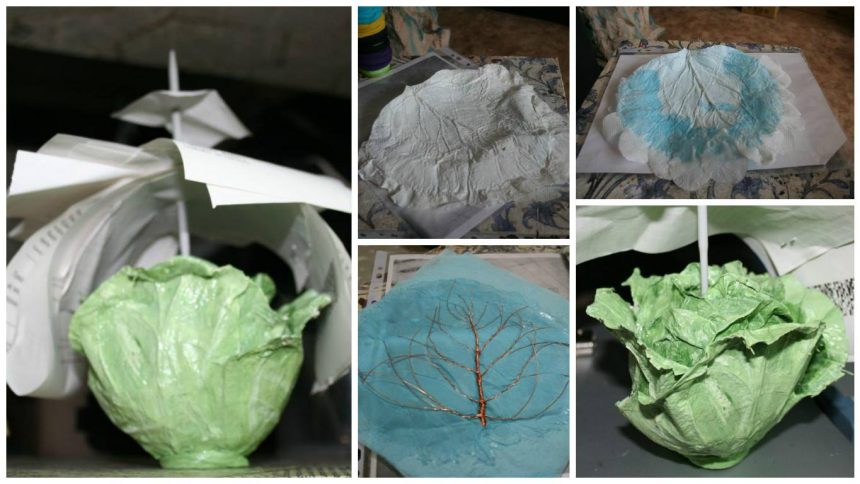
Posted onJanuary 12, 2017inDIY, Home Decor, Paper Crafts, Step by step, Tutorial DIY Beautiful cabbage leaf organizer
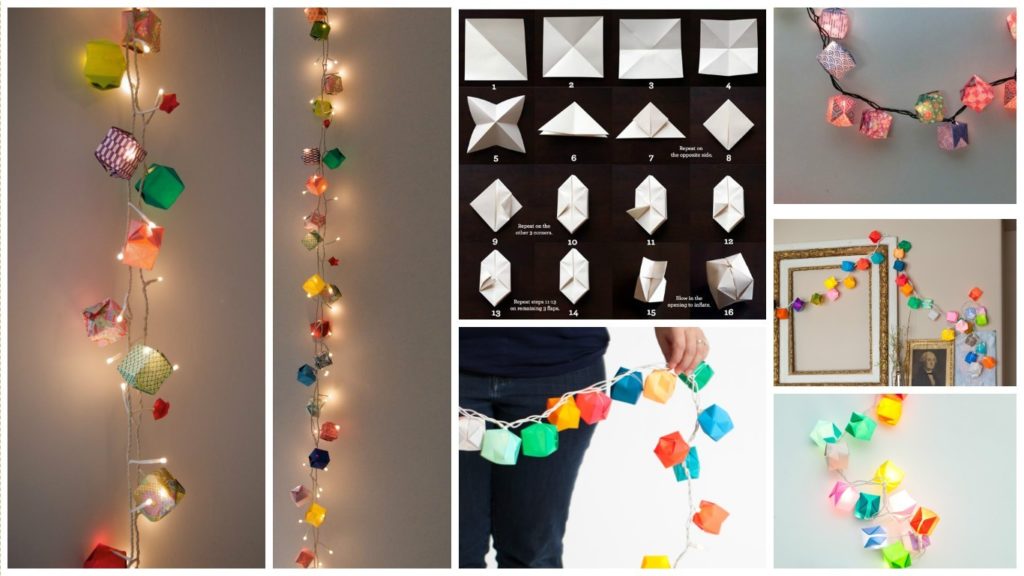
Posted onJanuary 11, 2017inDIY, Home Decor, Origami, Step by step, Tutorial Beautiful Origami Light Garland
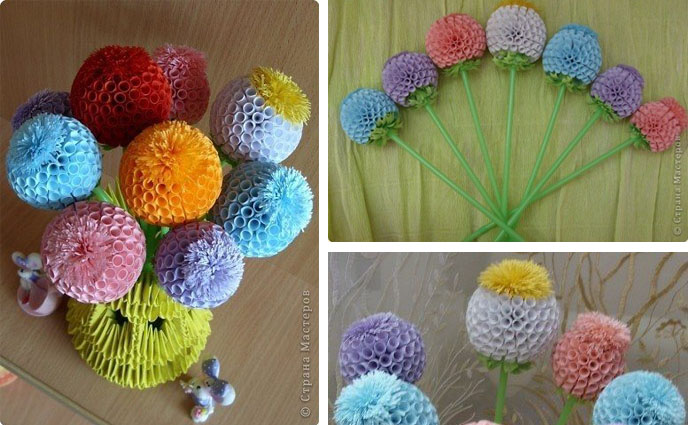
Posted onJanuary 11, 2017inDIY, Flower Crafts, Quilling, Step by step, Tutorial DIY Quilling wonder balls
Posted onJanuary 11, 2017January 11, 2017inChristmas, DIY, Origami, Paper Crafts, Step by step, Tutorial How to Make Origami Snowman
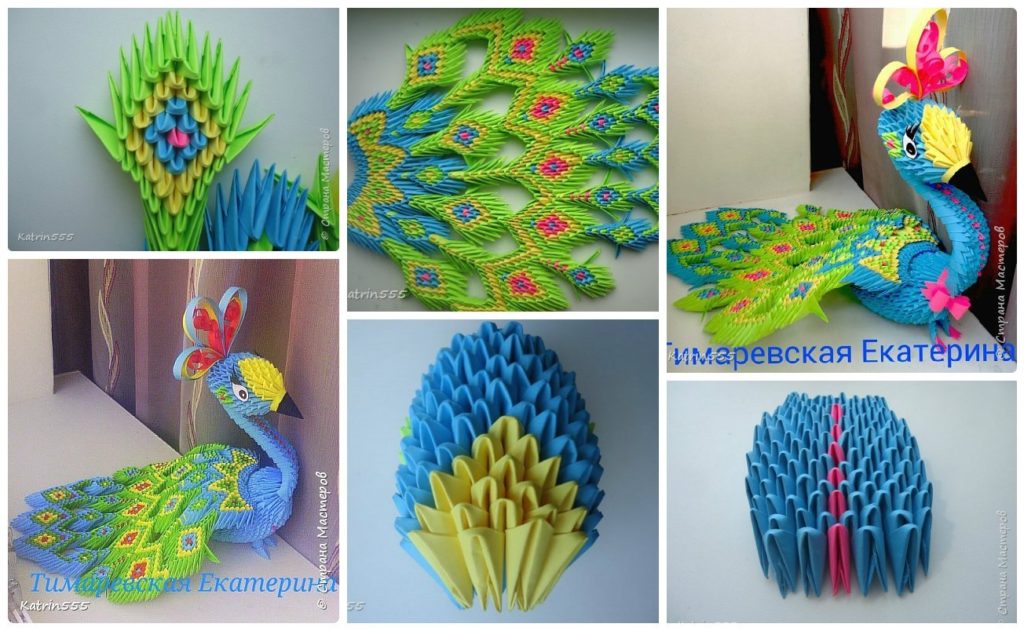
Posted onJanuary 11, 2017January 11, 2017inDIY, Origami, Paper Crafts, Step by step, Tutorial DIY How to make origami peacock