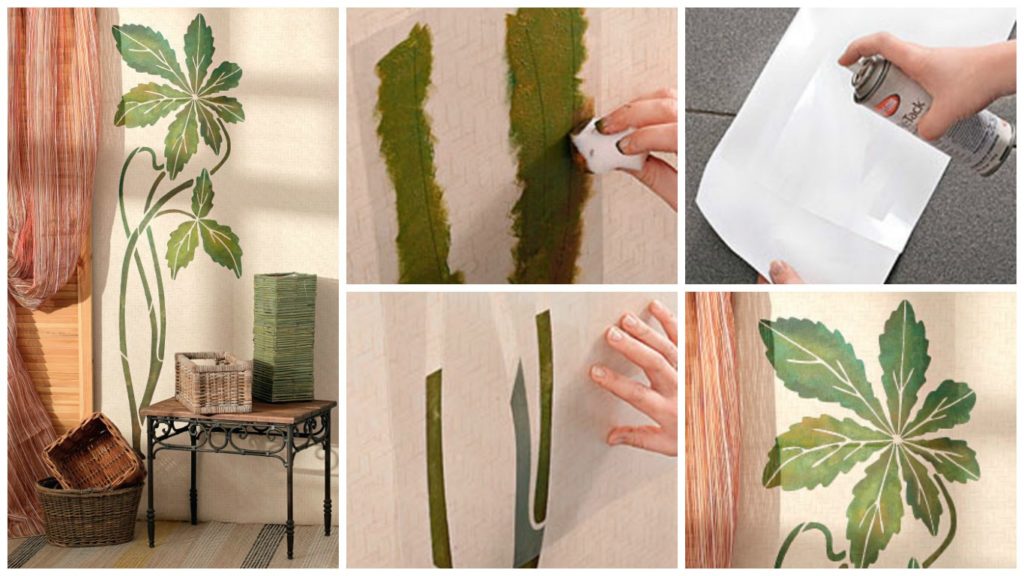
Posted onJanuary 22, 2017inHome Decor, Step by step, Tutorial How to draw herbal mural – Step By Step
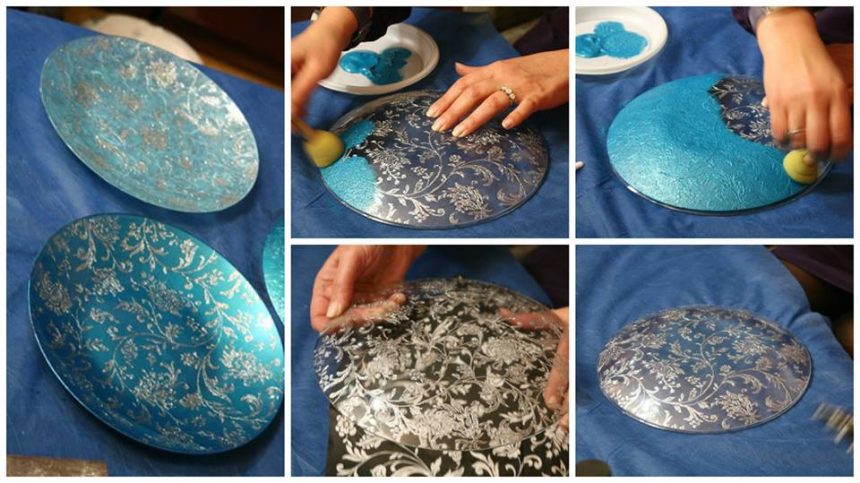
Posted onJanuary 20, 2017inHome Decor, Step by step, Tutorial How to make plates with a brocade effect – Step By Step
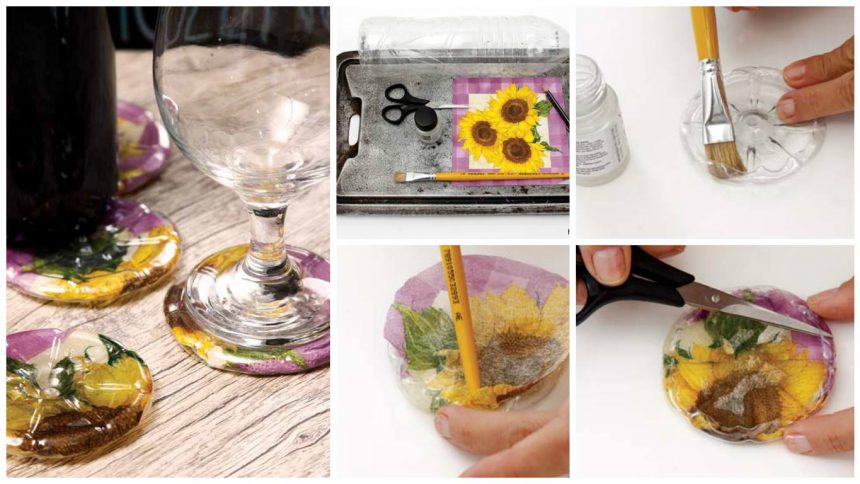
Posted onJanuary 19, 2017January 19, 2017inHome Decor, Step by step, Tutorial Beautiful coasters out of plastic bottles
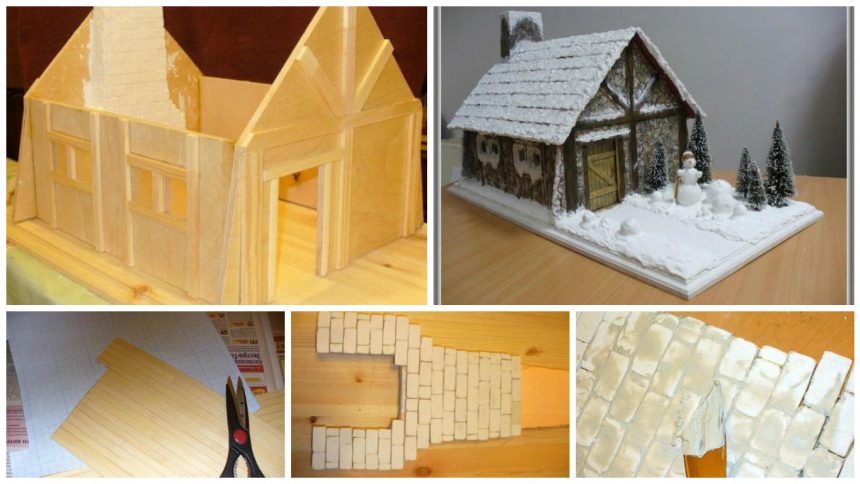
Posted onJanuary 19, 2017inHome Decor, Step by step, Tutorial How to make a miniature alpine hut – Step By Step
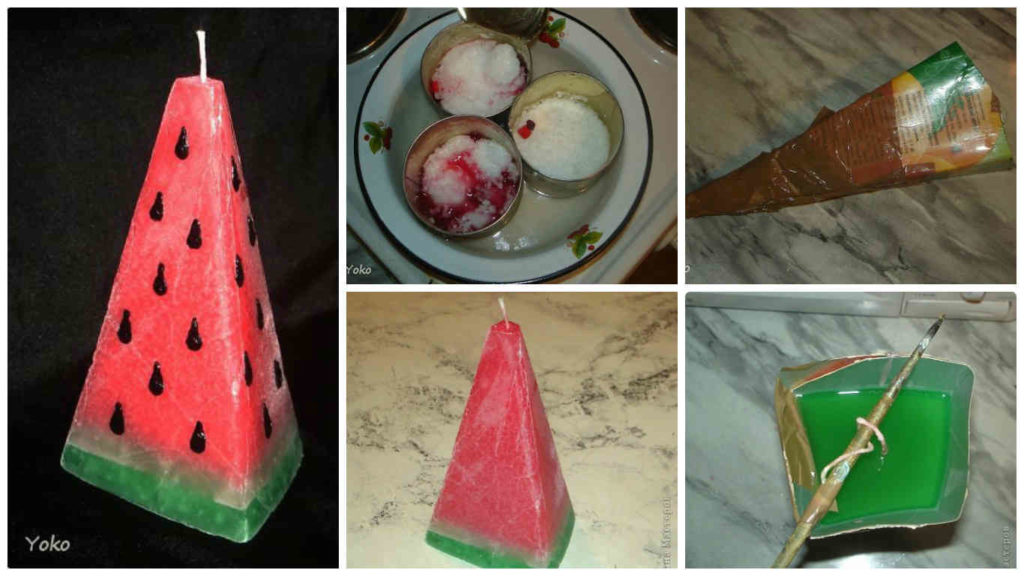
Posted onJanuary 18, 2017inHome Decor, Step by step, Tutorial How to make beautiful watermelon candle
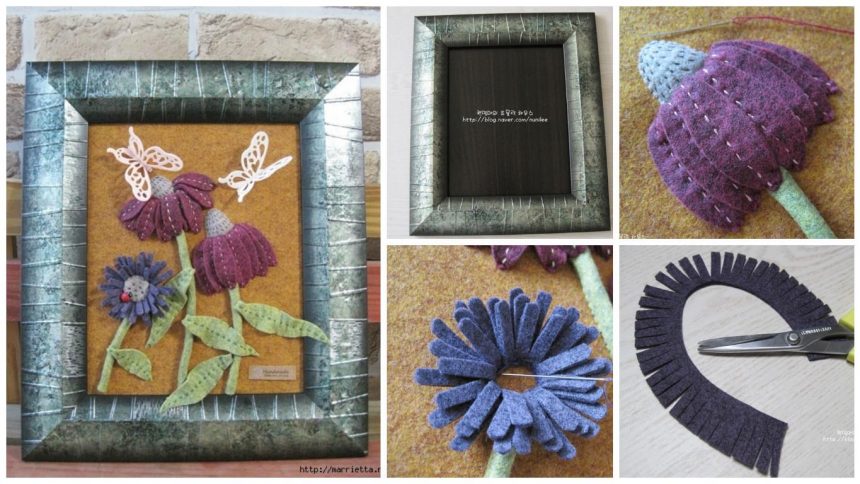
Posted onJanuary 16, 2017inHome Decor, Step by step, Tutorial How to make flower art panels of felt – Step By Step
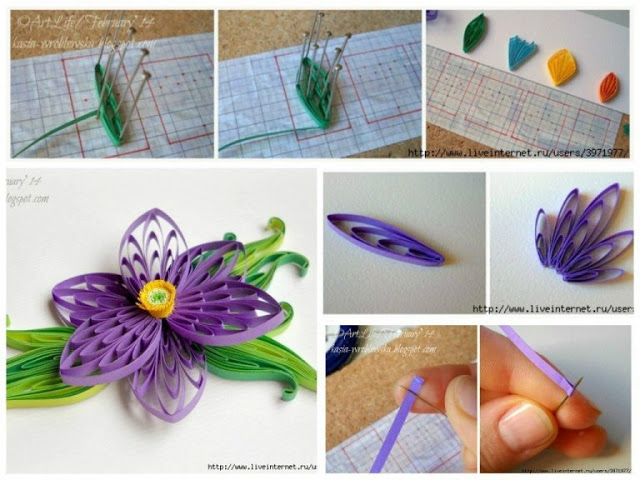
Posted onJanuary 15, 2017inDIY, Flower Crafts, Home Decor, Quilling Husking quilling paper idea – step by step
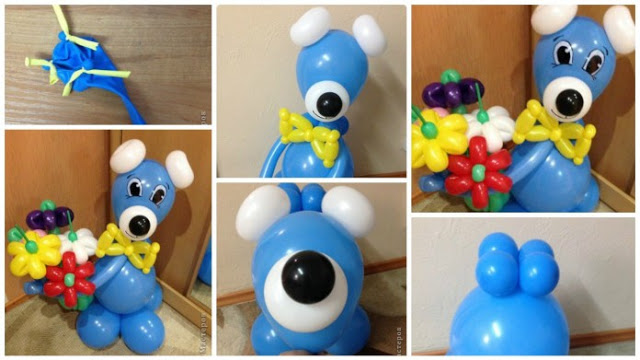
Posted onJanuary 15, 2017inBirthday, DIY, Home Decor, Kids Crafts, Tutorial How to make Bear of balloons
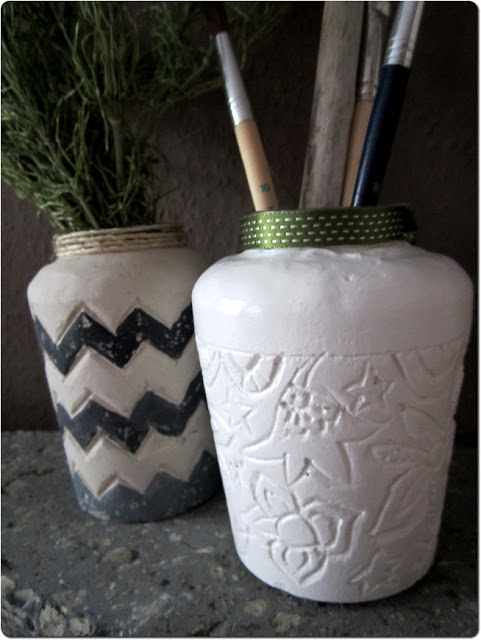
Posted onJanuary 15, 2017inHome Decor, Step by step, Tutorial How to make stylish flower vase – Step By Step
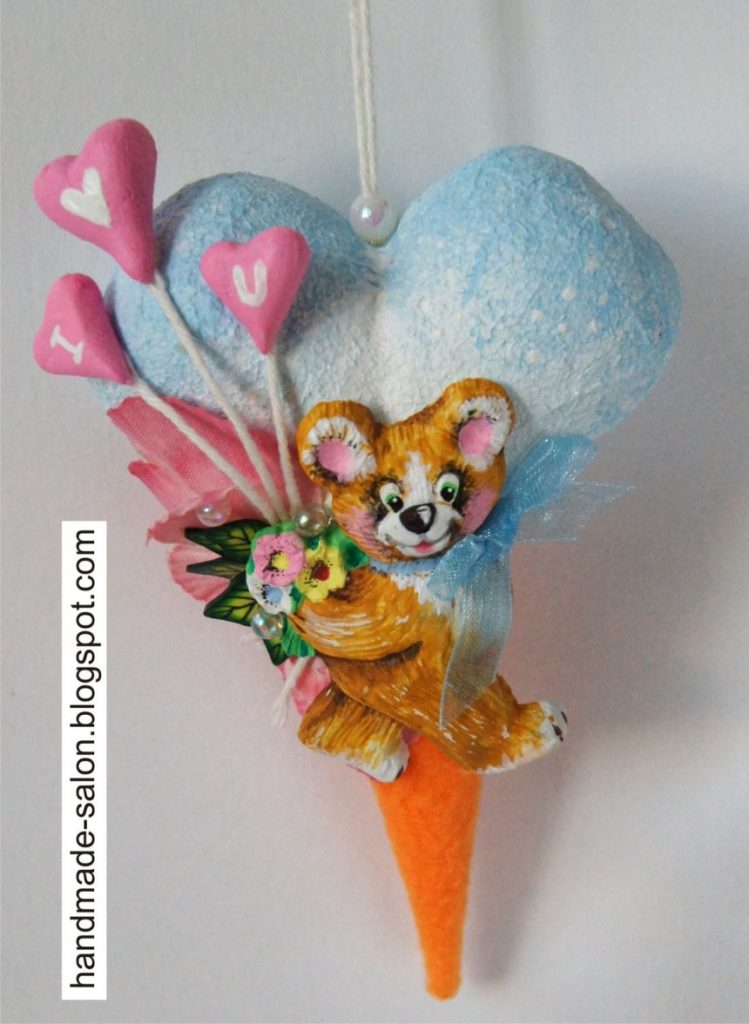
Posted onJanuary 15, 2017inHome Decor, Step by step, Tutorial How to make heart of kinder – Step By Step