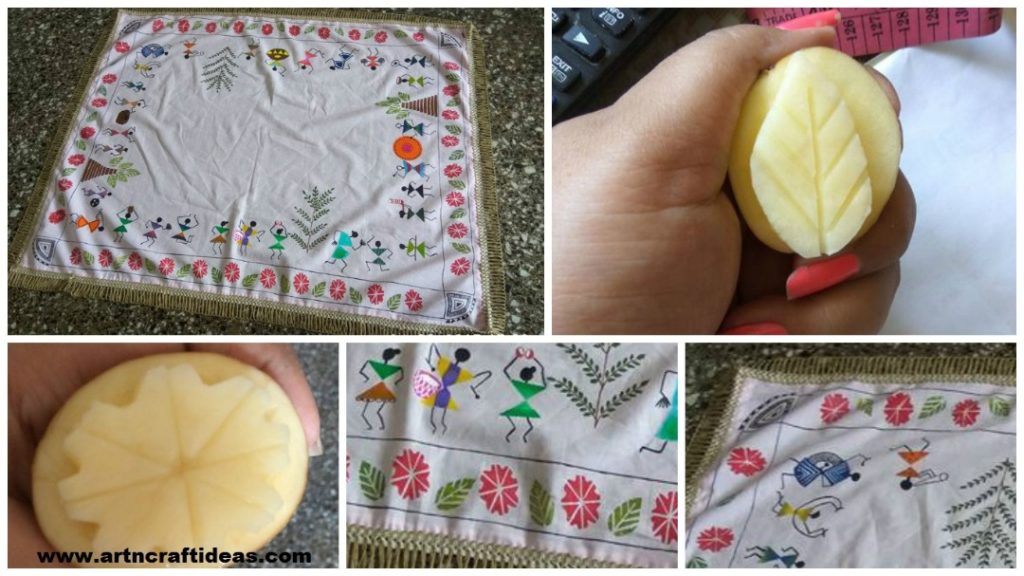
Posted onJune 9, 2017November 20, 2018inBest out of Waste, Craft, Tutorial DIY warli art table cover using potato stamps
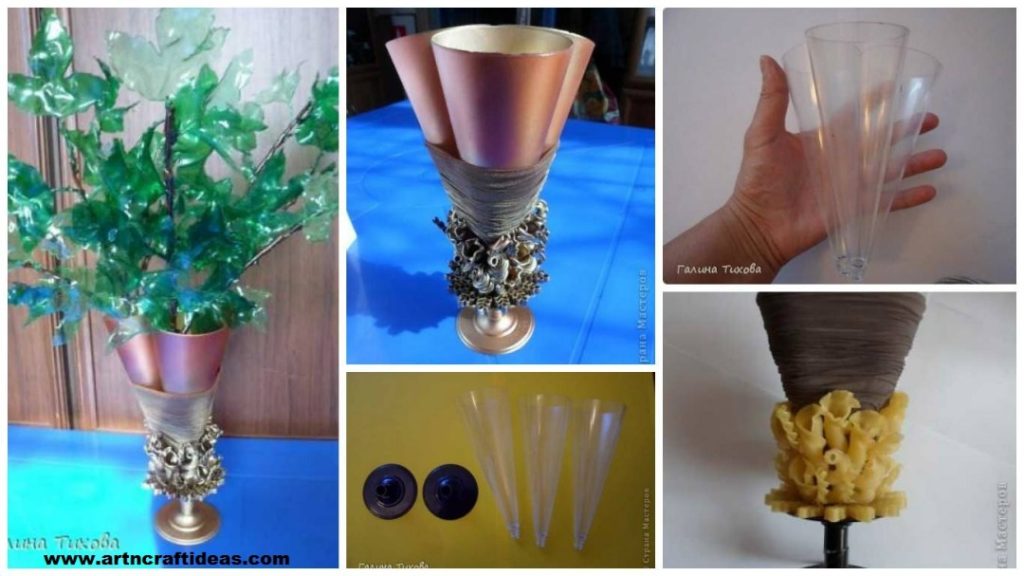
Posted onJune 9, 2017inBest out of Waste, Craft, Tutorial DIY Vase of branches made from plastic bottles
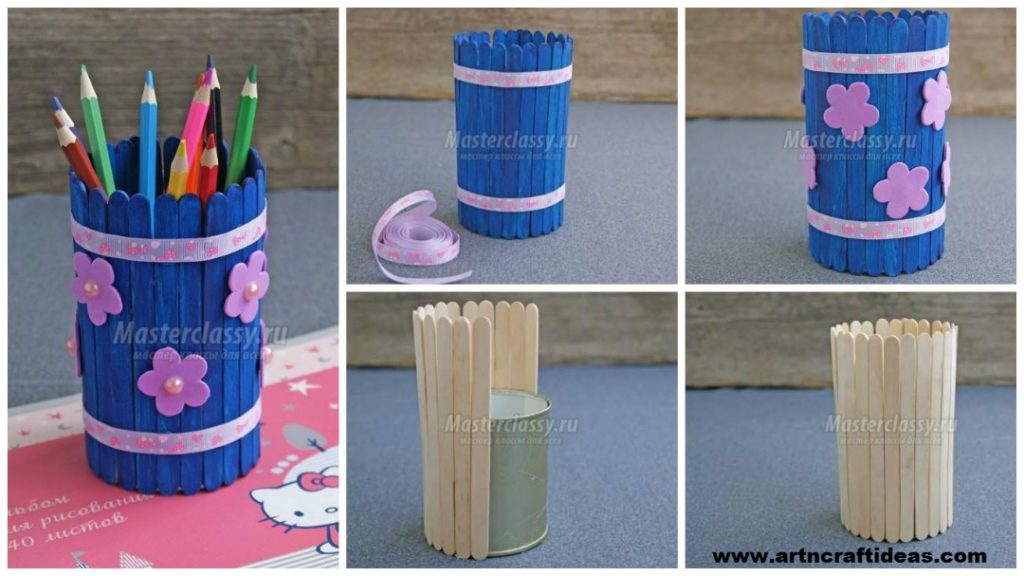
Posted onJune 9, 2017inBest out of Waste, Craft, Tutorial How to Make a Pencil Holder with Popsicle Sticks
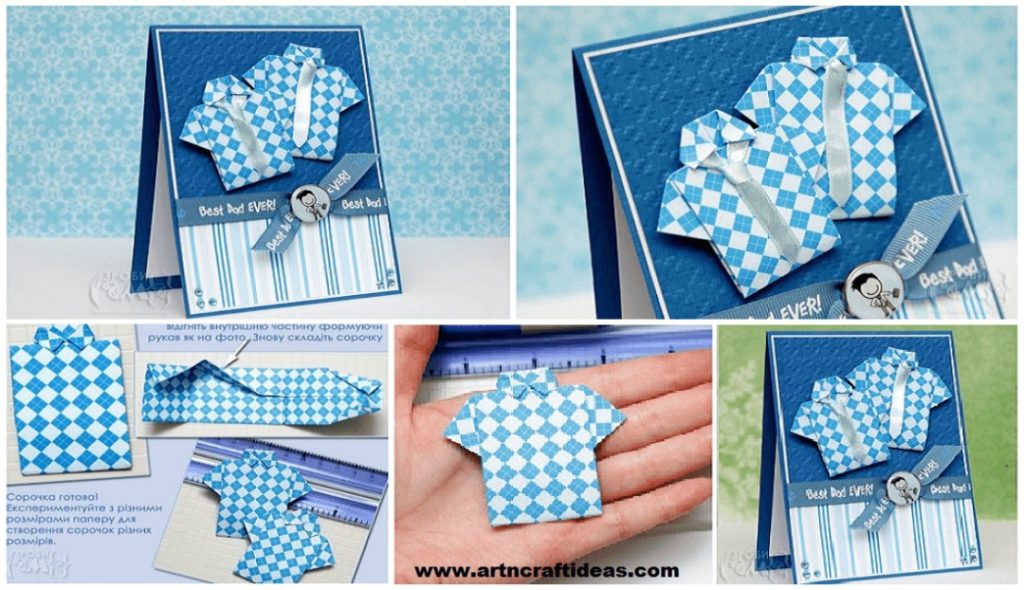
Posted onJune 3, 2017June 3, 2017inCraft, Father's Day, Origami, Tutorial Father’s Day Cards – card with origami-shirt