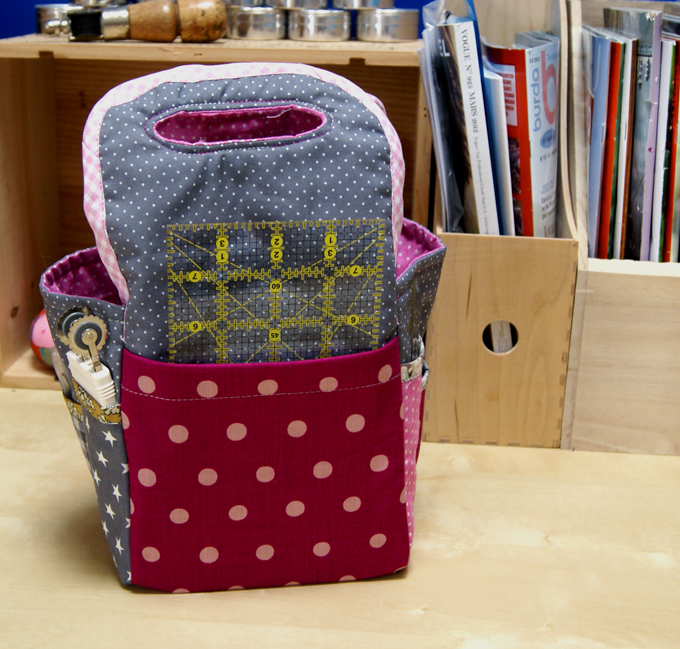
Today a boss and a little tutorial to make a cute little stitching bag, inspired by the scrap booking tote bags, which you will be able to see page 78 of my last book, Workshops, and sewing corners.
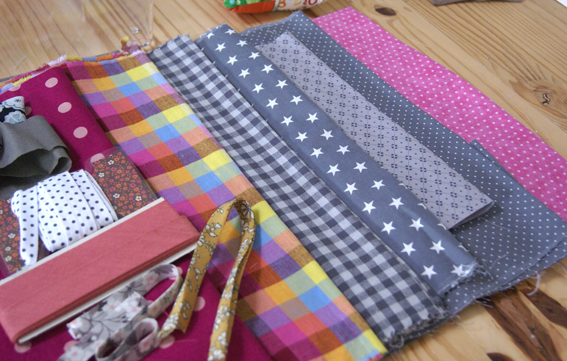
To make it, you need:
– of matching cotton,
– of interlining to stiffen and reinforce the small pockets
– of Vlieseline X50 or H630 (a little fleece and Thermo coll ante on one side) to give a holding to the basket.
– the bias (or bias) associated with the selected tissues.
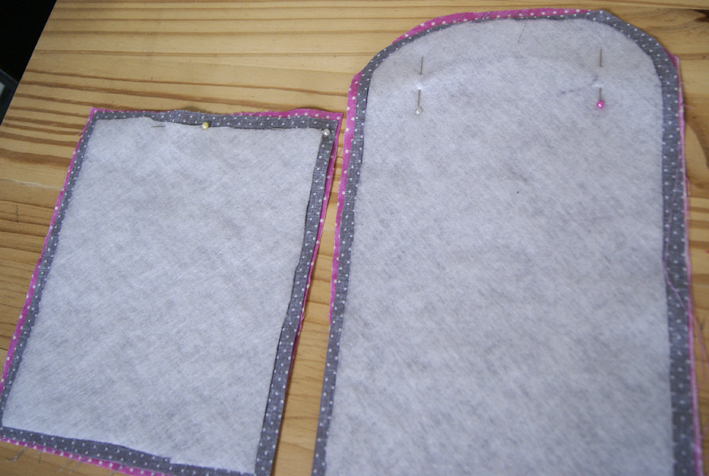
Here are the templates of the different parts: pdf file to print the sewing margins are not included Parts A and A “bis”: long side of the basket where the handle is (to be cut 4 times in the fabric, interlining Colleton e) Parts B and B “bis”: small side of the basket (cut 4 times in the fabric, 2 times in the interlining ….é ). Exhibit C: backplane (2 times cut in the fabric, interlining 1 time in …..é ). And the sizes of the small pockets (sewing margins are not included)
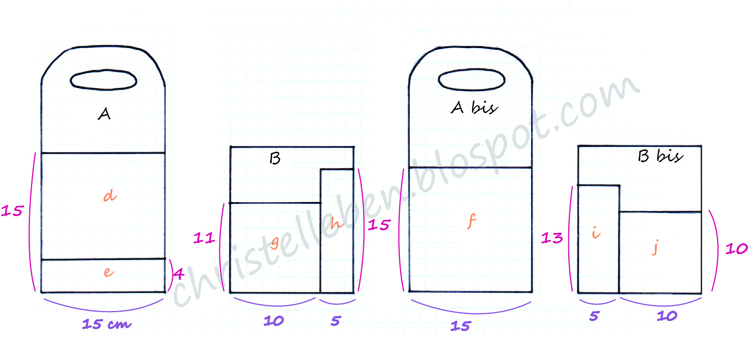
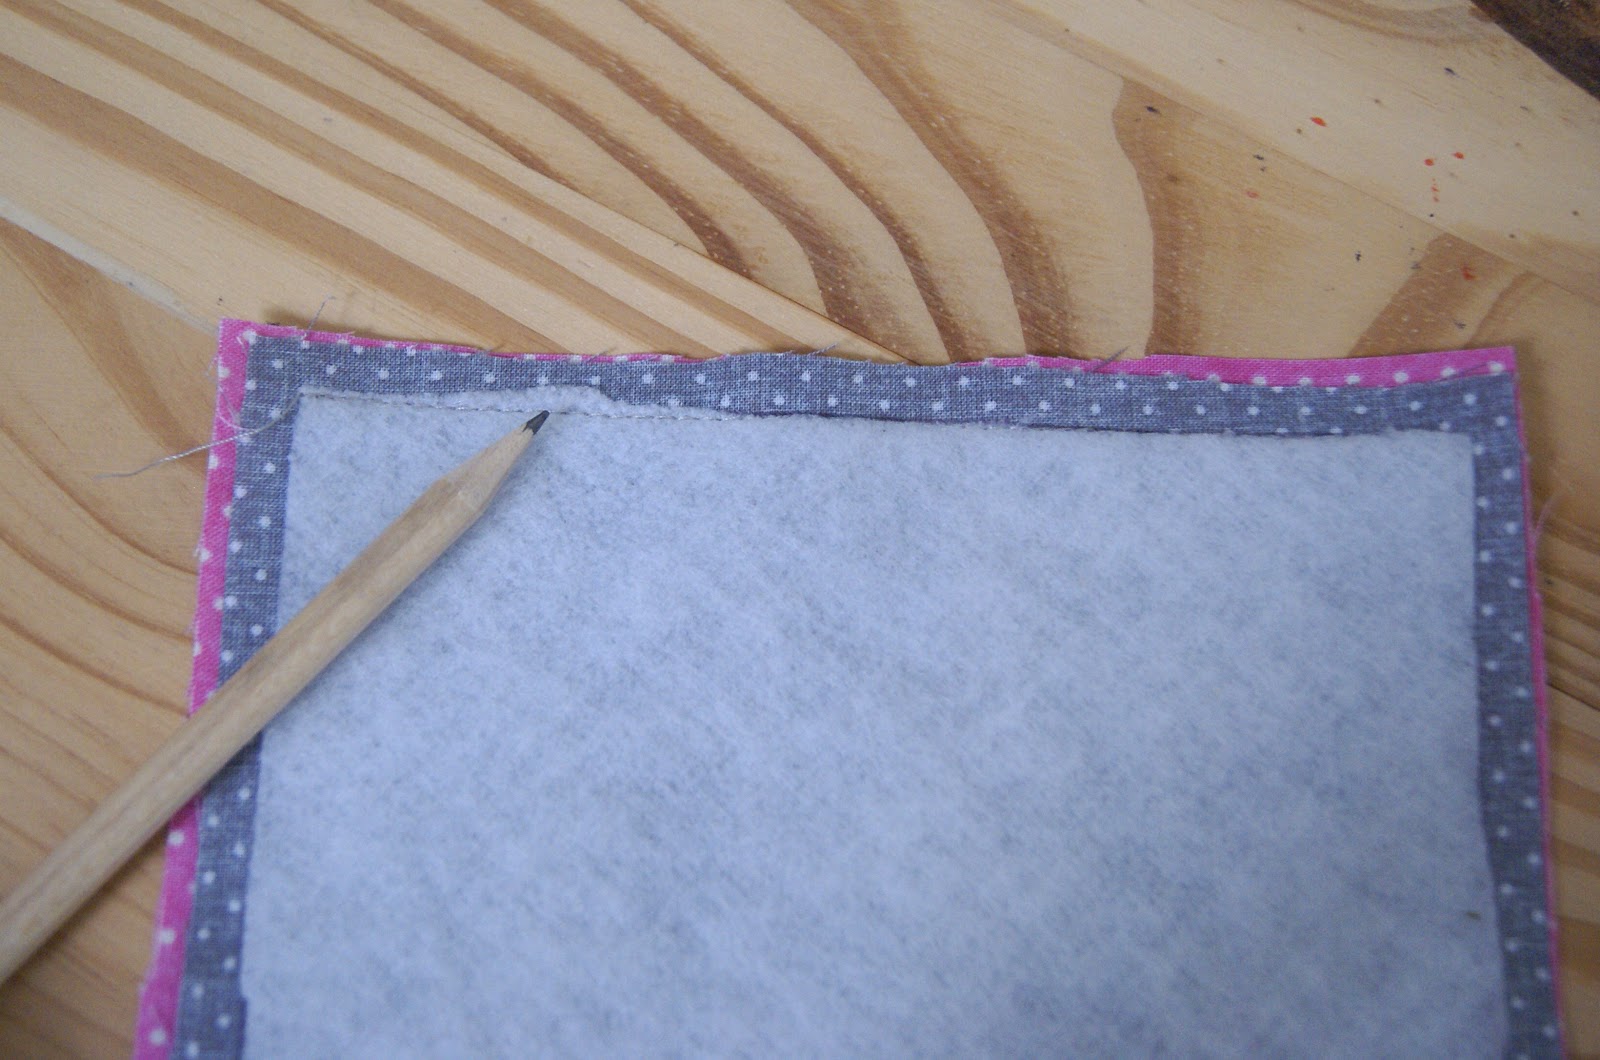
Pocket d: large pocket of part A (to be cut once in the fabric and once in the interlining) Pocket e: small pocket of part A (to be cut once in the fabric and once in the interlining) Pocket f: medium pocket of the piece Abis (to be cut once in the fabric and once in the interlining) Pocket g: left pocket of B (to be cut once in the fabric and once in the interlining) Pocket H: Right B pocket (to be cut 1 time in the fabric and 1 time in the interlining) Pocket i: left pocket (to be cut once in the fabric and once in the interlining) Pocket j: pocket (To be cut 1 time in the fabric and 1 time in the interlining) Step 1: Prepare the 4 sides of the baskets and the bottom of the basket ■ Draw and cut each piece in the outer fabric and inside the fabric by adding The margins of seams.
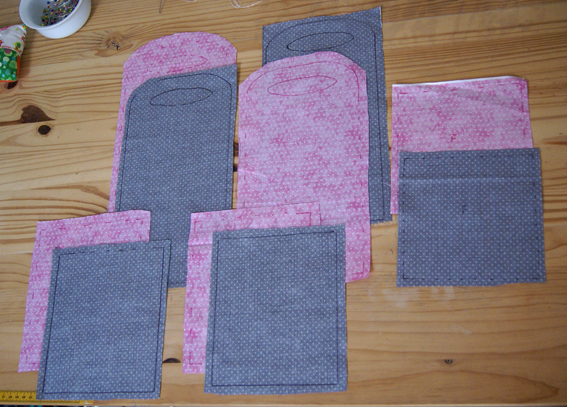
■ Cut parts A, B and C in the fleece fabric without seam allowance and attach each piece of fleece to the corresponding piece of the outer fabric. Wait about ten minutes before handling them again.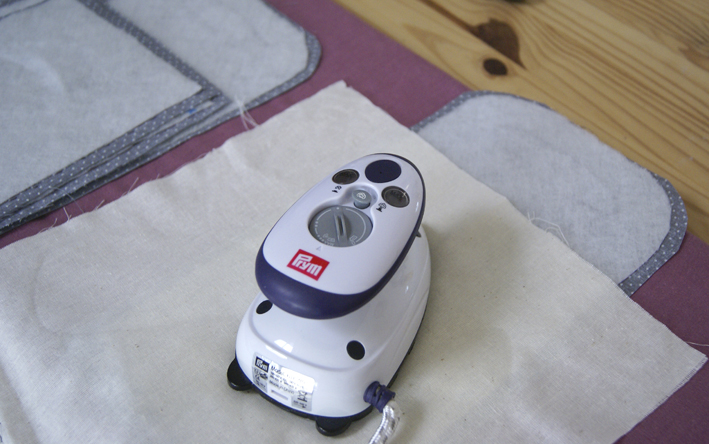
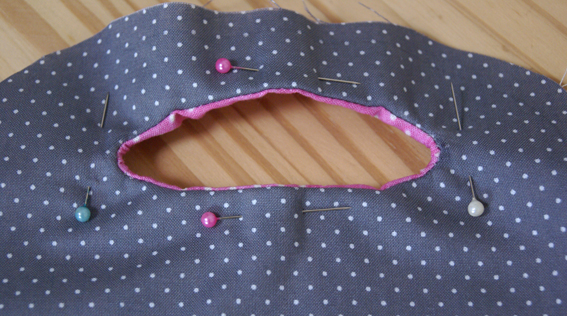
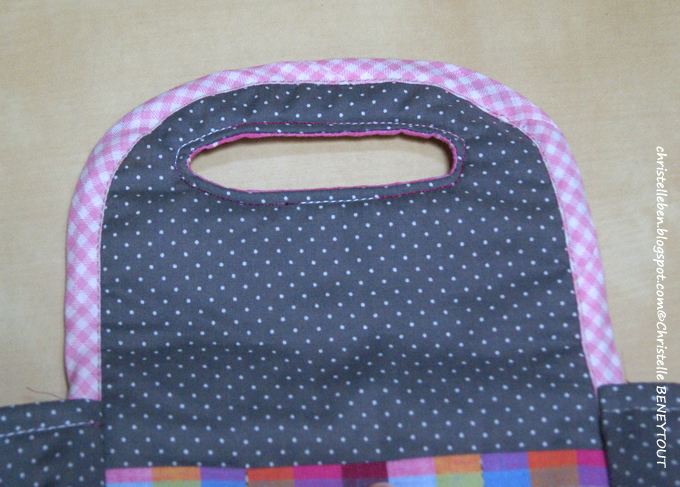
■ Sewing the handles of the parts A: Place the outer part An on the inner part A, right side up and sew the opening on the right stitch (place the fleece over you, redraw the hole on the fleece).
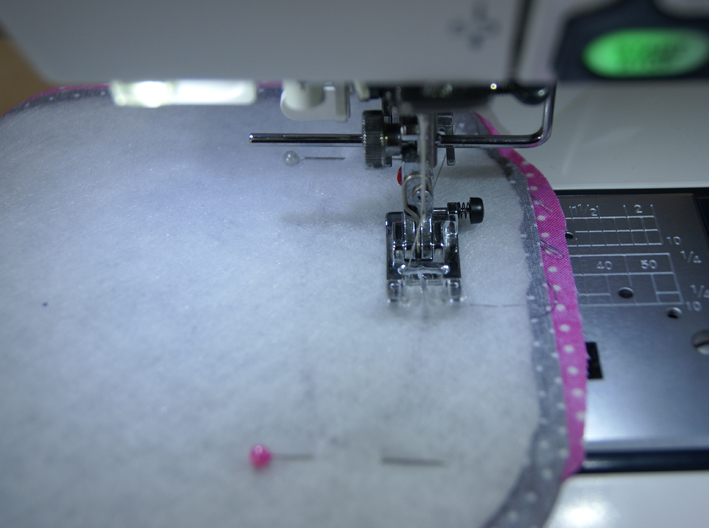
Using a chisel or wire cutter, slit the inside of the opening and crunch the ends.
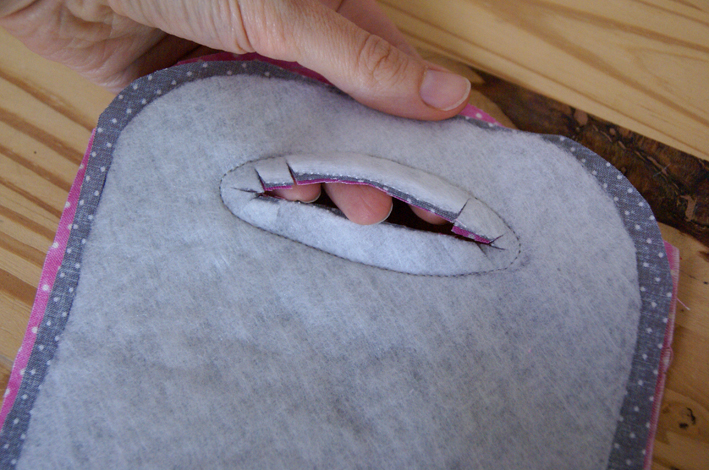
Pass the outer fabric through the hole in the opening, position the pieces face-to-face and stitch the round of the opening.
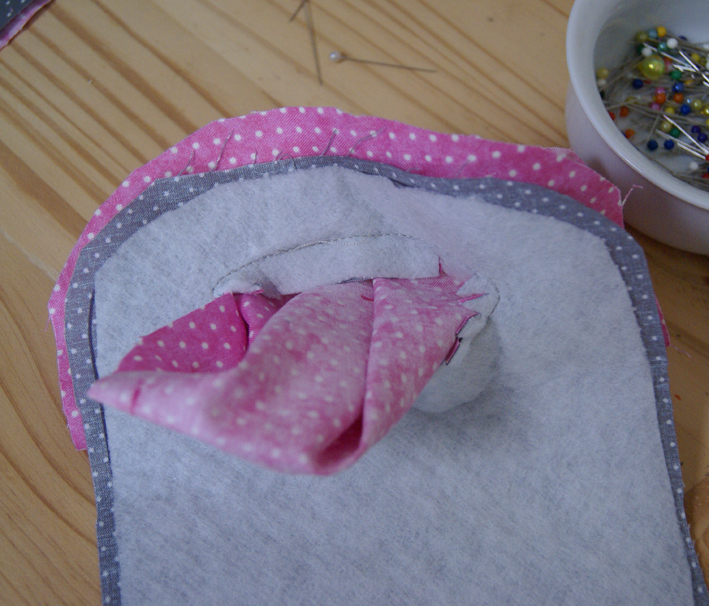
Finally, bend the handle between the 2 markers. You get this:
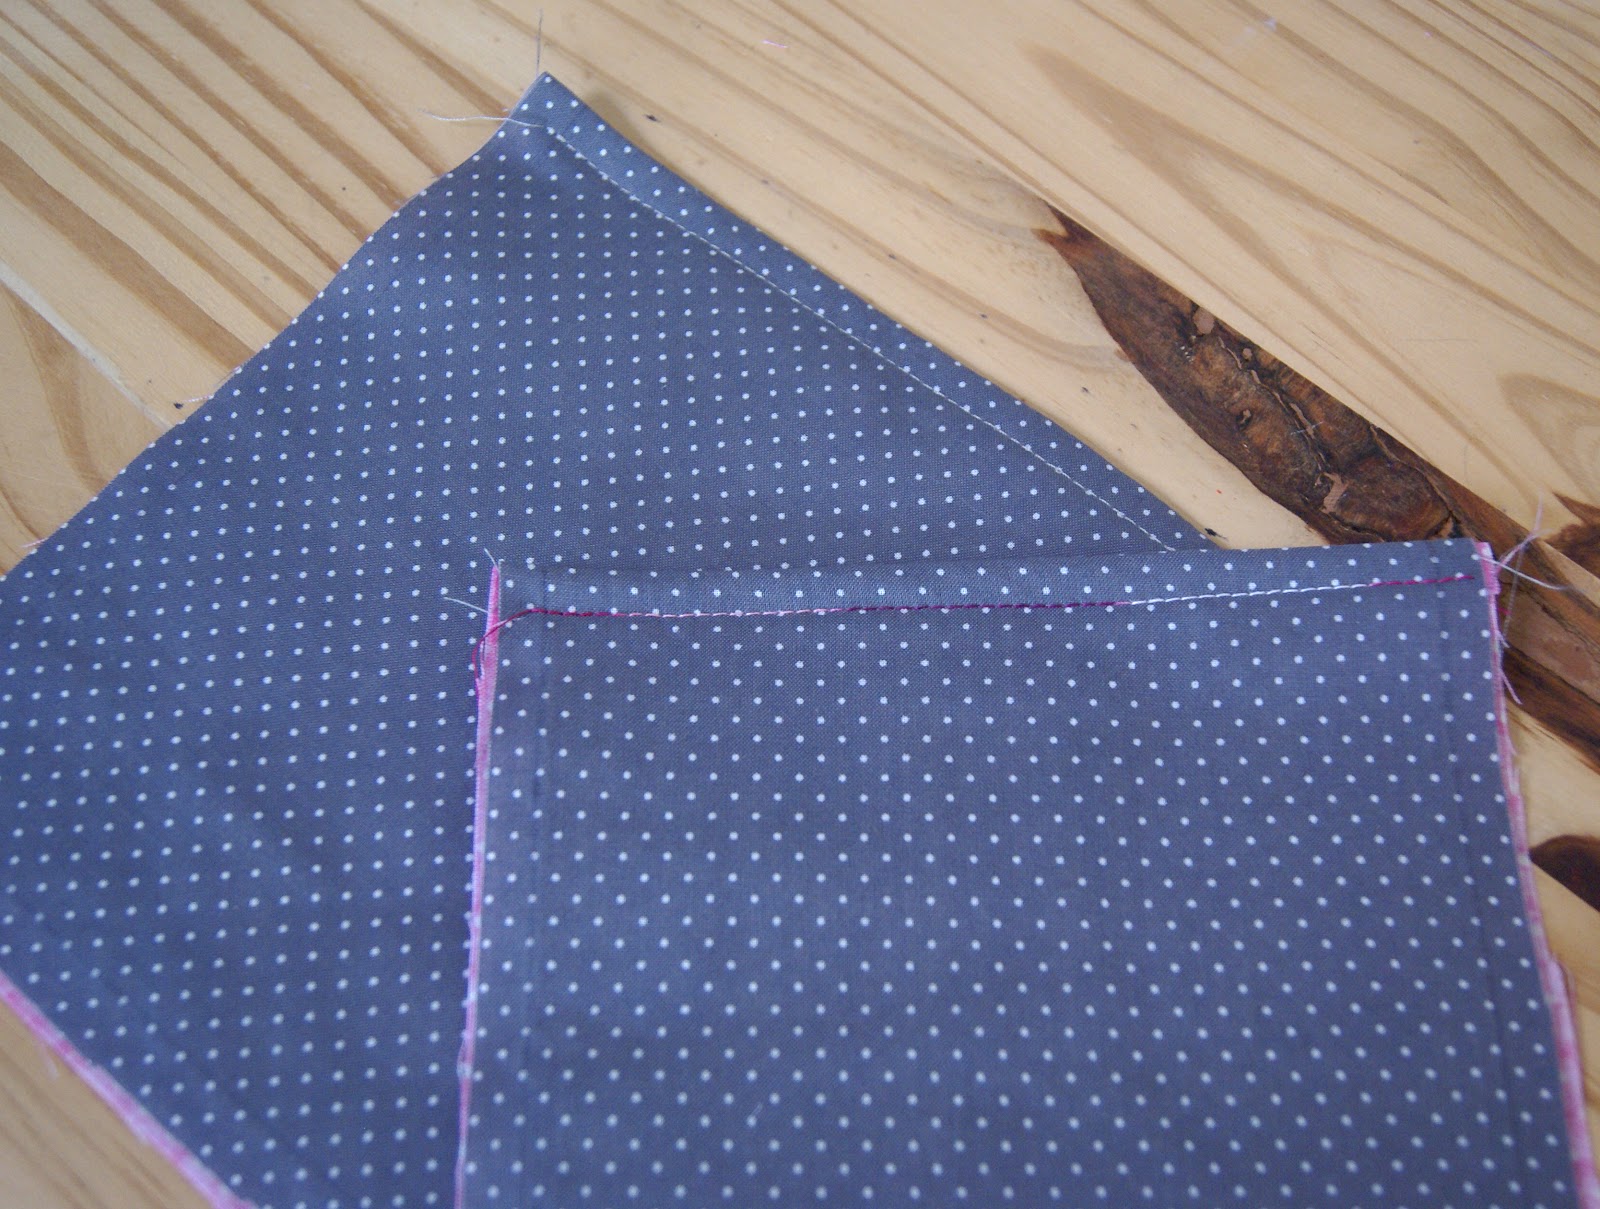
■ Prepare sides B : place each inner piece on each outer piece, place against the place and assemble the top edge.
Turn over, place iron and stitch on place 0.5cm from an edge.
Step 2: Prepare the pockets.
■ For pockets, choose to border the edge that remains open, or make a simple hem if the fabric is thick enough, or double with another fabric.
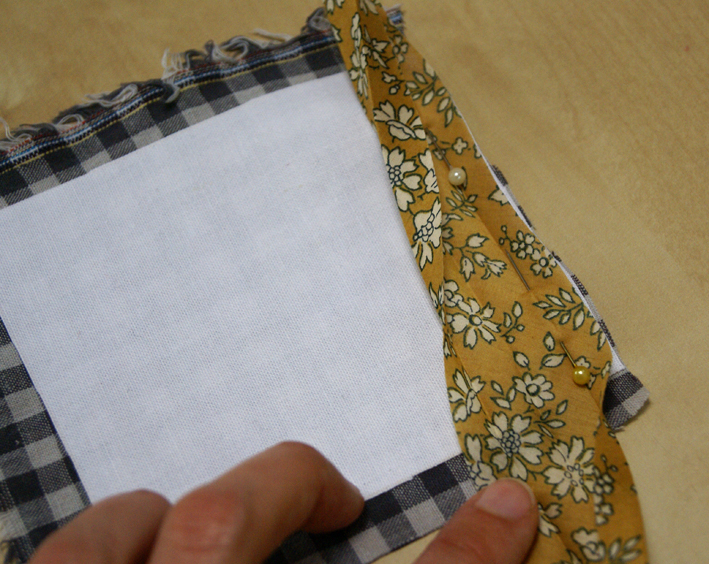
Think about covering the fine fabrics so that the pockets have the hold and can contain the material that you will put in it.
■ Attach the pockets to the sides of the basket.
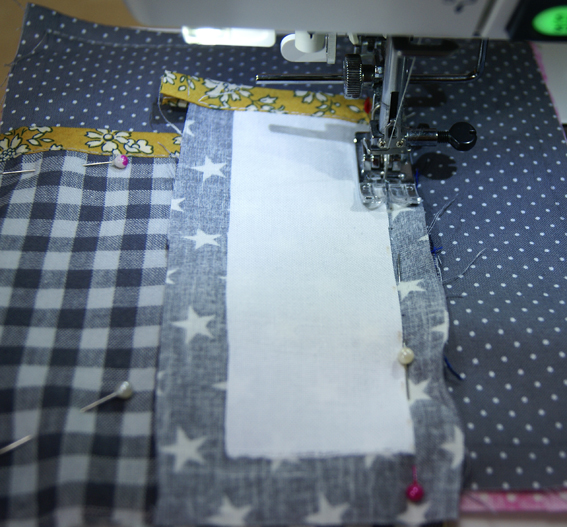
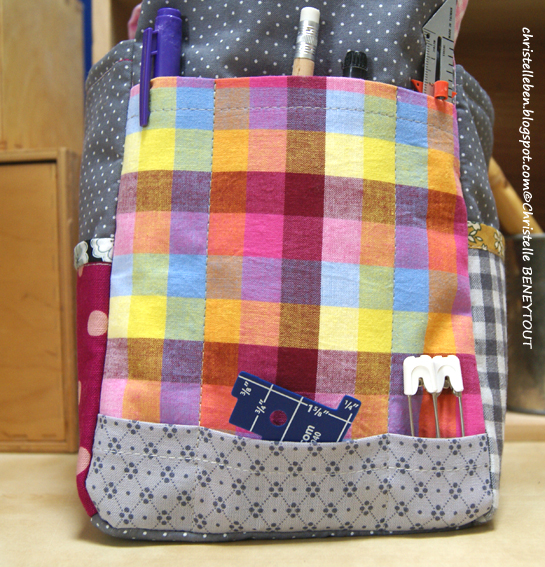
You can divide one of the large pockets of the sides An or Abis, by sewing straight lines that will make separations for your pencils, rulers etc.
We obtain the 4 sides thus, and the bottom: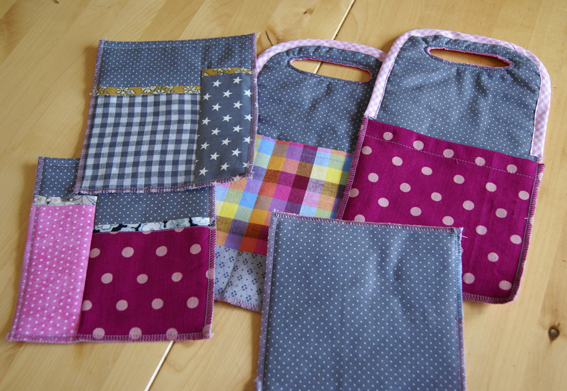
■ Mounting the basket:
Scuff the sides and bottom. Assemble the sides together, then sew the bottom of the basket.
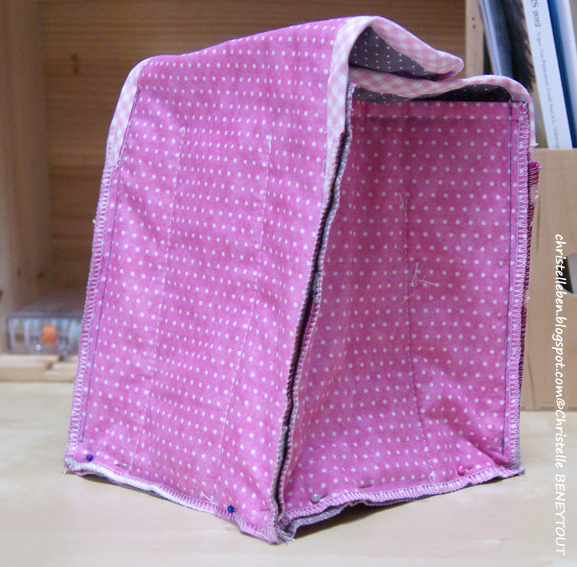
And return to the place: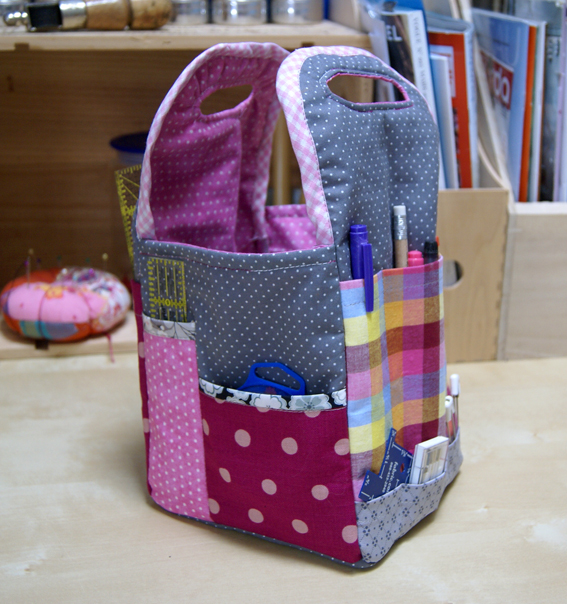
So here is a small storage basket, to divert according to your desires (for children’s felts and pencils, makeup products in the bathroom etc), a gift idea more for Christmas approaching;)