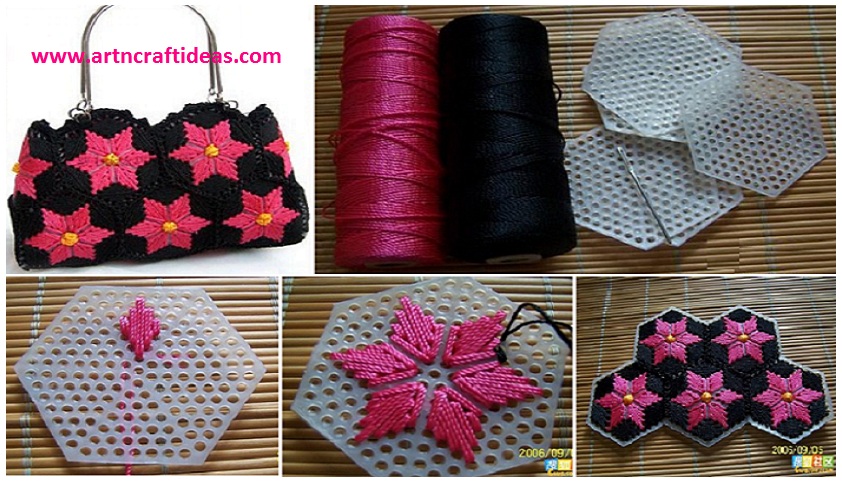
Posted onJuly 10, 2017July 10, 2017inDIY, Fashion, Tutorial How to Make Pretty Hand Bag from Stitch on Plastic Canvas
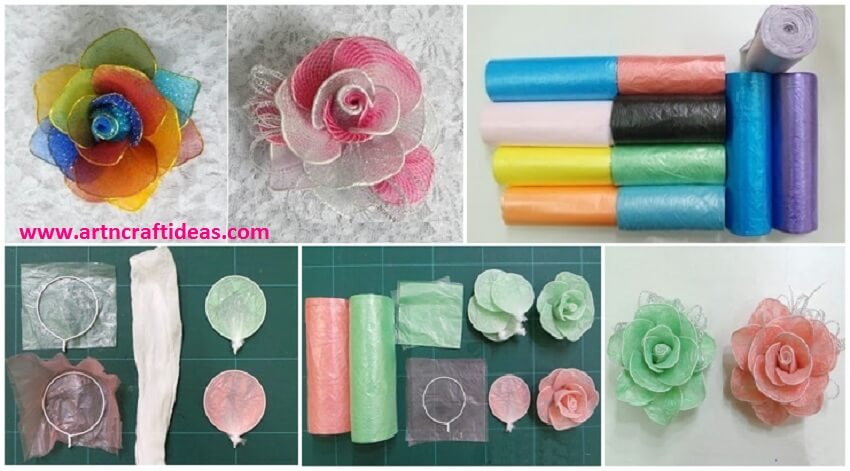
Posted onJuly 10, 2017inBest out of Waste, Craft, Flower Crafts, Tutorial How To Make Rose Using The Plastic Bag
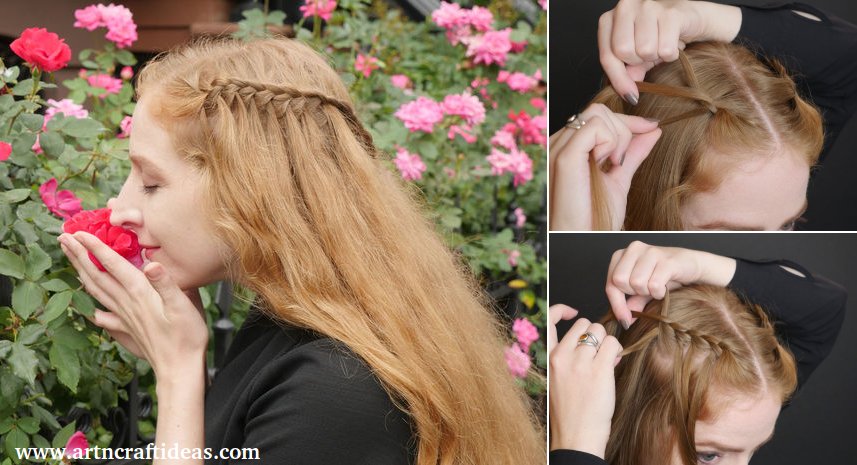
Posted onJuly 10, 2017September 14, 2017inFashion, Hairstyle, Tutorial Easy Waterfall Braid Tutorial – Step by step
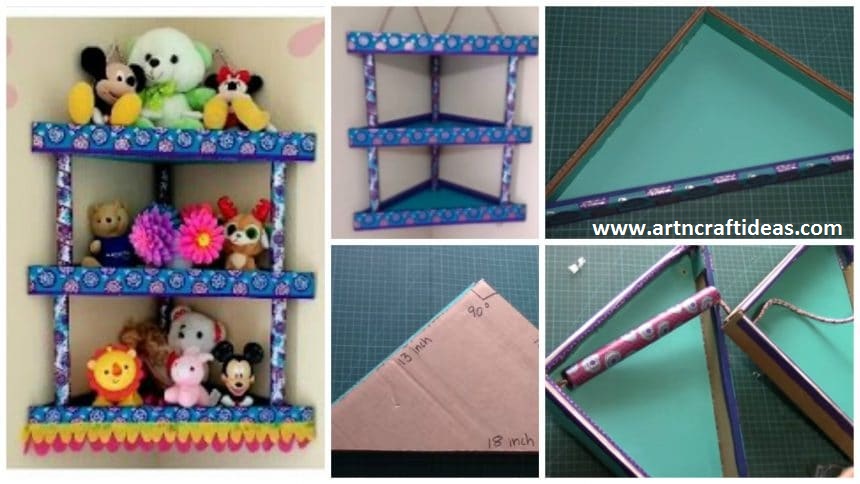
Posted onJuly 9, 2017inBest out of Waste, Cardboard Crafts, Craft, DIY, Home Decor, Tutorial, Video How to Make Cardboard Corner Shelf / Rack
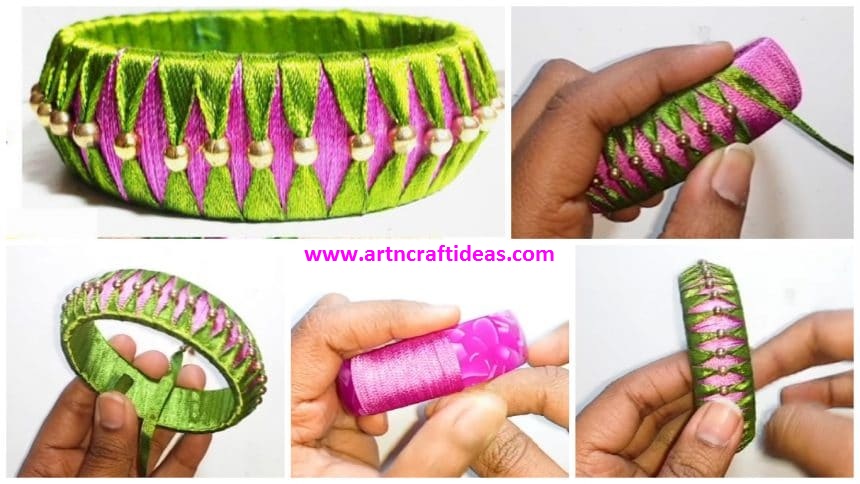
Posted onJuly 9, 2017inCraft, DIY, Jewellery, Tutorial, Video How to Make Silk Thread Ribbon Bangle at Home
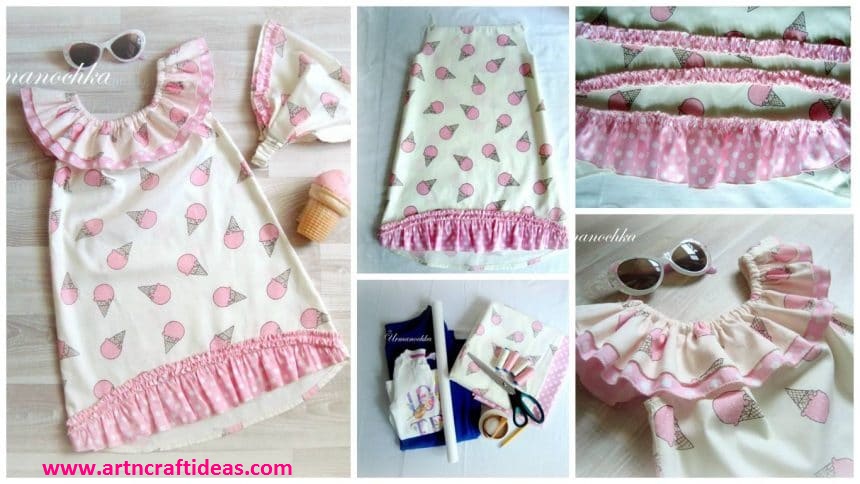
Posted onJuly 9, 2017inClothing, Embroidery And Sewing, Kids Corner, Tutorial How to sew a bright summer dress for girls “Strawberry ice cream”
Posted onJuly 9, 2017inClothing, Embroidery And Sewing, Tutorial, Video One Side Patterns and Button New Kurta Neck Design
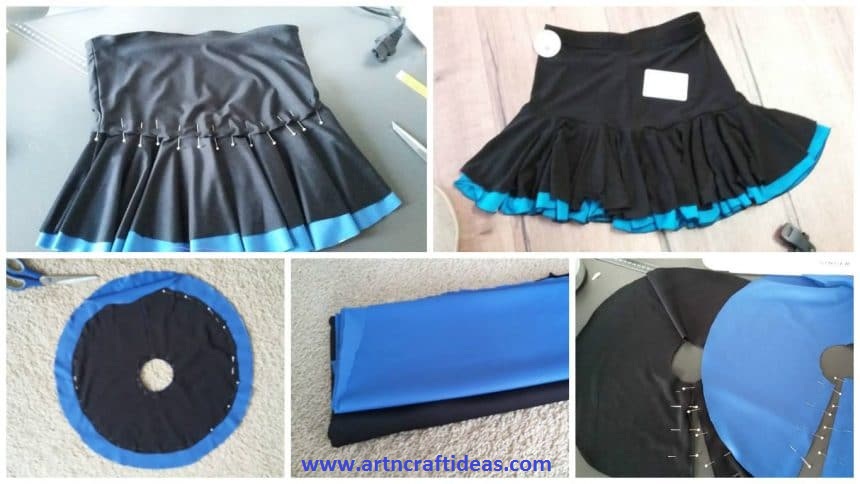
Posted onJuly 8, 2017inClothing, Embroidery And Sewing, Tutorial How to Sew Two-layer Latin Dance Skirt
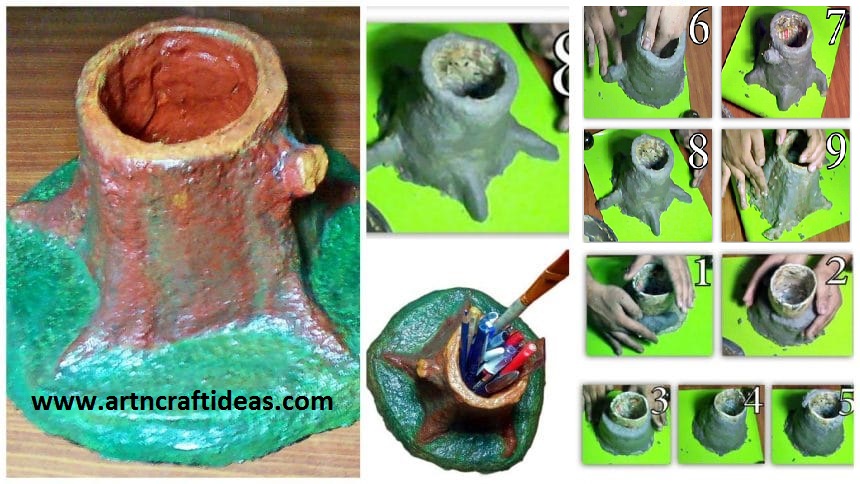
Posted onJuly 8, 2017July 8, 2017inBest out of Waste, Craft, Newspaper Crafts, Tutorial, Video DIY: Handmade Paper Mache Pencil Holder