Soon, many will go to such a long-awaited vacation! Someone close to the sea, some to the country! And to this wonderful time, of course, we need to thoroughly prepare! We always want that to our girls look the most beautiful and fashionable, and with it, their clothing was easy and convenient, and the tissue from which it was sewn genuine.
I assure you, create, sew the perfect dress their girls to the power of many! And I invite you to a workshop on self-tailoring summer beach dresses for girls of any age! In such a nice light dress can make a leisurely stroll along the sandy beach or go boldly into a small sea voyage on a boat!
And how to spend days of fun at sea under such a bright hot sun without a hat? I propose to make a simple partial scarf with elastic in the kit to our dress.
Let’s get started:
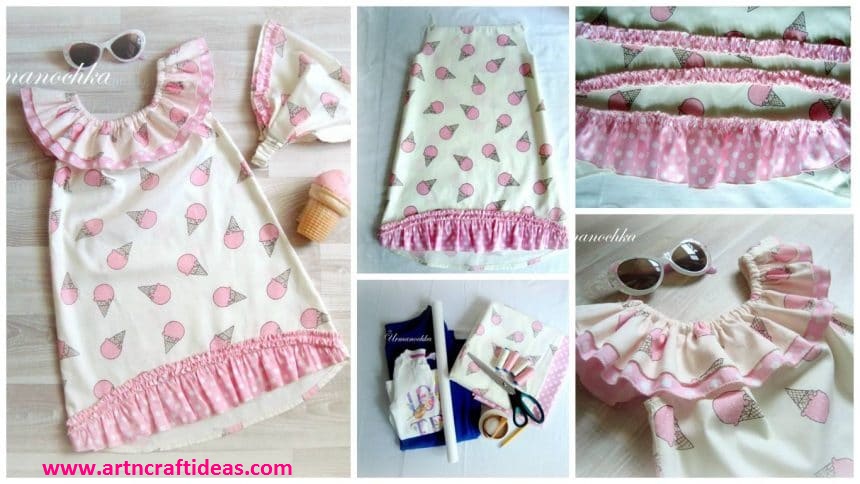
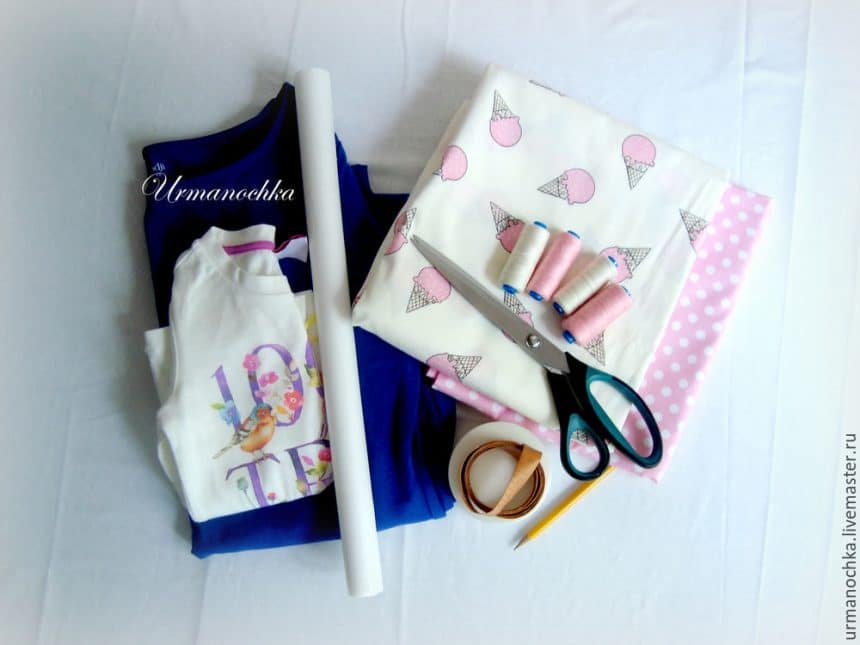
Required Material:
The basic cotton fabric. I chose this merry pretty popular cotton charming Morozhenko.
Fabric companion cotton, for some items and decor of our dress.
Thread cotton fabric tone.
Children’s T-shirt for making patterns.
Elastic narrow 0.5 cm and 1.5 cm wide.
Tape measure.
Sewing machine.
Iron.
Scissors.
Safety pins.
Tracing paper.
Crayon or marker for the tissue.
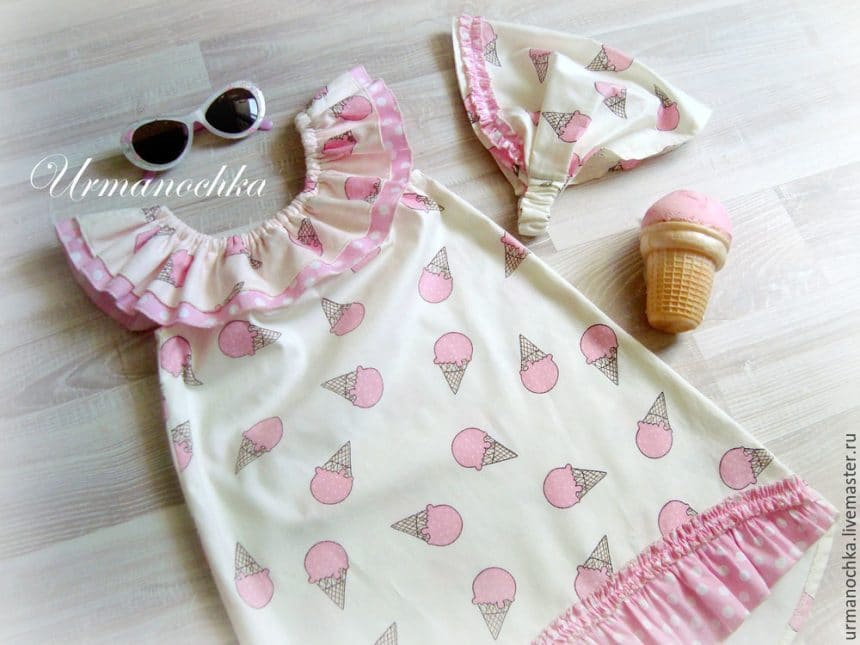
Now it is a very fashionable dress with such a romantic flounce at the shoulders. It’s something we are going to sew. Dress, in my opinion, is not difficult, but very interesting and spectacular! Imagine how charmingly will sway in the wind shuttlecock. Also, we will have an asymmetrical bottom and unpretentious ruffles.
1. Construction of a pattern
Since my workshop is intended for all those who are unprofessional sews clothes, I decided to give you not finished the pattern and not the one that will have a long and hard to build, and an option to many easily sewed a dress their baby. So, take the baby t-shirt that sits perfectly on the child (preferably not too tight), folded in half, back inside, draw out a pencil. Note the line of the armhole and neck. We get here a dress before.
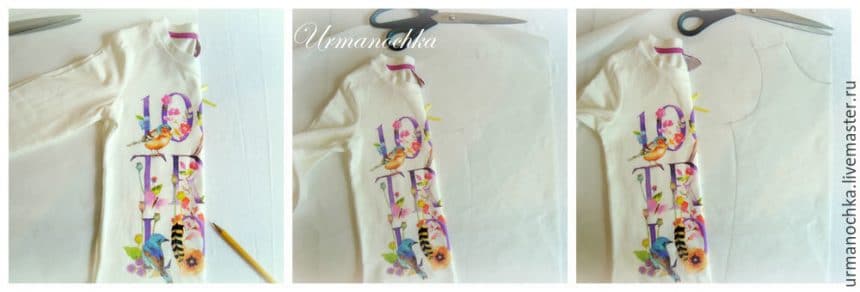
Now we pattern. Pattern we will be unified for both forehand and backrest product (of course, to some extent, this is not entirely true, but it is possible, most importantly do not sew the back to back, let it be a little loose, especially since the idea model allows, then armhole not will pull). I traced the side, slightly extending it for the convenience of the child, he said the waistline, neck draw a new line, as we will cut with flounce. Bottom draws a semicircle inside – it before, outside – it will back the product. Cut out the pattern, that’s what happens.
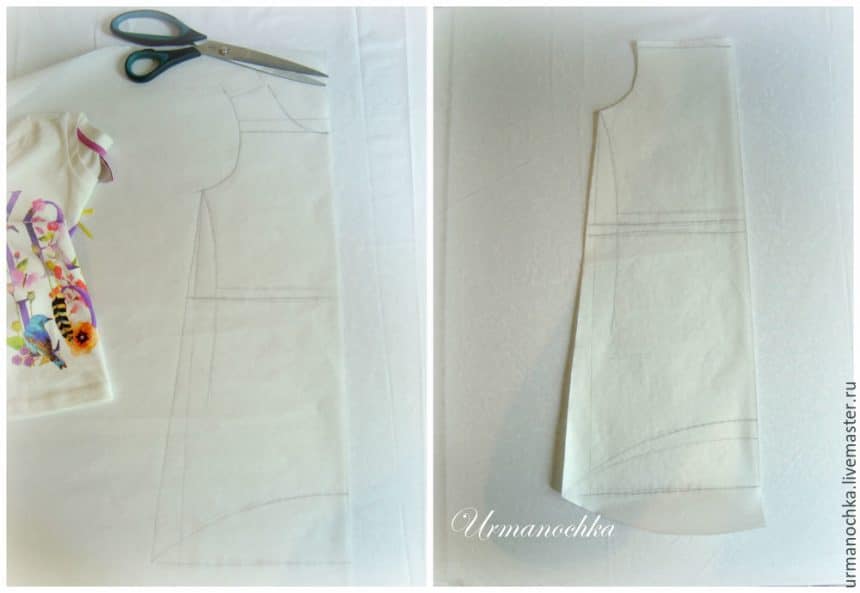
For this the pattern to create basic patterns before and back our future dresses.
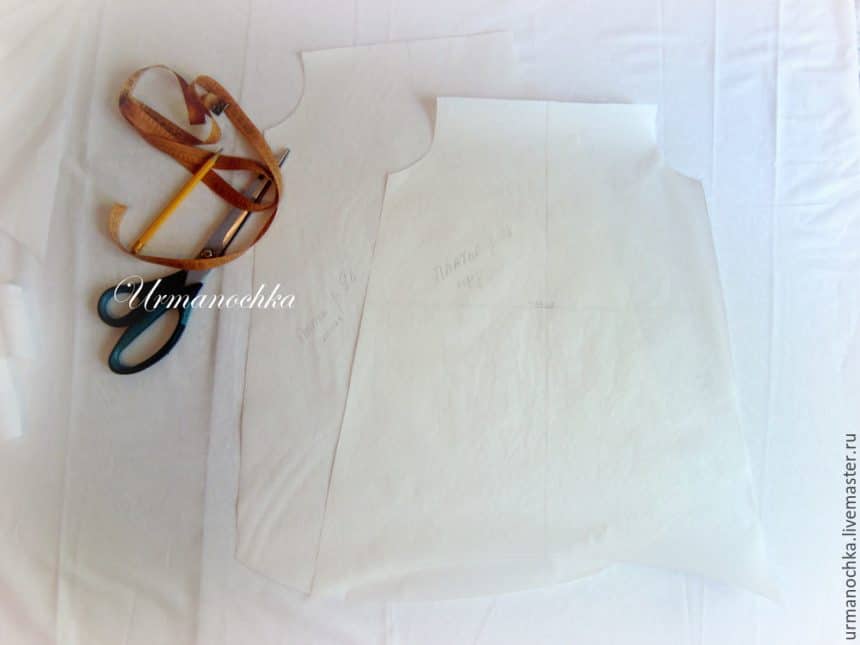
2. Cutting (Items proposed in accordance with the size of the child’s growth on 98 cm., Depending on the variation of parts dimensions can be modified).
Prior – 1 pc.
The back – 1 pc.
2 parts of the shuttle base fabric by 70 cm long. And a width of 9 cm.
2 parts of the shuttle companion tissue 70 cm. And a width of 10 cm.
1 part for the lower part before the excised semicircle and a length of 50 cm, a width at its widest point to 8 cm.
2 armholes piping forehand and backrest (cutting obliquely) and a length of 21 cm and a width of 4 cm, including allowances.
Gum for the shuttle, narrow, 60 cm long and gussets, wide and 8-10 cm long.
1 gusset piece for a length of 40 cm, a width of 25 cm (volume 48 cm head).
1 item for registration gum 10 cm long and 4 cm wide.
2 strips 70 cm long and 90 cm wide and 2 cm, for decoration and dresses the bottom gusset.
Sam all the slices and dress hem – 1.0 cm.
Impose our patterns on the fabric is pinned in several places, so as not to move out draw out the pattern, cut out.

3. Tailoring dresses
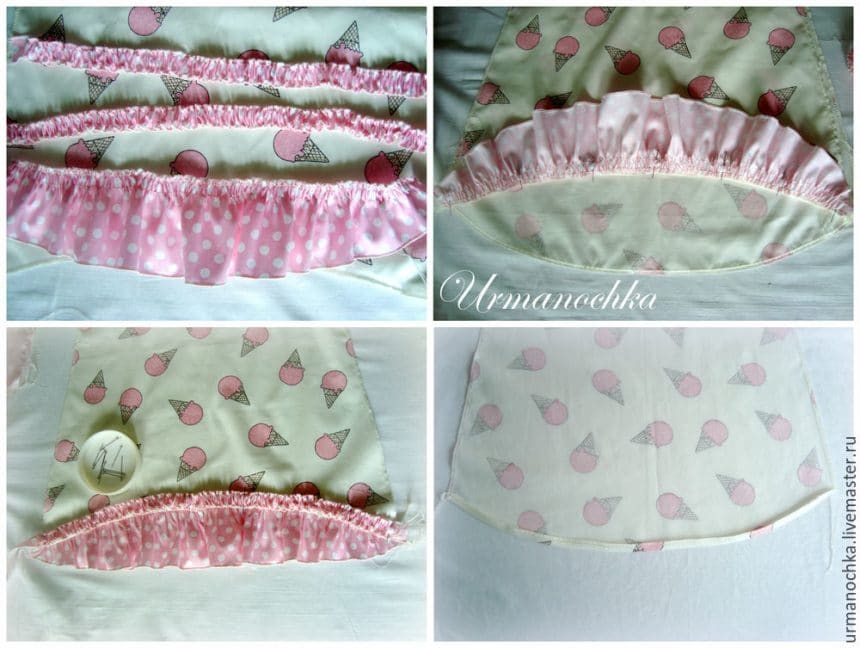
So, to start all the details. The lower part of the flounces, the lower part of the forehand and the decor strips (for the length of two sides) is treated with role-seam. If you do not have such an opportunity, and bends over the edge.
First of all, I would like to draw the lower part of the prepayment. Take the lower part of the strip and for decoration, these parts on upper edge, namely paving two parallel lines at a low tension of the upper thread, contractible yarns on the lower pulling simultaneously (in this case obtained assembly). Shear and grind 2 parts before. Remove the padded for assembly seams. Allowances press out up, we make fun decorative stripes on the front part, as in the photo, and at its center along the entire length. Remove the padded on the strip for assembly seams. That’s what we do: in front of little shorter dresses back, and this simple effervescent bottom
Now just issue the backrest down, folded the allowance at 1 cm, ironed.
We perform the side seams of our products. Gut-wrenching, iron out the seams
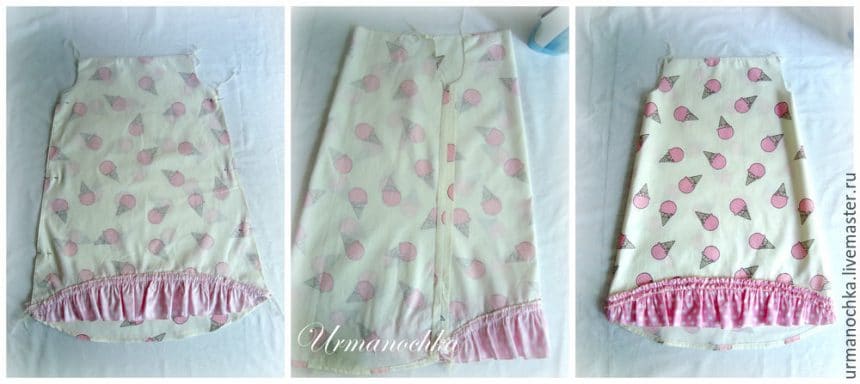
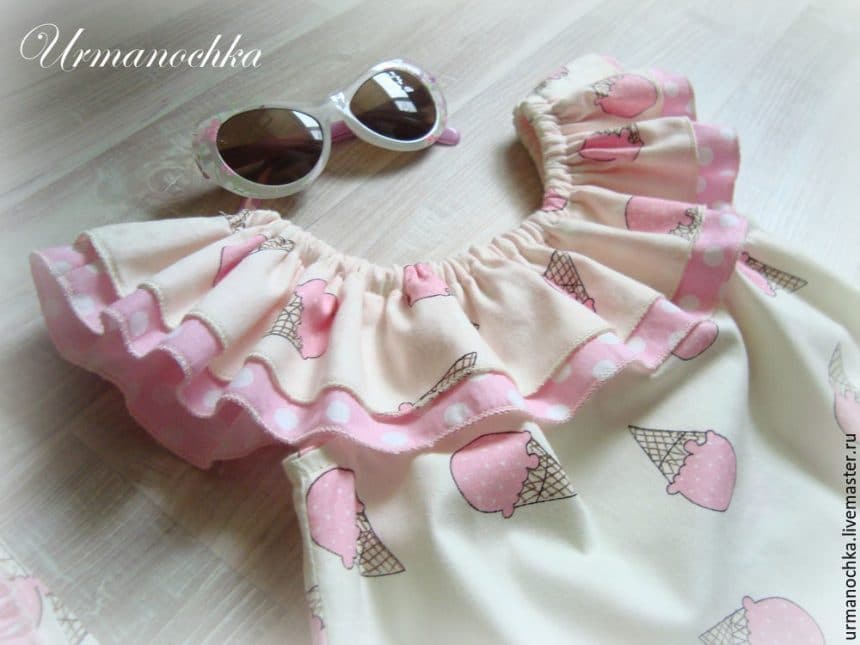
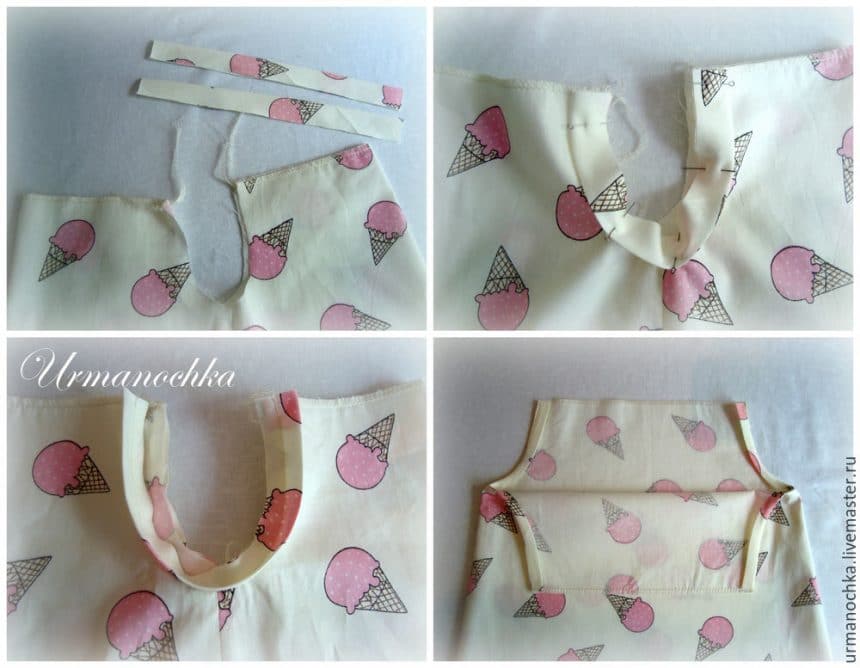
We proceed to the processing of armholes. Every piping folded along the right side out. Folded piping pin and stitch shear armholes. Oversized cut close to the weld line, the piping wrench on the wrong side edges, armhole defer 0.5 cm.
Grind short sections shuttlecocks, their iron out. Impose shuttlecock from the main tissue of a shuttlecock companion tissue. Determine the middle shuttle and before dress pin up to a distance of 1.5 cm from the top to the gum. Grind down, leaving room for threading elastic bands.

Our future shuttlecock. We put the gum, collect and distribute evenly. Zastrachivaem place threading gum. Our dress is ready!
4. Sewing scarves
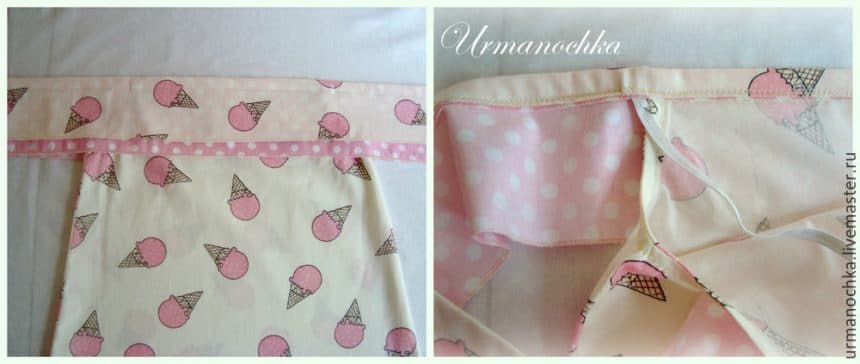
Take a rectangle of fabric for our scarves, overcast edge. Tuck hem around the perimeter of the inside-out, ironed. Take a decorative strip of cloth, to pin up on the edge of the front face of our scarves.
Take the box to gum, long sections of grind, gut-wrenching, gum paste. We fix and stitched around the edges.
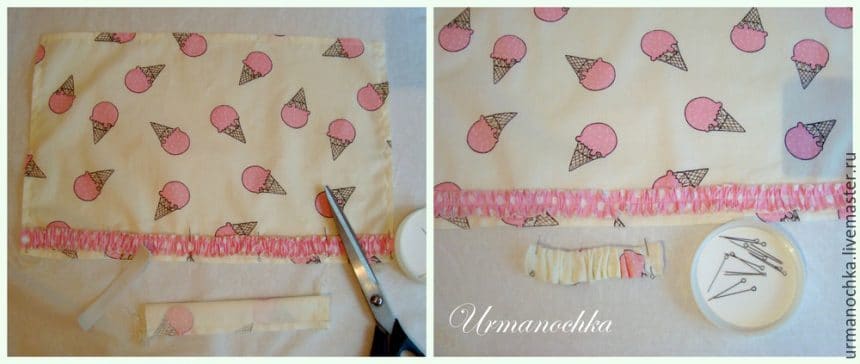
Now we collect our scarf on short sections (I prefer the Christmas tree), by inserting between our gum, and the top anchoring, ie stitched by. Our scarf is ready!
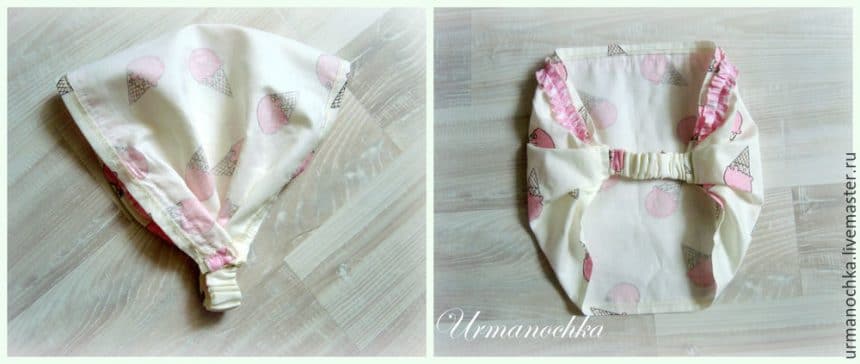
Here’s a set we turned! By the beach season ready! Sea met!