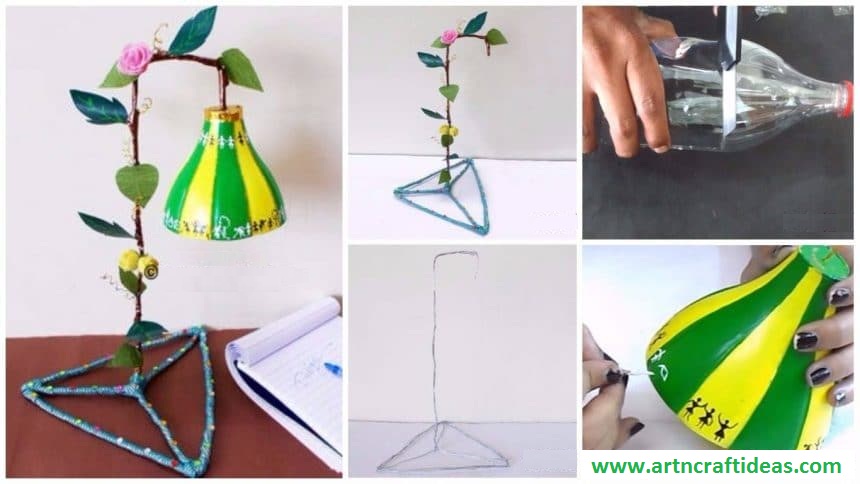
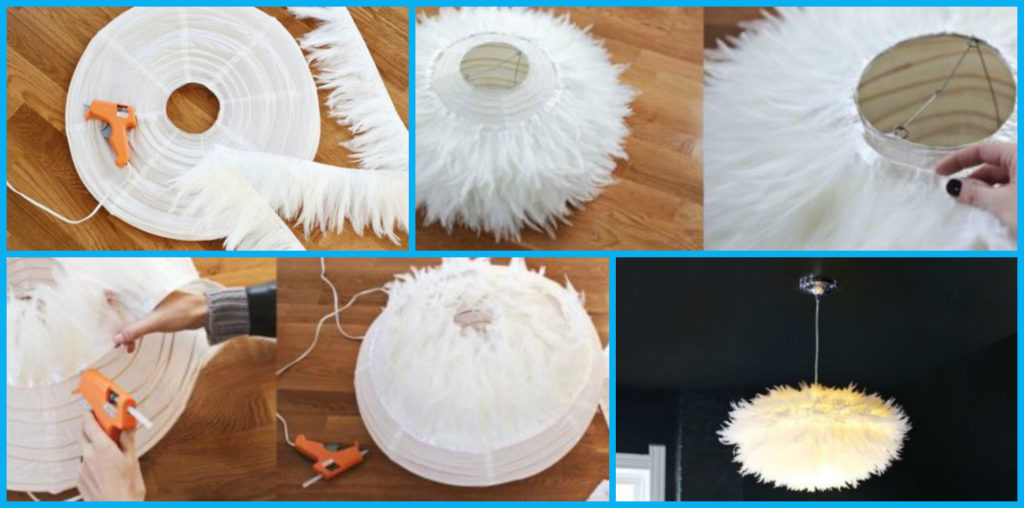
Posted onFebruary 9, 2017inBest out of Waste, DIY, Home Decor, Step by step, Tutorial How to make oyule lamp
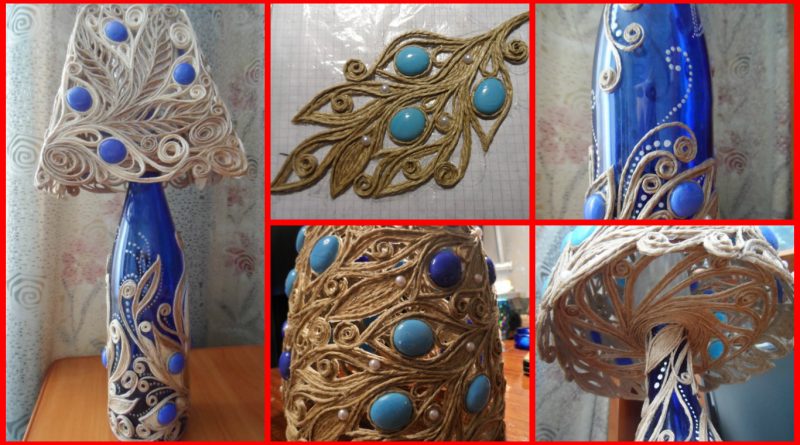
Posted onFebruary 6, 2017inBest out of Waste, DIY, Home Decor, Step by step, Tutorial DIY: Handmade jute lampshade
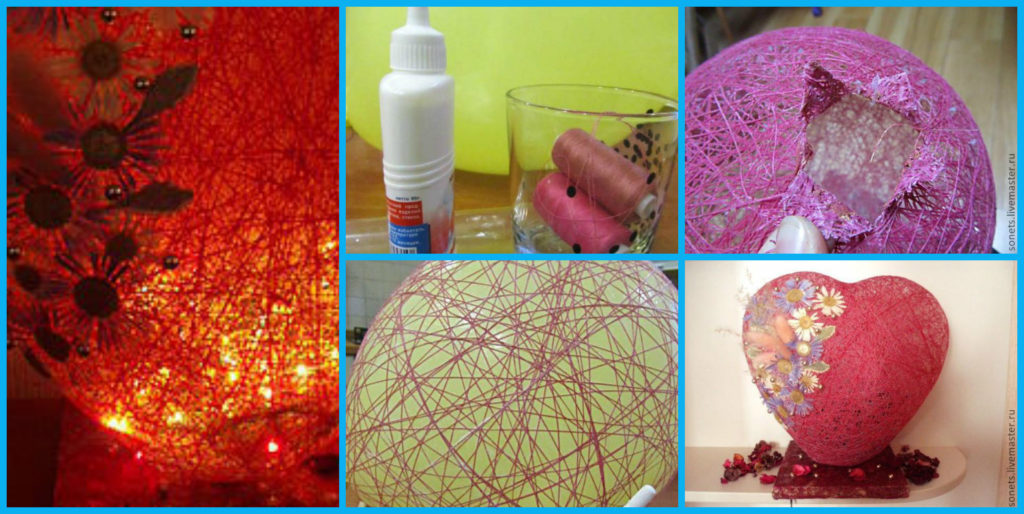
Posted onFebruary 1, 2017February 1, 2017inBest out of Waste, DIY, Home Decor, Step by step, Tutorial, Valentine’s Day DIY: Beautiful (Night Lamp) Heart ball of thread
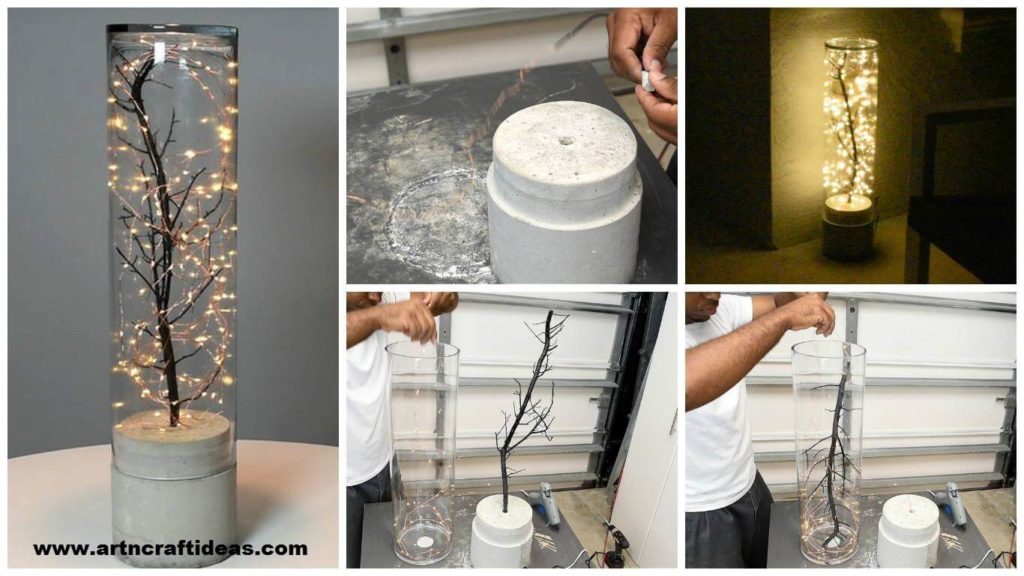
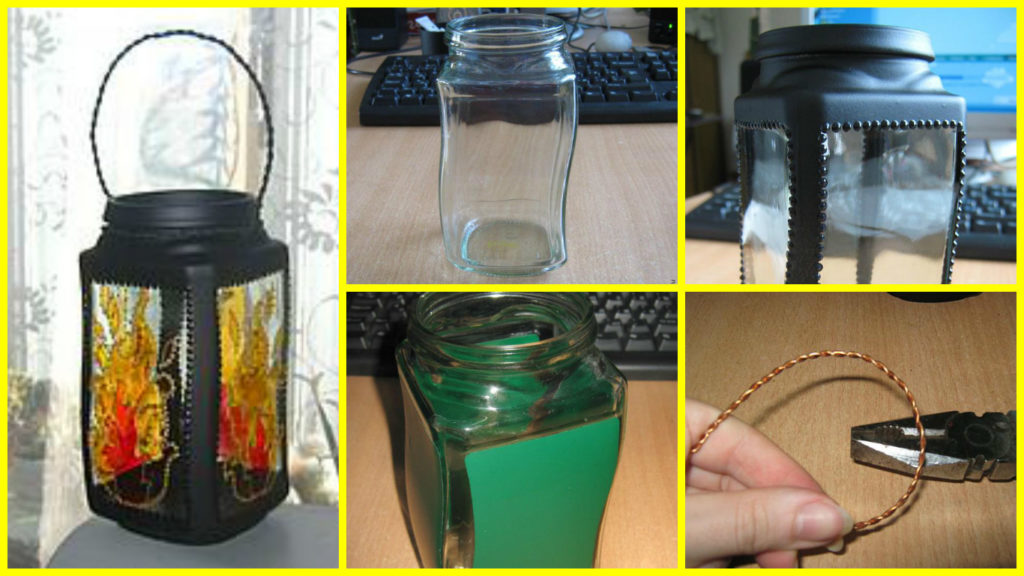
Posted onJanuary 29, 2017inBest out of Waste, DIY, Home Decor, Step by step, Tutorial How to make jar vase lamp
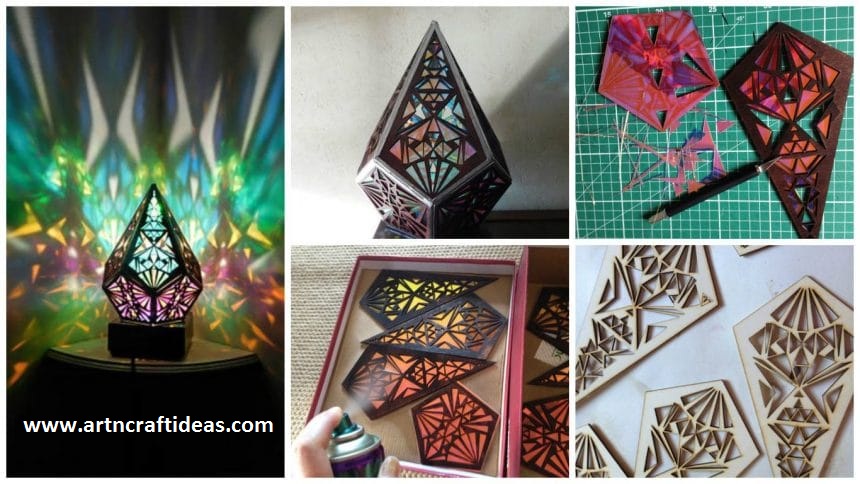
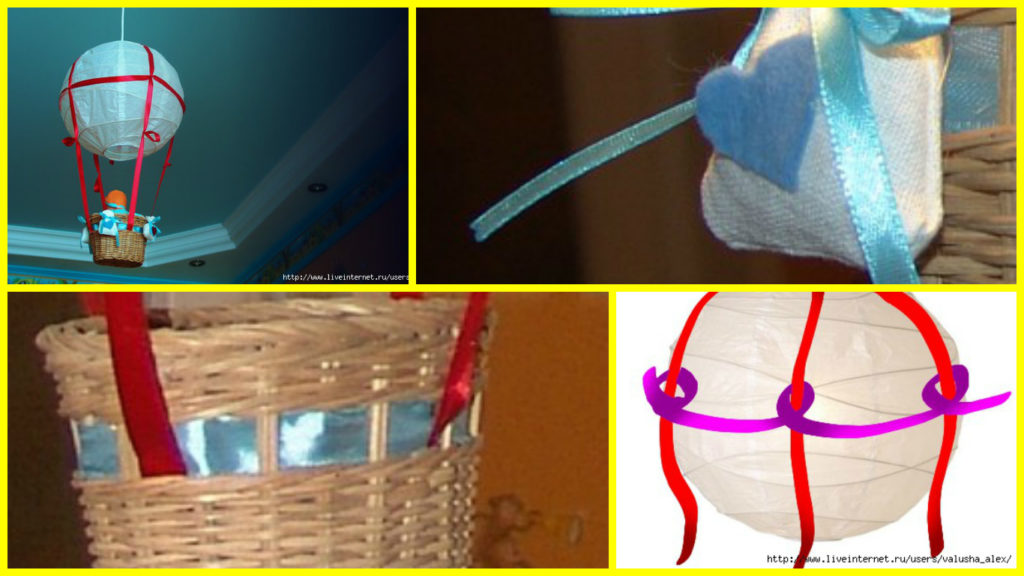
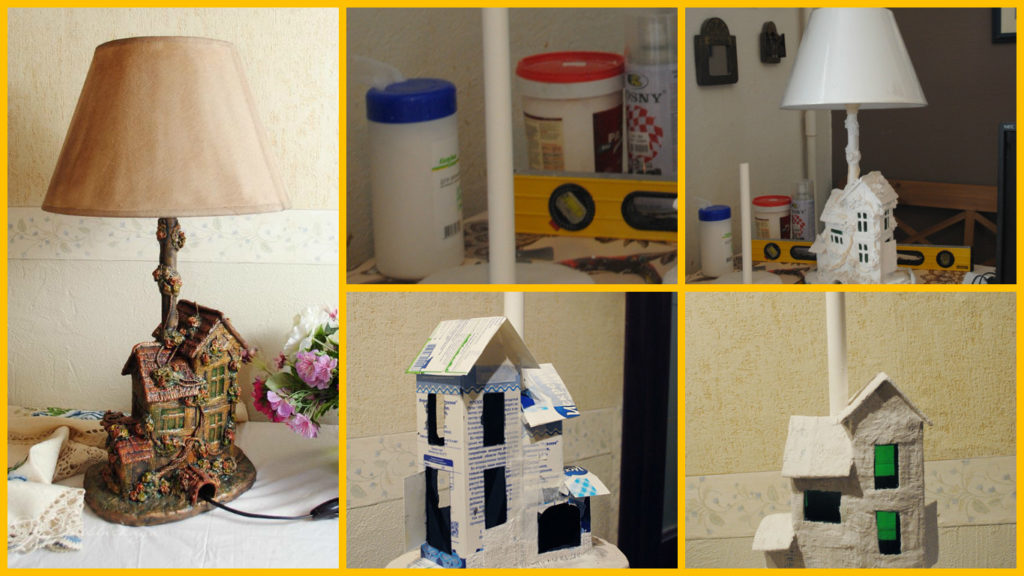
Posted onJanuary 28, 2017June 24, 2017inBest out of Waste, DIY, Home Decor, Step by step, Tutorial How to make beautiful lamp house