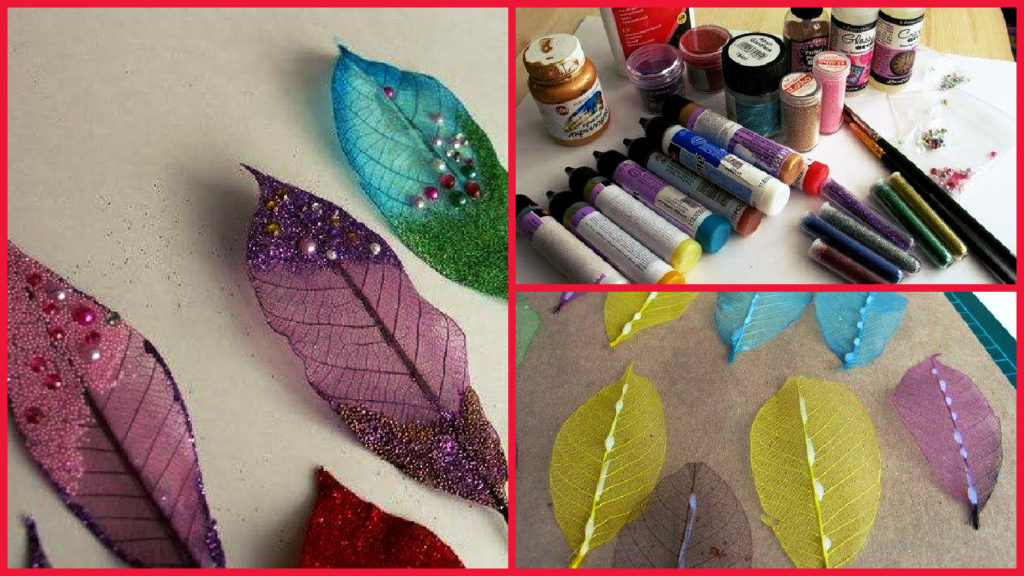
Posted onJanuary 27, 2017inDecorations, DIY, Step by step, Tutorial How to decorate skeletonized leaves
Posted onJanuary 26, 2017inBest out of Waste, Other, Step by step, Tutorial How to organize your craft tools (Tutorial)
Posted onJanuary 24, 2017November 19, 2022inPatchwork Crafts, Step by step, Tutorial How to create a personal organizer for needlewoman
Posted onJanuary 24, 2017November 19, 2022inOther, Step by step, Tutorial How To Do Canadian Smocking Matrix Design
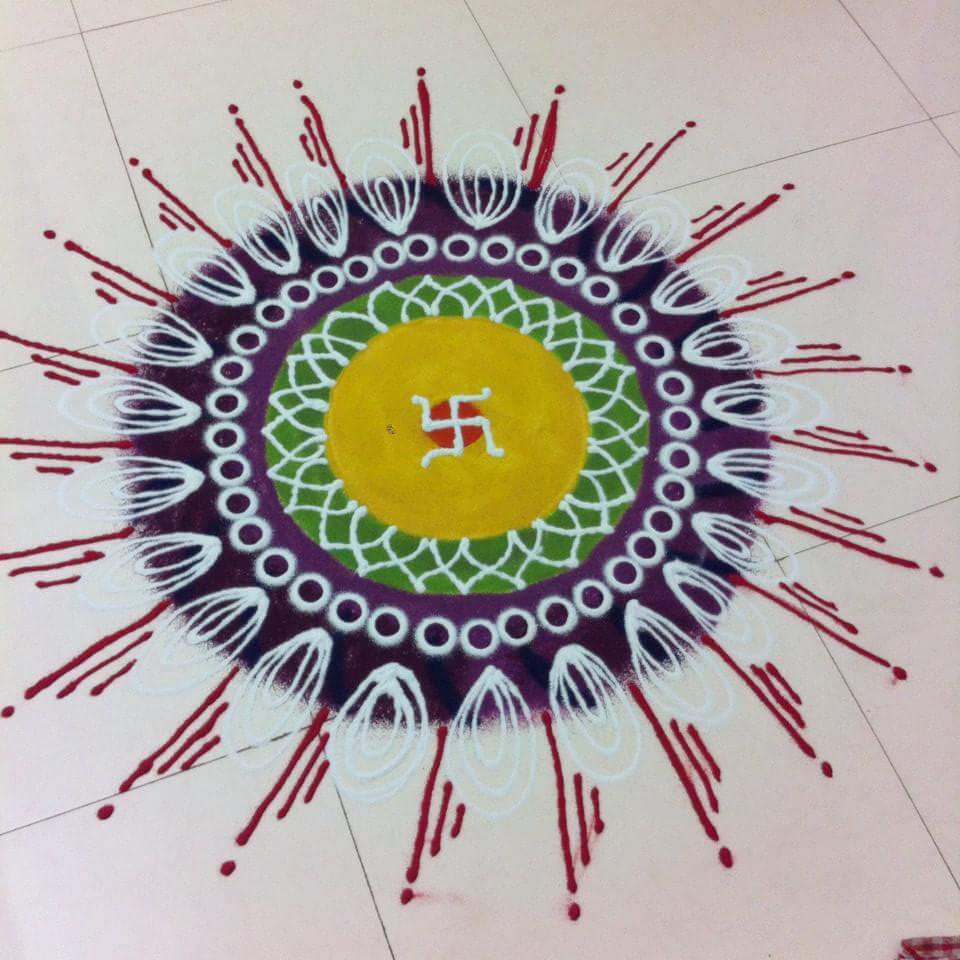
Posted onJanuary 24, 2017November 19, 2022inRangoli, Step by step, Tutorial How to draw a rangoli design step by step
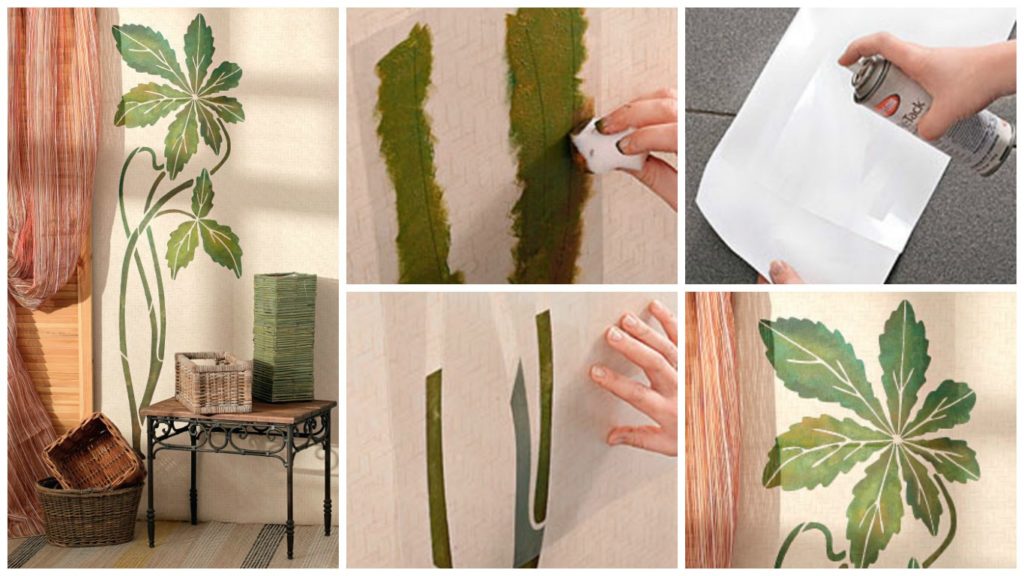
Posted onJanuary 22, 2017inHome Decor, Step by step, Tutorial How to draw herbal mural – Step By Step
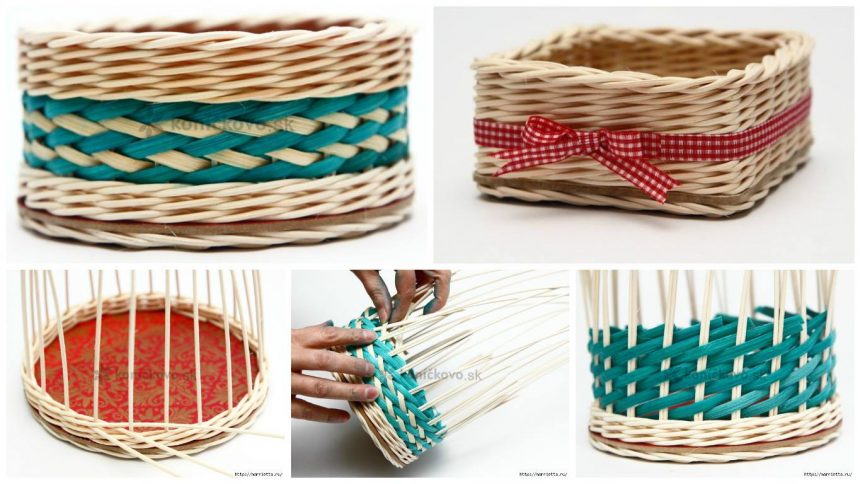
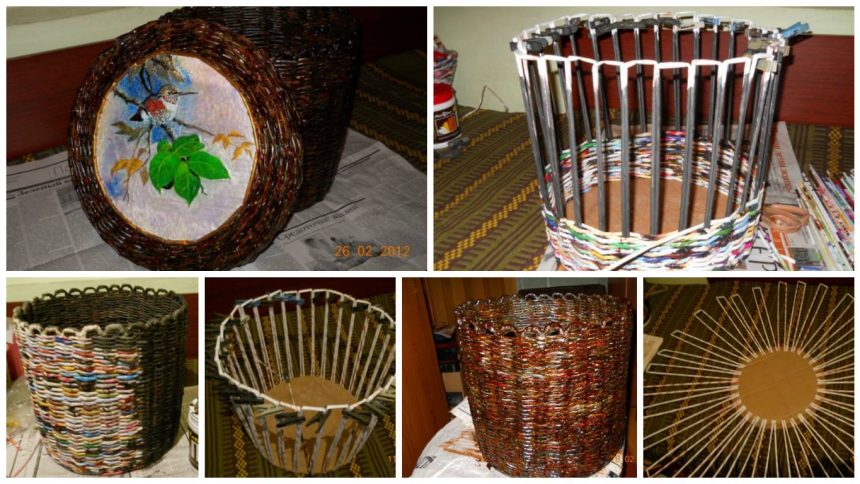
Posted onJanuary 19, 2017inNewspaper Crafts, Step by step, Tutorial How to weaving box for needlework
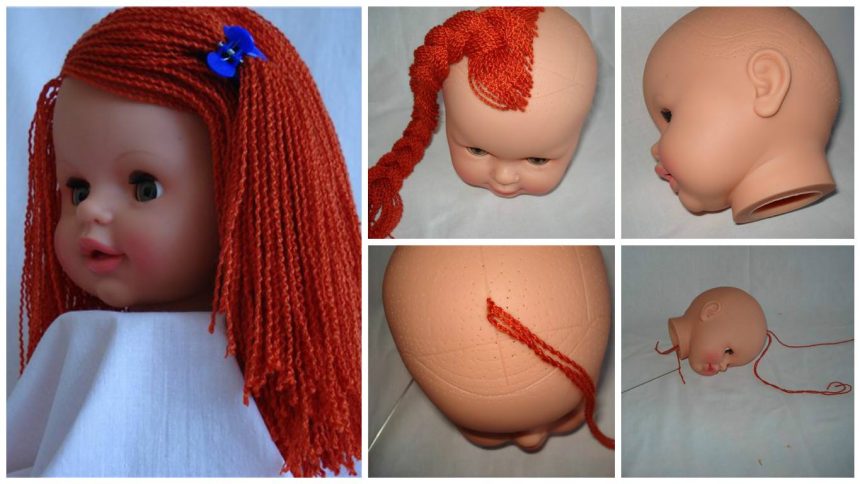
Posted onJanuary 19, 2017inKids Crafts, Step by step, Tutorial How to change the matted hair on the doll’s head to the new – Step By Step
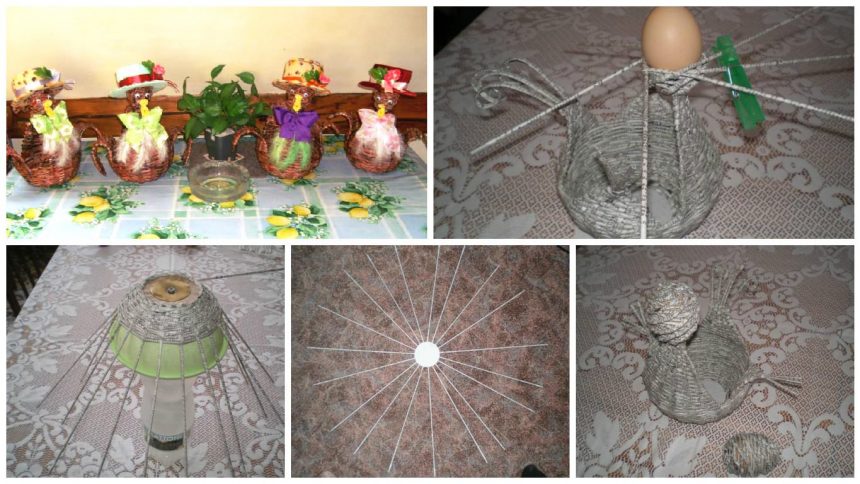
Posted onJanuary 19, 2017April 26, 2017inNewspaper Crafts, Step by step, Tutorial How to weaving poultry from newspapers tubes