Posted onJuly 7, 2017inHome Decor, PVC Crafts, Tutorial How to make PVC Bathroom Shelf for indoor plants
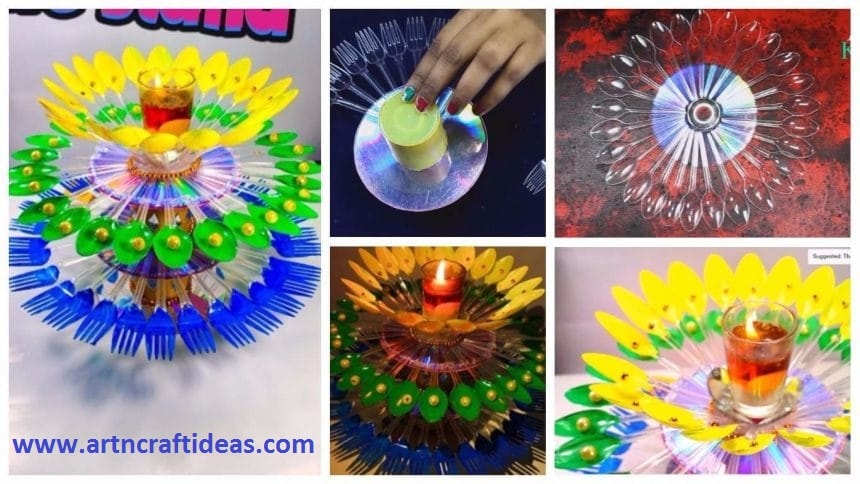
Posted onJuly 6, 2017July 6, 2017inBest out of Waste, Christmas, Craft, Diwali, DIY, Home Decor, Tutorial How to Decorate Candle Holder/Stand from Plastic Spoons
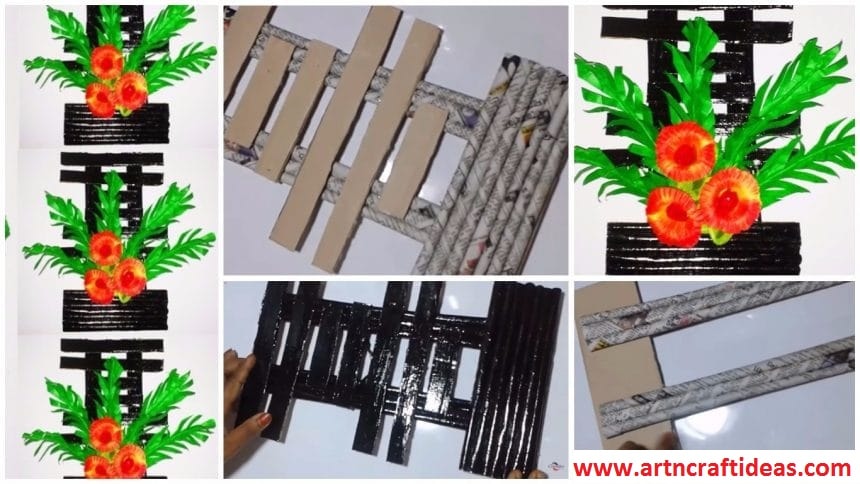
Posted onJuly 6, 2017inBest out of Waste, Craft, Home Decor, Newspaper Crafts, Tutorial How to Make Handmade Newspaper Wall Hanging
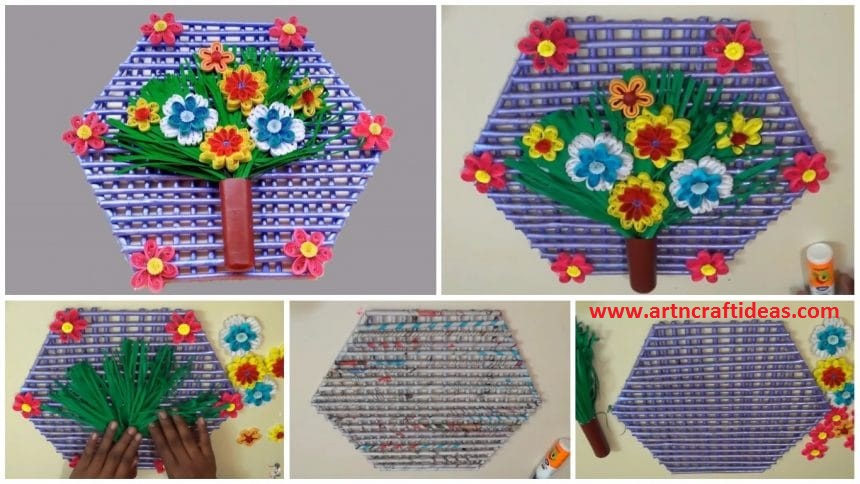
Posted onJuly 6, 2017inBest out of Waste, Craft, Newspaper Crafts, Quilling, Tutorial Paper quilling wall hanging design for room decoration
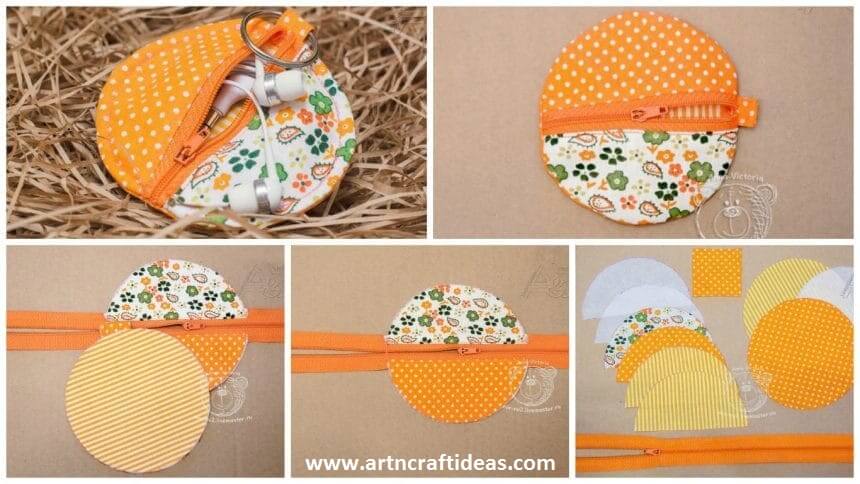
Posted onJuly 6, 2017inDIY, Embroidery And Sewing, Tutorial How to sew case for the headphone and different things
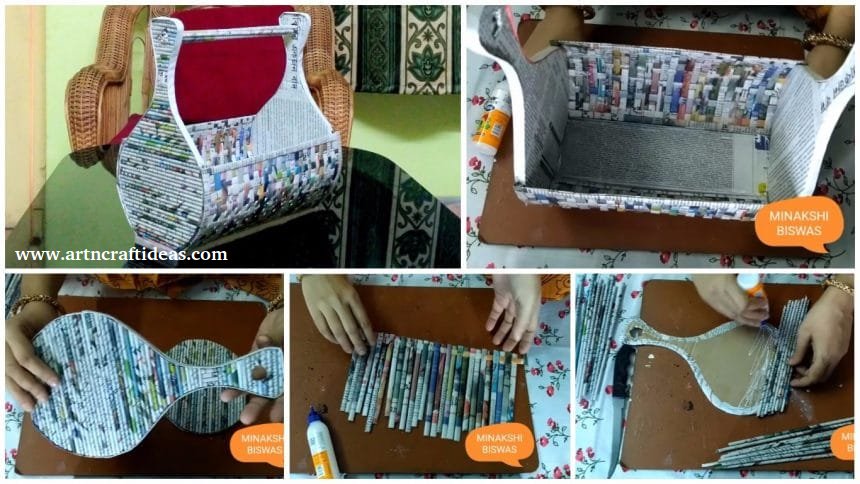
Posted onJuly 6, 2017inBest out of Waste, Newspaper Crafts, Tutorial How to make a newspaper rack / holder – Step by step tutorial
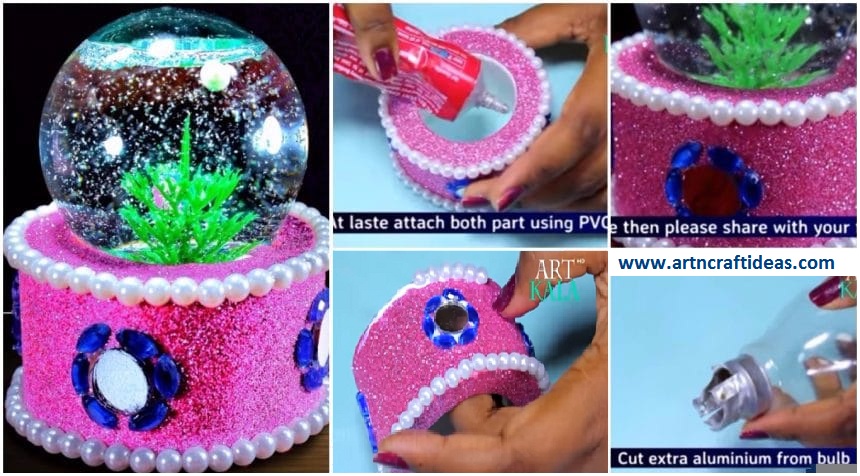
Posted onJuly 5, 2017July 5, 2017inBest out of Waste, Craft, DIY, Tutorial How to make snow globe from waste fuse bulb best out of waste