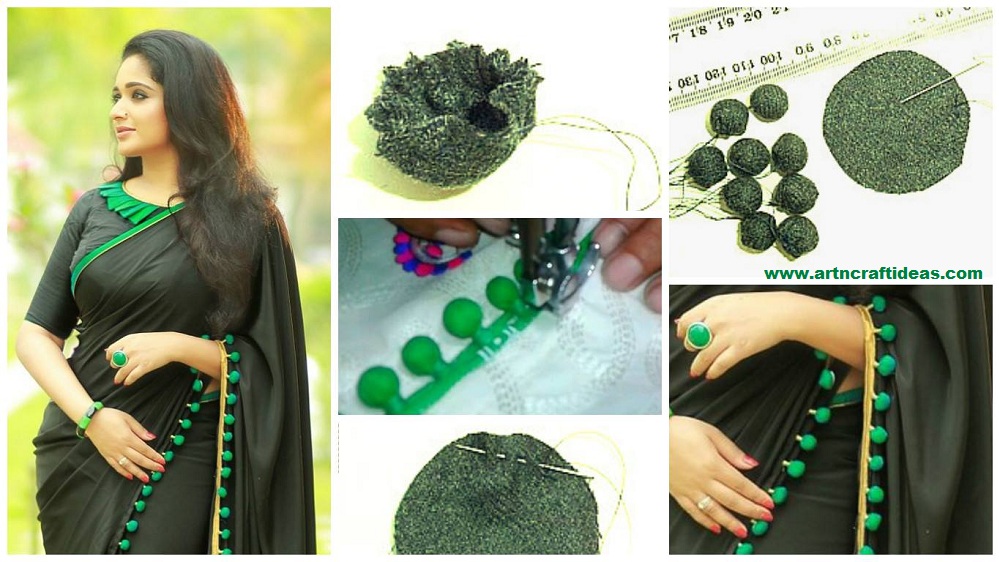
Posted onJune 2, 2017inClothing, Embroidery And Sewing, Tutorial How to decorate saree from fabric pompom
Posted onMay 18, 2017inClothing, Featured, Kids Corner, Tutorial Little Red Riding Baby Boots Pattern Tutorial
Posted onMay 17, 2017May 17, 2017inHome Decor, Kids Corner, Tutorial Love birds – Acrylics Painting on Canvas
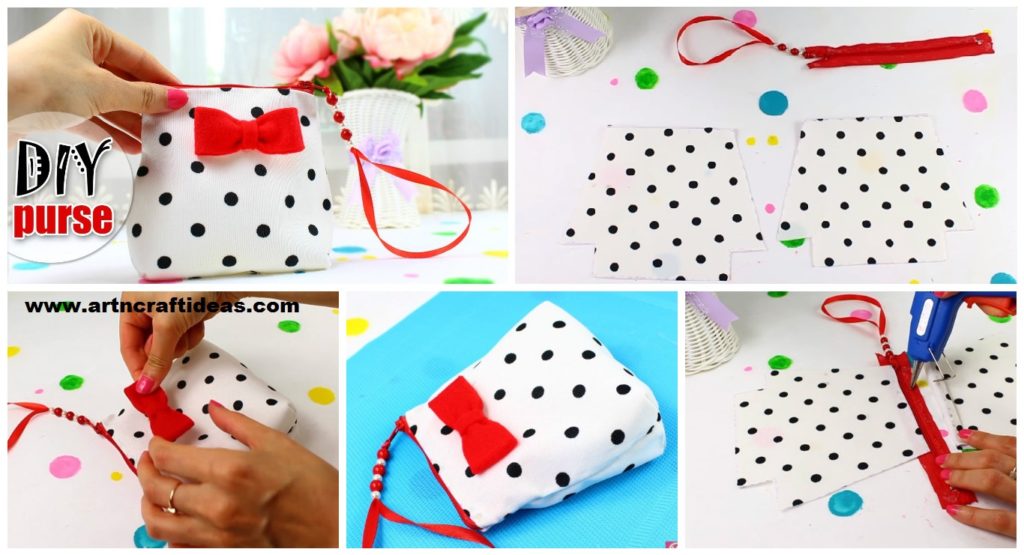
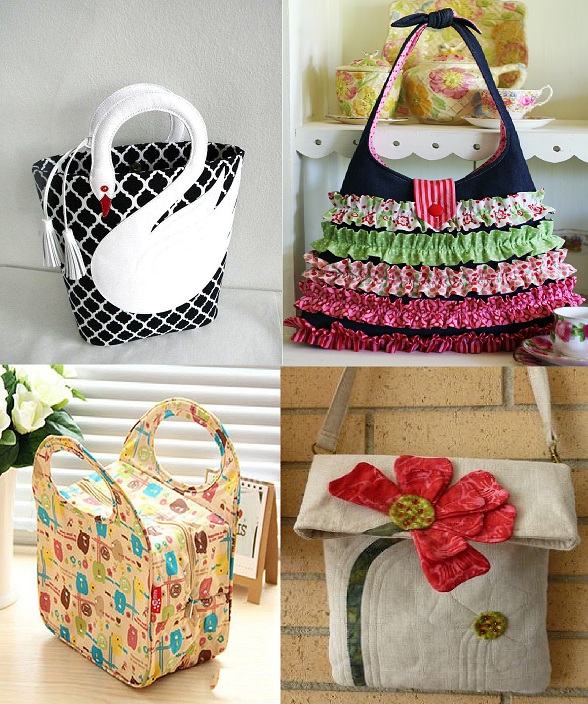
Posted onMarch 4, 2017November 19, 2022inEmbroidery And Sewing, Ideas, Patchwork Crafts Handmade cloth bag patterns
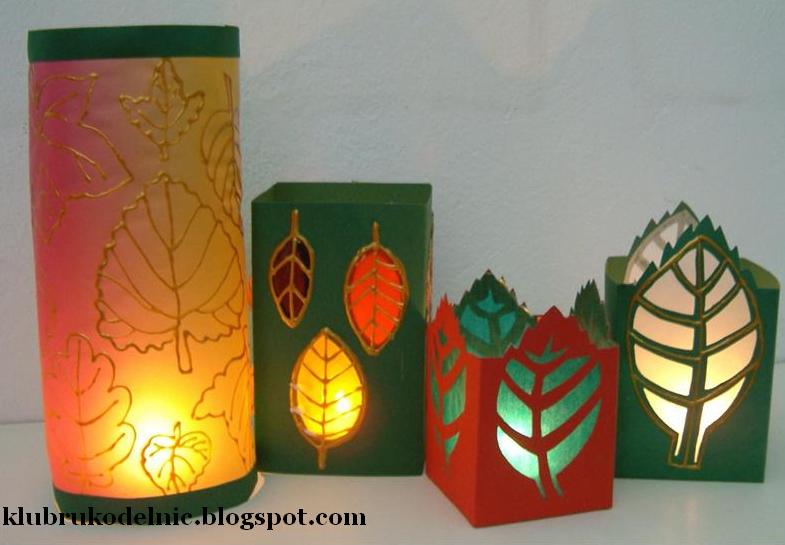
Posted onMarch 4, 2017inBest out of Waste, DIY, Home Decor, Tutorial DIY: Lanterns with autumn leaves create
Posted onMarch 4, 2017May 20, 2018inDIY, Embroidery And Sewing, Patchwork Crafts, Tutorial Homemade small sewing basket