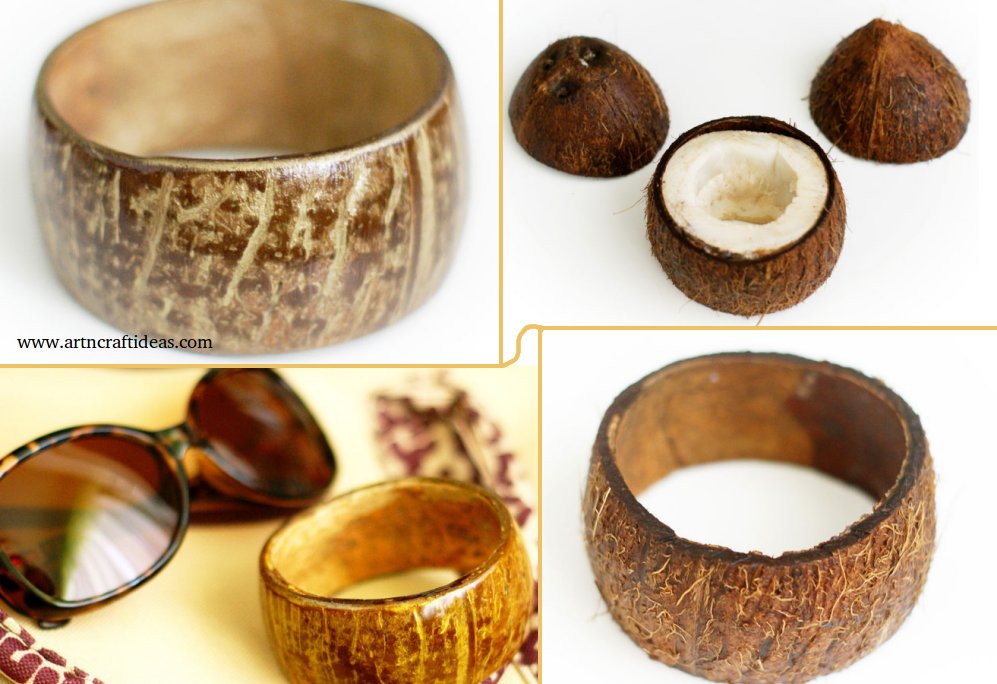
Posted onJune 1, 2017inBest out of Waste, Jewellery, Step by step, Tutorial How to make coconut shell bracelet – Step by step
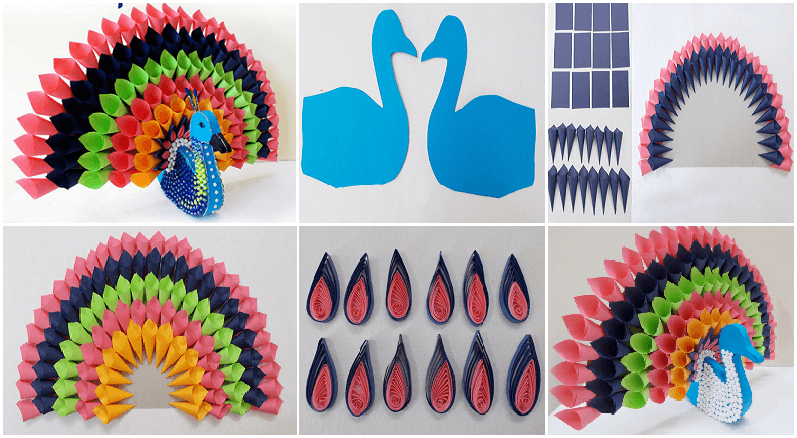
Posted onMay 28, 2017inKids Crafts, Paper Crafts, Step by step, Tutorial DIY Multicolored Paper Peacock
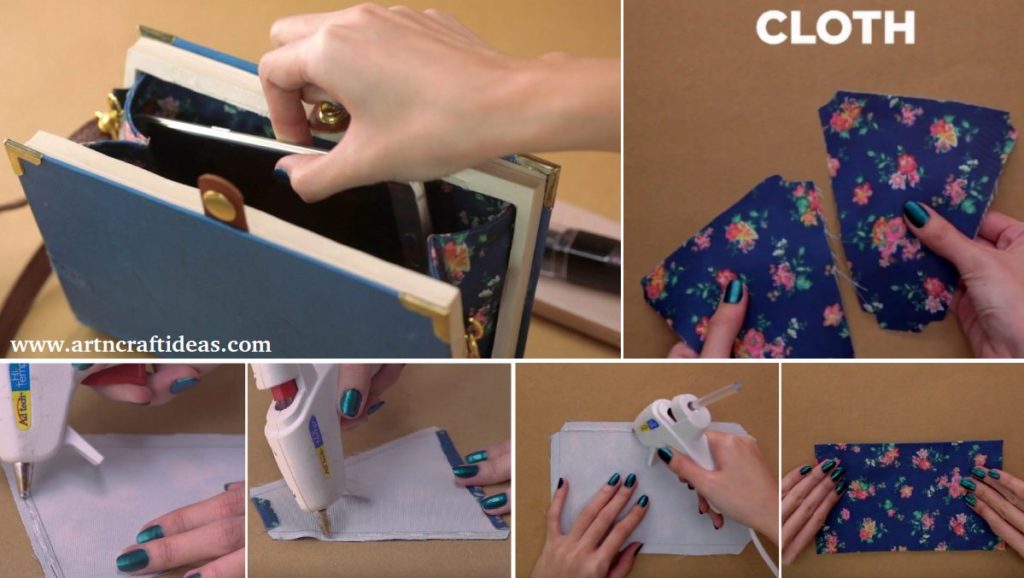
Posted onMay 21, 2017May 21, 2017inBest out of Waste, DIY, Step by step, Tutorial How To Make A DIY Book Clutch Tutorial – Step by step
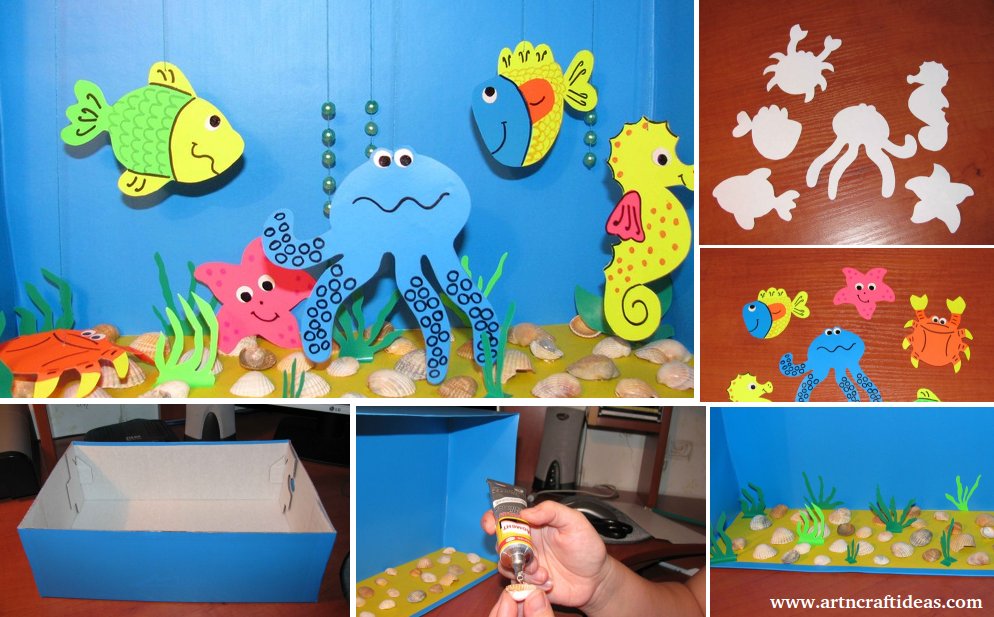
Posted onMay 19, 2017May 19, 2017inCardboard Crafts, DIY, Step by step, Tutorial Aquarium – Crafts for children from the box and color paper
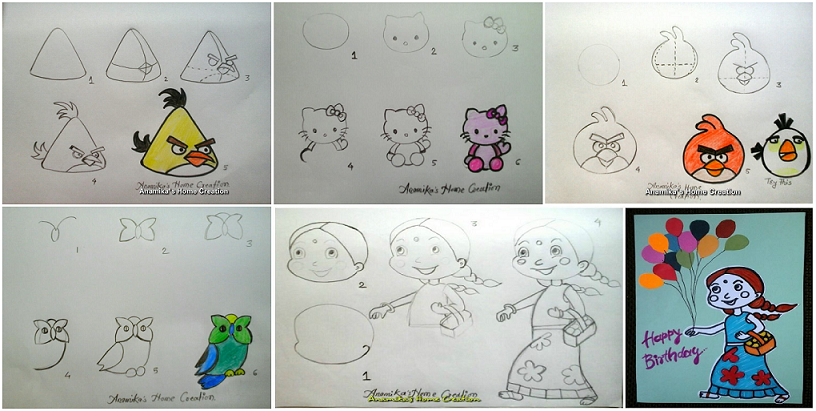
Posted onMay 17, 2017May 17, 2017inFeatured, Kids Corner, Step by step How to draw cartoon characters step by step
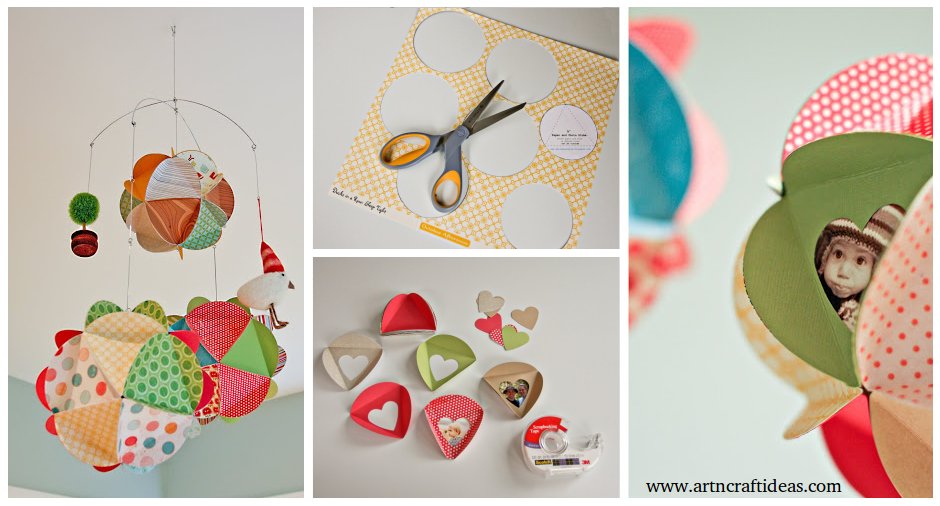
Posted onMay 17, 2017inDIY, Kids Corner, Paper Crafts, Step by step, Tutorial Easy DIY Photo Globe Mobile Tutorial
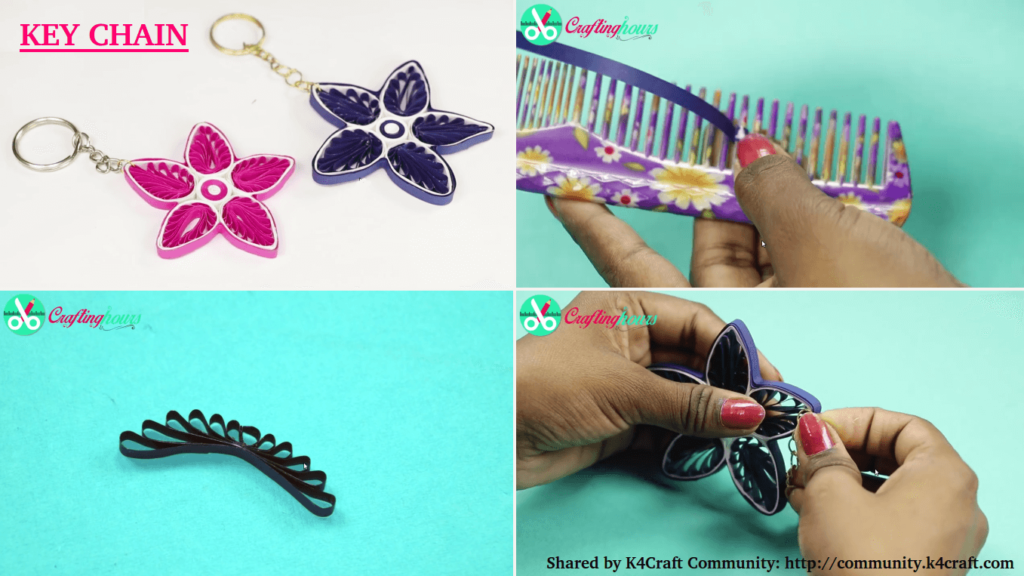
Posted onApril 25, 2017inQuilling, Step by step, Video Paper Quilling – How to Make Key chain from Quilling Art
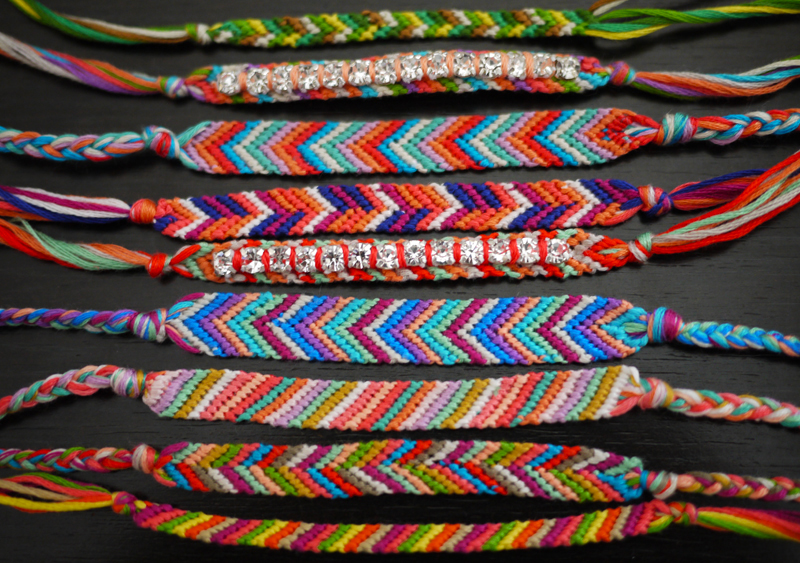
Posted onFebruary 25, 2017February 25, 2017inDIY, Friendship Day, Jewellery, Step by step, Tutorial DIY Beautiful Friendship Bracelet