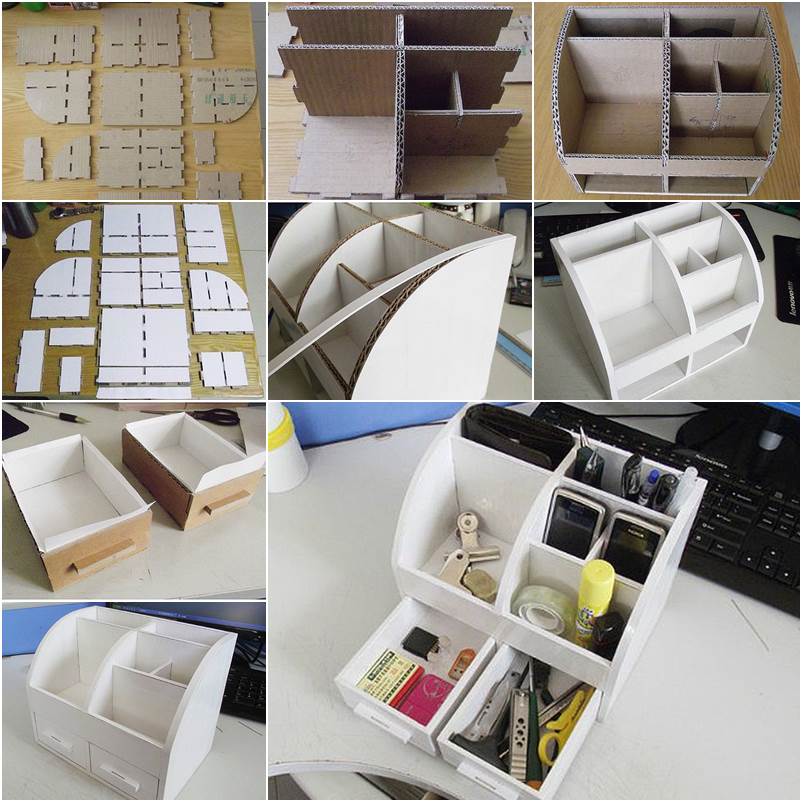
It is awesome to take some recycled cardboard and make a nice desk organizer with drawers, as shown in this DIY Crafts. With its multiple dividers and two drawers, this organizer is a great space saver to put away your stationery, accessories, cell phones, keys, wallet and so on. It’s very easy to make and you can be rest assured that everything will be organized and looking nice on your desk. You can use your favorite wrapping paper or fabric to create your own style.
Required Material:
- Cardboard (you can use shipping boxes);
- Wrapping paper or fabric with colors and patterns of your choices;
- Cardstock paper;
- Glue;
- Craft Knife;
- Scissors;
- Ruler;
- Pen.
Steps:
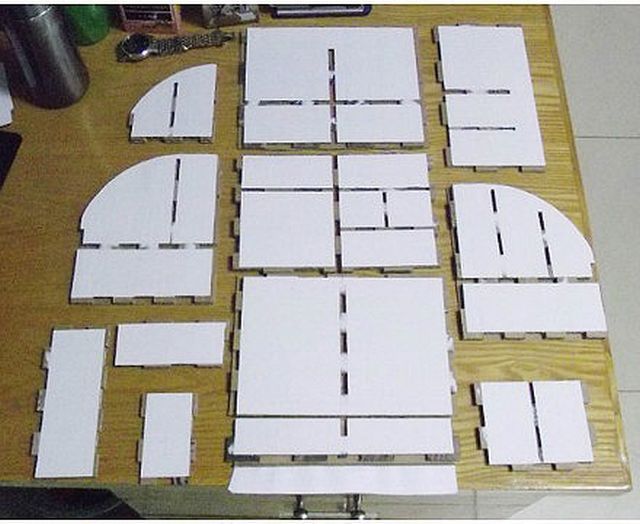
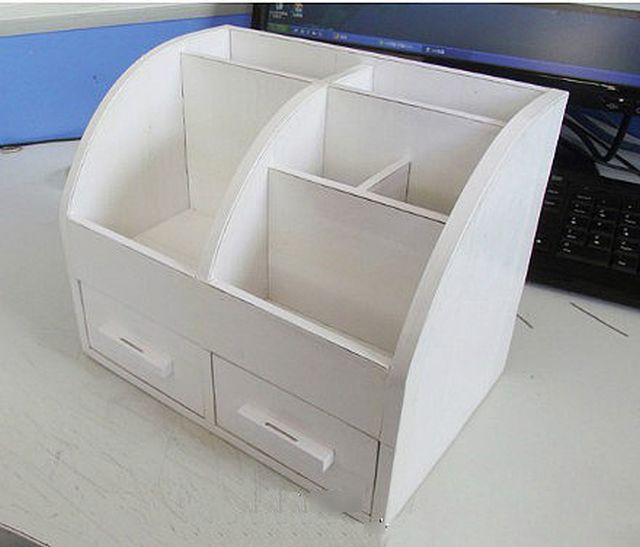
1. Decide the size of your organizer, draw the templates on cardboard and cut out the pieces. The dimension of the organizer is about 30 cm in length, 20 cm in width and 20 cm in height. The front section is about 12.5 cm in width and the back section is about 7.5 cm in width.
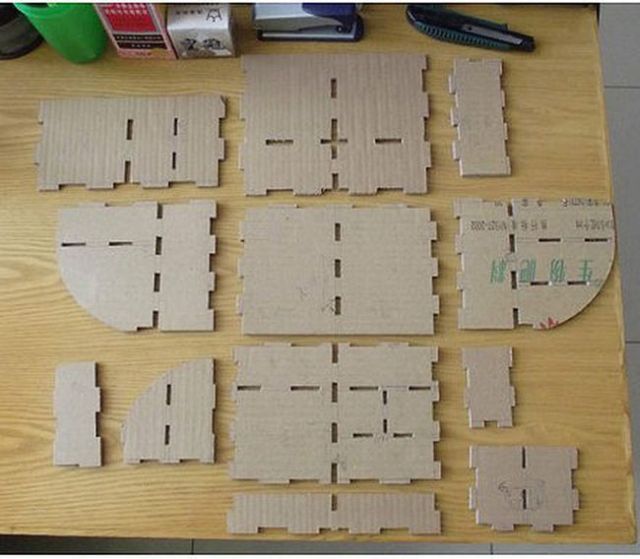
2. Assemble the pieces to see if they fit. Make adjustments if needed.
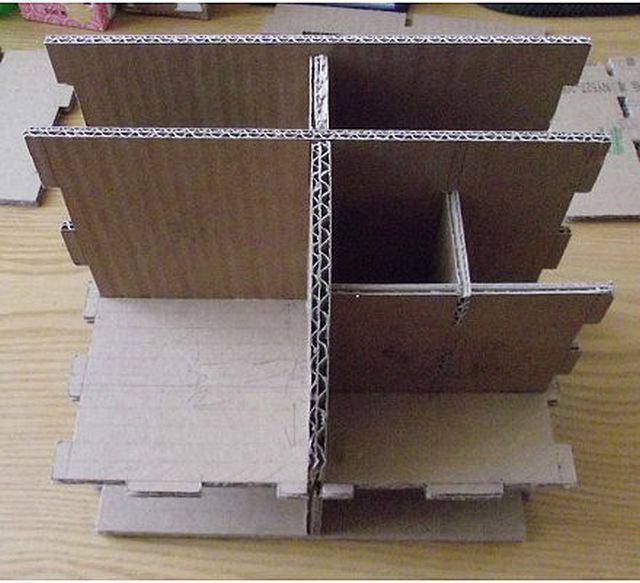
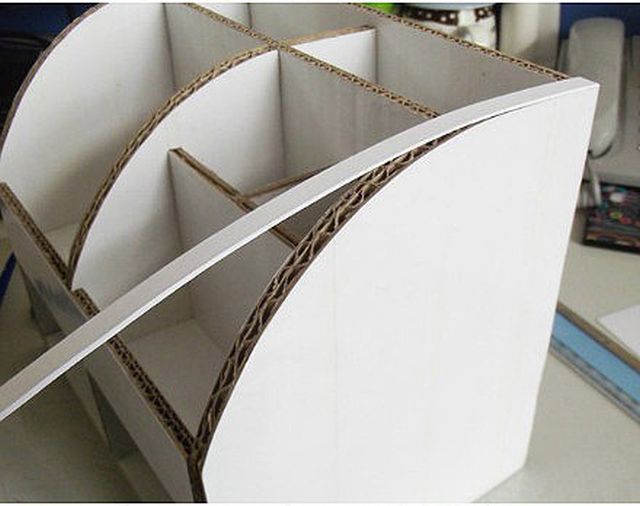
3. Assemble the side pieces and make sure every piece fits perfectly.
4. Disassemble the organizer and wrap each piece with paper or fabric and secure with glue.
5. Assemble the wrapped pieces again into the organizer and cover the seams with cardstock strips. Secure with glue.
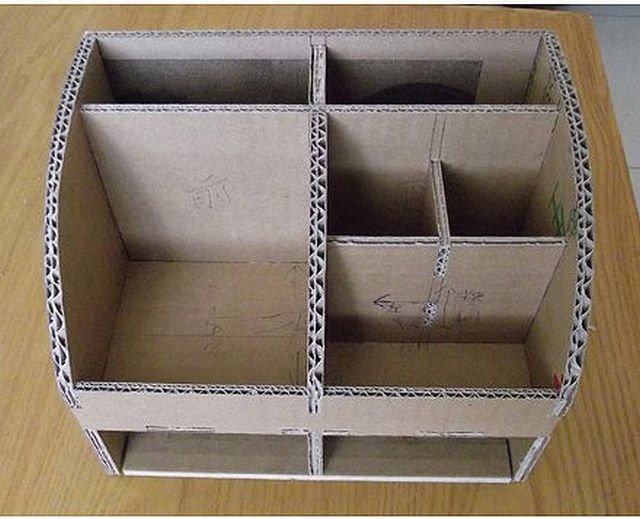
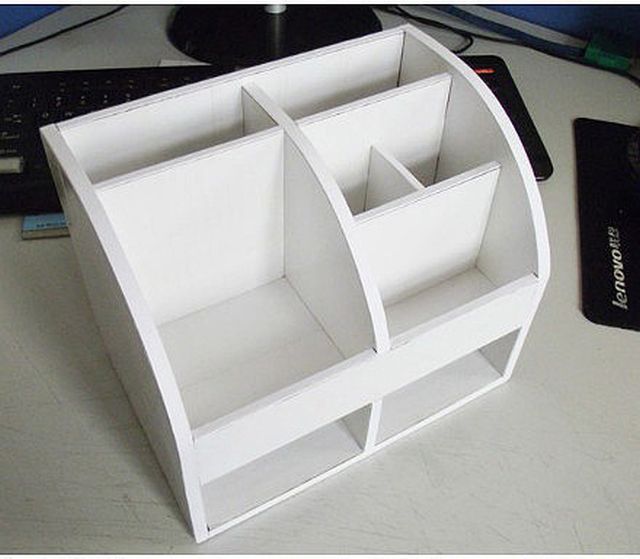
6. Now it looks like this.
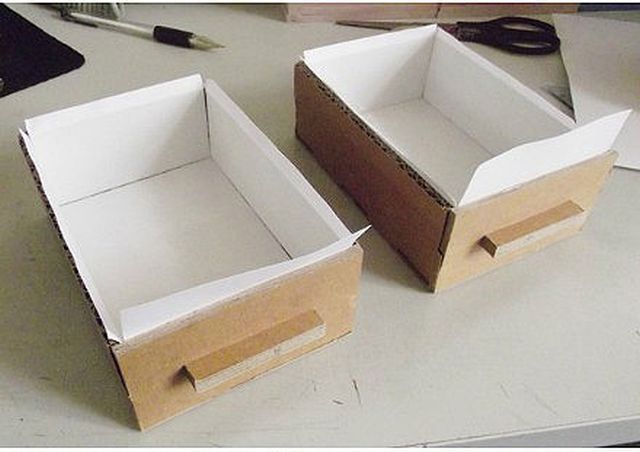
7. Wrap the drawers with paper and insert into the drawer slots of the organizer.
8. The cardboard organizer is done. It looks nice, doesn’t it?
9. Place your accessories, stationery and other stuffs in the organizer. Enjoy!

Hope you like this desk organizer craft tutorial.
Image source: icreativeideas
We would love to hear your thoughts in the comment section below. And be sure to like us Facebook for more ideas!
Thank you for visiting our website. Keep Creating with Art & Craft!