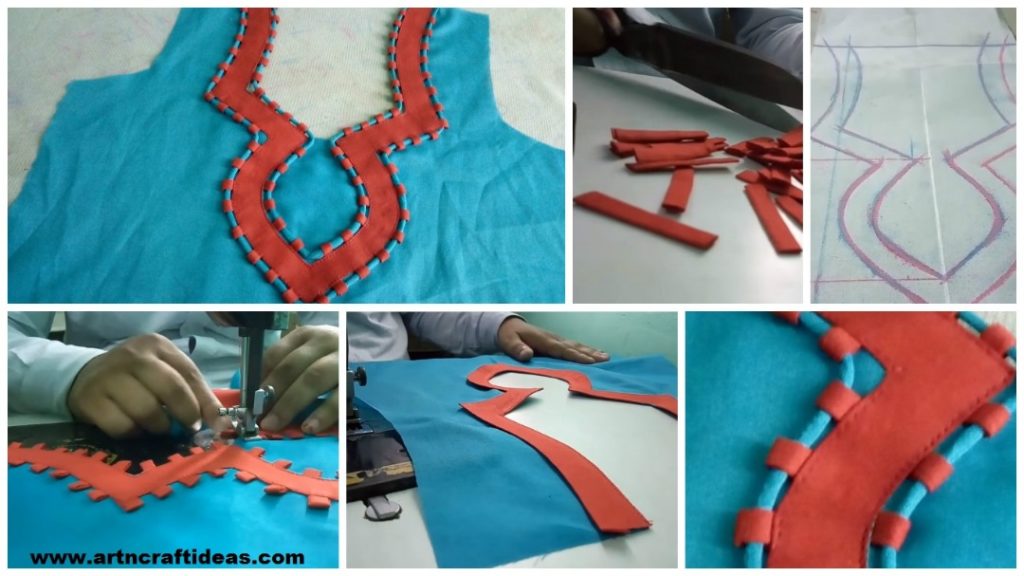
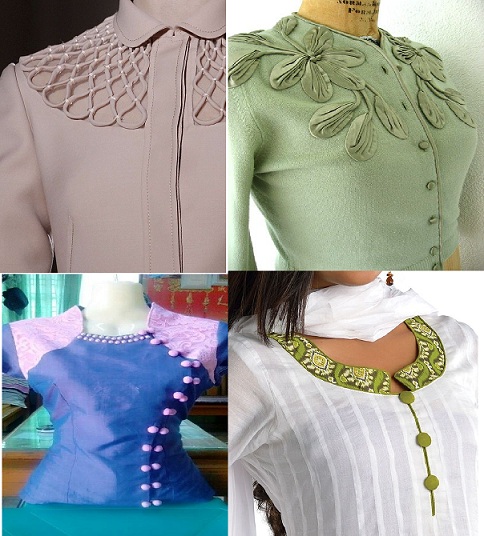
Posted onJune 9, 2017inClothing, Embroidery And Sewing, Patchwork Crafts, Tutorial How to sew piping neck design
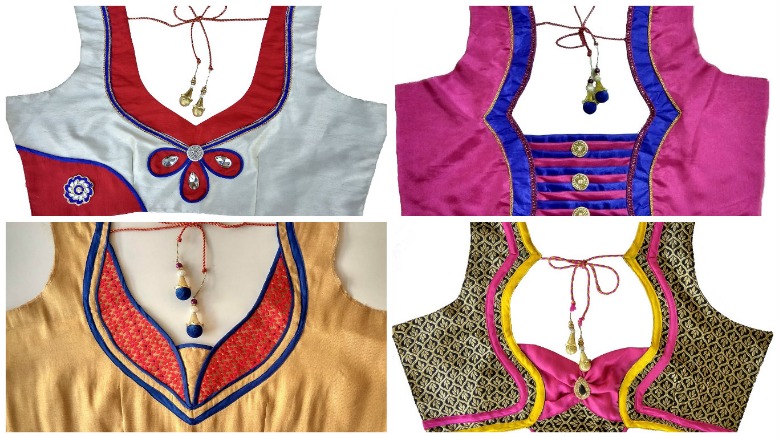
Posted onMay 19, 2017November 19, 2022inClothing, Patchwork Crafts, Tutorial, Video How to make designer back neck blouse
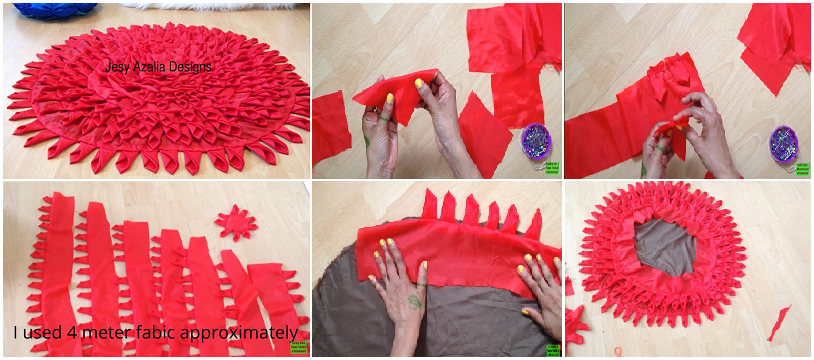
Posted onMay 18, 2017inBest out of Waste, Embroidery And Sewing, Tutorial, Video DIY Floor mat using old cloth
Posted onMay 16, 2017inClothing, Embroidery And Sewing Different Types Of Kurti Designs For Stitching
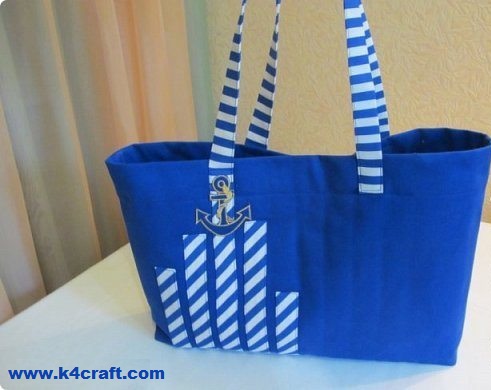
Posted onMarch 10, 2017inEmbroidery And Sewing, Patchwork Crafts, Tutorial DIY beach bag for the sea promenade
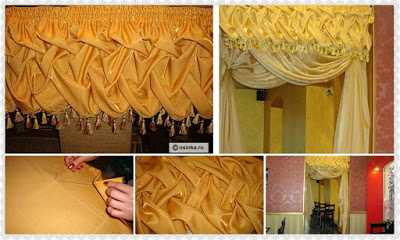
Posted onMarch 10, 2017inEmbroidery And Sewing, Home Decor, Patchwork Crafts, Tutorial How to make fancy curtains
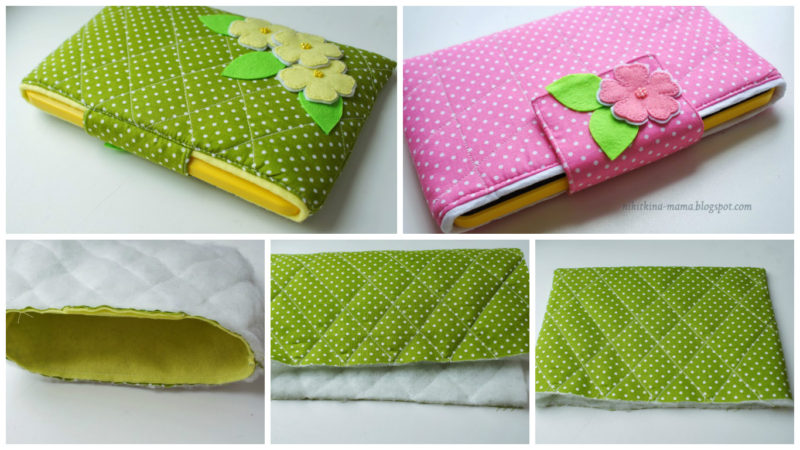
Posted onMarch 4, 2017inEmbroidery And Sewing, Patchwork Crafts, Tutorial DIY: Beautiful Mobile Cover
Posted onMarch 4, 2017May 20, 2018inDIY, Embroidery And Sewing, Patchwork Crafts, Tutorial Homemade small sewing basket
Posted onFebruary 22, 2017February 23, 2017inClothing, Ideas, Patchwork Crafts Different Types Of Kurta Neck Designs
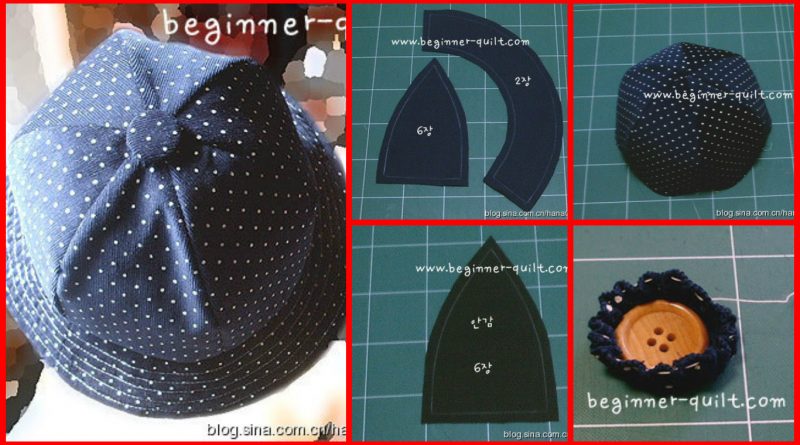
Posted onFebruary 10, 2017inDIY, Embroidery And Sewing, Step by step, Tutorial Sew A Summer Hat for Children