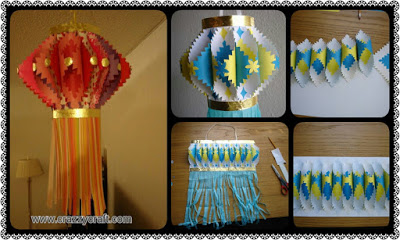
A symbol of the festive and children together to produce a fine and simple lanterns! A very beautiful handmade paper lantern Oh! Ready to the required materials, to produce this Pupils handmade lanterns!
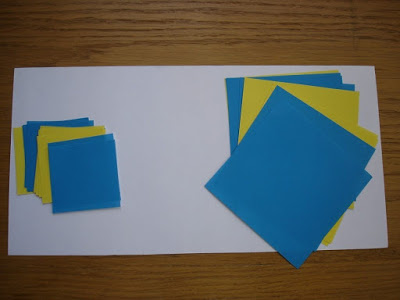
Step 1
Prepare two colors of colored paper, and cut them into a square, large sheets of small square should have, as shown, and a large rectangular white paper
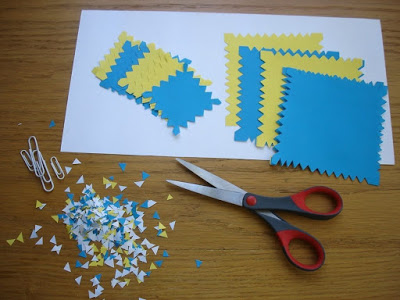
Step 2
Cut all the edges of the square into a jagged shape, as shown in the figure, note that the lace should be consistent,
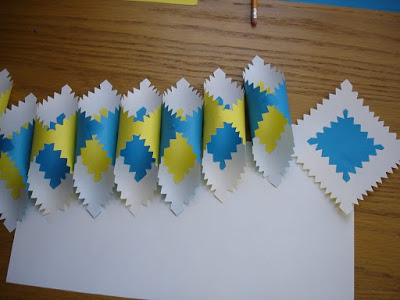
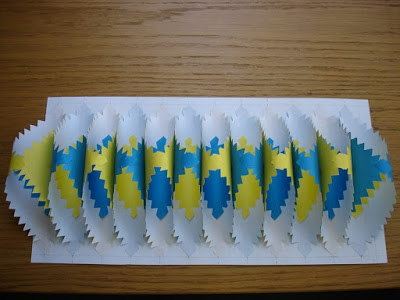
Step 3
Wrap the large square and the back of the small square with each other and then roll them up as shown
Step 4
Will each roll up the roller paste fixed in a row, and then fixed in the white rectangle, up and down to leave a side
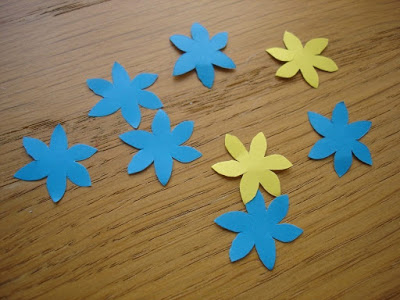
Step 5
Cut out some flowers with embossing machine or scissors, the best size of the flowers do not differ too much
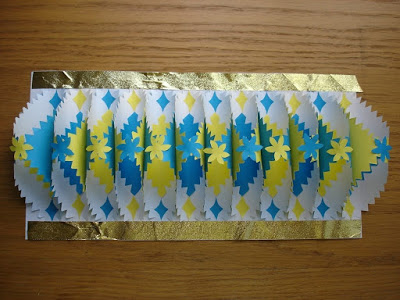
Step 6
Will cut the small flowers attached to the reel in the contact point, and then paste the gold color on the edge of the upper and lower
Step 7
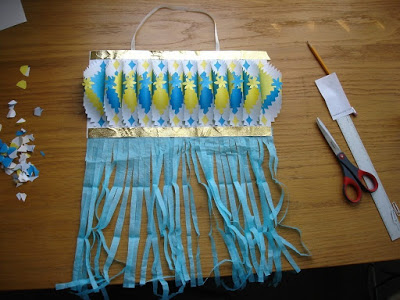
The crepe paper or colored paper to expand the folds, and then cut into a tassel-like, pay attention to the top of a margin
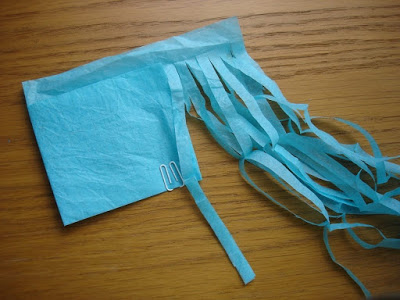
Step 8
Will cut the tassel paste in the bottom of the inside, the other cut a long strip, and then paste in the top of the inside, make lanyard
Step 9
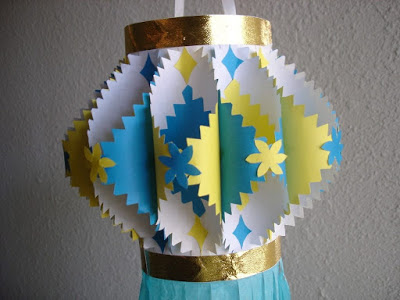
Will be rolled up the whole step into a lantern-like, fixed, you can hang in the favorite place!
 Another lantern with different color:
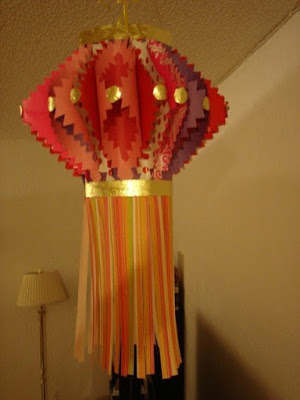 Source