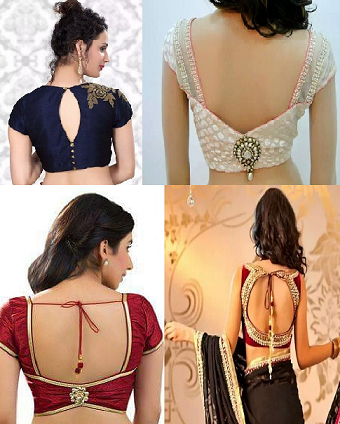
Posted onMarch 4, 2017March 4, 2017inClothing, Featured, Ideas 15 Latest Blouse Back Neck Designs Patterns
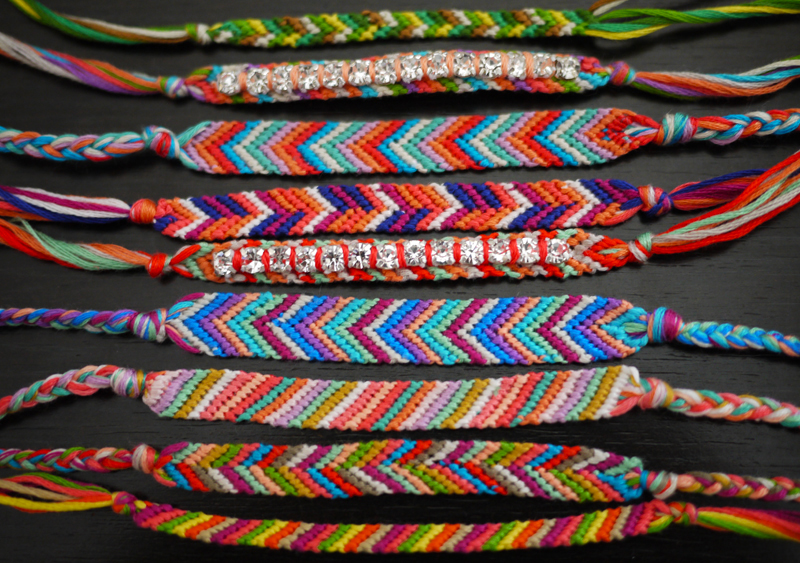
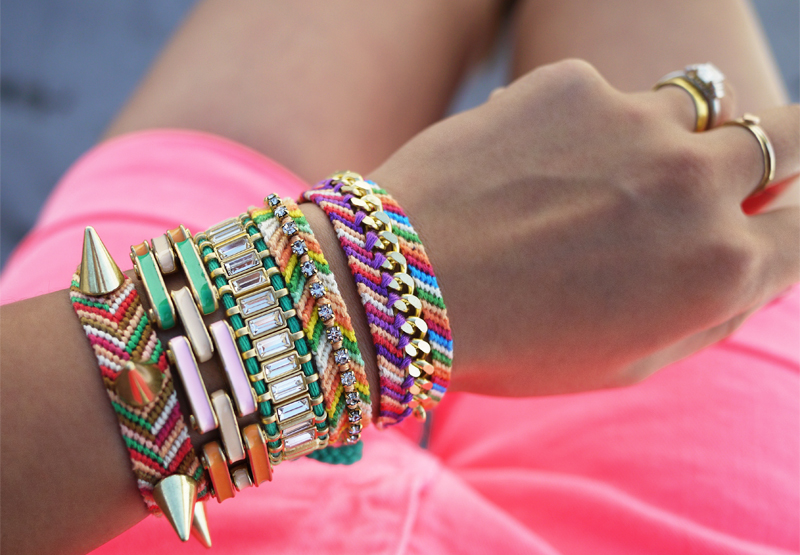
Posted onFebruary 25, 2017February 25, 2017inDIY, Friendship Day, Jewellery, Step by step, Tutorial DIY Beautiful Friendship Bracelet
Posted onFebruary 25, 2017February 25, 2017inDIY, Featured, Friendship Day, Jewellery, Step by step, Tutorial DIY Decorate Friendship Bracelets
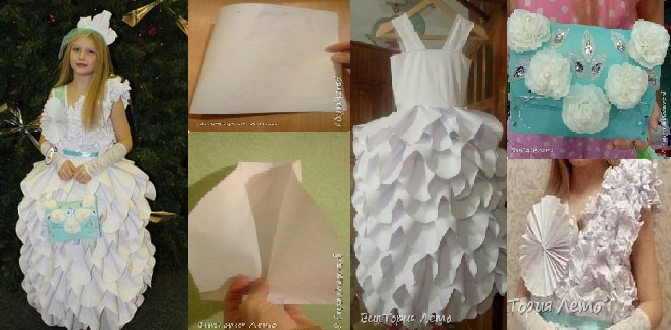
Posted onFebruary 24, 2017inBest out of Waste, Clothing, DIY, Kids Crafts, Step by step, Tutorial Handmade paper frock for fancy dress competition
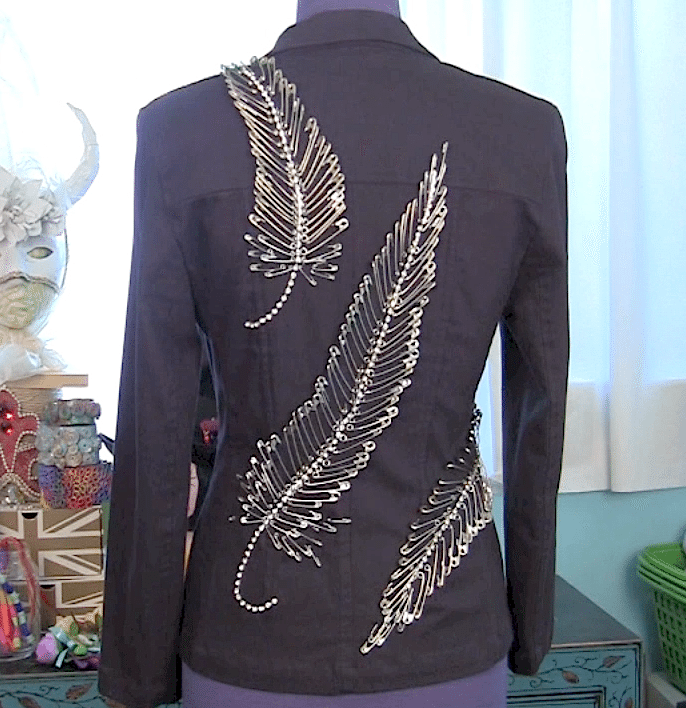
Posted onFebruary 22, 2017inBest out of Waste, Clothing, Step by step, Tutorial DIY: Safety pin feather jacket
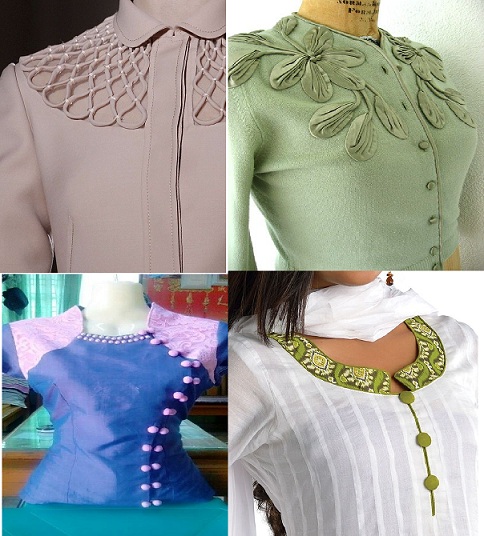
Posted onFebruary 22, 2017February 23, 2017inClothing, Ideas, Patchwork Crafts Different Types Of Kurta Neck Designs
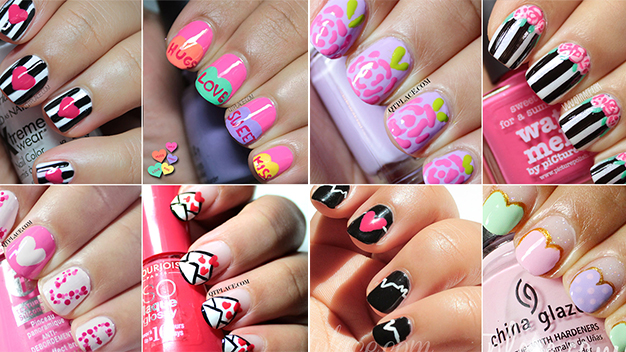
Posted onFebruary 13, 2017February 13, 2017inNail Art, Valentine’s Day Valentine’s Day Nail Art Designs Ideas
Posted onFebruary 6, 2017inDIY, Jewellery, Step by step, Tutorial How to make earrings in the technique ganutell
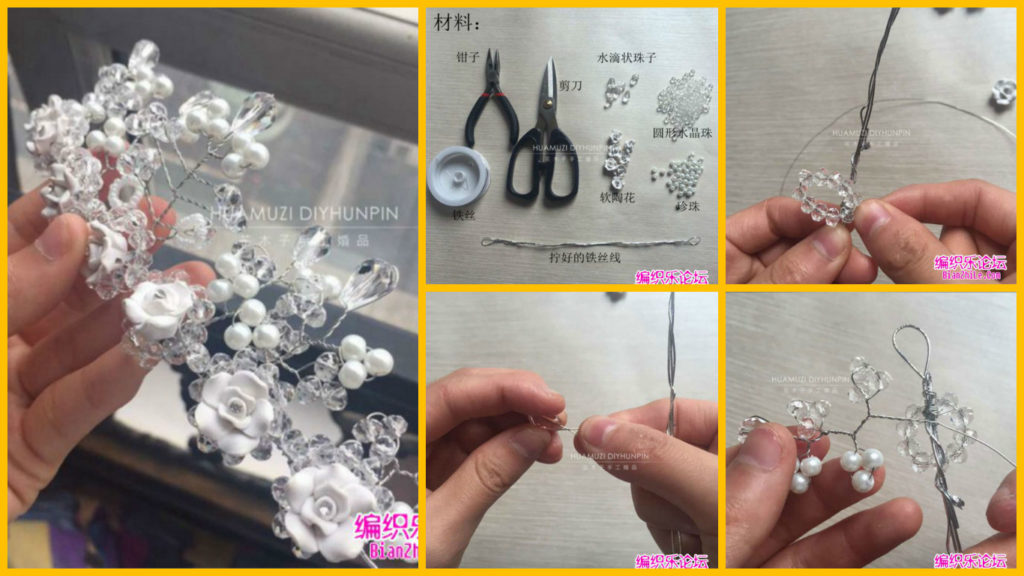
Posted onFebruary 6, 2017February 6, 2017inDIY, Jewellery, Step by step, Tutorial DIY: Beautiful beaded ornaments