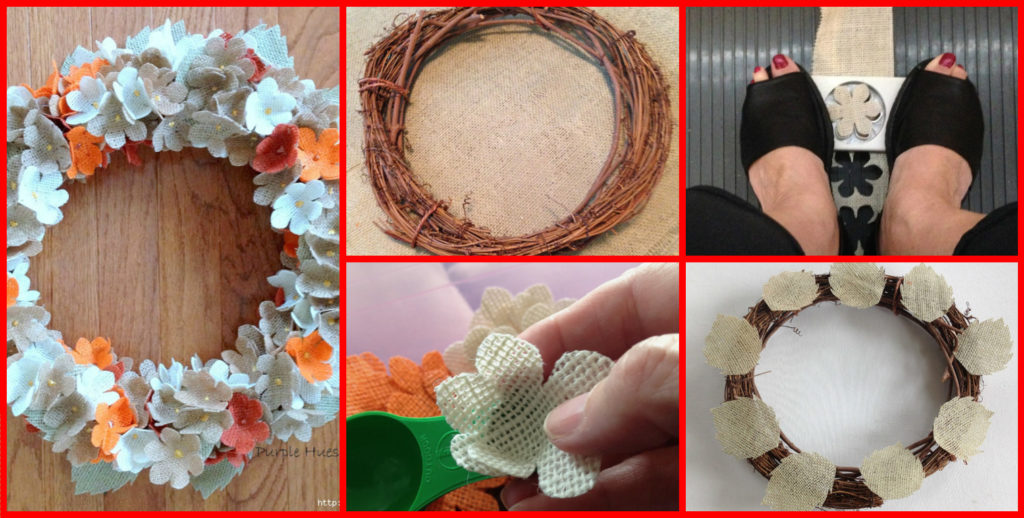
How to make a burlap sunflower

Beautiful Sunflower pick for fall wreaths. You can make any color you like. I hope you have fun making this flower. Step 1: Required Material 

15″ of 5 1/2 wide burlap – color of your flower

5″ of 5 1/2 wide burlap – green for your leaves

Scrap piece of brown burlap for the center

Cutting mat

Decoupage

wide sponge brush

1 fine gauge wire

Scissors

Flower template mine came from http://www.freekidscrafts.com

I could not find a leaf template so I have included a picture of what I free hand cut

2 paper plates

one plastic rectangular bowl

Straight pins with the heads on them

Step 2: Decoupage

Pour about a half of a cup of your decoupage into the plastic bowl.

then pour enough water into the decoupage to make it thin. You will know it is thin enough when it drips off your brush.

Use your first paper plate and lay your burlap piece down and start brushing until you have covered the whole piece.

Place the piece on the clean paper plate and repeat. I did take another plate for the 6″ of the green burlap.

I let my dry overnight.

Step 3: Pin and Cut Flowers Out

You will need to cut your flower templates out. I downloaded the flowers and then resized them to 5″, 4″, and 3″.

Take your straight pins, I use the ones with the heads on them, and pin from the top of the peddles to the center.

Now a trick I use is to start with a paddle and cut around the top then do the same thing with each peddle until you have gone all the way around. I then turn over the paddle and cut the opposite side of each paddle. Look at the picture of the front and back of the peddles and you will see this gives you a clean cut.

Now take your pins out and you will be ready to assemble.

Step 4: Putting Your Flower Together

In the first picture you will see I am using my fingers to fold the flower in haft, I will do this on both sides of the flower to find the center.

Now stack each of your flowers and turn over to slide the wire through the center. If you do not want to use the flower for a pick skip this step and glue each one in the center.

Turn over and glue your center circle of brown burlap in the center.

Turn back over and lay your leaves, you can use as many or little as you like, to the back of the flower.

Glue the leaves on.

That is it and now you have your burlap flower as a pick or you can make and use on hats, headband, anything you like.

Hope you enjoyed this.

courtesy: toj66

Hydrangea Wreath with Burlap

FLOWERS HYDRANGEA WREATH WITH BURLAP 1

For a long time I want to try to bleach and color burlap … all hands did not reach) Look, what a beautiful and gentle wreath can wring out of the vine and the branches or host miniature hydrangea flowers of colored burlap. Very original idea! Suitable for decoration of any interior. Enjoying a master class?

So, to create a delicate floral wreath we need the following materials:

*hessian (can be combined with another cotton cloth);
*scissors;
*vine or branch (the basis for the wreath can be and other scrap materials);
*Melt with hot glue;
*paint for fabric – on request;
*decoupage glue or Mod Podge glue PVA;
*stamp for scrapbooking in the form of flower;
*plastic measuring spoon.

Getting Started. From the vine and the branches are twisted hoop – the basis for our wreath

Now we take the burlap and cover it with an adhesive layer for decoupage Mod Podge or PVA glue. We wait until the drying treated burlap. With a stamp for scrapbooking cut out flowers. If not, cut the hydrangea flowers with scissors. With the help of a plastic measuring spoon attach the flowers form. Now cut out the leaves of burlap previously created a template from the paper. Glue the leaves to the wreath with hot glue Next, glue the flowers: The shutdown circuit note midway flowers.