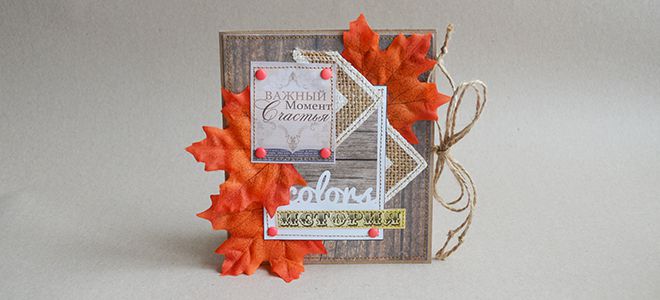
Posted onFebruary 21, 2017inCardboard Crafts, DIY, Step by step, Tutorial Autumn scrapbooking-postcard
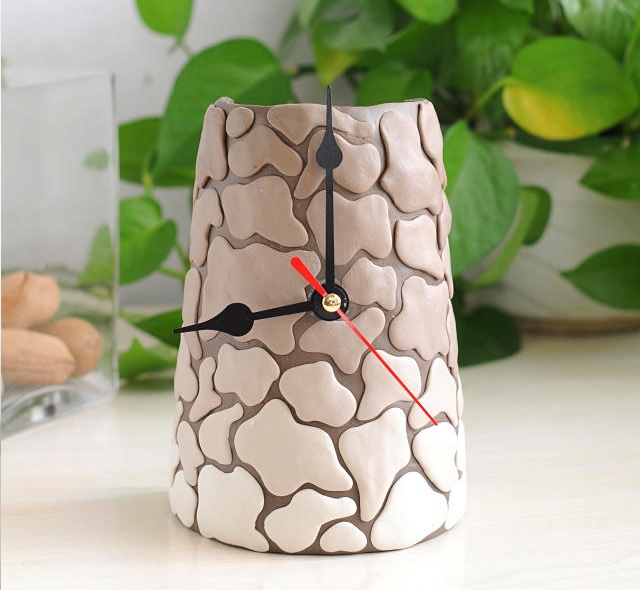
Posted onFebruary 18, 2017February 19, 2017inDIY, Step by step, Tutorial How to make soft pot clock ornaments
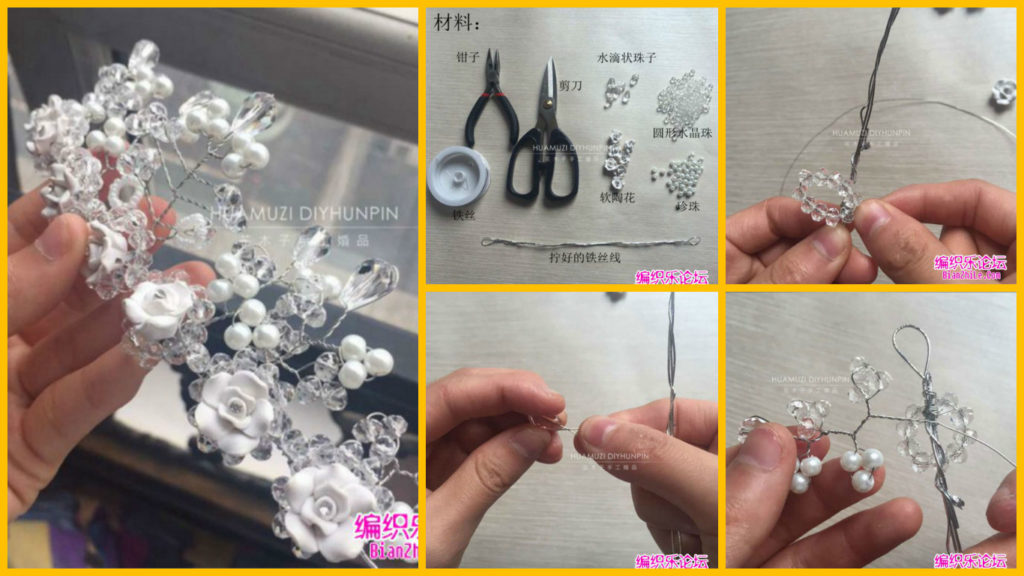
Posted onFebruary 6, 2017February 6, 2017inDIY, Jewellery, Step by step, Tutorial DIY: Beautiful beaded ornaments
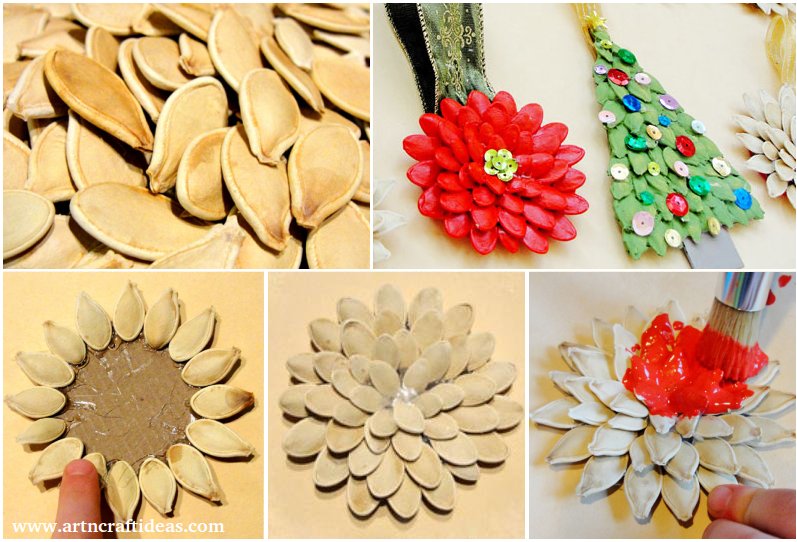
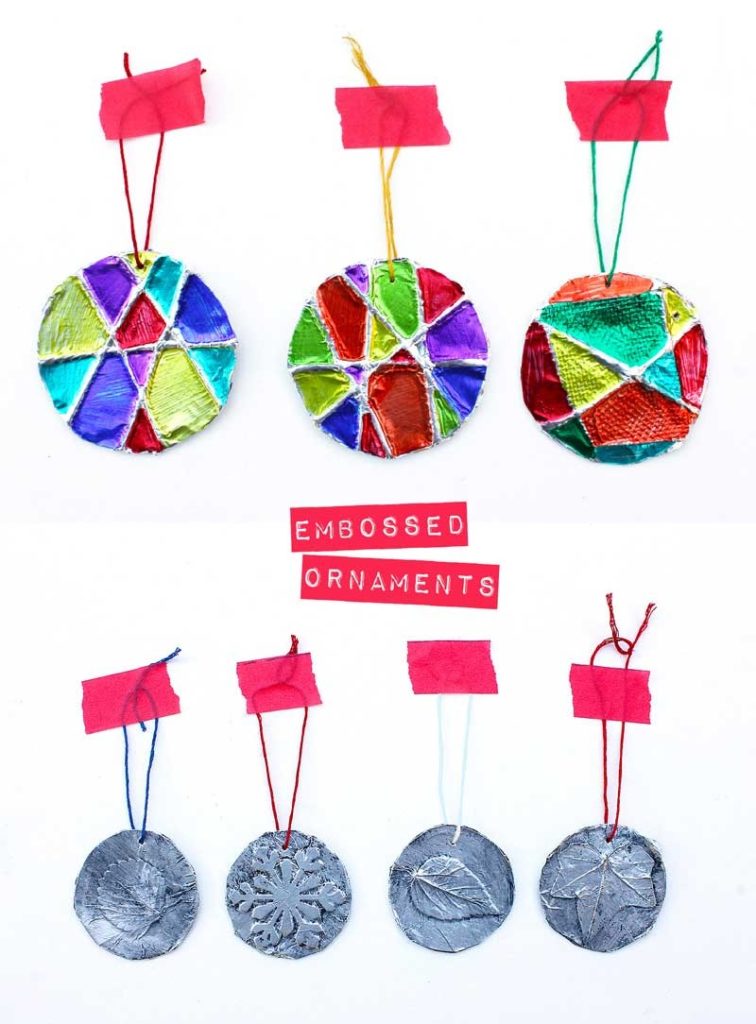
Posted onJanuary 21, 2017inChristmas, Step by step, Tutorial 5-Minute Embossed Ornaments (Christmas Ornaments)