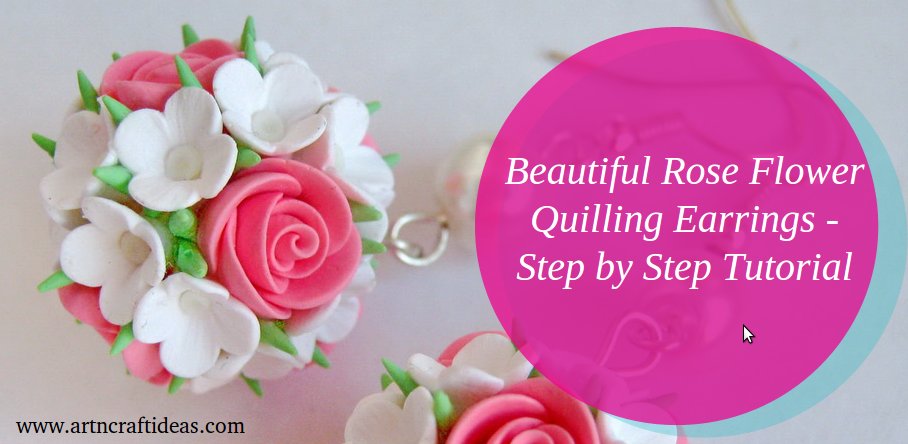
Posted onJune 25, 2017inJewellery, Quilling, Tutorial Beautiful Rose Flower Quilling Earrings Tutorial
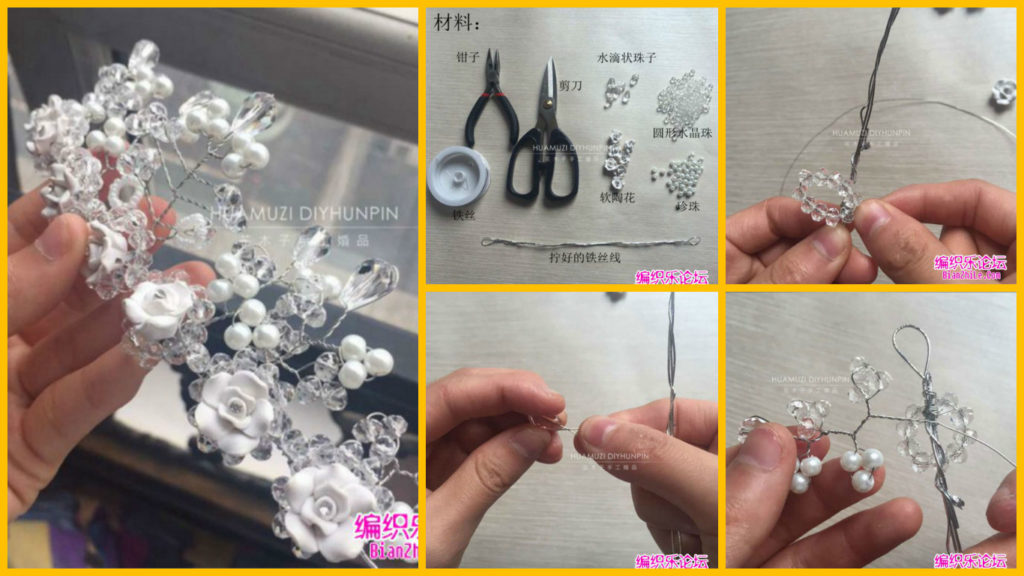
Posted onFebruary 6, 2017inDIY, Jewellery, Step by step, Tutorial How to make earrings in the technique ganutell
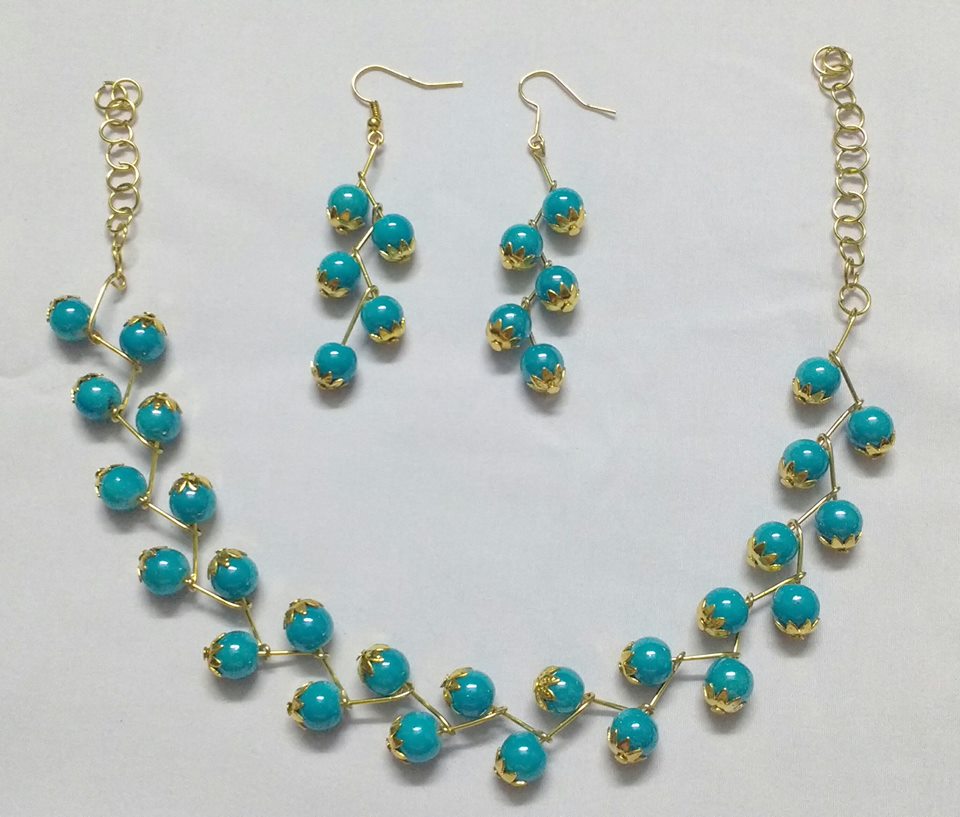
Posted onFebruary 6, 2017February 6, 2017inDIY, Jewellery, Step by step, Tutorial DIY: Beautiful beaded ornaments
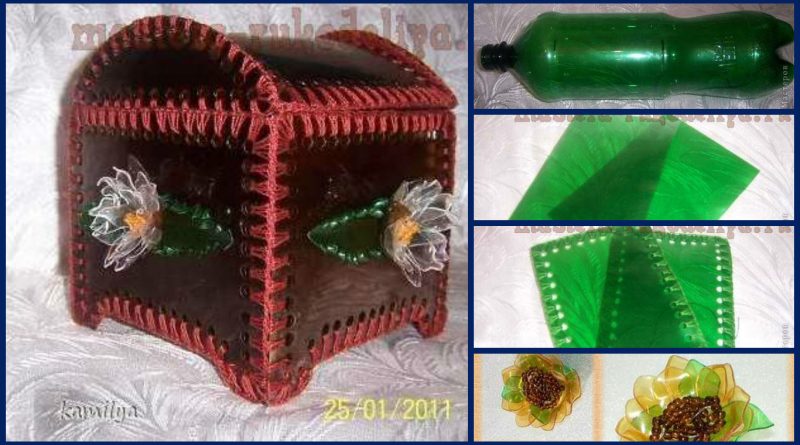
Posted onFebruary 5, 2017inBest out of Waste, DIY, Step by step, Tutorial How to make Jewellery casket from a plastic bottle
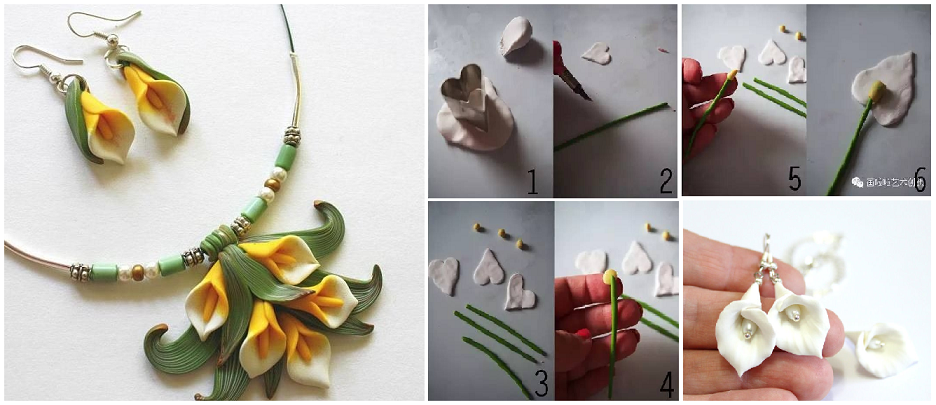
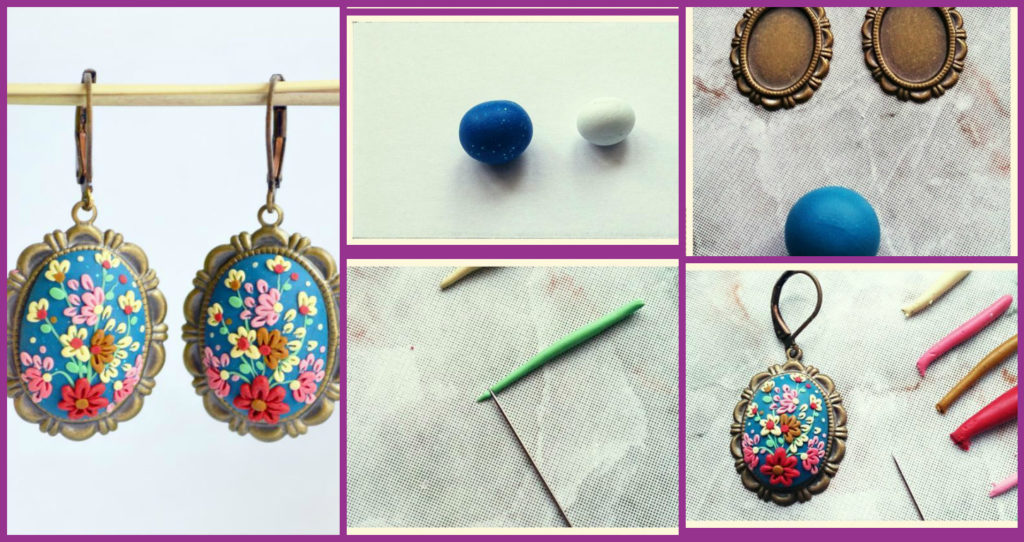
Posted onJanuary 31, 2017inDIY, Jewellery, Step by step, Tutorial How to create earrings in filigree technique
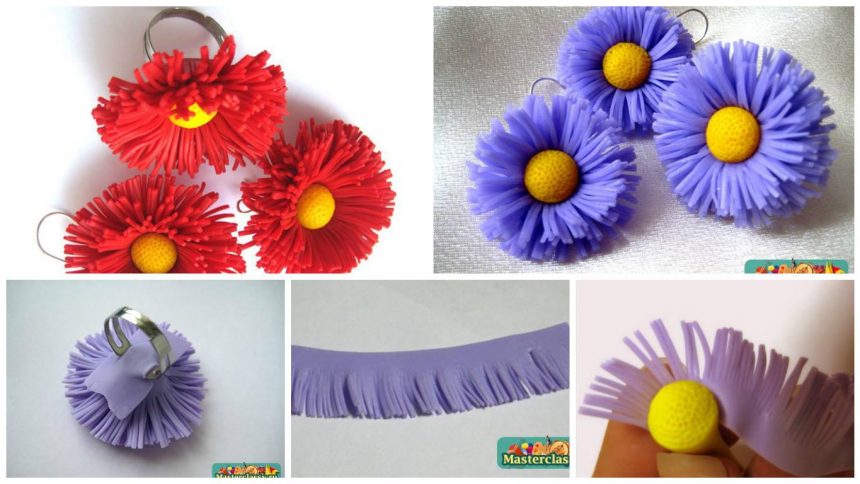
Posted onJanuary 20, 2017inFlower Crafts, Jewellery, Step by step, Tutorial How to make beautiful astry flower jewellery
Posted onJanuary 13, 2017inJewellery, Step by step, Tutorial How to make ring sphere “Paris” of the epoxy resin – Step by Step