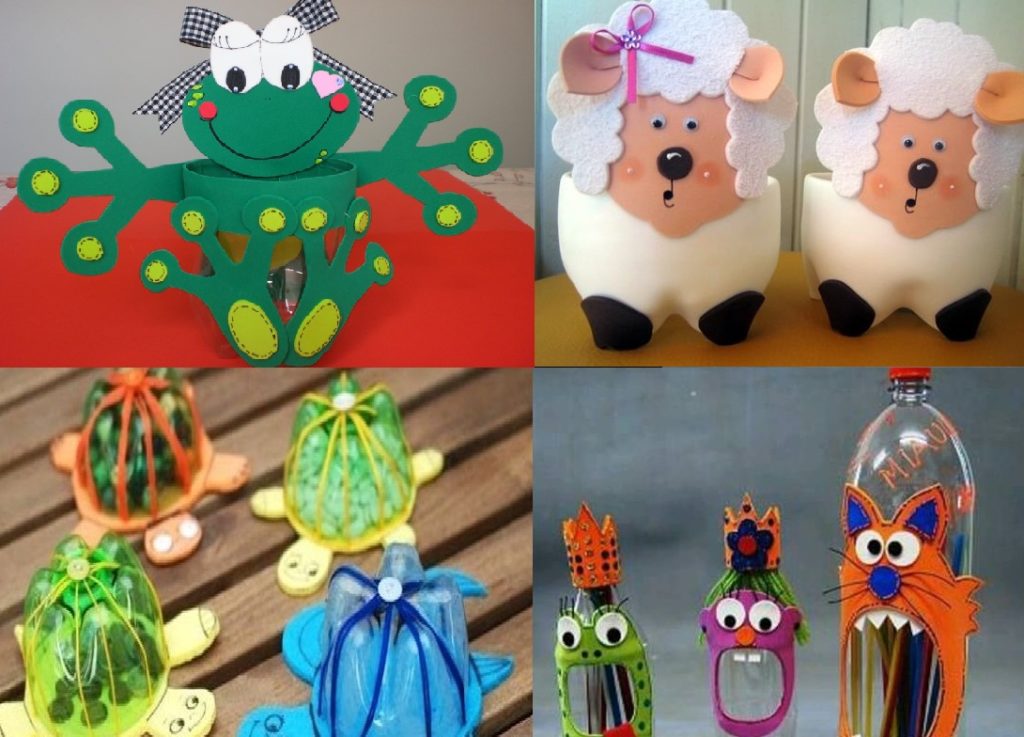
Posted onFebruary 18, 2017inBest out of Waste, DIY, Ideas, Kids Crafts 22 crafts made with EVA and Plastic bottle
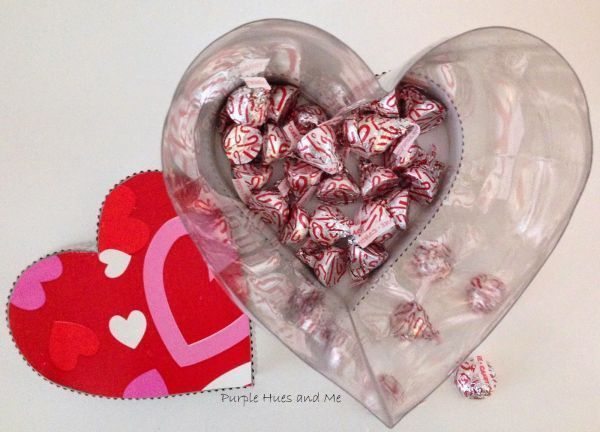
Posted onFebruary 15, 2017inBest out of Waste, DIY, Step by step, Tutorial Recycled Soda Bottle Heart Shaped Keeper
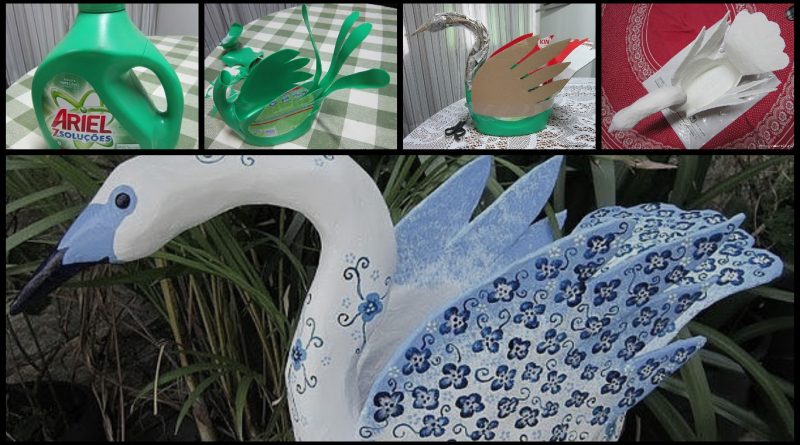
Posted onFebruary 9, 2017inBest out of Waste, DIY, Home Decor, Step by step, Tutorial How to make swan of plastic bottle
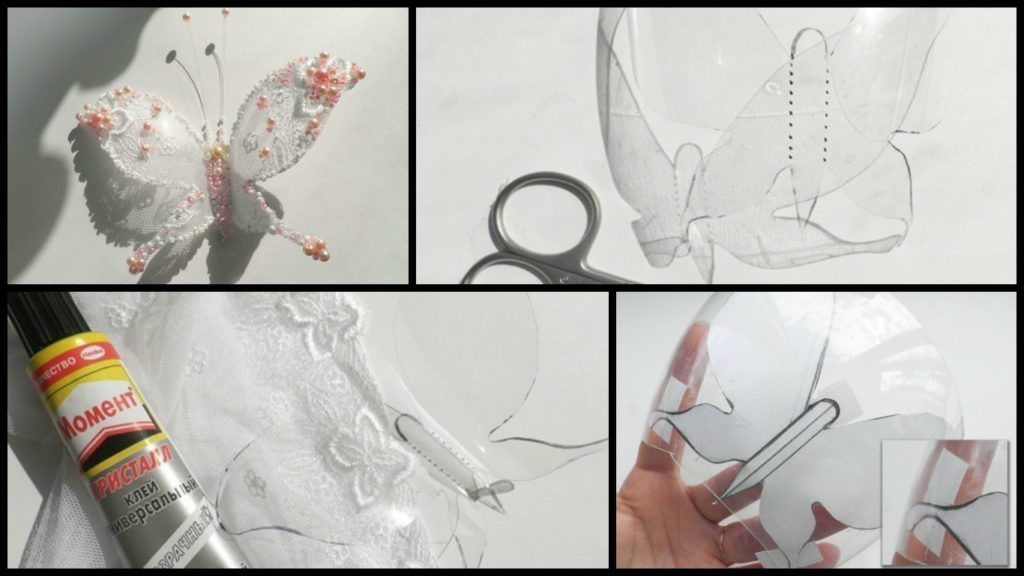
Posted onFebruary 1, 2017inBest out of Waste, DIY, Home Decor, Step by step, Tutorial How to make butterfly from a plastic bottle
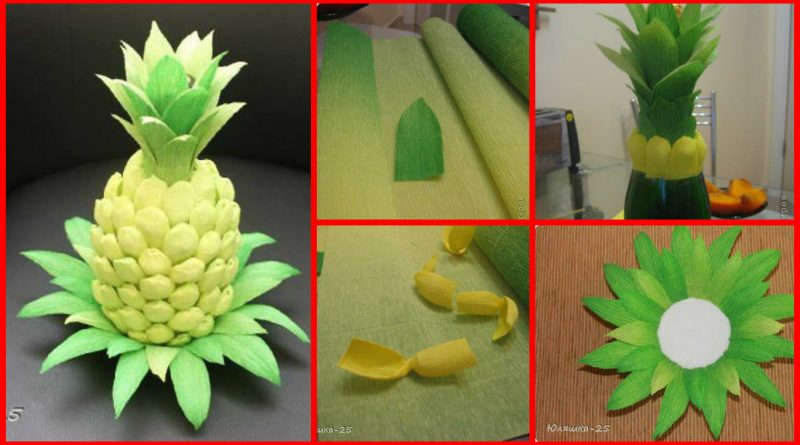
Posted onFebruary 1, 2017inDIY, Kids Crafts, Paper Crafts, Step by step, Tutorial DIY: Pineapple from the bottle
Posted onJanuary 28, 2017inBest out of Waste, DIY, Home Decor, Step by step, Tutorial How to decorate bottle “Little House”
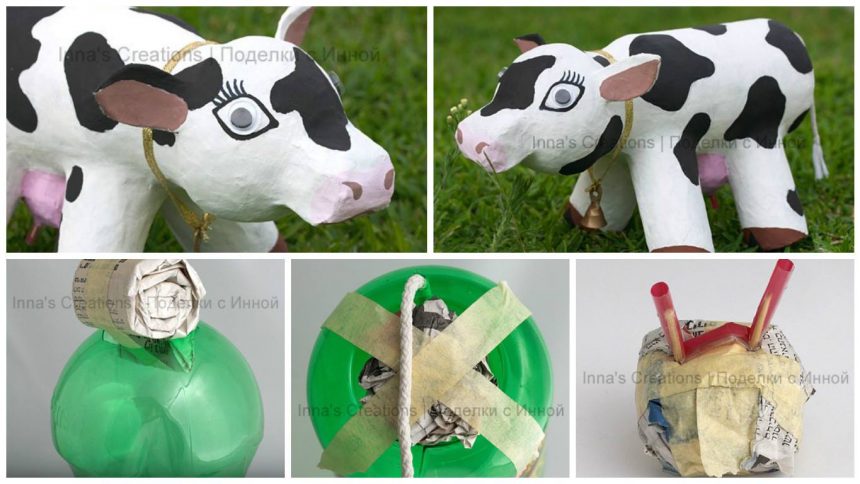
Posted onJanuary 16, 2017inKids Crafts, Newspaper Crafts, Step by step, Tutorial Make a papier-mache cow using an empty water bottle and toilet paper rolls – Step By Step
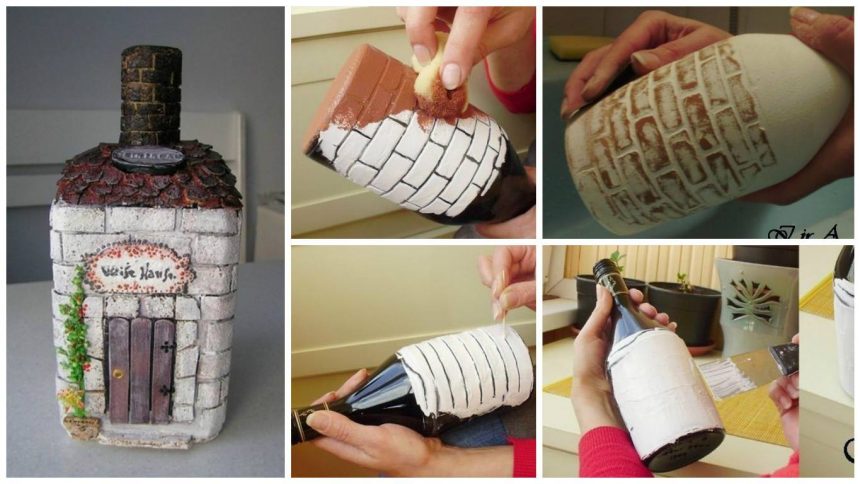
Posted onJanuary 12, 2017inBest out of Waste, DIY, Step by step, Tutorial How to make imitation bricks on the bottle – Step by Step