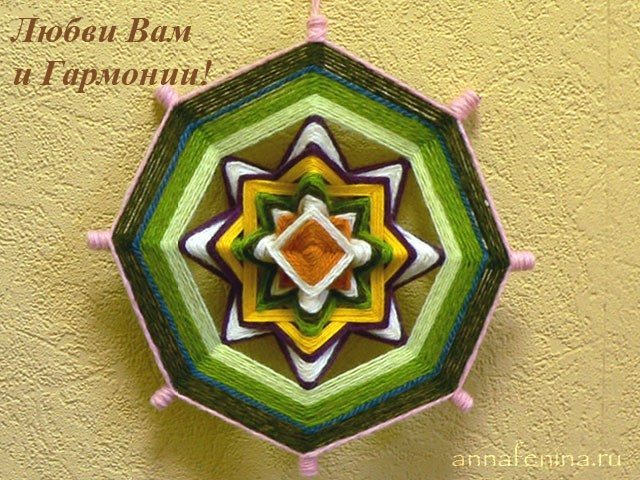
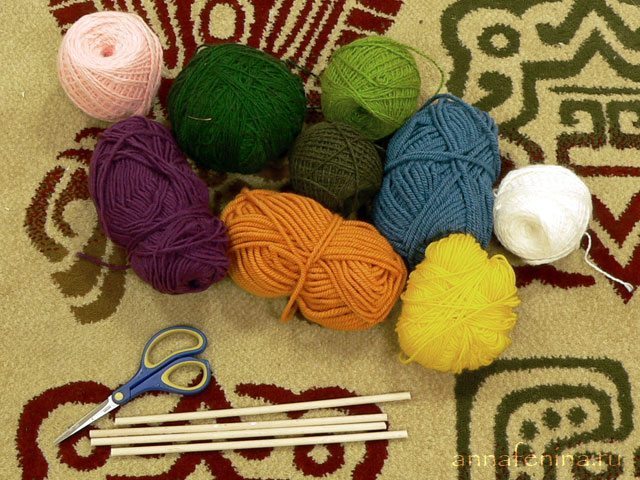
I invite you to an entertaining lesson in the manufacture of Indian mandalas. We try to make decorative eight pointed Indian mandala made of wool and wooden sticks. Sit back, turn off the TV and radio, and supplies should be: arm rests, four sticks (I took the rod 25 cm long and 6 mm in diameter), a pair of scissors. More we do not need.
Putting two sticks together and bind them firmly in the middle of a double knot. Leave a small tail, which in the process will go under the braid.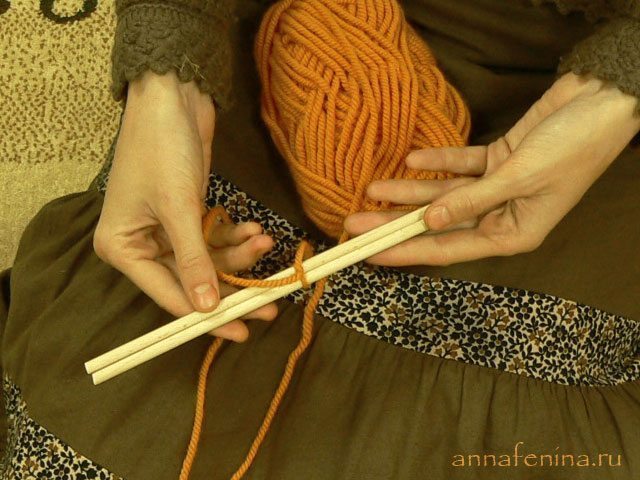
Deploy sticks so that they form a straight cross. Be careful and make sure that the angle between the rods remained 90 degrees in the process of weaving. We fix sticks tightly wrapping them 6-7 times obliquely, first on one diagonal, then on the second. Check that the cross durable and sticks it move not.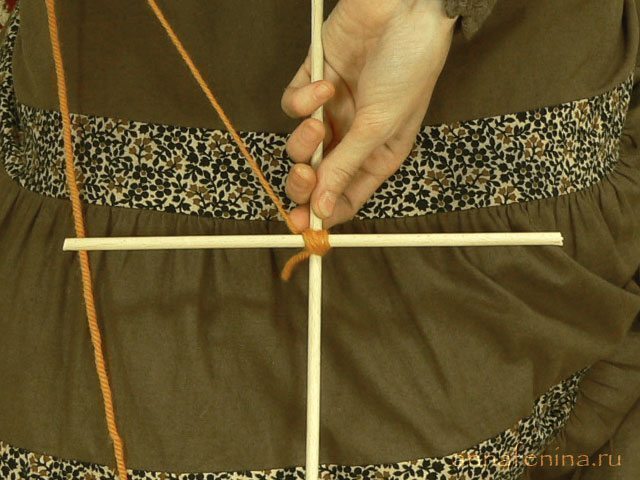
And now begins the thread braid in a circle each stick. Draping string top, makes a complete revolution around the sticks, and when the thread once again be on top, toss it to the next stick. Do not forget the uniform tension. Scourge until you see what happens square. Make it as large a wish.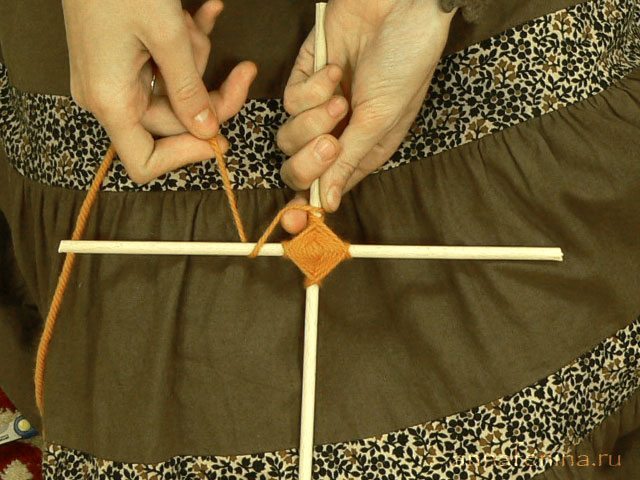
When you decide what size square enough, cut the thread with a small margin and tie it around that sticks, which begins with a square weave usually single node. On wooden sticks even a single node is kept pretty tight.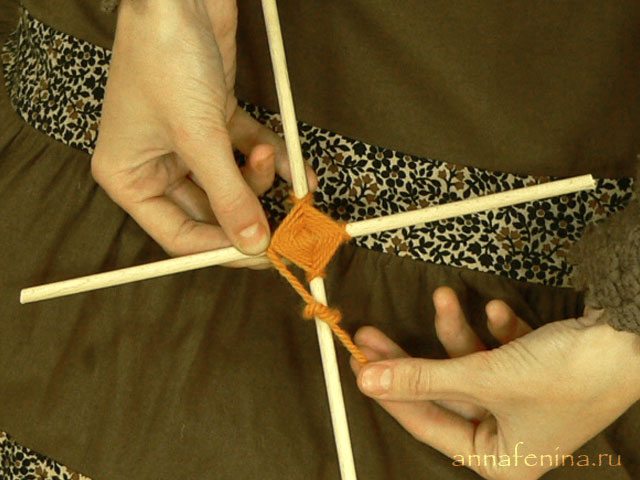
Then bind to the same or another stick thread of another color, leaving a small ponytail. And new colors start to move around again. When you get to the first rod, let under the braided ponytail remained there, after his little pulling. Let them do everything under the braided ponytails that will remain with you in the process of weaving.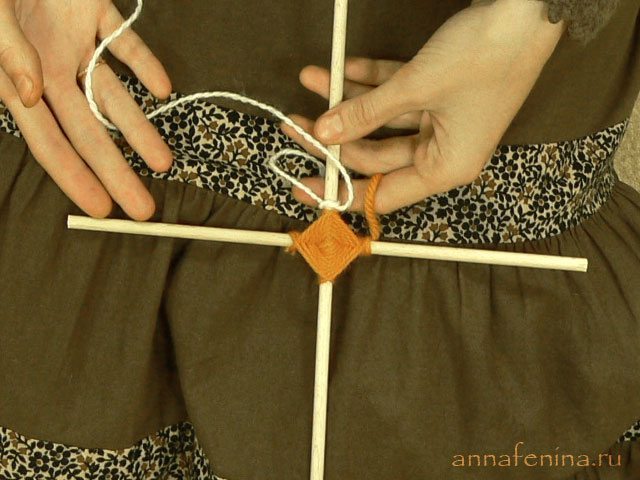
When finished weaving a second color, fasten thread. The most simple – tie her with residual tail double knot.However, complex mandala, for example, shaped or therapeutic trudge all with just one unit – and the one at the end. And not a drop of glue!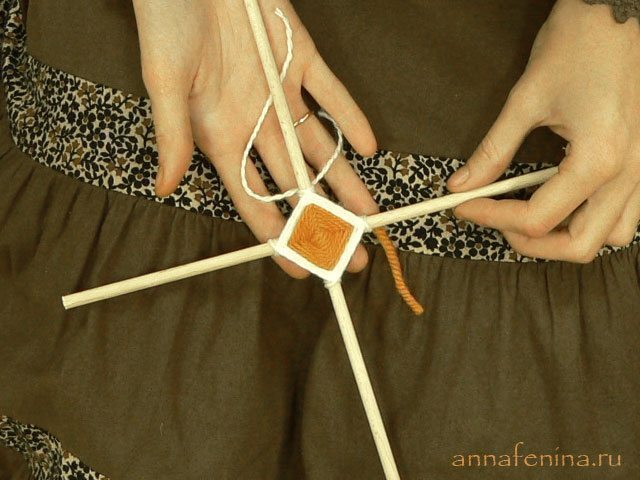
And then the gossip the same square on the remaining two sticks. There is enough of the same color: it is barely visible in the mandala. The size should be exactly the same as the size of the first square or a few millimeters larger it.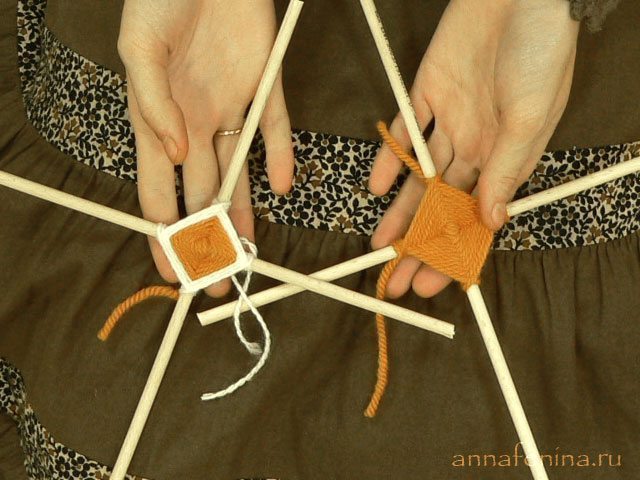
The first step has been taken. Ahead – the most difficult: the socket. Rosette – a small sun, which is obtained at the beginning of weaving mandala and the quality of which depends on its strength and quality. Put two squares at each other evenly sticks and tie a string to one of the rods of the lower square.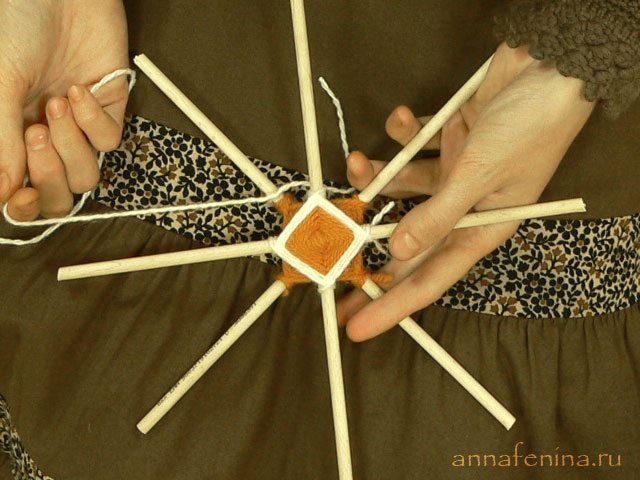
Getting braid sticks thread THROUGH TWO. That is, the thread passes under the mandala, grabs a stick from the previous two, revolves, and again goes under the mandala to the next stick in two. Initially, the mandala can not hear, “walk”. Your task – to make a full circle, back to where started, after which the correct squares to each other in all planes. Make as many laps as you want, but do not forget during the weaving sticks correct relative to each other in all planes.
Here’s how it will look from the inside. Pattern, which is obtained by weaving “two” is called “rays”. And all of this composition – the socket. When finished weave this color fasten thread.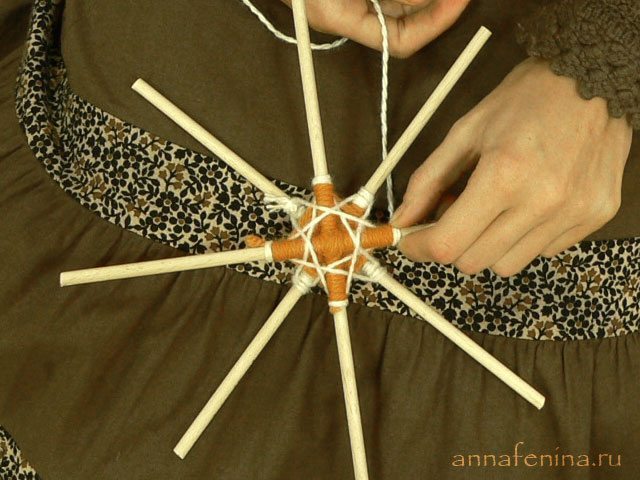
Tie to stick color and begin to weave them.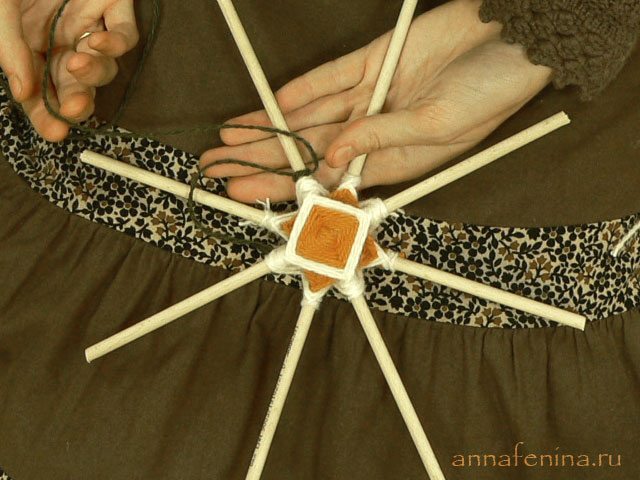
On the reverse side will be obtained this way. After finishing a dark green color, I wove a few rows of light green.You can use as many colors as you want.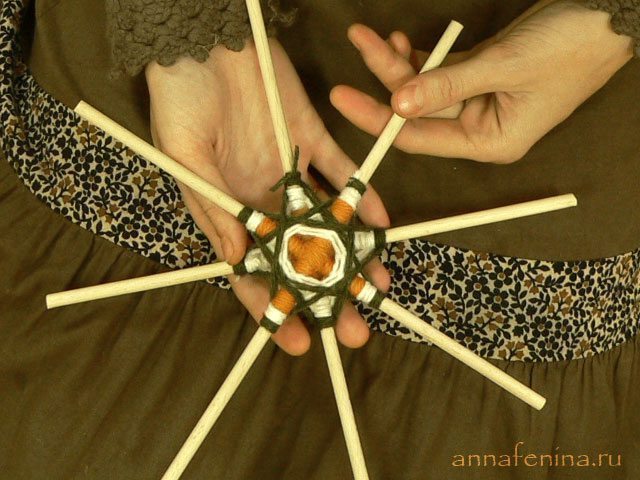
We prepared socket – the hardest thing in the entire mandala. Now proceed to the relaxed side netting – a square.Squares weave, almost like rays through only one stick. It turns out that we weave is square on the top cross, then on the bottom, as in the beginning. Tie one of the rods of the lower square thread of the new color and begin to weave through a wand. Finished color – fasten the thread knot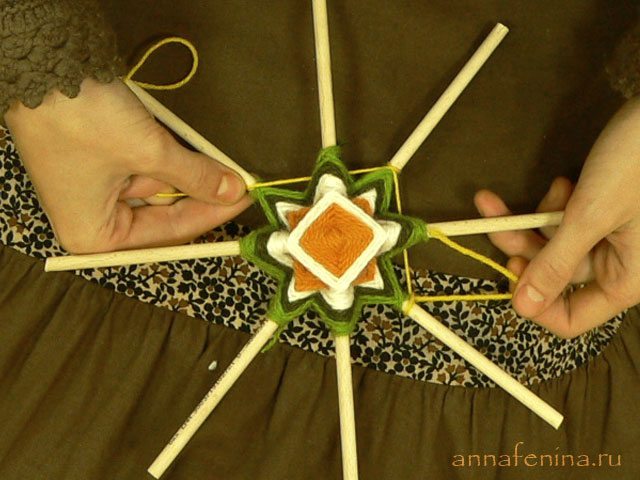
Weave square exactly the same width, but on the upper cross. Can choose a different color.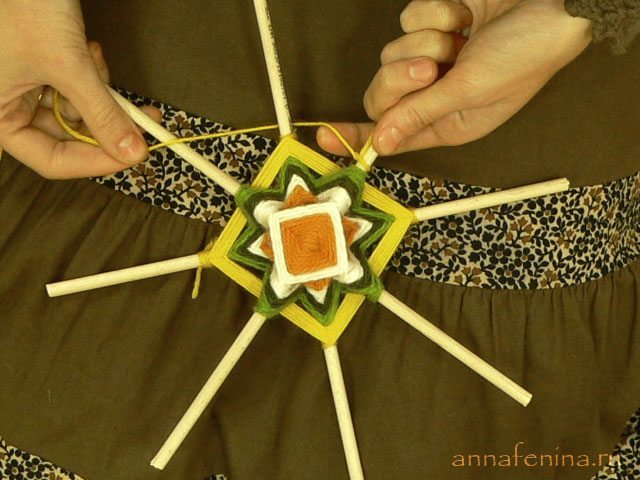
We starting to get here is such a beautiful flower.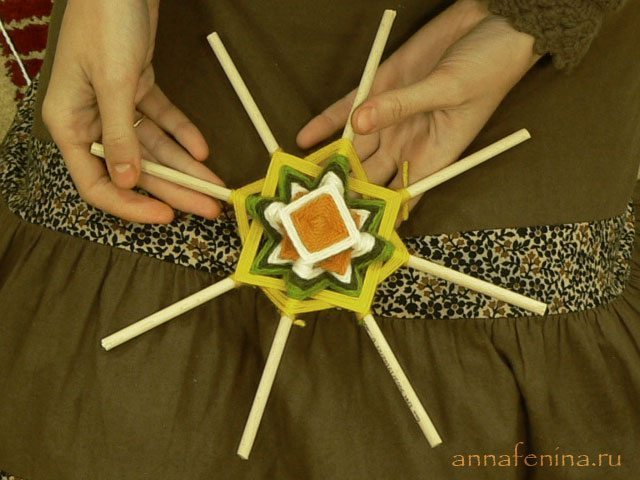
Add a couple of squares of different colors. I decided to stay at the purple, but you can add more colors.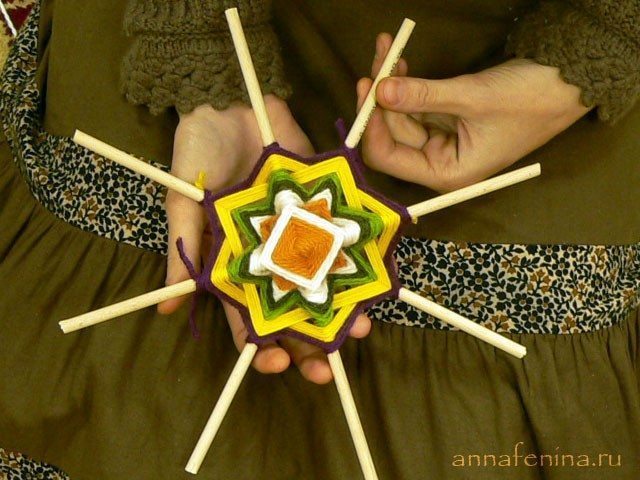
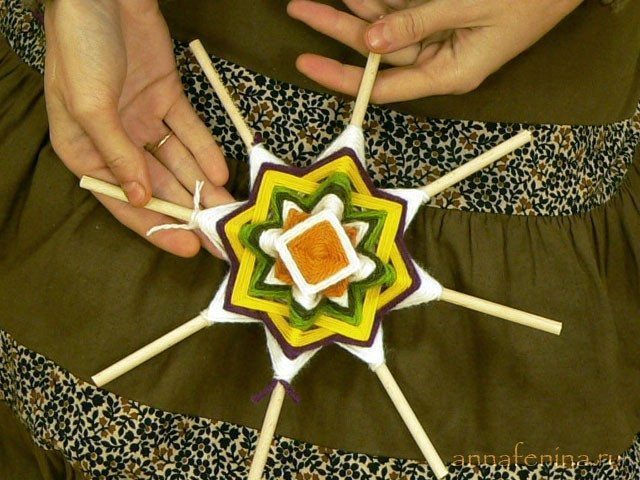
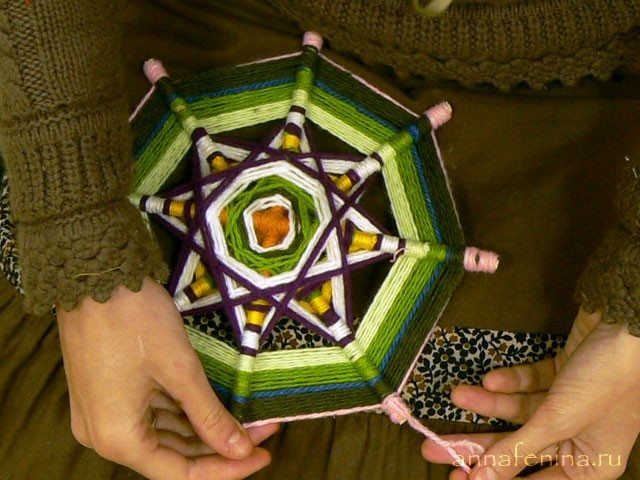
Add more flowers as you see fit, but be sure to leave at least one-quarter of sticks to weave them the final element of the mandala – a belt.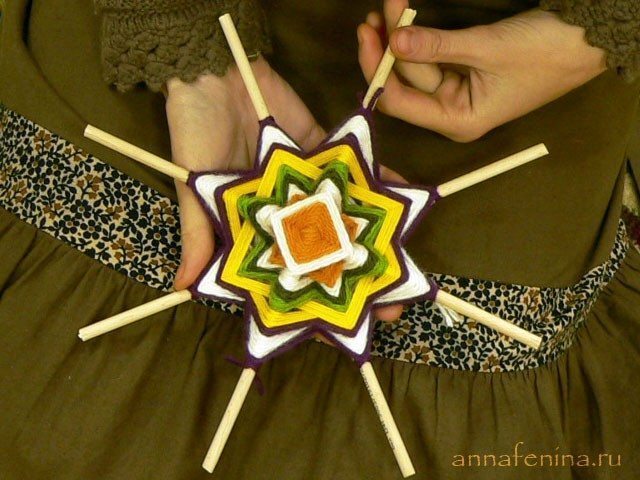
Wrong Side of the mandala.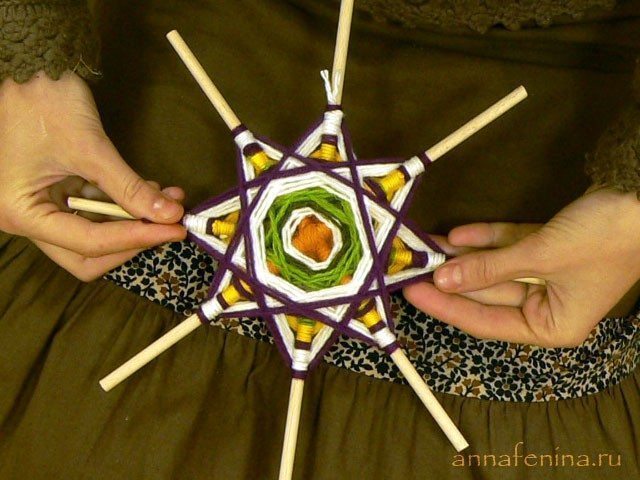 Getting Chain Belt. Tie a string to a stick, and any sequence begins braid sticks around. This is perhaps the easiest of the mandala patterns.
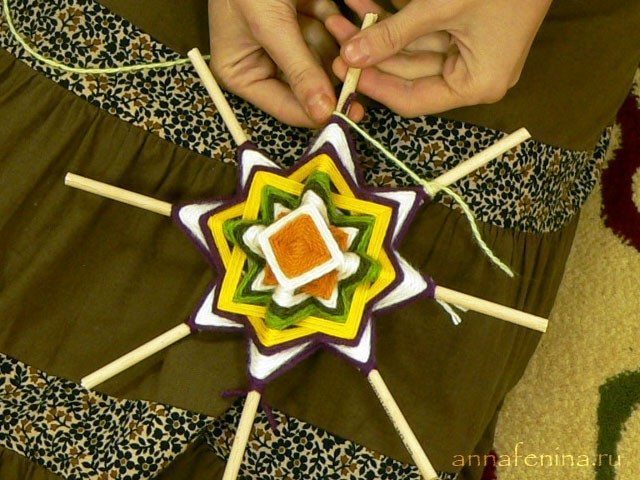
Finish one color, skip to the next. After several rows of light green, I added a row of blue and completed times are dark green.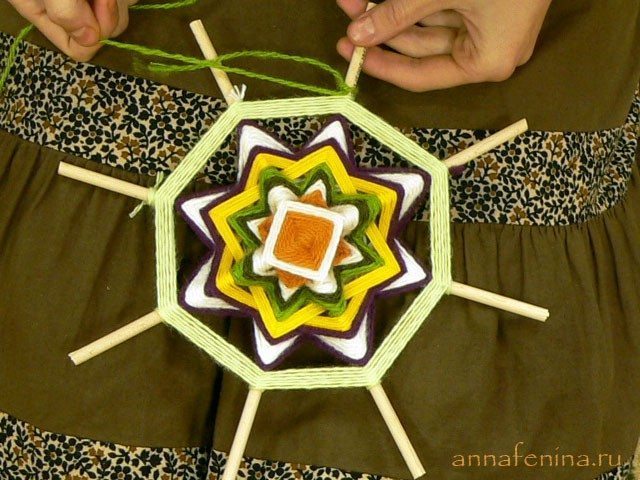
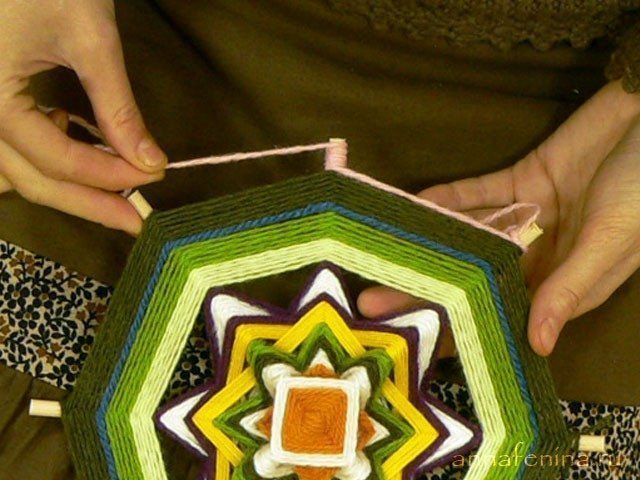
Well, the last fixing pattern. We stayed neopletennye ends about an inch long sticks. Tie one of the sticks thread, kototoraya will complete color chord in the mandala.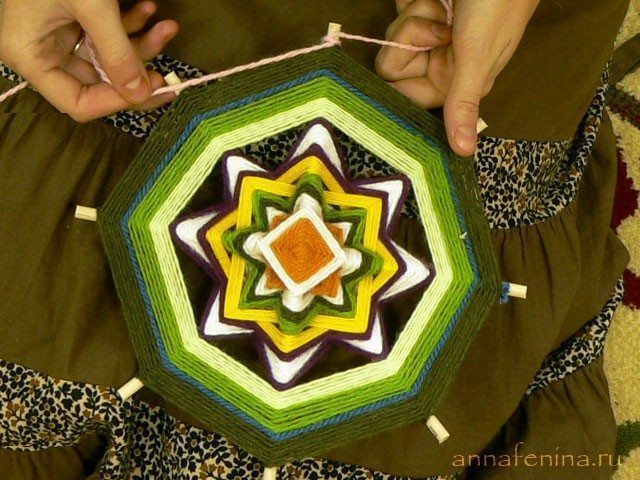
It will be a kind of belt in a row. Loop the thread to the next stick and wrap it to the end, up to the top and then back down to the bottom and wrap the thread perekin’te further.
Going round the circle completely and shook the ends of rods, tie a string to the tail of the same color and make the tails of the loop.